


Instant Pot Yogurt: Step by step directions for making homemade yogurt in a pressure cooker – the result is thick yogurt that your family will love!
Making homemade yogurt is something I have done for years in my crock pot. That was, until 2015 when I picked up an Instant Pot on Amazon. To make yogurt in your Instant Pot you will need the pot that has the yogurt function (not all do) – I’m not sure if the most recent pot has it though I am almost certain it does.
Yogurt in your Instant Pot is relatively easy to do – it’s not something that can be ready in a matter of minutes though, but more like 10 hours from start to finish. I find it easiest to start around 8 pm at night … and finish up first thing in the morning.
Somehow it’s easier for me to ‘wait’ while I’m sleeping than to hover around the Instant Pot all day and worry that my kids are going to disrupt the yogurt process by pushing a random button (it has happened!)
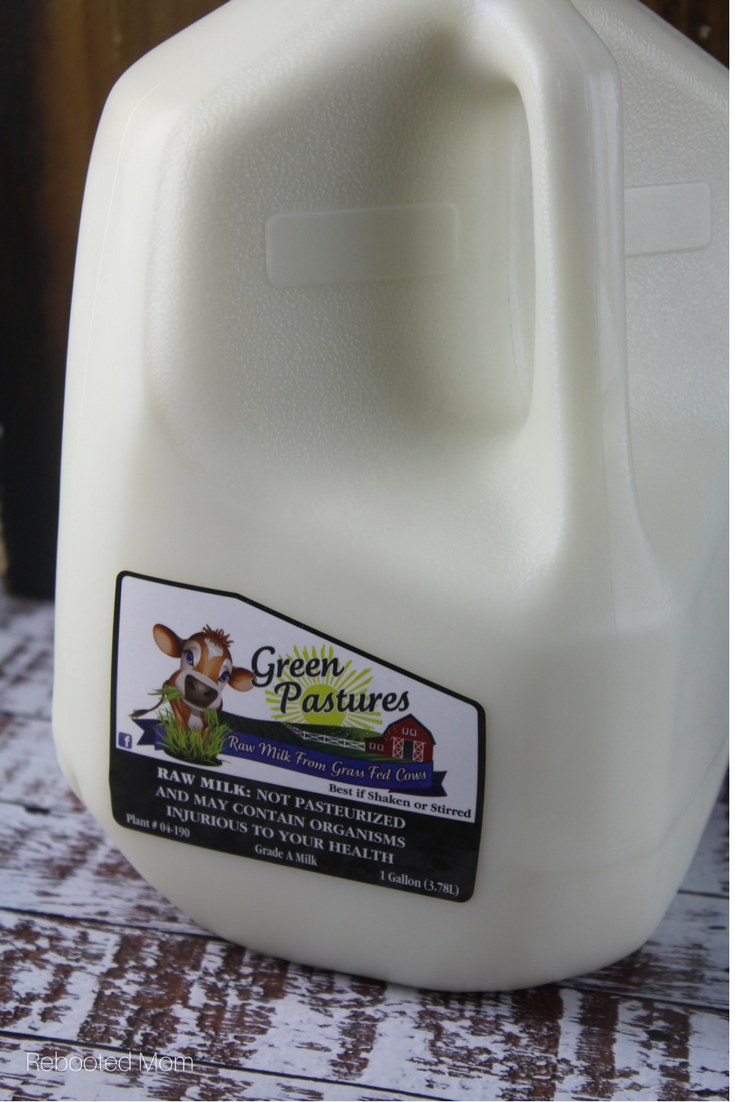
We make our yogurt with raw milk and it results in deliciously thick yogurt that doesn’t easily fall off the spoon. Raw milk is legal in our state of Arizona (if you aren’t sure if it is in yours, you can check the Real Milk site). We use our raw milk for everything from making our own cheese, to homemade yogurt, drinking, and the whey for making our own sourdough or ciabatta bread.
Whey can also be used to rinse your hair after a shower or, on your garden, too.
In order to make yogurt, you must change the protein structure of the milk. This is done (and can only be done) by heating the milk. The Instant Pot first brings the milk to a low boil at 180 degrees F before you allow it to cool to 115 degrees F and add your culture.
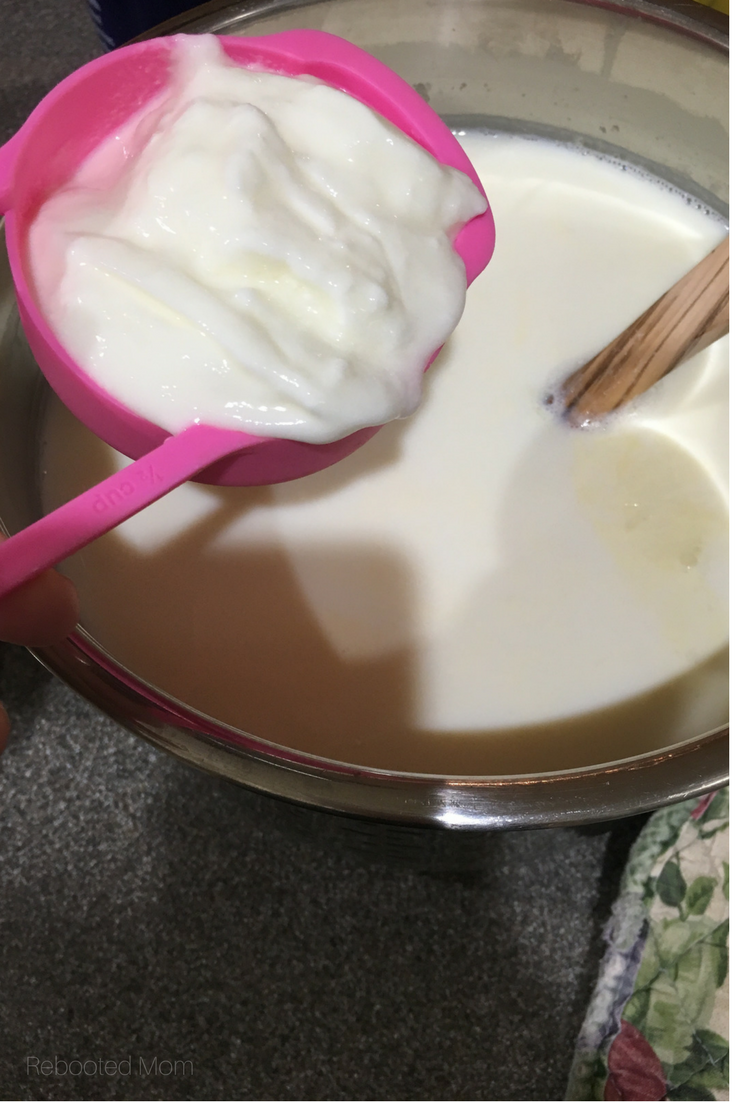
That culture can be 1/2 C. of yogurt from your previous batch, or 1/2 C. of plain, organic yogurt with active cultures.
Once you add your 1/2 C. culture, give it a really thorough stir and push the yogurt function. Once you hit that “yogurt” key, the timer will count up to 8 hours. At the completion of that 8 hours, I usually remove my stainless steel insert, and place in my fridge until I get a chance to strain.
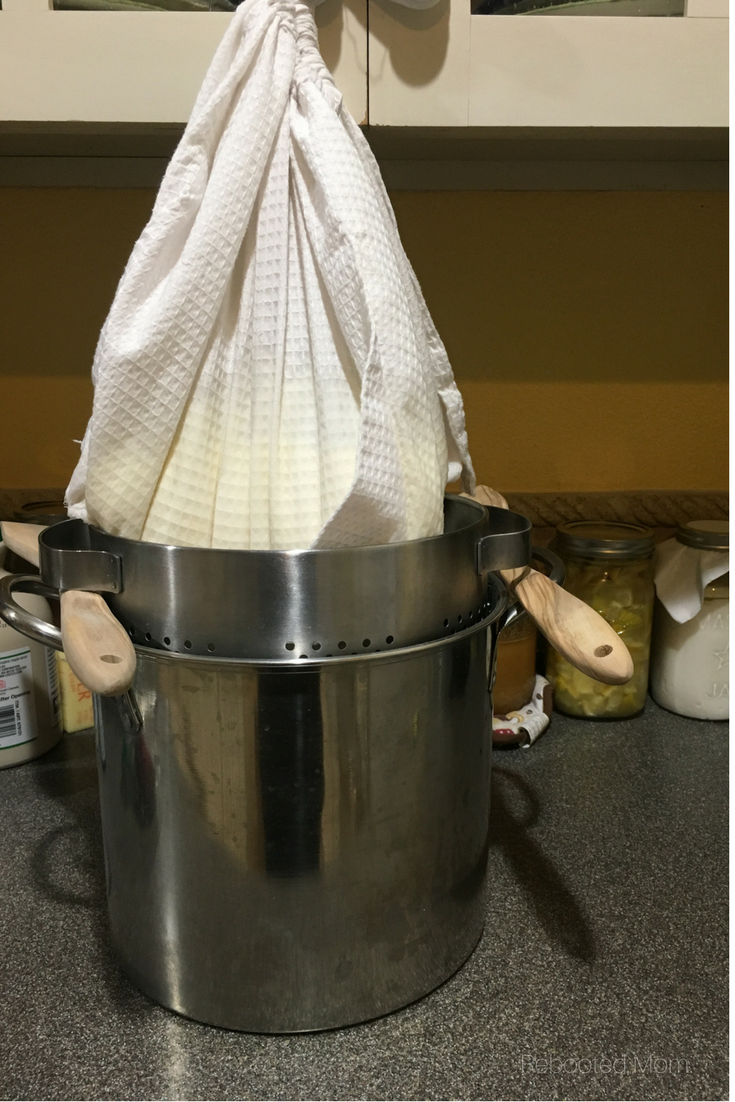
You can use any of these frugal alternatives to cheesecloth; once strained, keep in canning jars in your fridge. This recipe makes 5 pints of yogurt (and lots of whey!)
Keep your whey — there are so many ways to use it. One of my favorite ways to put it to use is in this whey caramel. Yum!
One of the biggest questions I have had when it comes to making yogurt with raw milk is why we opt to ruin the probiotics in the yogurt by using the boil function on the Instant Pot. I agree – raw milk is precious! (We consume about 8 gallons a week for our family of 7!) However… I feel that it still offers a huge benefit compared to varieties you would purchase in store.
Those varieties often times have added (synthetic) vitamin D, vitamin A, carrageenan, and even titanium dioxide (whitening pigment). That pigment is usually disclosed under ‘added colors’ and sometimes not even listed on the label.
Instant Pot Yogurt (Everything You Need to Know)
First, make sure you are going to be home for some of these steps … you can pop in and out all day but some of these times are crucial.
Ingredients
- 1 gallon raw whole milk
- 1/2 C. plain whole milk yogurt with live active cultures
1. Sanitize your Instant Pot
This is the easiest step – all you need to do is pour a cup of water in your Instant Pot and close the lid, and hit steam for 1 minute. Do a quick release at the end and then dump the water. Now you are ready.
2. Scald your milk
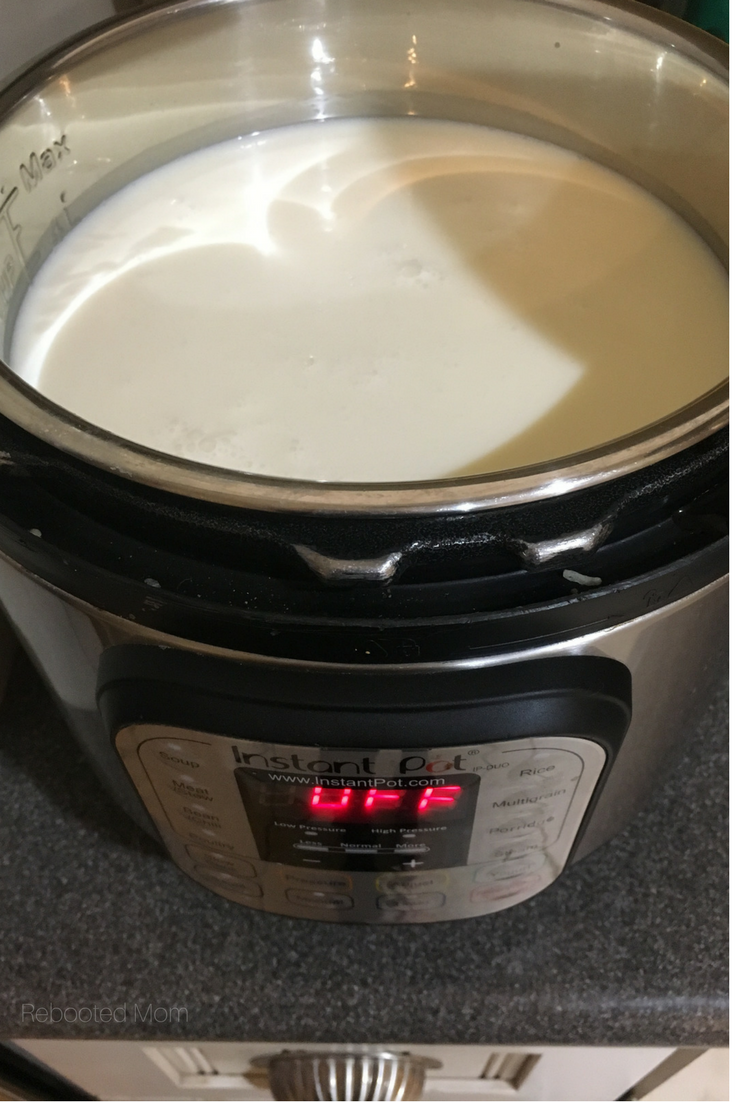
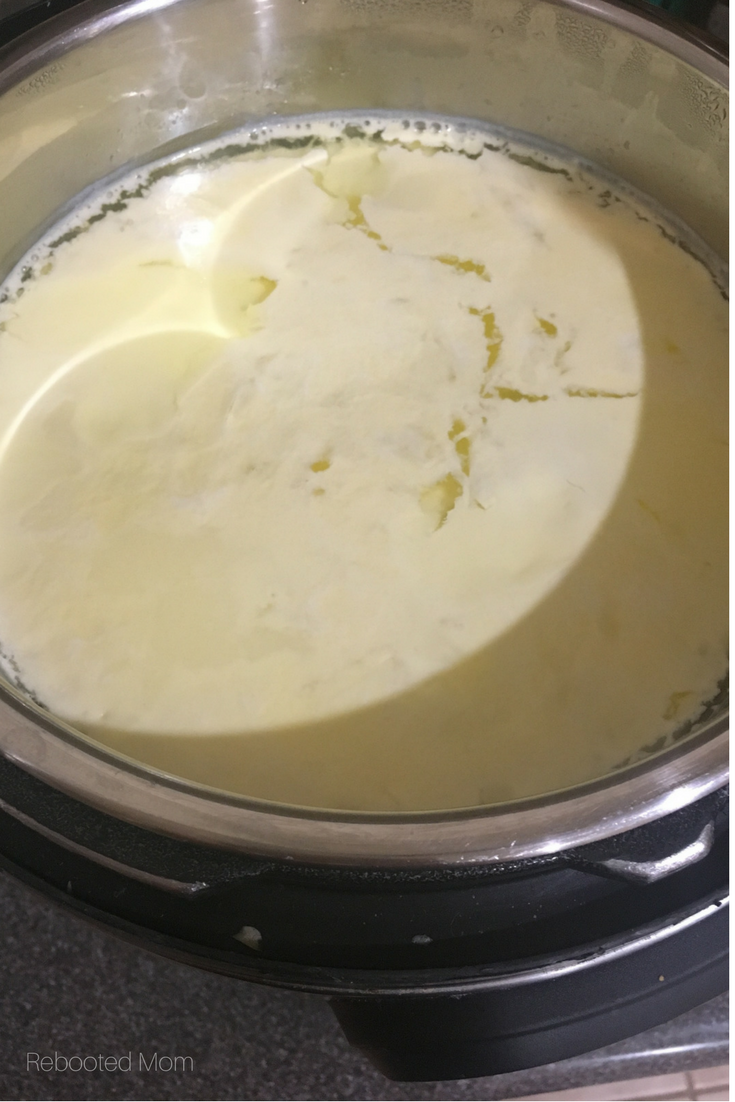
Pour the ENTIRE gallon of raw milk into your Instant Pot. Place the lid on, hit the YOGURT Button. Then hit the adjust button until it says BOIL – leave it to beep and then wait for the milk to boil on it’s own – it takes about one hour.
Once it comes to a boil you do have to be there to open the lid, and remove the Instant Pot. Turn OFF the Instant Pot, and unplug it. Place the inner stainless steel pot on the counter (it will cool faster).
3. Let the milk cool + add your culture
Once you remove your instant pot and sit it on the counter, wait for the temp to cool to 115 – use a thermometer for this. It took my milk just over 90 minutes – I sped up the process by stirring it frequently too. Make sure your thermometer is sanitized and just wait patiently.
Once the yogurt reaches 115, you will need to add 1/2 C of your yogurt starter culture – mix it in well. If you don’t have any of your own yogurt from a previous batch, then I would suggest a plain, full fat organic yogurt variety (it can be greek, too).
4. Make your yogurt
Once you add the starter, take the Instant Pot and set it back in the cooker. Put the lid on and push YOGURT. It will display 8 hours. Don’t touch anything at all – once it starts it will switch to “0:00” which means it’s going to start counting UP to the 8 hour mark. Do not let your kids take off that lid at any time (if they are like mine they wanted to keep opening!)
5. Strain
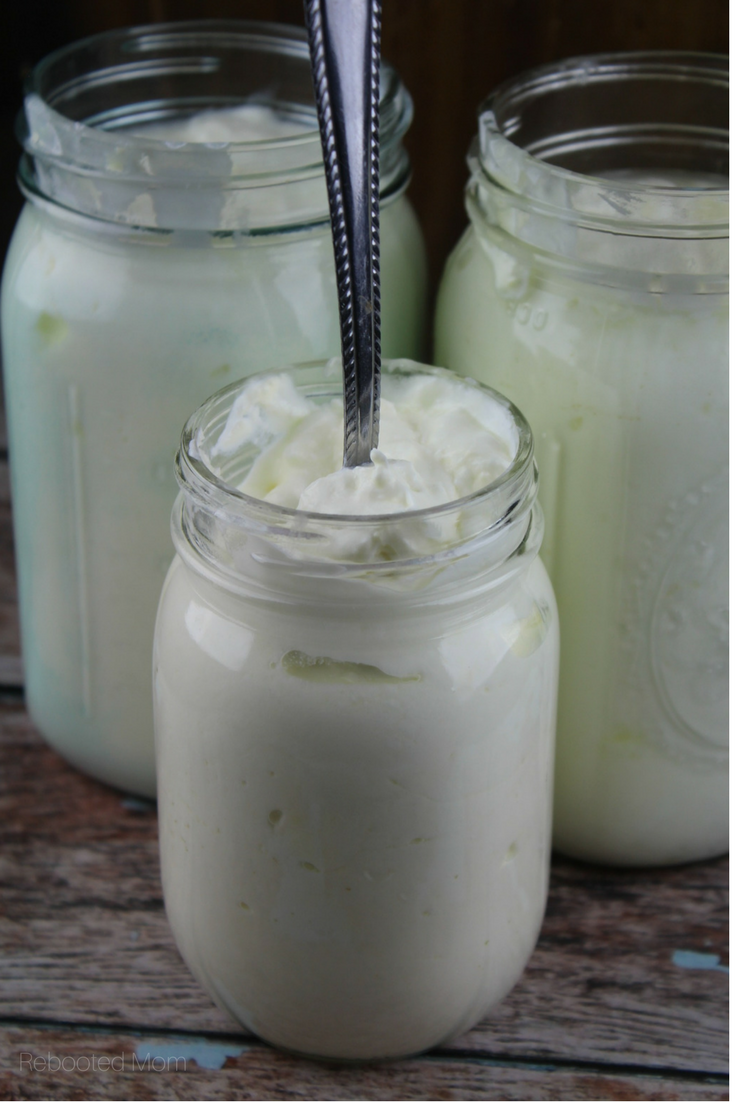
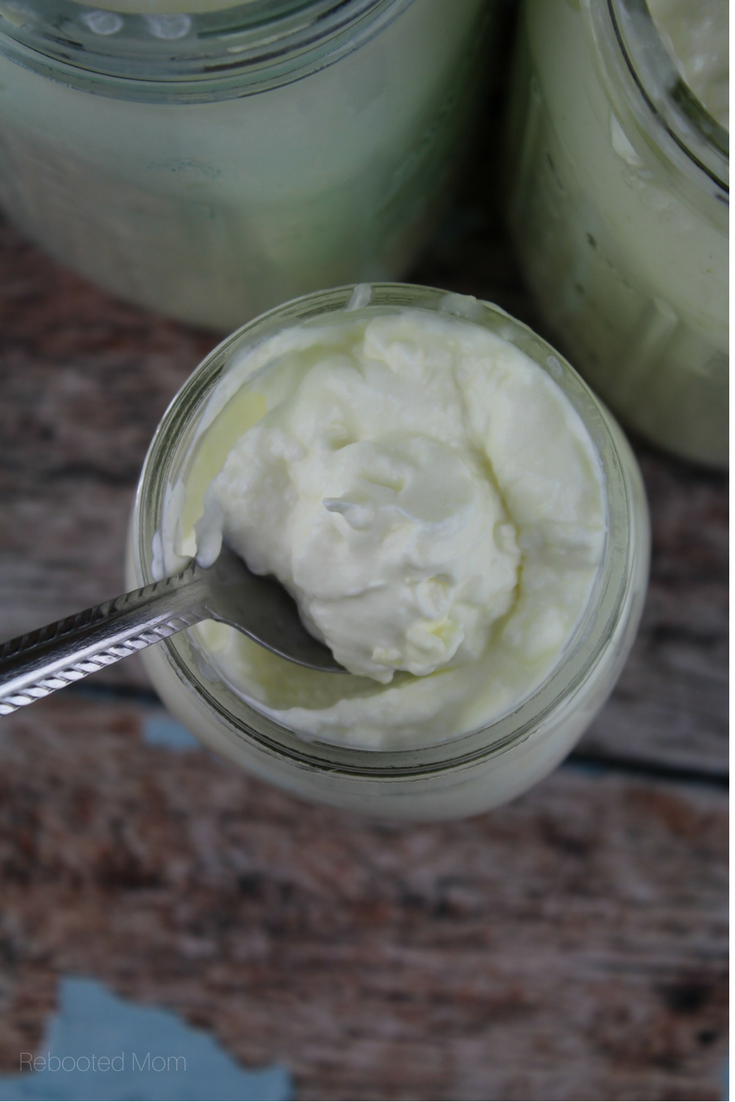
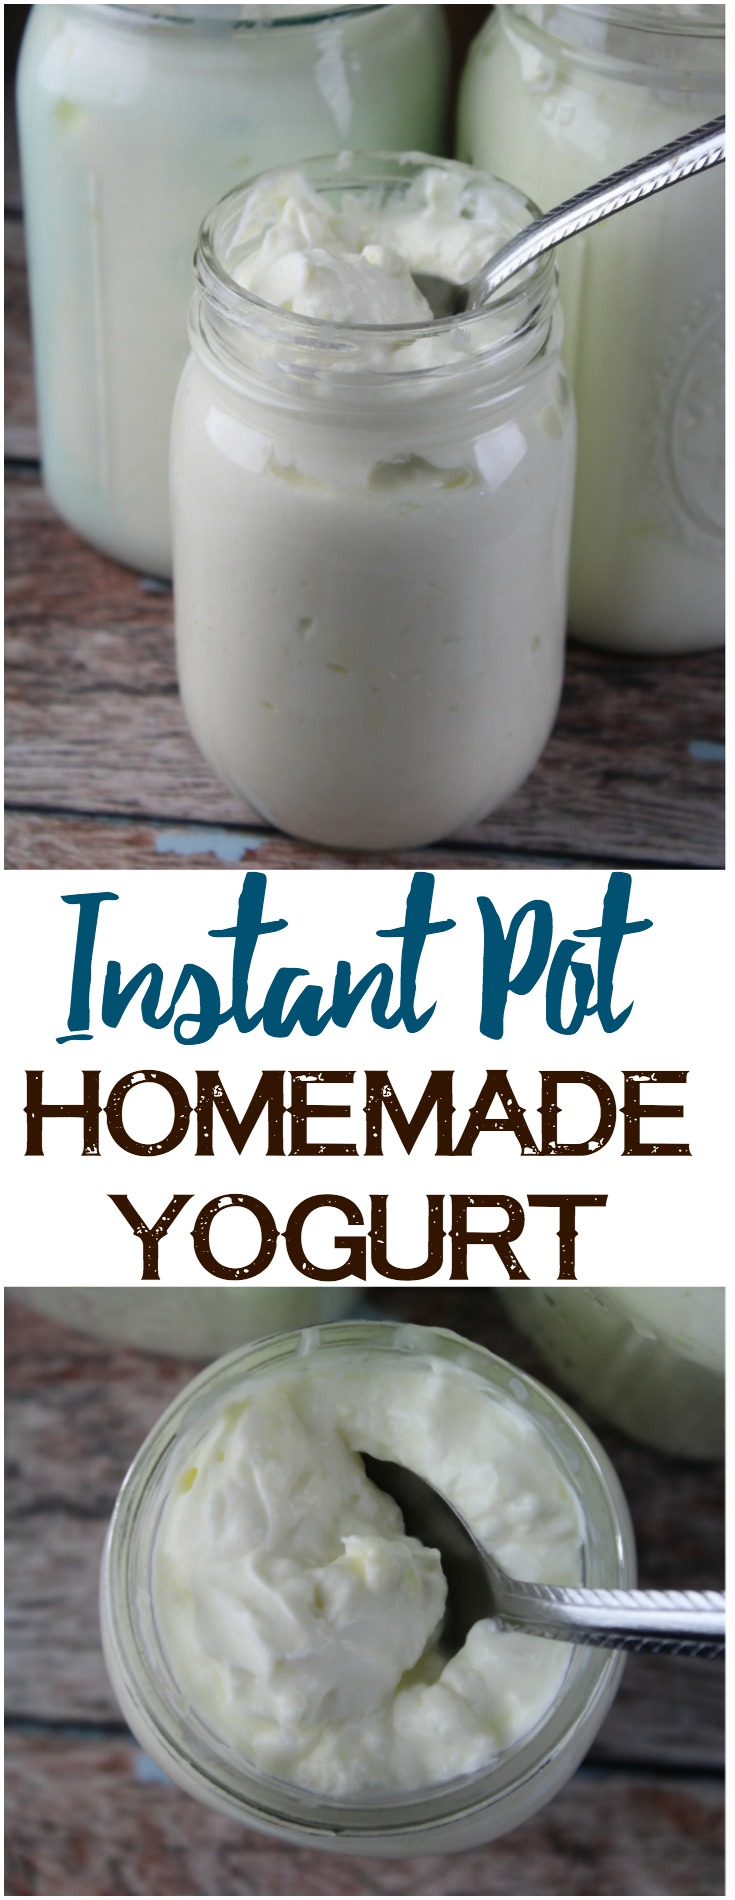
Once the 8 hours is up, the Instant Pot will beep, then you can remove the pot. We love our yogurt thick! We put the entire stainless steel insert (as is) in the refrigerator on the top shelf for a few hours. When we get time that afternoon we strain it and keep the whey.
Our homemade yogurt is SO thick – we can flip the spoon over and it will just stay. It won’t fall off easily — if at all. That’s a wonderful thing!
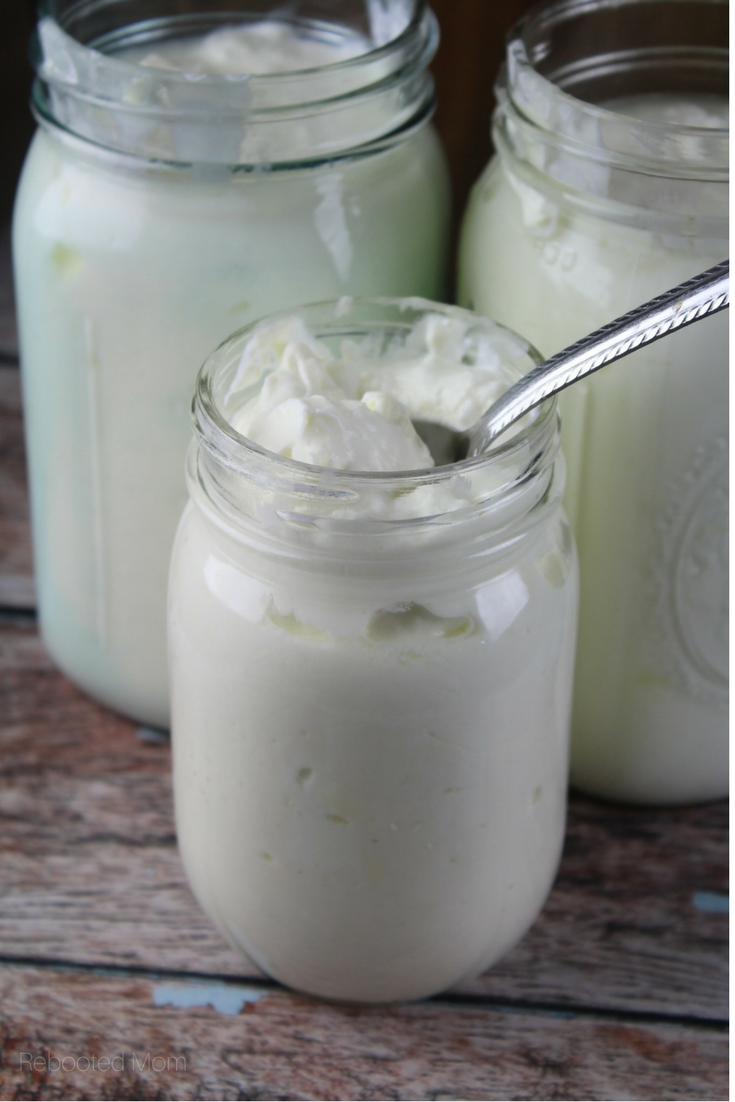
After it strains, we jar up into 5 pint-size jars, and put in the fridge.
Transform a gallon of raw milk into deliciously thick, creamy yogurt in your Instant Pot!
Ingredients
- 1 gallon of raw, full fat milk
- 1/2 C. starter culture (yogurt from a previous batch) or, organic, full fat yogurt with active cultures
Instructions
- Pour 1/2 C. water in your clean Instant Pot. Push the steam button, and set the timer for 2 minutes. After the time is up, quick release and dump water.
- In a clean, sanitized Instant Pot, pour 1 gallon of raw milk. Place the lid on the pot, close the valve, and push the yogurt function, then adjust button until the pot says "boil". Let boil (approx. 1 hour).
- After that 1 hour is done, the pot will beep. Unlock the lid, and carefully remove the stainless steel insert. Place the insert on your counter top, and allow to cool to 115 degrees (stir occasionally to help it cool faster).
- Once the milk has cooled to that temp, add 1/2 C. starter culture (from a previous batch or, organic, full fat yogurt with active culture). Stir to combine, and place the stainless steel insert back in your Instant Pot. Place the lid on the pot securely, and close the valve.
- Push the yogurt function. The pot will let out a series of beeps and start at 00:00 (it counts UP from that to 8 hours). Go about your day.
- After the 8 hours is up, remove the lid. You can pour through cheesecloth or (alternative cheesecloth options), or opt to place the stainless steel insert on the top shelf in your fridge for a few hours for thicker yogurt.
- Strain when you are ready - a longer strain will lead to a thicker yogurt. Jar up your yogurt in pint or quart size jars (5 pints), and keep the whey into separate jars to refrigerate. The whey is great to make bread!

Once your yogurt is done, make sure you keep the whey! Whey makes the best whey caramel sauce ~ give as gifts or simply keep it for yourself!

When do you add vanilla and raw honey to the yogurt?
I add it to the yogurt when it’s completely done (and strained!)
I have read others taking out the plastic ring from the instant pot. Did you?
No, I did not.
If your ring has a “smell” to it, then you may want to switch it out with another one that does not have that savory smell. Many people have two rings, one for savory dishes and one for sweet or non-savory items.
(You have probably figured this out by now).
So true! I keep a ring just for making yogurt because that ring so easily inherits the smell of whatever you make.
If I use half a gallon would the boil time be halved or should it still take a full hour?
If you use a half gallon the boil time may be less. The pot will beep once it’s done.