


Easy homemade sourdough bagels you can make at home with your own active sourdough starter. This step by step tutorial makes the most delicious bagels!

After a half dozen attempts at making bagels, I’ve finally found the perfect recipe for simple sourdough bagels from an old cookbook I’ve had for years. Nineteen years to be exact, and it’s an old church cookbook that I’ve had since my time in the service.
I’ve made regular bagels several times in the past, but nothing compares to a fresh sourdough bagel. They are absolutely divine!
A few tweaks to the original church-cookbook recipe resulted in perhaps the most delicious bagels I’ve made yet. These bagels require a sourdough starter – plan ahead!
Active Sourdough Starter
If you have a sourdough starter you keep daily (or, even one that you keep in your fridge and pull out when needed) this recipe is literally a breeze. The mixing of this recipe is quite simple – it’s the waiting that is hard to do! I like to mix them up at night (very late) before bed, around 11pm. Then I plop the dough in a greased mixer bowl and cover with a plastic bag (like a grocery store bag) and allow it to rise overnight.
First thing in the morning, I remove the bag and continue to shape the bagels, allow them a short time to rise, then place in the baking soda and water boil.
After their baking soda bath, I brush them with a mixture of egg and water (blended well of course), then sprinkled with my topping. Who doesn’t love a combo of sesame seeds, dried onions, poppy seeds and salt? It’s clearly perfection!
Delicious Sourdough Bagels
It’s important to make these bagels with a very active and fresh sourdough starter. If you currently keep a starter, you’ll want to feed it about 4-5 hours before you start making these bagels.
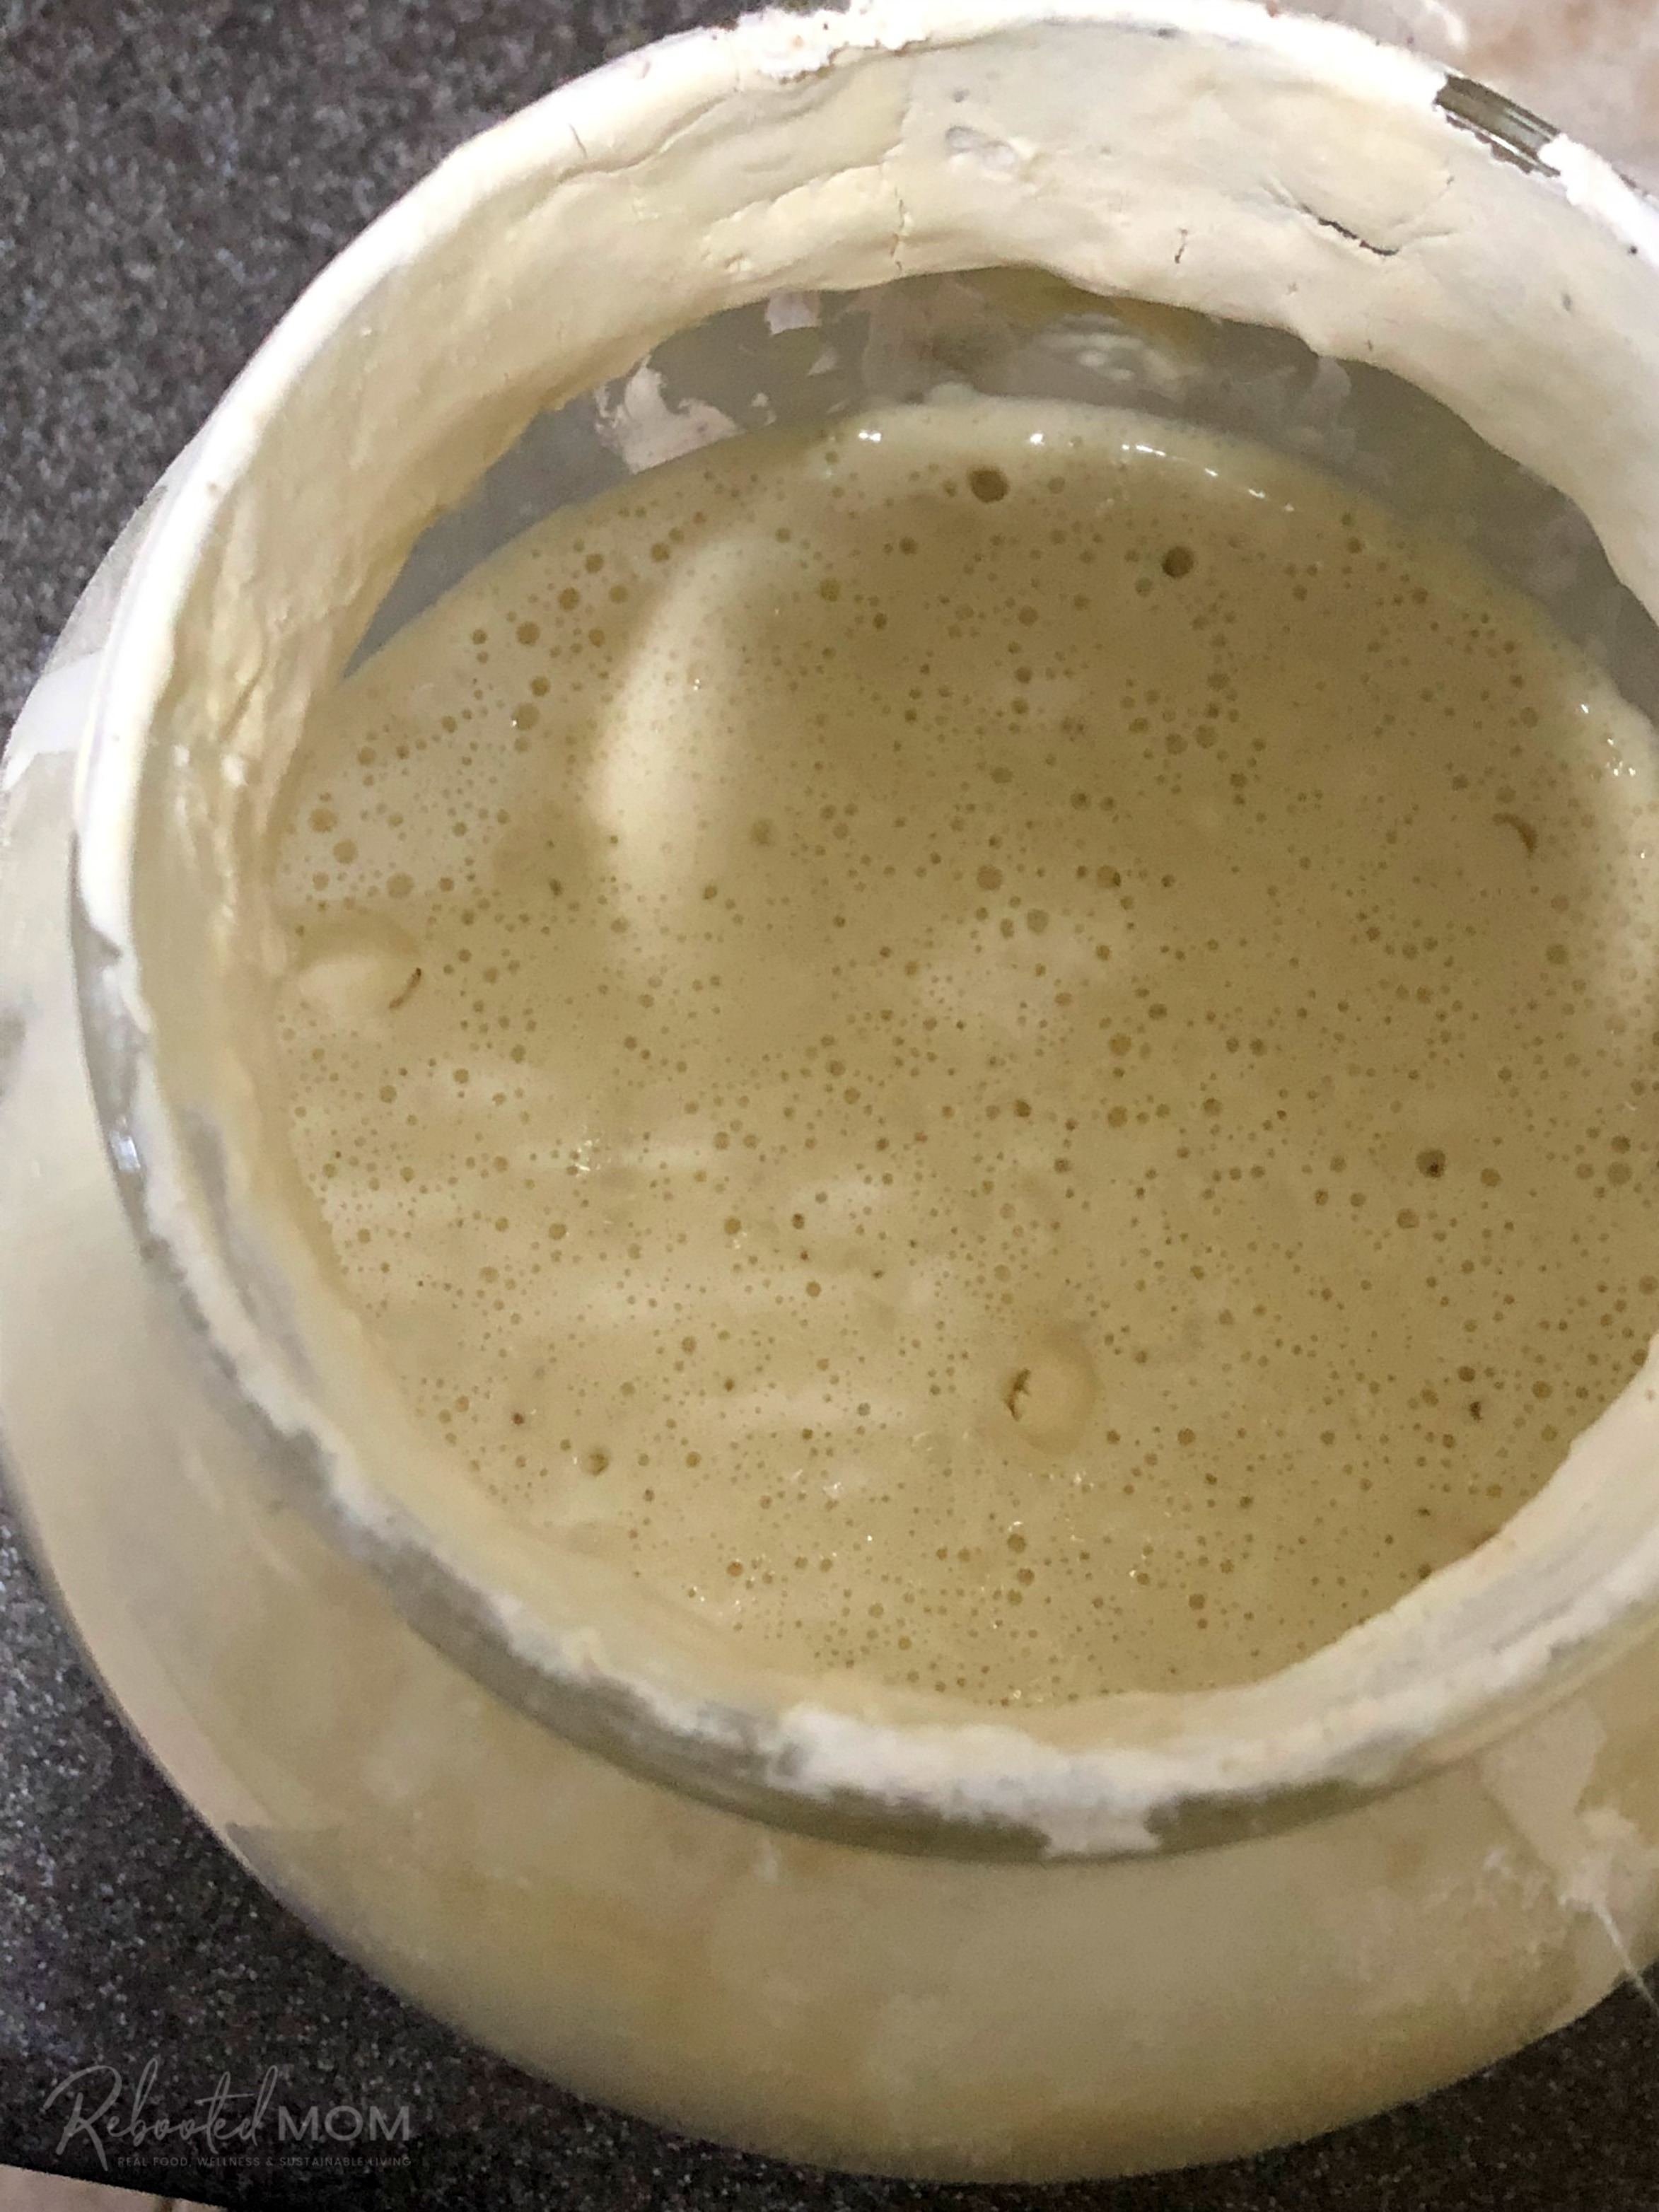
If you don’t keep a sourdough starter, consider starting one: equal parts of flour and water, twice a day, for 4-5 days. in a large jar (like this kombucha jar here). Every few days, I like to dump a little of the starter out to keep it fresh, then add my flour/water. It’s ready when you see active bubbles on the surface.
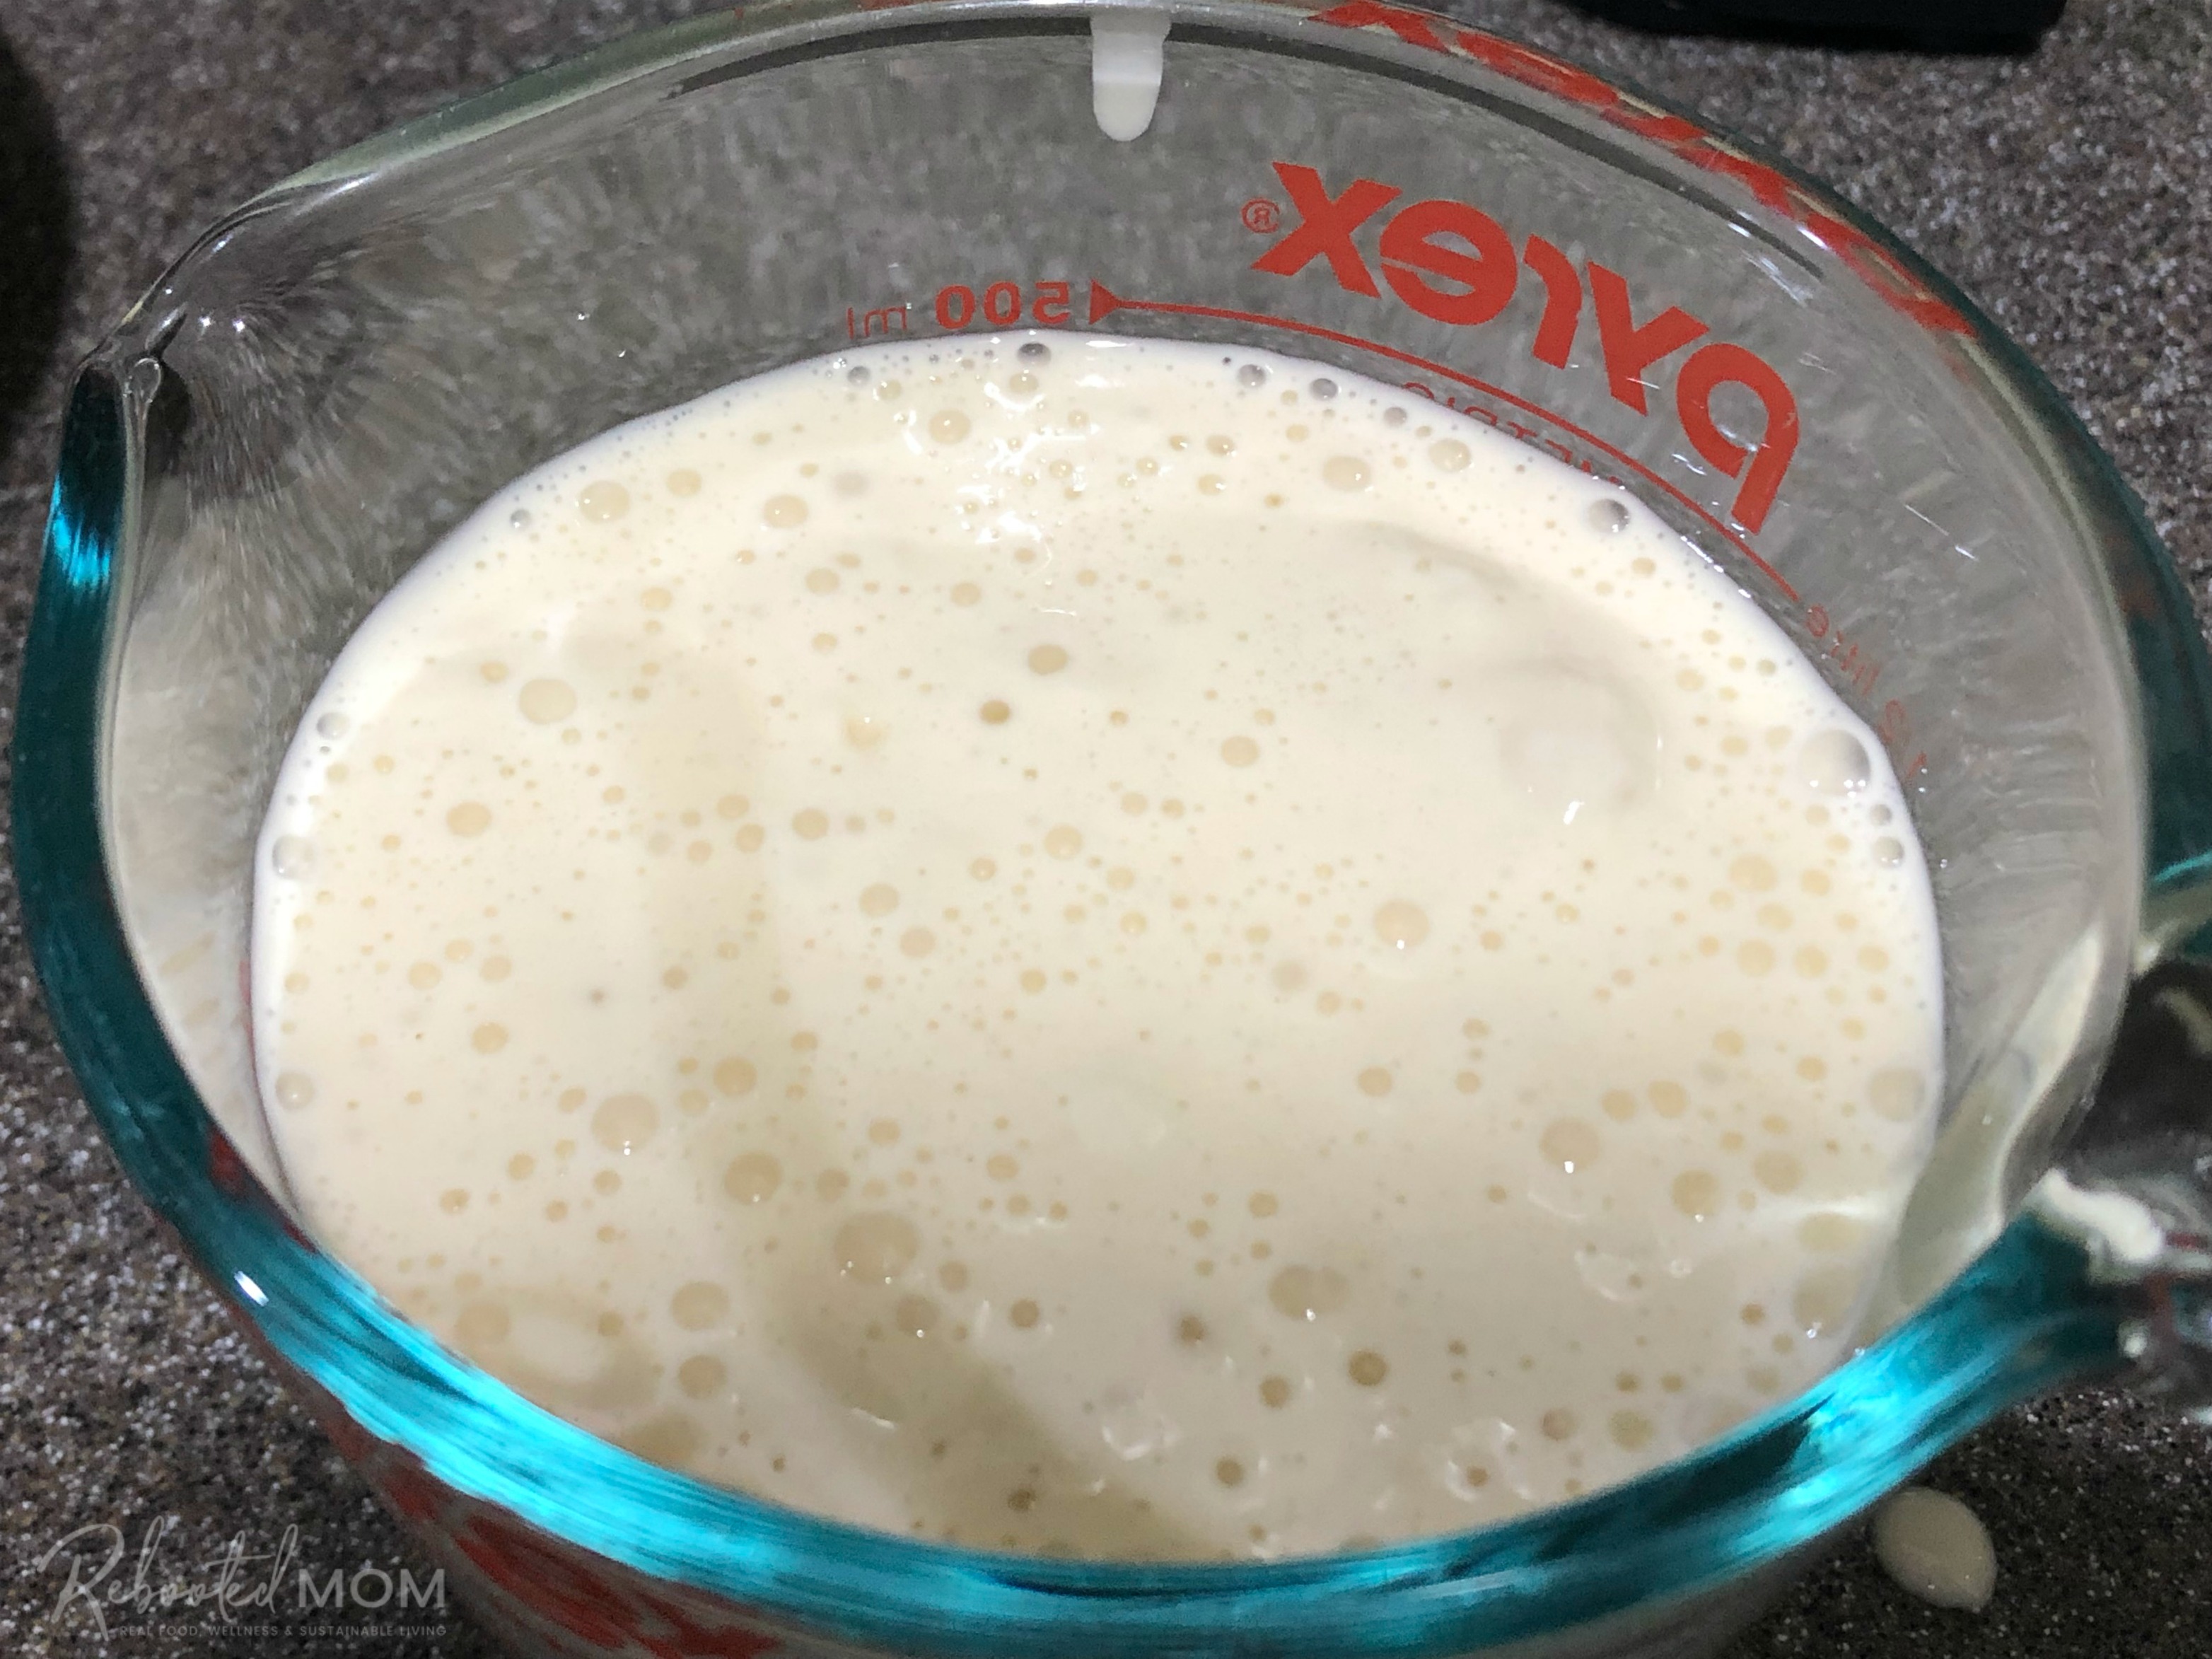
This sourdough starter in the measuring cup was just 4 hours after a feeding – it was nice and bubbly on the top and I knew it was ready to use in some fresh sourdough bagels.
Once you mix all of the ingredients, use your dough hook to knead the dough in the KitchenAid Mixer for a good 7-8 minutes. During that time, I like to wash dishes (or unload the dishwasher) and clean up the kitchen counters.
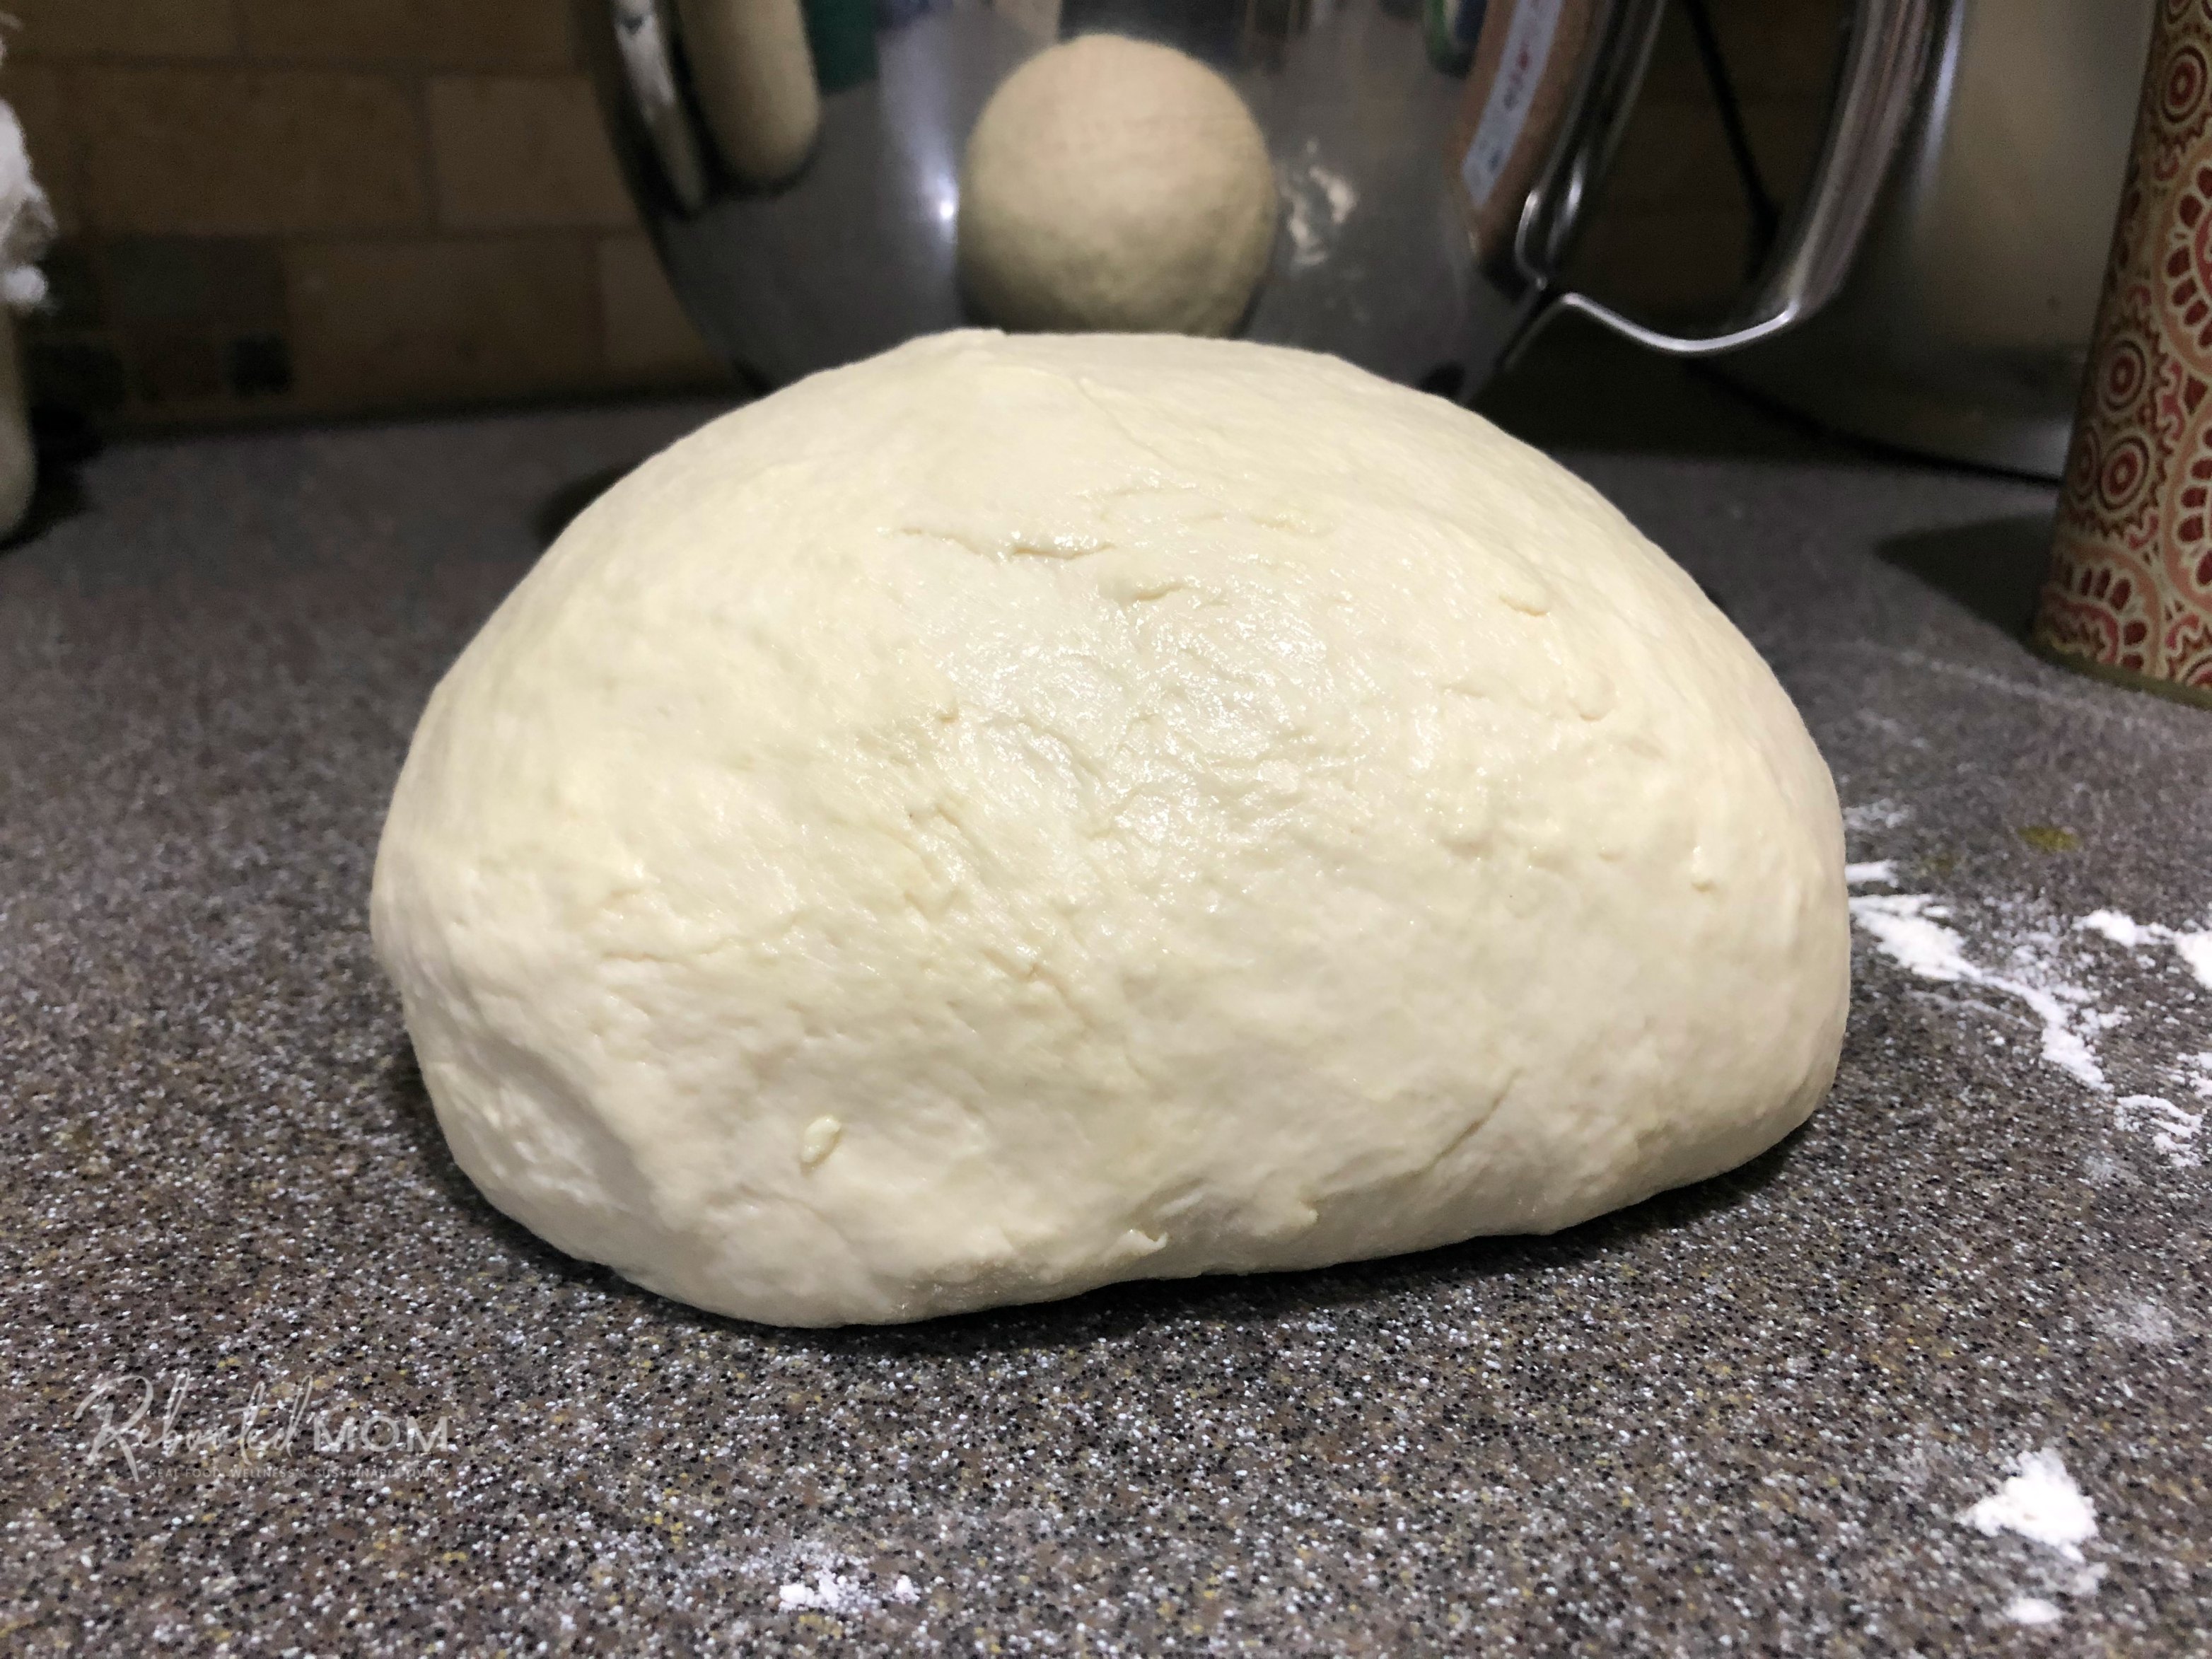
The bagel dough will definitely be a stiff dough – but the more you knead with the dough hook, the more manageable it becomes. You will need the flour to pass the windowpane test – if it doesn’t, allow it to rest for 3-4 minutes, then flip the mixer back on again for a few more minutes.
Eventually it will pull away from the side of the bowl. Once ready (and once it passes the windowpane test), lightly flour your counter and dump the dough out right on top.
Allow to Rise
Lightly oil a bowl (I scrub out the mixer bowl and dry thoroughly), and plop the dough in there. Turn it around to give it a light coat of that oil and then throw a plastic bag over the top. A grocery bag works great.
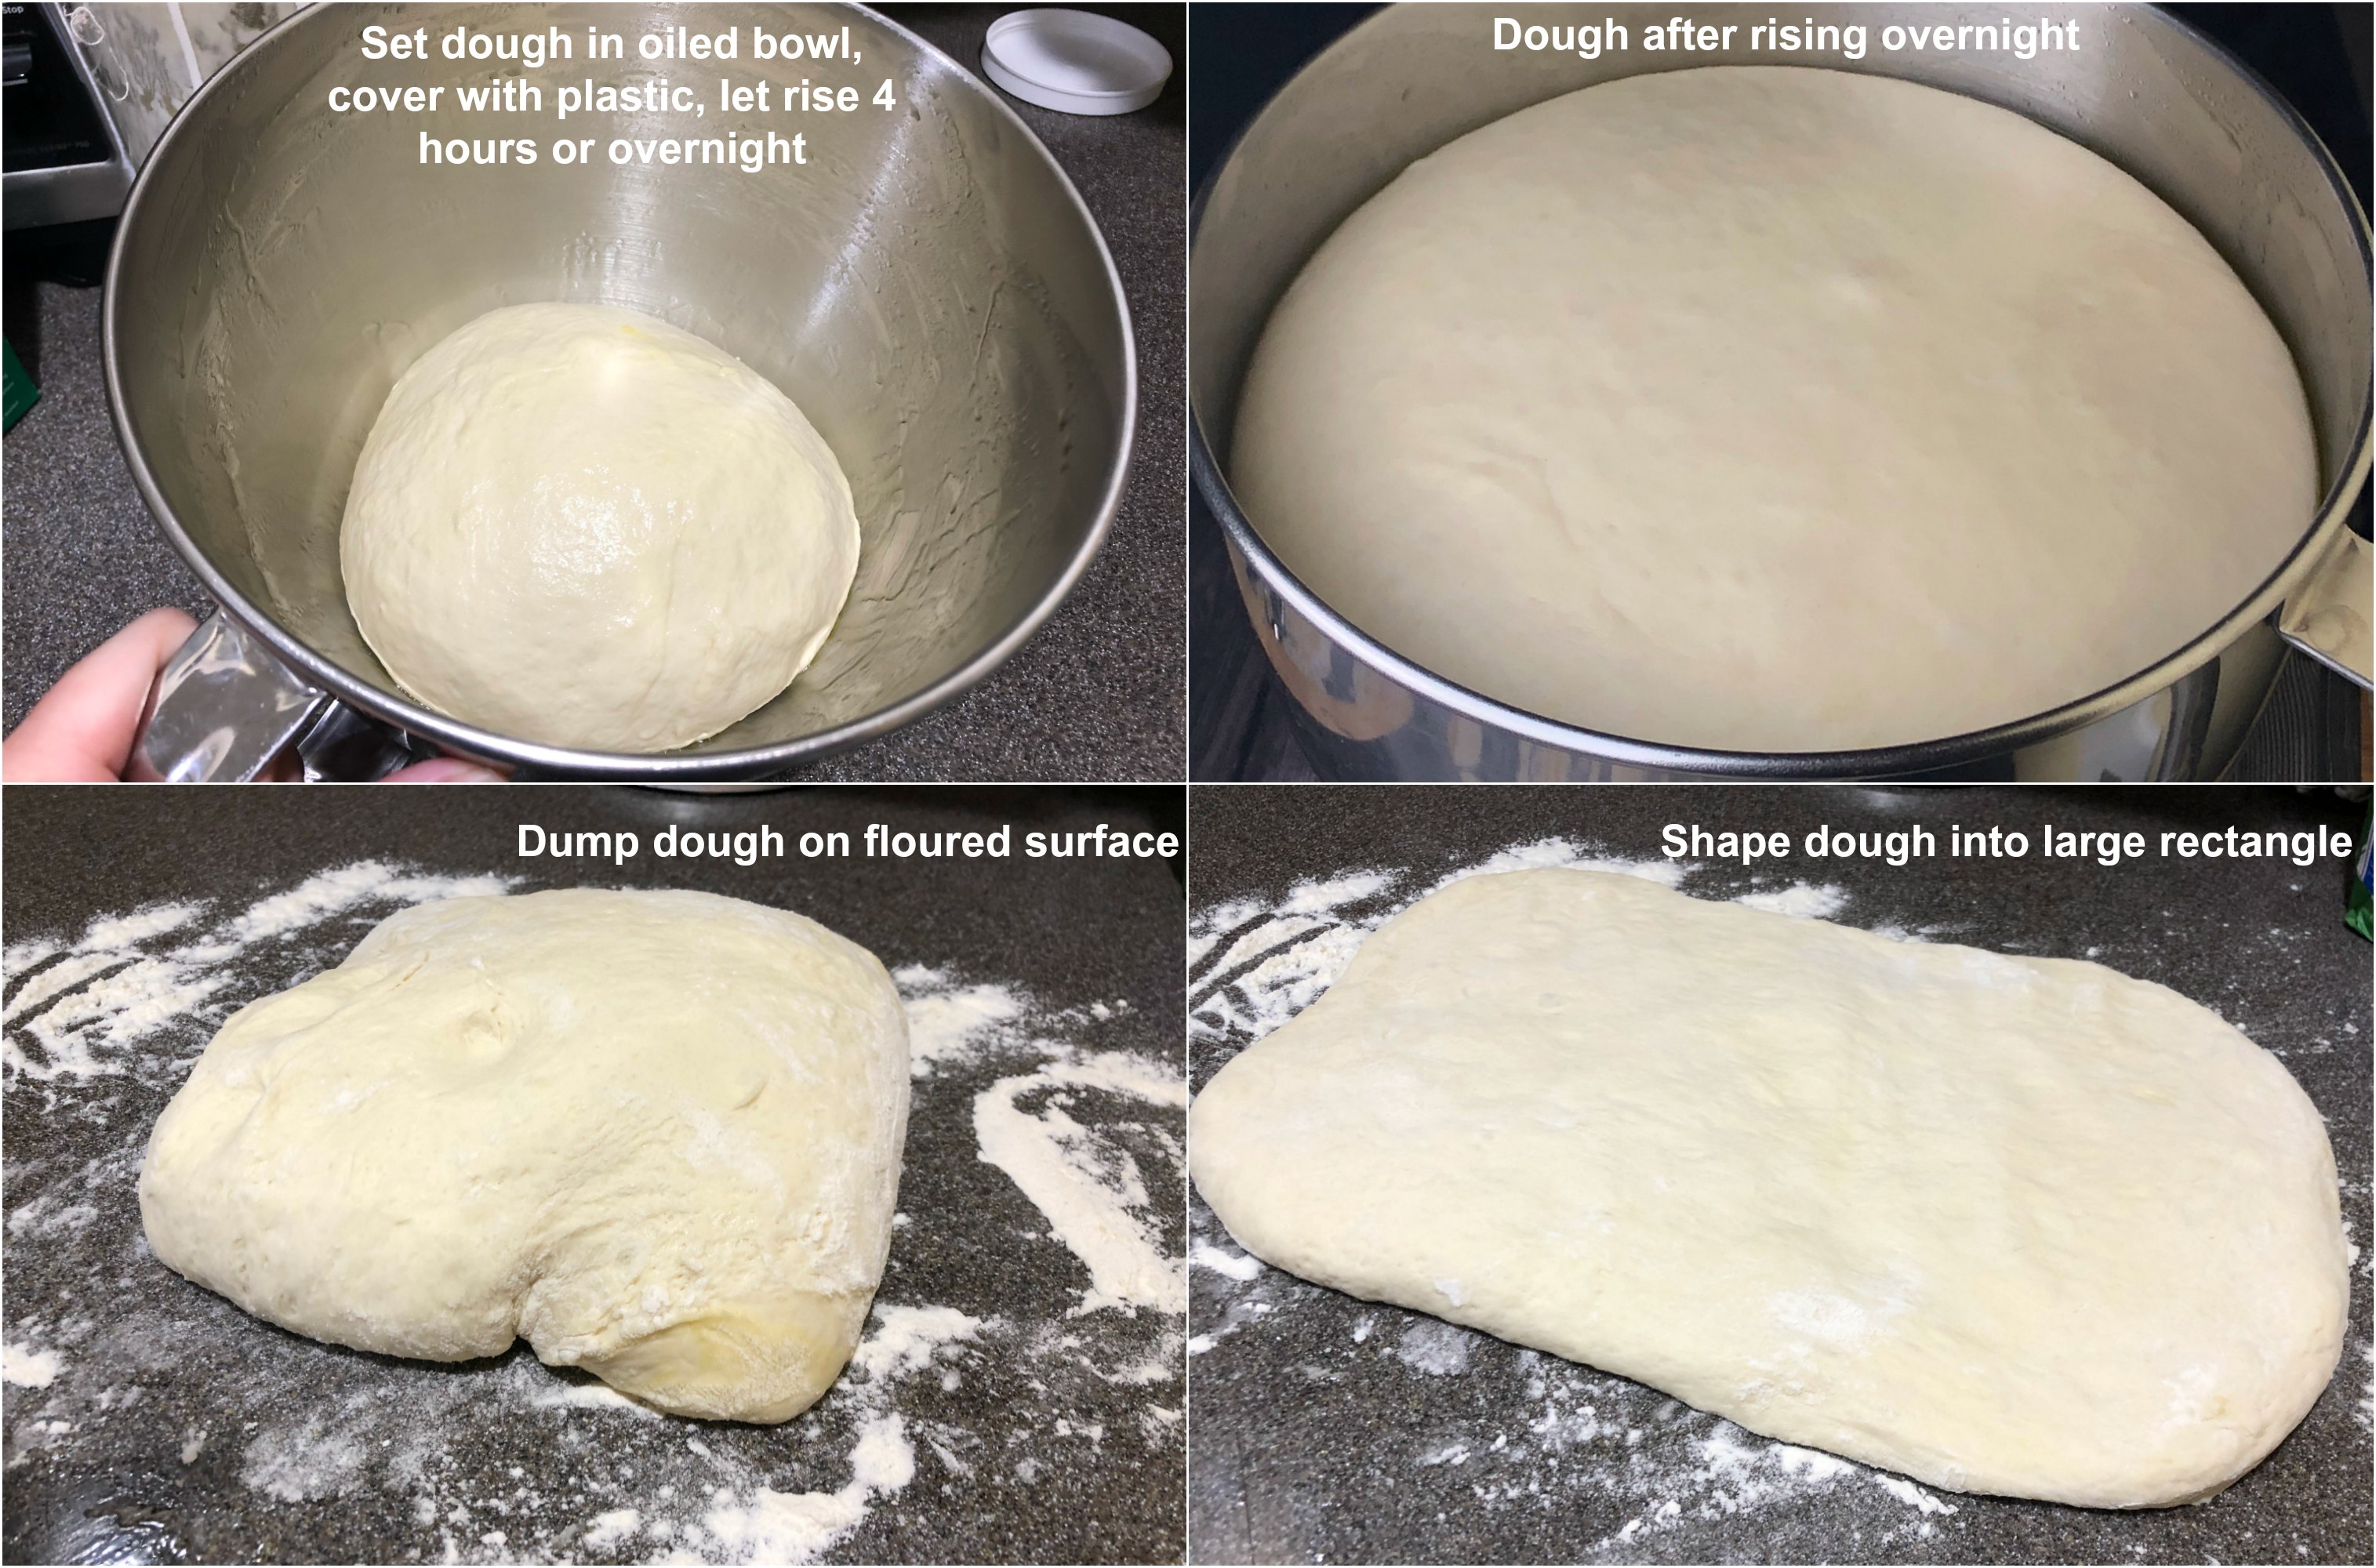
Allow the dough to rise for at least 4 hours, if not overnight (8 hours). When it’s ready, dump out onto a floured counter top.
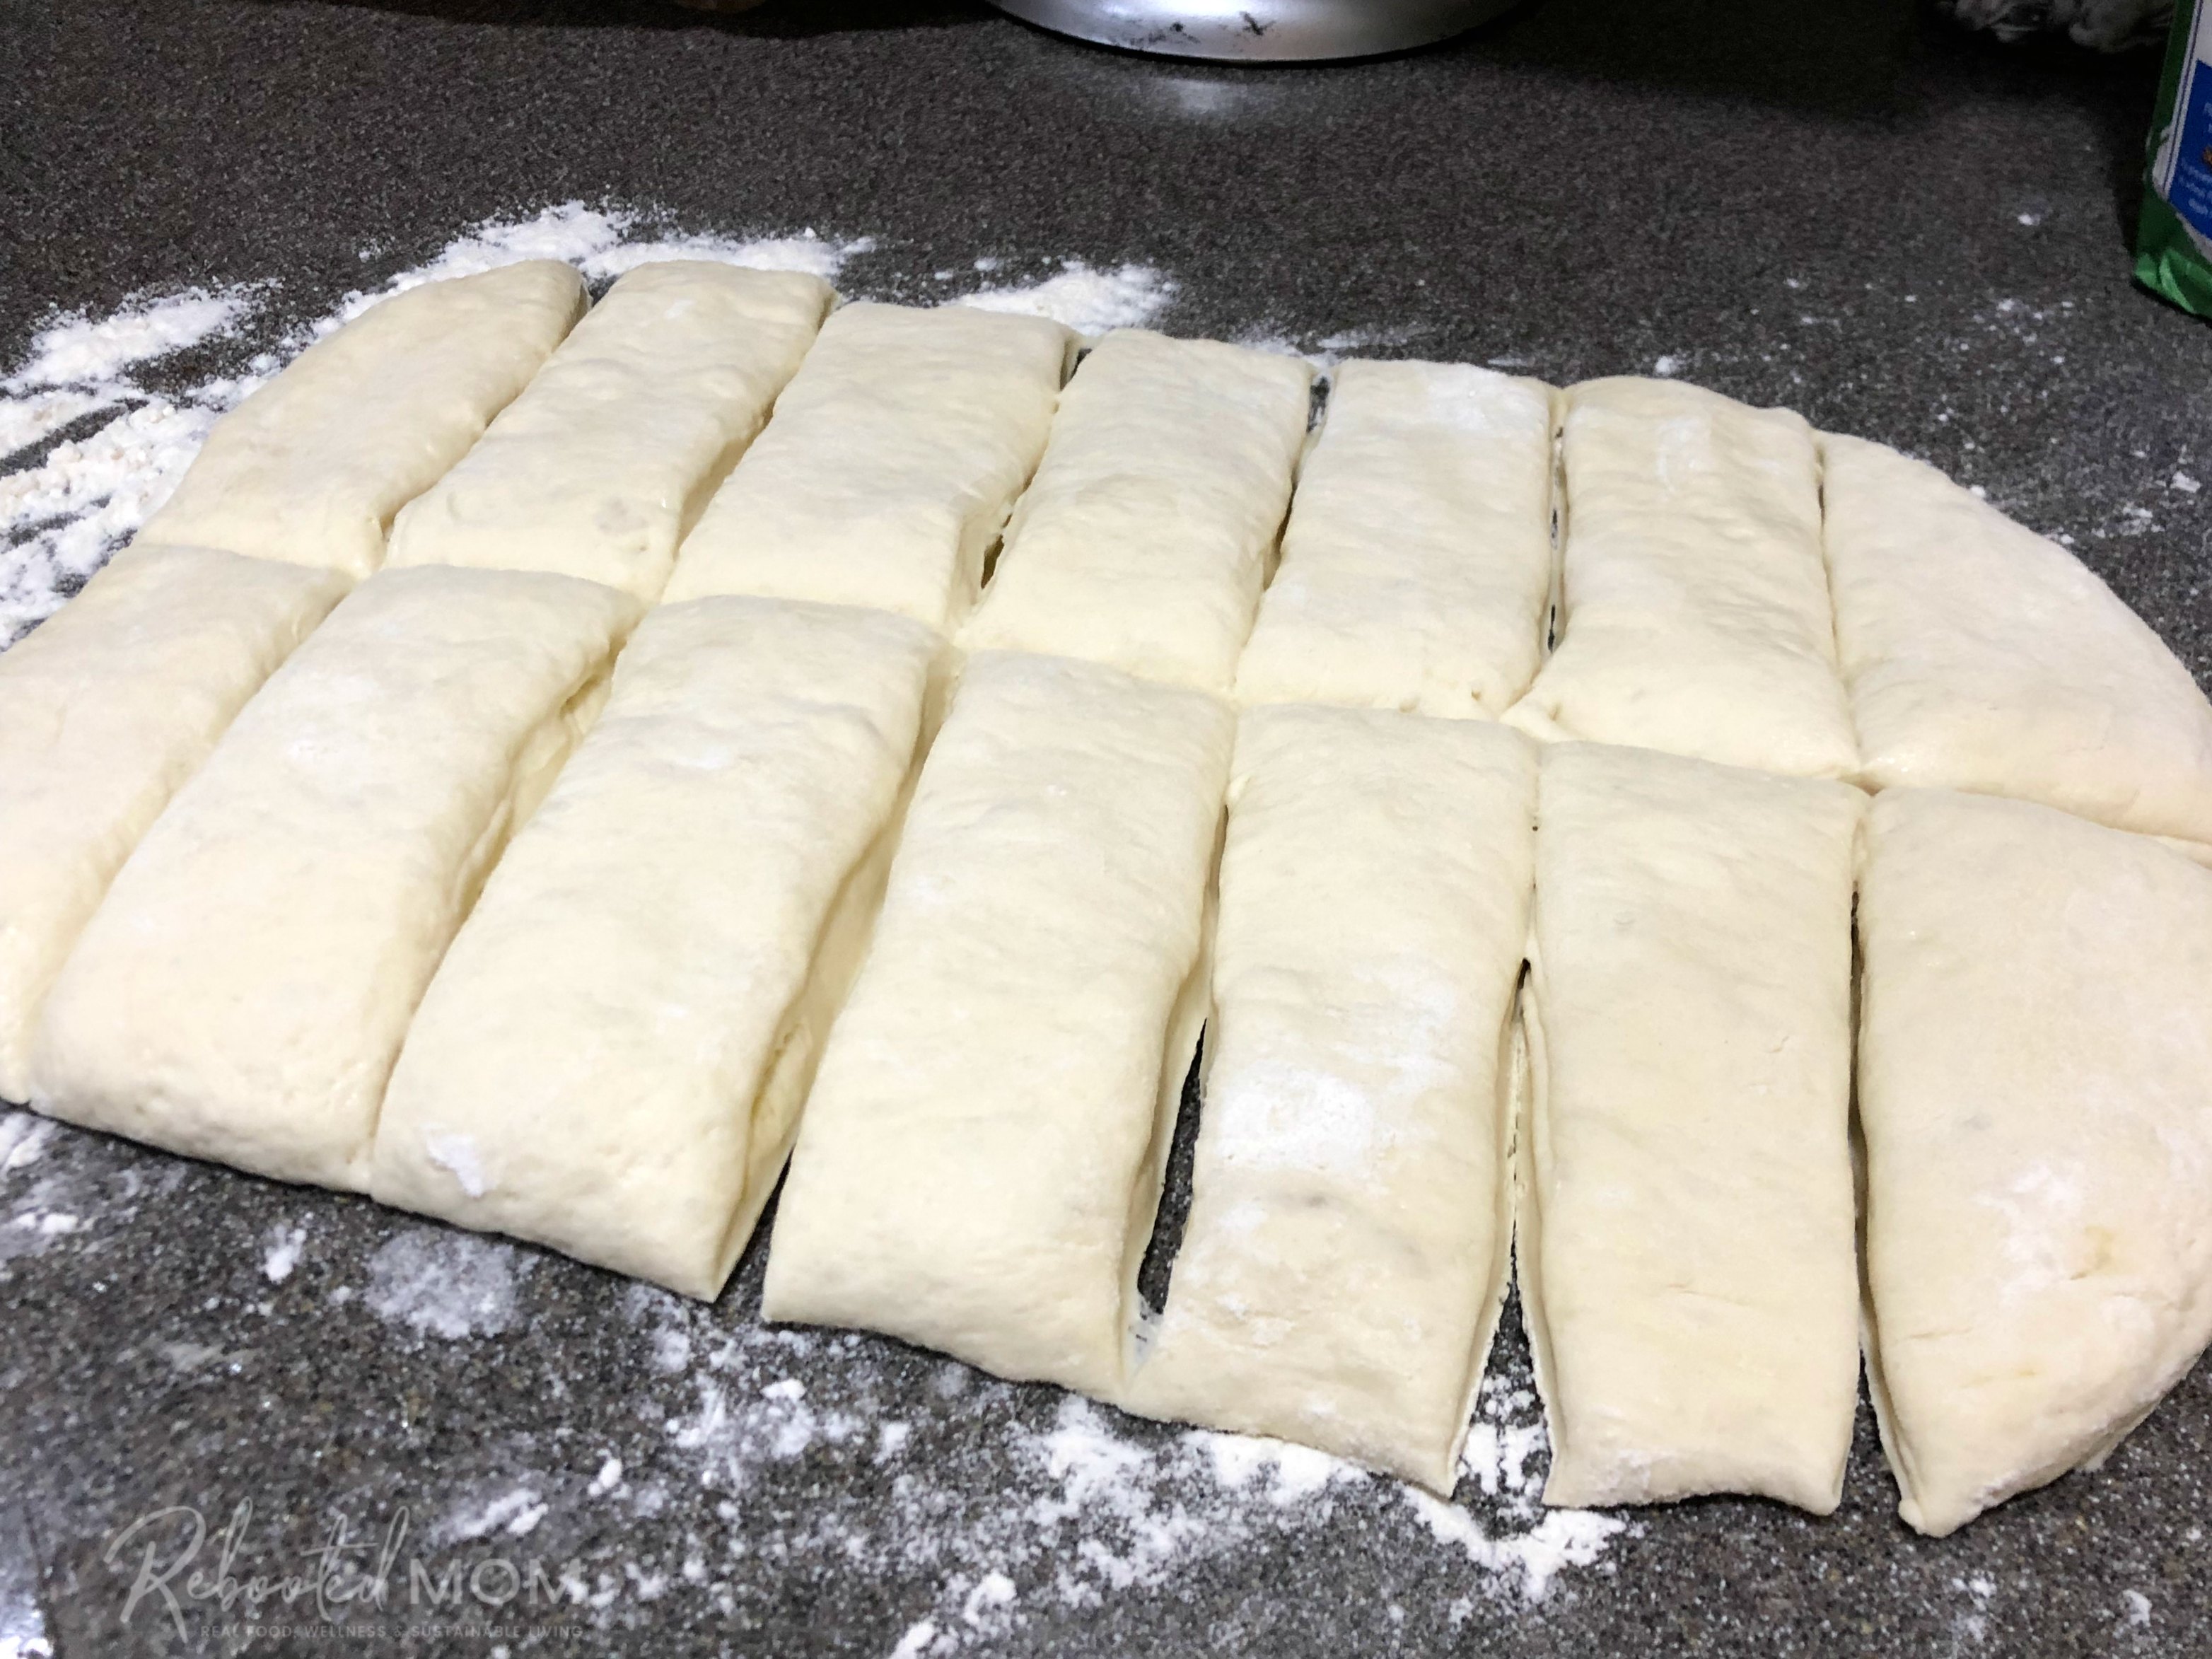
Push the dough into a large rectangle and cut into 14-16 even pieces. Once it’s rolled out, a large knife works wonderful for slicing it into pieces.
Shape and Boil the Bagels
Now it’s time to make the bagels:
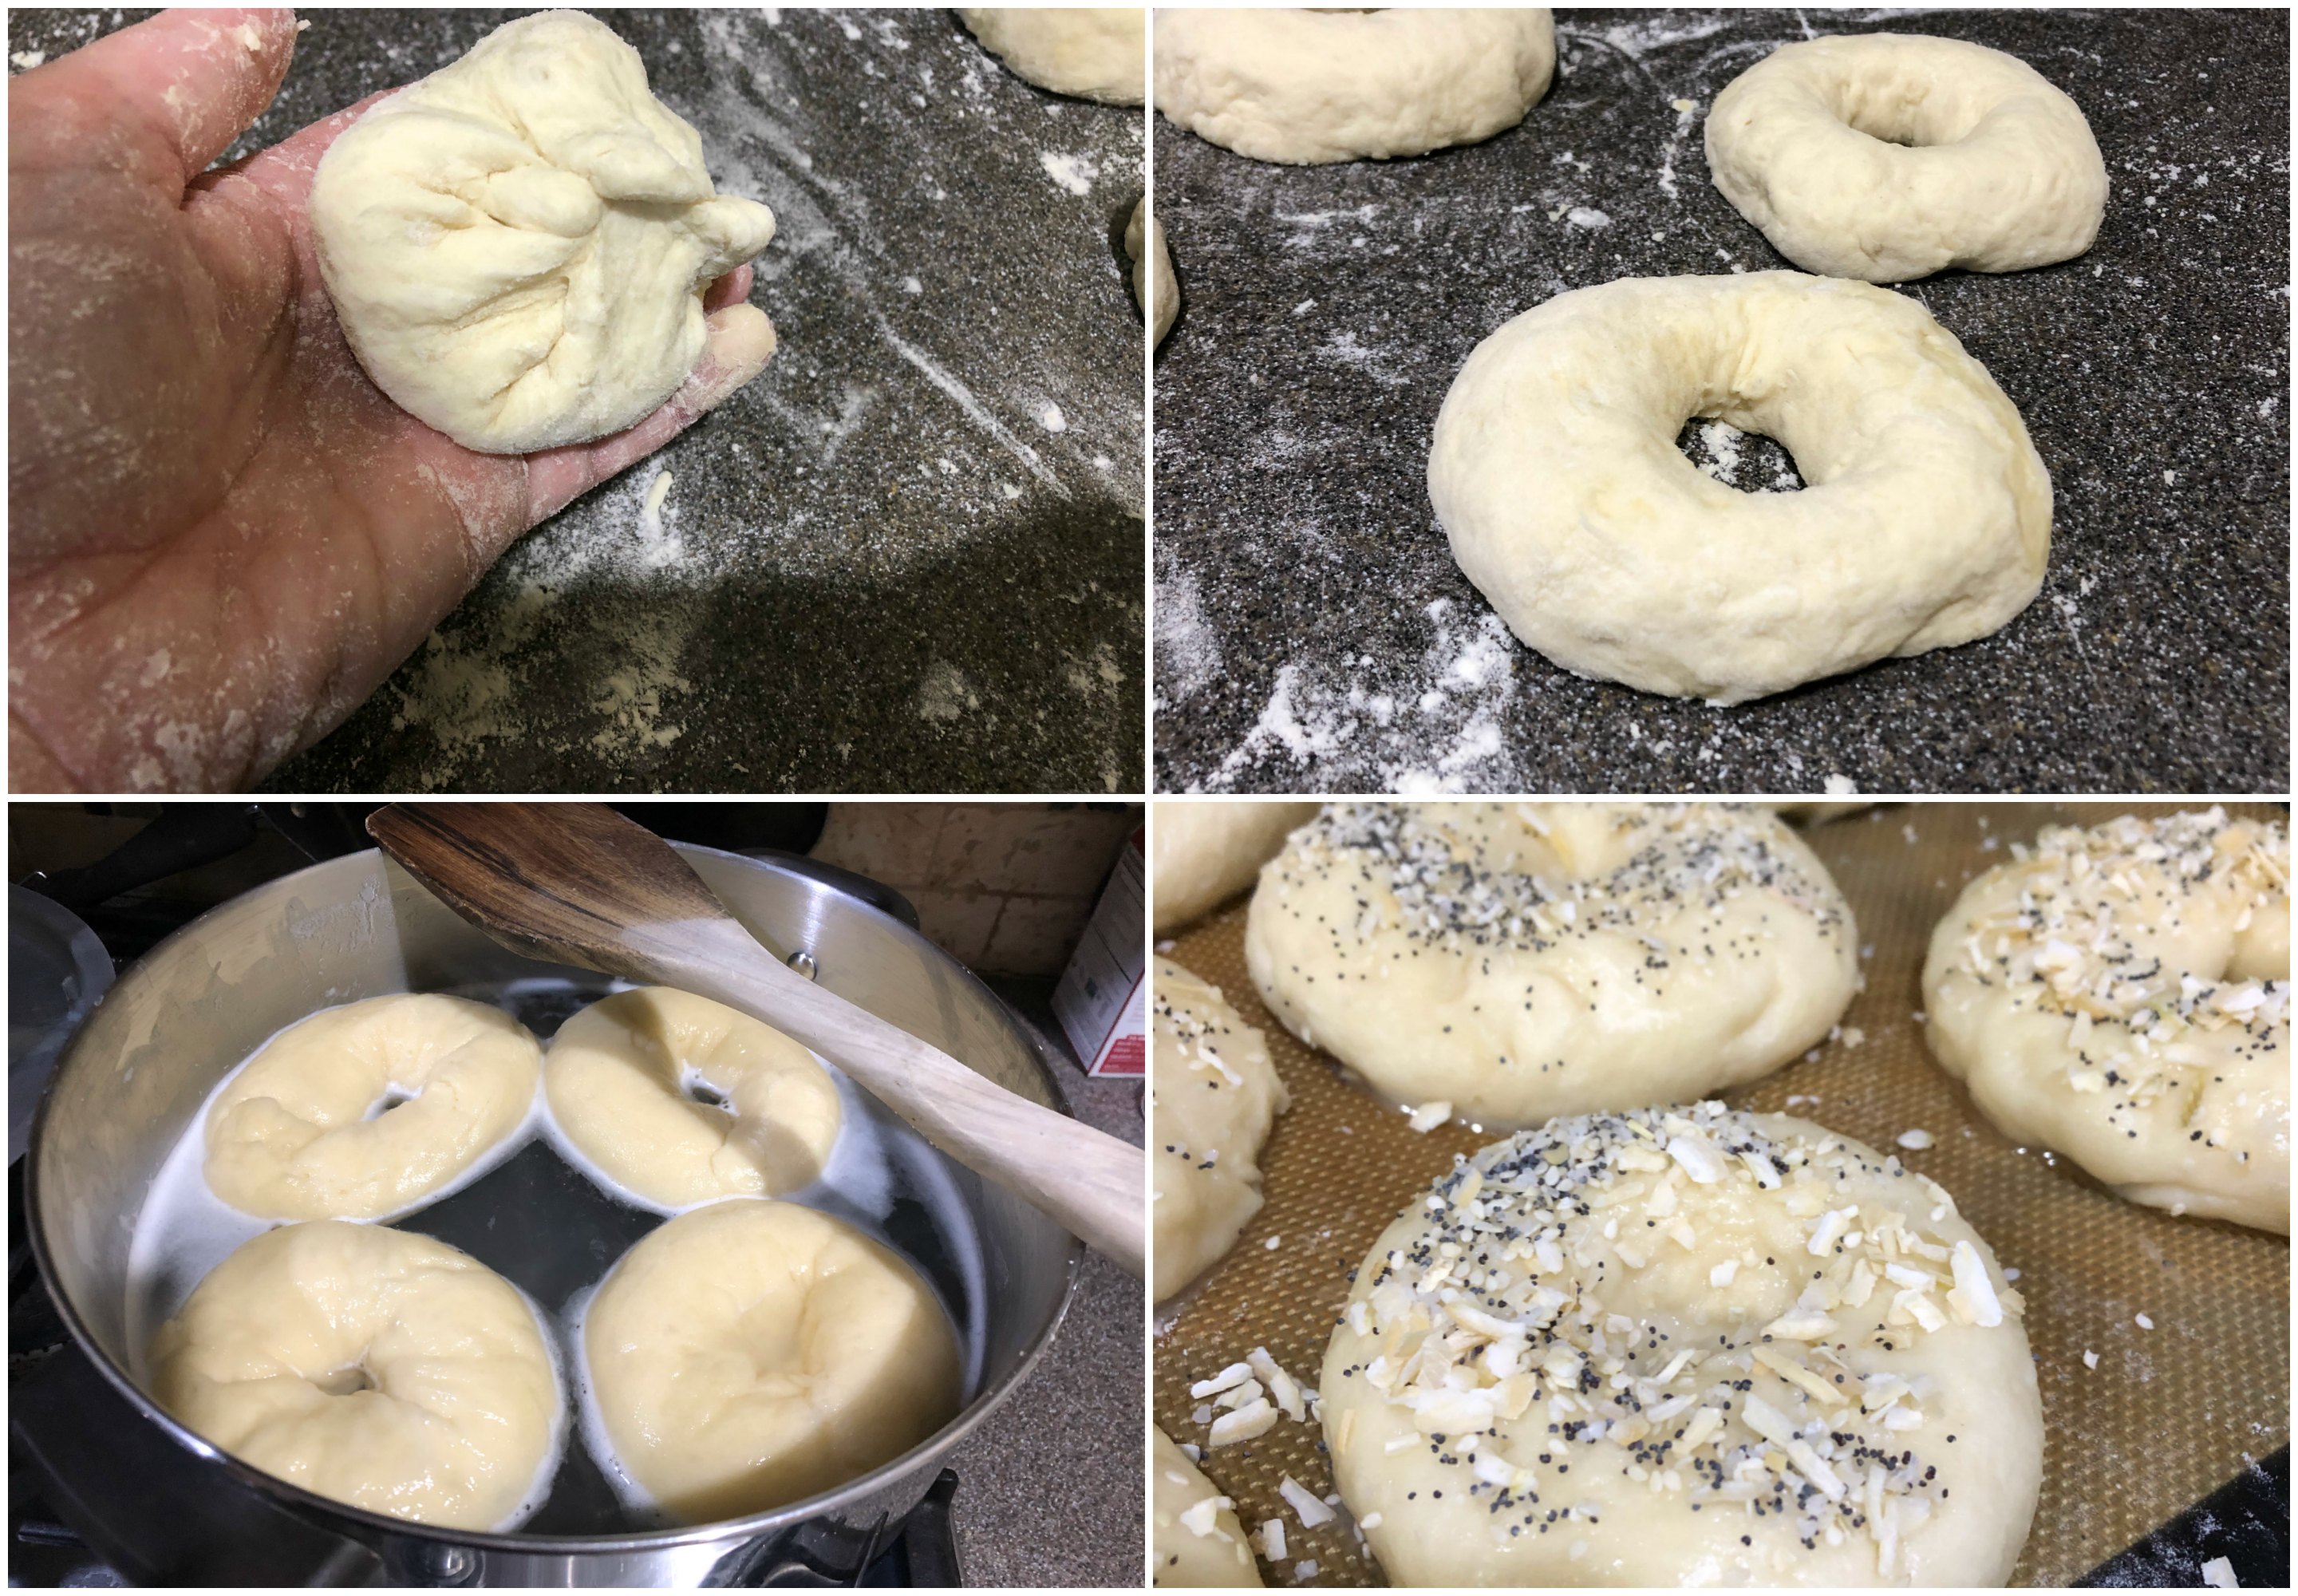
- You can take each piece and pinch the bottom to make a round ball. Then push your finger through to make a “hole”. Then twirl on your hand to make the hole larger until it’s the size you would like.
- Or… roll the piece out as if you are making pretzels. Instead of making the pretzel, make it a circle and push the two ends together.
I prefer to pinch the sides under and start with a round ball, then push my finger through to make the hole. It’s just so much easier (plus it’s fun, too). Don’t worry if your bagels look lumpy, they’ll even out over time.
Once you shape all of your sourdough bagels, place them on a greased cookie sheet (or greased baking mat) and lay a damp towel over them. You will need to allow them 30-45 minutes to “rest” – during that time they’ll gradually rise.
While you wait for that rise, fill a large stockpot with water. I use a one-gallon pot and fill with just over two quarts of water. Add one tablespoon of baking soda, and allow the pot to come to a low boil.
One by one, add the bagels to the water and boil for 30 seconds on each side. Flip, and repeat for another 30 seconds. Remove and place on your greased baking sheet or baking mat. My pot can fit 4 bagels at one time – you might be able to do more (just don’t crowd your pot!)
While you boil your bagels, preheat your oven to 450 degrees F.

Add Toppings and Bake
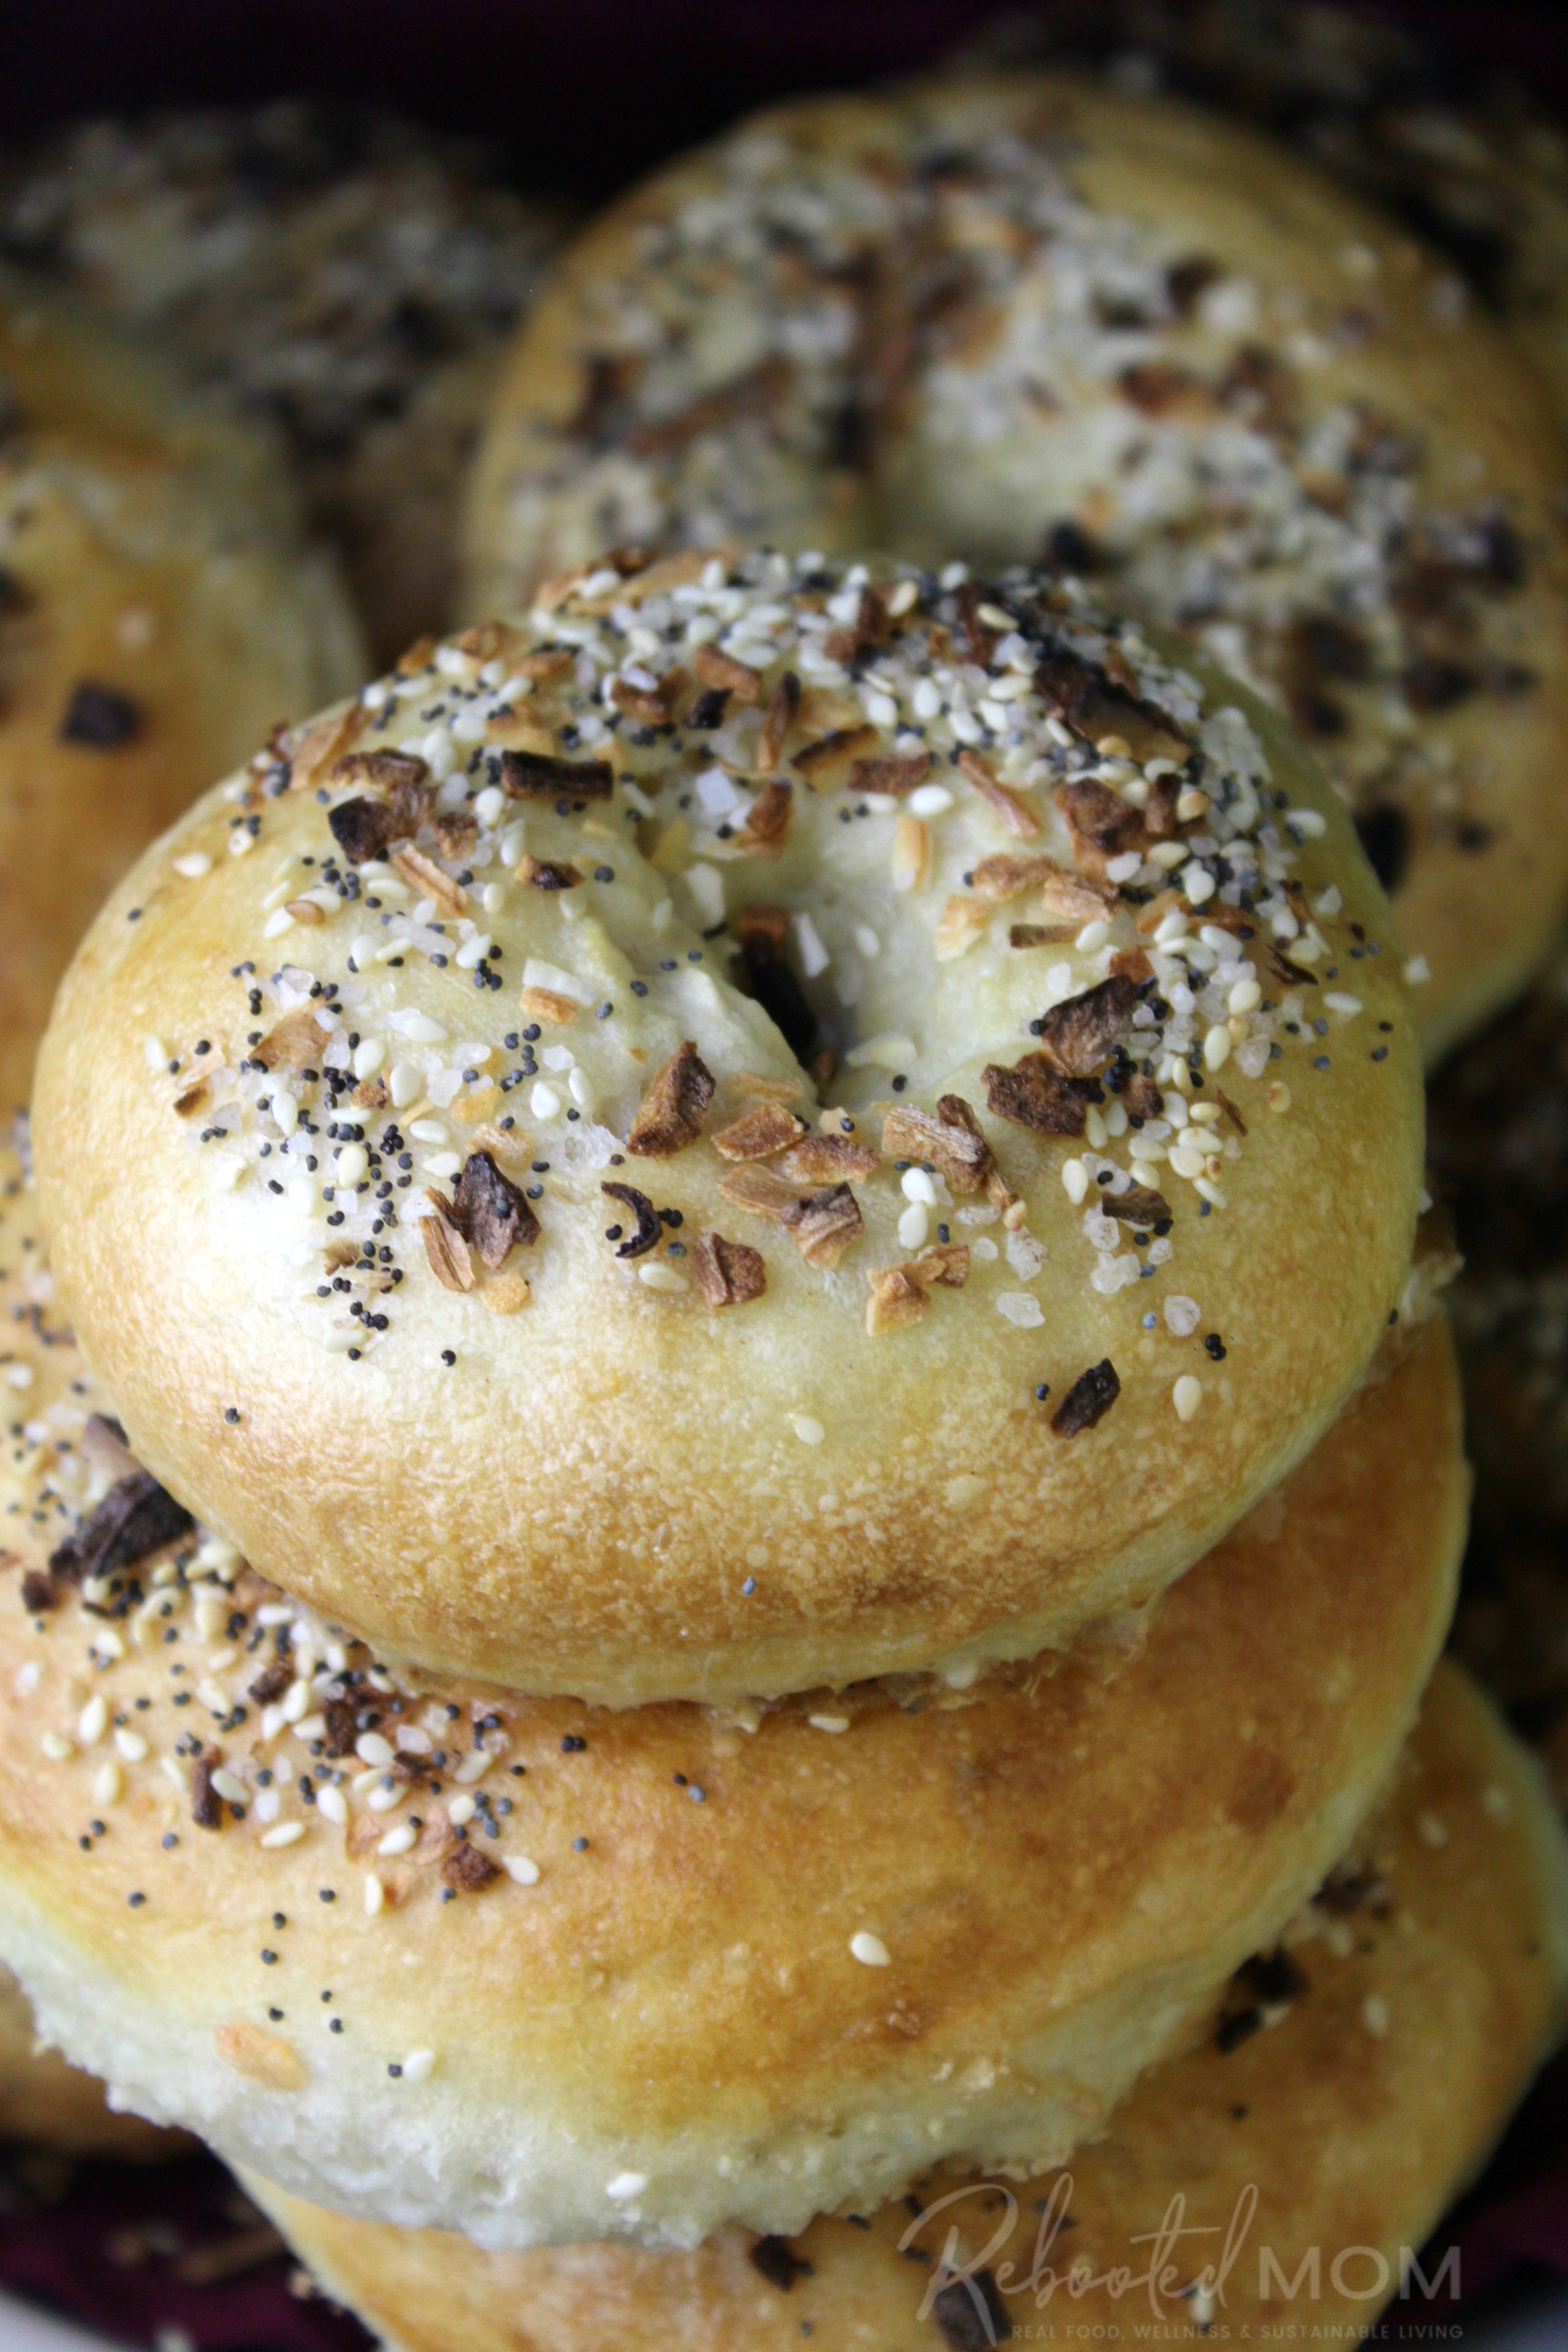
Place the sourdough bagels on your baking sheet and give them a quick brush with the egg + water mixture. Then sprinkle with your choice of toppings (I like sesame seeds, poppy seeds, dehydrated onions and coarse sea salt).
Bake in your 450 degree F oven for 13-15 minutes. The tops should become very brown when they are done. Remove and allow them to cool before enjoying.
(They will be very hard out of the oven but will soften up nicely once they begin to cool). They are best when enjoyed immediately – but they keep wonderfully in a gallon ziploc bag.
Did you make these?
If you did, please rate the recipe and leave a comment – I’d love to know how they turned out for you!

Homemade Sourdough Bagels
Ingredients
Sourdough Bagels:
- 2 C active sourdough starter 4-5 hours after being fed
- 1 Tbsp olive oil
- 5.5 C all purpose unbleached flour + more for dusting the counter top
- 2 tsp salt
- 10 oz water
For water boil:
- 2 quarts water
- 1 Tbsp baking soda
Glaze & toppings:
- 1 egg yolk and white + 2 Tbsp water
- optional toppings: poppy seeds sesame seeds, dehydrated onion flakes, parmesan cheese, jalapeños)
Instructions
- Combine your active sourdough starter, oil, flour, salt and water in a KitchenAid mixer bowl. Use the dough hook to mix the dough, and knead for a solid 7-8 minutes. The dough is ready when it pulls away from the bowl and becomes quite stiff.
- Transfer the dough to a well-oiled bowl, cover with plastic for 4 hours if not overnight.
- After that time, dump the dough onto a lightly floured surface. Roll or flatten into a large rectangle and cut into 14-16 pieces.
- Shape your bagels: pinch the ends over and meet at the bottom, shaping into a ball. Push your finger through the middle to form the "hole", and widen to about 1.5-2 inches. Repeat.
- Place the shaped bagels on a greased cookie sheet or counter top. Cover with a damp towel, and allow to rise again for 30-45 minutes.
- During that time, combine the 2 quarts water + baking soda in a one gallon stock pot. Bring to a low boil. Preheat your oven to 450 degrees F.
- Place 3-4 bagels at a time into the baking soda + water mixture. Boil for 30 seconds on each side. Remove with a slotted spoon and place back on the greased cookie sheet/baking mat.
- Brush the bagels with the egg + water mixture (optional, but gives a nice shine). Top with your choice of toppings.
- Bake for 13-15 minutes at 450 degrees F, or until bagels are a beautiful golden brown. Allow to cool before enjoying.
Did you try this recipe? If you did, please take a second to rate the recipe and leave a comment as I’d love to know how it turned out.
I’d ask you to tag me on social media but I gave up social media several years ago (Crazy – right??!!) It was the best thing I ever did. I still love to read comments and hear from you though – so don’t be afraid to leave comments on this post as I do take the time to read and respond when I can!

These look so good! What a versatile way to use your sourdough starter! There are so many ways to eat bagels too!
Thanks for sharing! Do they keep long?
Vanessa, they do. Just keep them in a ziploc gallon bag, refrigerate if your kitchen is warm. I usually make a double batch and freeze half of them (after baking). Then I just reheat them in the oven or the microwave. My kids like them cut in the middle and toasted on the griddle before they put jam/butter/cream cheese on them.
Made these today and they turned out fabulous. Skipped the egg wash as my husband is basically vegan. Will definitely make again.
Do you have the recipe information base on weight by any chance? starter changes volume once mixed, so i always find weight more accurate when making anything to do with sourdough.
I made these sourdough bagels today and they are really delicious. I will definitely make them again.
I have a question : I prepared the dough and placed it in a bowl to rise at 4pm, was going to let it rise overnight and bake in the morning but i was worried it would collapse, could I have waited until morning to bake ?
Sonia,
I haven’t waited that long … I have put it in the bowl at around 10 pm and done it when I got up at 6 a.m. (about 8 hours). I would probably not go that long (4 pm till morning)… as I have done that with sourdough bread and it has collapsed. You could also let it rise, then shape them then put them in the fridge overnight (covered of course). Then pull out of the fridge in the morning and let them rest for an hour or so before baking.
Sheryl,
Thank you for your reply. I absolutely love all of your recipes,……Looking
forward to making the pretzels and pickles.
Thank you for sharing.
Sonia ~
I’m a little late for helping out the original poster for this question, but in case anyone else is curious… I made my dough at 11pm and then shaped at 12pm (13 hours later…) and boiled/cooked at 1:30pm. I had checked on it at 9am when I woke up, and it was a little smaller than I expected, so let it go longer to 12pm. It’s also winter, so pretty chilly on my countertops, and I feel like my sourdough starter isn’t super aggressive anyway. I was happy with how they turned out!
Should the dough be kneaded until it passes the windowpane test? I’ve tried making these 3 times, each time in the food processor. The food processor makes kneading the dough a breeze. I’ve processed the dough until it passes the windowpane test but then after rising the dough won’t hold its shape. I’m trying to figure out what I’m doing wrong so I’m wondering if it’s necessary to pass the windowpane test? I’d appreciate any advice you could offer, I really want master this! thanks
Can these be made without a stand mixer? Just hand kneading for 10-15 min?
You definitely could do it without – it’s just a bit more effort. I would hand knead for 10-15. Let me know how they turn out!
Thank you so much for this recipe. Bread baking has become one of my “Covid creations”. My sourdough starter was created in May so having one more awesome recipes close at hand is great. This recipe was very easy to follow and the flavor is amazing.
Glad you enjoyed it Adele. Baking has also been a great way for me to deal with Covid — I’m glad to have something I can do to make my kids happy and bellies full during this time!
I love that your recipe doesn’t require any special ingredients. I was a little skeptical when I was shaping, because the dough seemed a little tough and I couldn’t eliminate the creases from folding into a ball. Then they didn’t rise much after shaping. But they turned out great! Nice crust, chewy inside. The first time I tried bagels, with a different recipe, the dough was too soft, and they turned out wrinkly, flat, and hard. Yuck. These are wonderful! Thank you!
So glad they worked well for you, Julie. I love bagels.. and these bagels have always turned out for me without fail. Have a wonderful holiday season!
I mixed my dough tonight and it is so dry and dense my mixer actually couldn’t keep up with it. It’s definitely not stretchy…more like a big hard rubber ball. I’ll let it sit overnight and see what happens by morning. Any suggestions to save it if it doesn’t rise?
I would love too do sour dough bread. But I cannot wrap my head around feeding it, and taking out one cup , so how m u ch do I feed it.. how do you make a starter in four hours. It just won’t work in my b r ain. I have dooor3sread dozens of recipes, they never give details on how too keep starter or volume . Or create
I feed mine twice a day… morning and evening. But you can start with once a day. Depends on how often you want to use it!
These bagels are SO good! I’ve made this recipe dozens of times at this point and have some tips for getting beautiful bagels every time. I let the dough rise for approximately 4 hours then divide evenly into dough balls. I make the bagel shape but let them rise again on small, individual parchment squares. I let them rise 1-2 hours covered by a damp tea towel so they are plump and beautiful. Then I just put the dough gently into the water bath with the parchment paper still attached (parchment on top). When I get 3 in the water, I go back and slowly peel off the parchmparchment with tongs. This way you don’t disturb the shape!
I also wanted to share that I added a can of pumpkin, tablespoon of molasses and a tablespoon of pumpkin pie seasoning to the recipe as is (actually I decreased the salt by half) and they turned out AMAZING! I sprinkled a bit more pumpkin pie seasoning on top for a finishing touch. I can’t believe how good they turned out. Thank you so much for the base recipe!
Abby, thank you for your tips! I think I’m going to try your suggestions myself!