


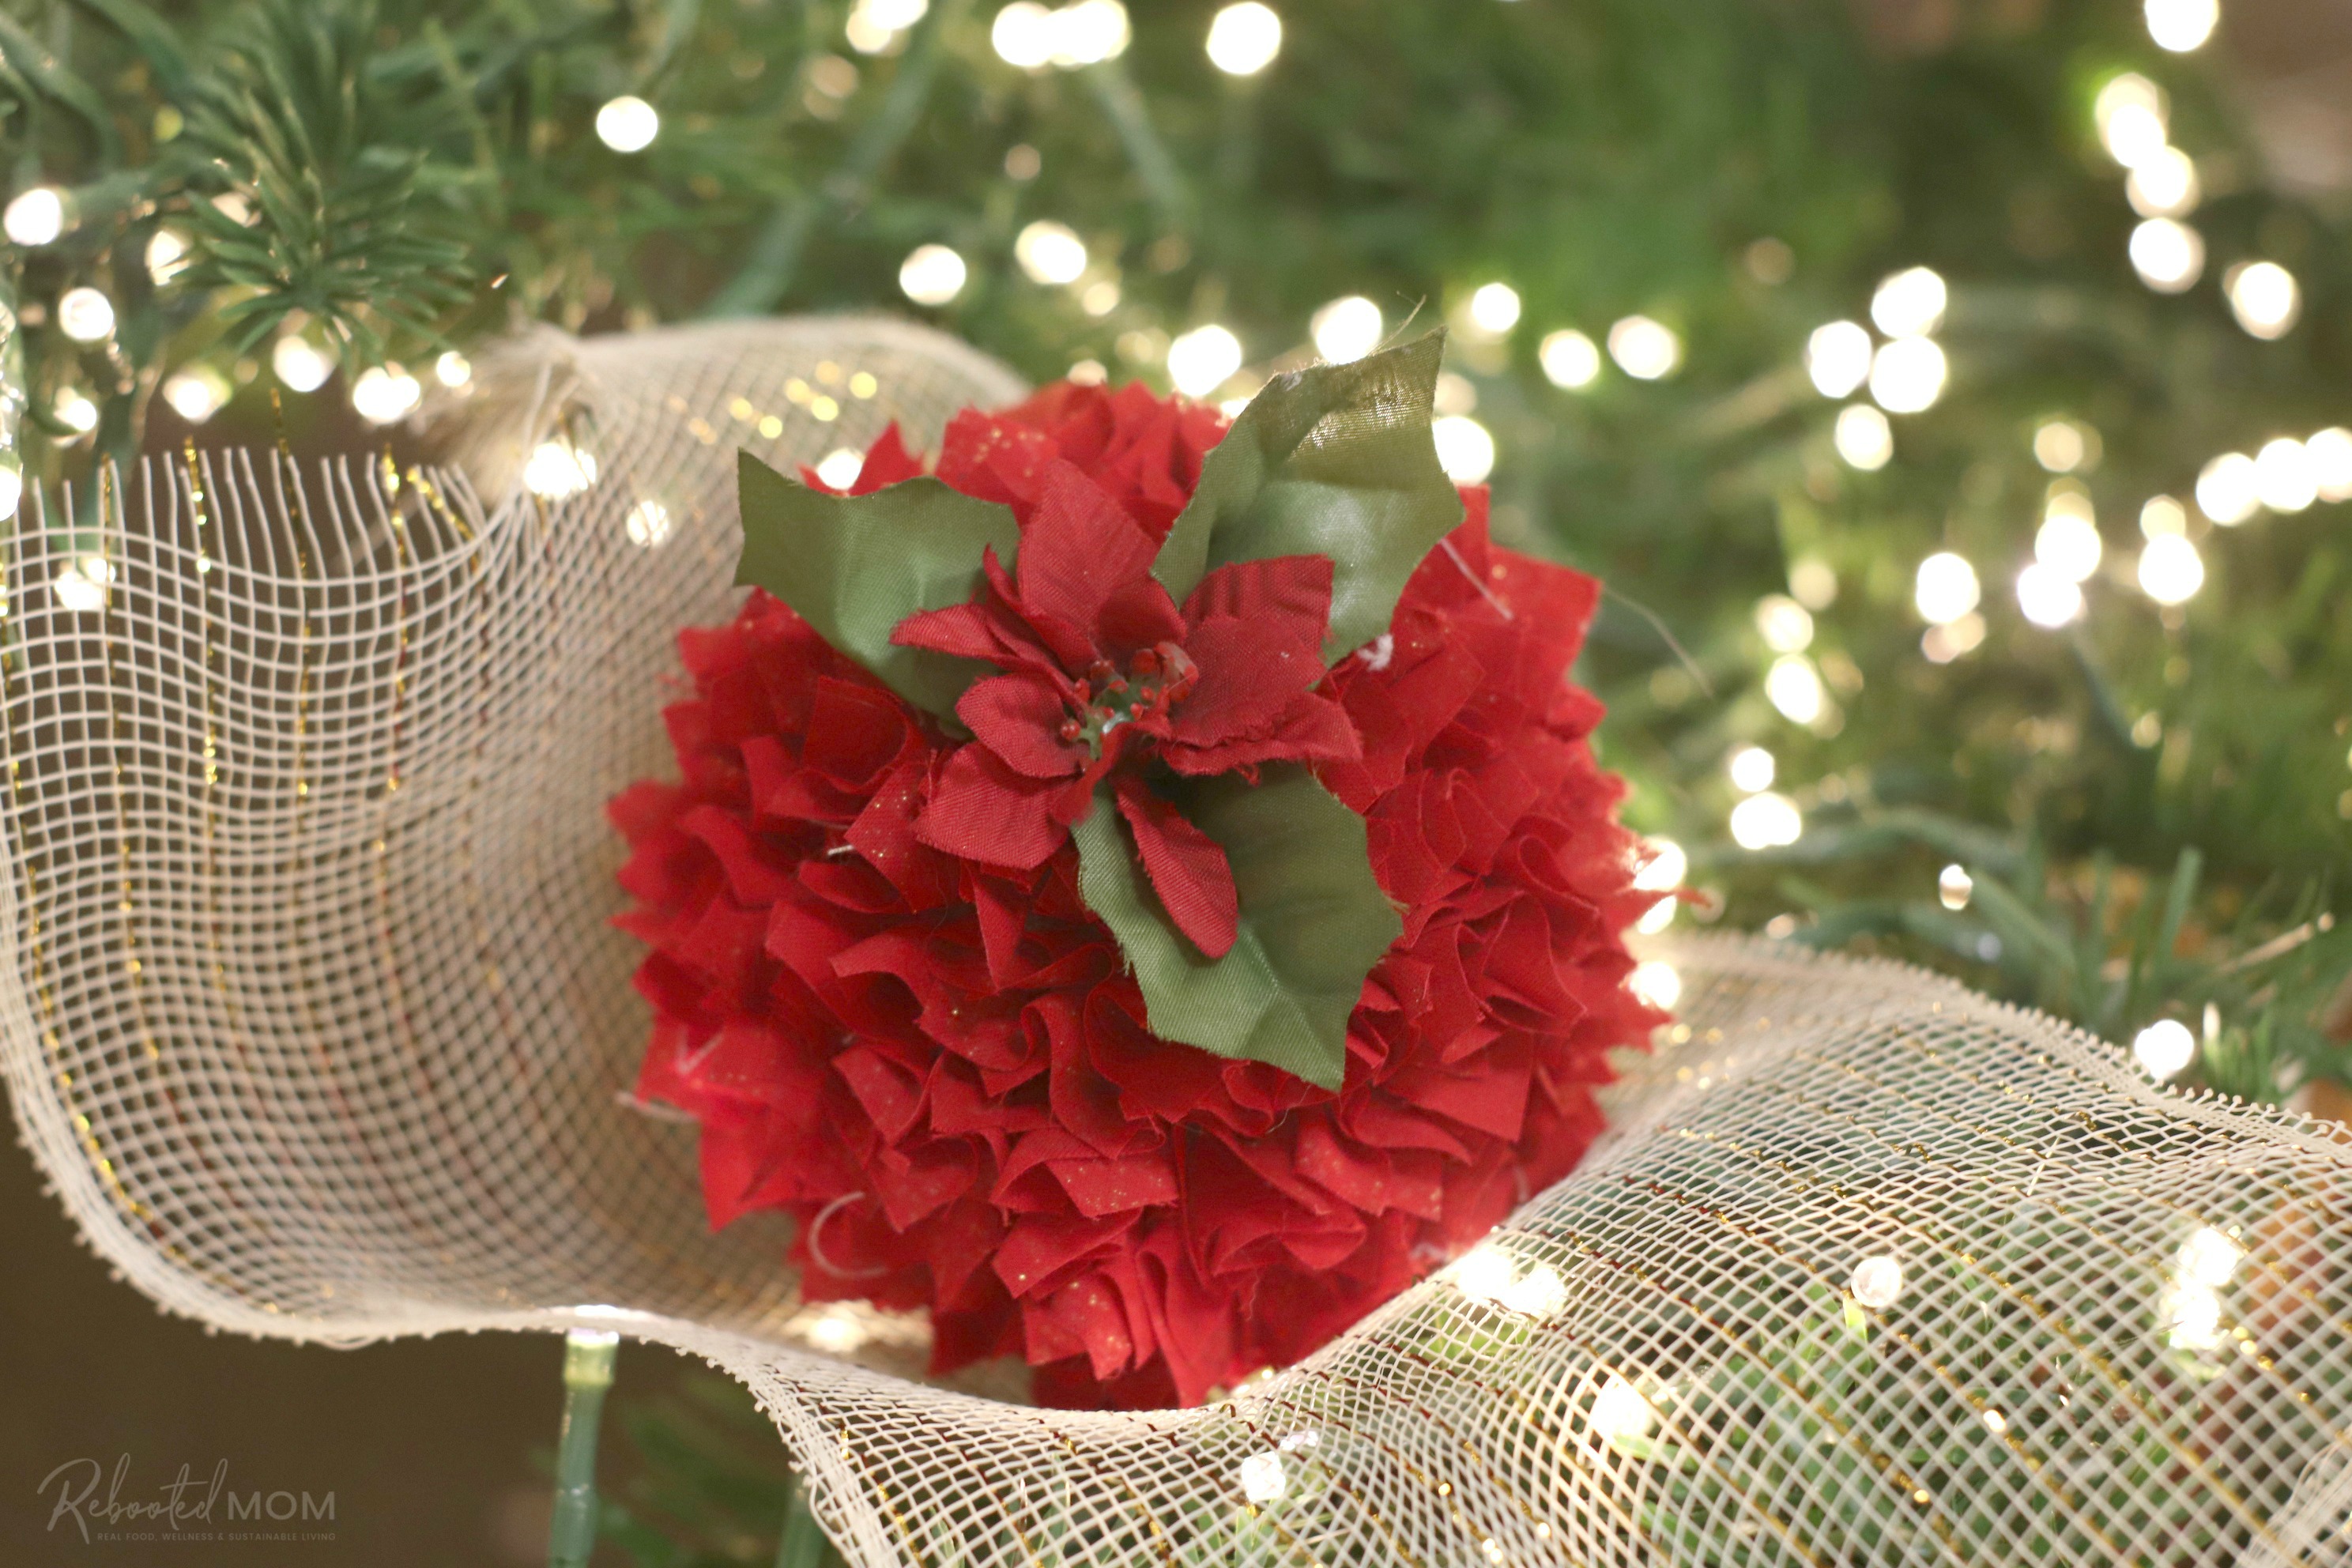
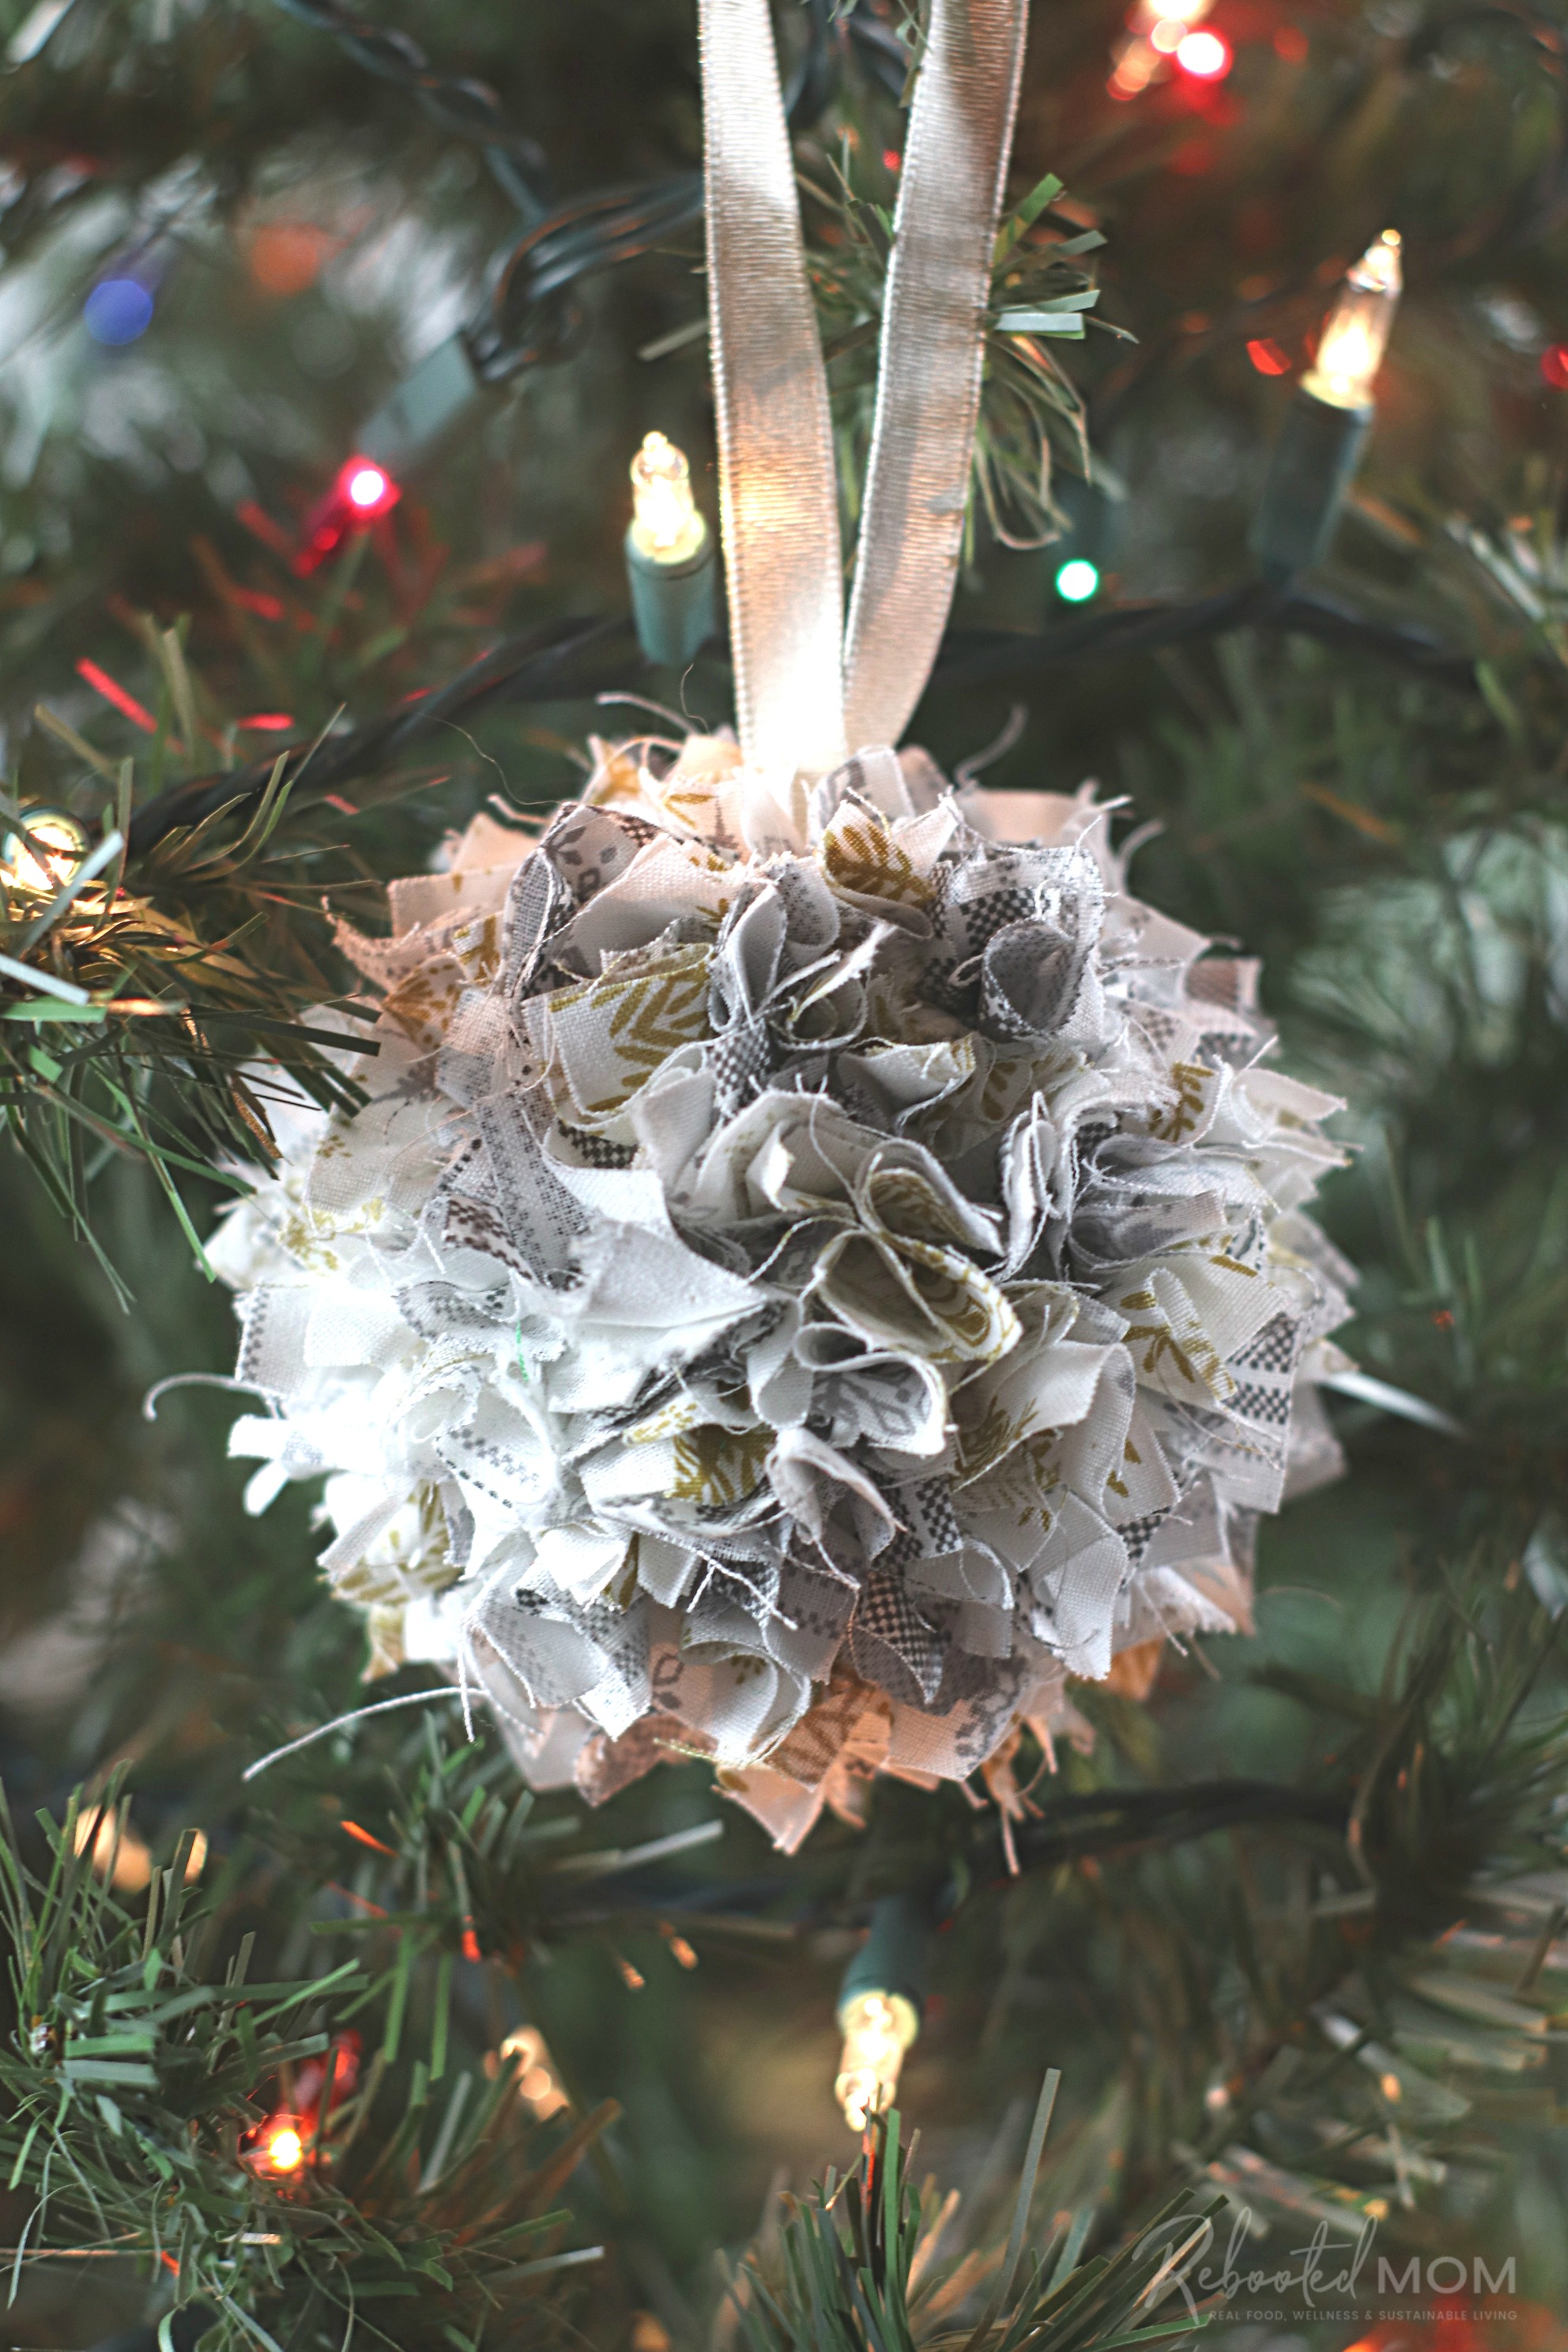
Whip up these foam ball fabric scrap ornaments easily with leftover scrap fabric, and decorate your tree for the holiday season!
I’ve taken a break from fermenting and food for a few days to catch up … on fabric.
I’m swimming in mountains and mountains of fabric as well as piles of scraps from making zippered pouches and lavender sachets as gifts. While I’m excited to gift these adorable handmade items this holiday season, dealing with the fabric leftovers is rough!
I don’t quite want to toss the scraps so I’m always trying to think of a way to use them up so I can re-create something magical at home. This time, I used my rotary cutter and mat to trim up the scraps into small squares to make these foam ball fabric scrap ornaments.
They really are simple to make – it took my oldest daughter and I just under an hour to make six. (And we did that while watching re-runs of Home Improvement!) It was great time spent together and we’re going to whip up a bunch more to hang on the tree.
Foam Ball Fabric Scrap Ornaments
Materials needed:
-
- 1/8 yard of cotton fabric
- 2 – 6” Styrofoam balls (pick up at Hobby Lobby in a 6 pk)
- Scissors or rotary cutter
- Glue Gun or Floral pins (You can find them on Amazon)
- Ribbon
- Wooden chopstick or similar item to poke the fabric into the Styrofoam*
*A pointed pencil works great too!
Each 1/8 yard of fabric will cover (2) 6″ balls.
Instructions:

Step 1: Cut your fabric into 2” squares. I used a variety of color combinations. If you do this, choose 1/8 yard of each color you want.
Step 2: Make a pile of your squares.
Step 3: Grab your fabric squares, Styrofoam balls and chopstick. If you are using the floral pins, grab one of those too!
Step 4: If you are using the floral pin to hold down your ribbon, add that into the top of the ball, but don’t push it all the way in. If you are using a glue gun, you can wait until the end for that step.
Take a square of fabric and using the pointed end of the chopstick, aim it into the middle of the square of fabric and push into the foam ball. You will push it in about 1/3 of the way in. If you push it in too far, you won’t get the fulness you want, but if you don’t push it in enough, the pieces will fall out.
You will quickly get into the rhythm and will be able to “feel” the right depth to push the fabric in.
Step 5: Once the ball is filled, you want to attach your ribbon. If you are using the floral pin, loop a length of the ribbon through and tie off. If you are using the glue gun, tie off the ribbon and glue onto the ball.
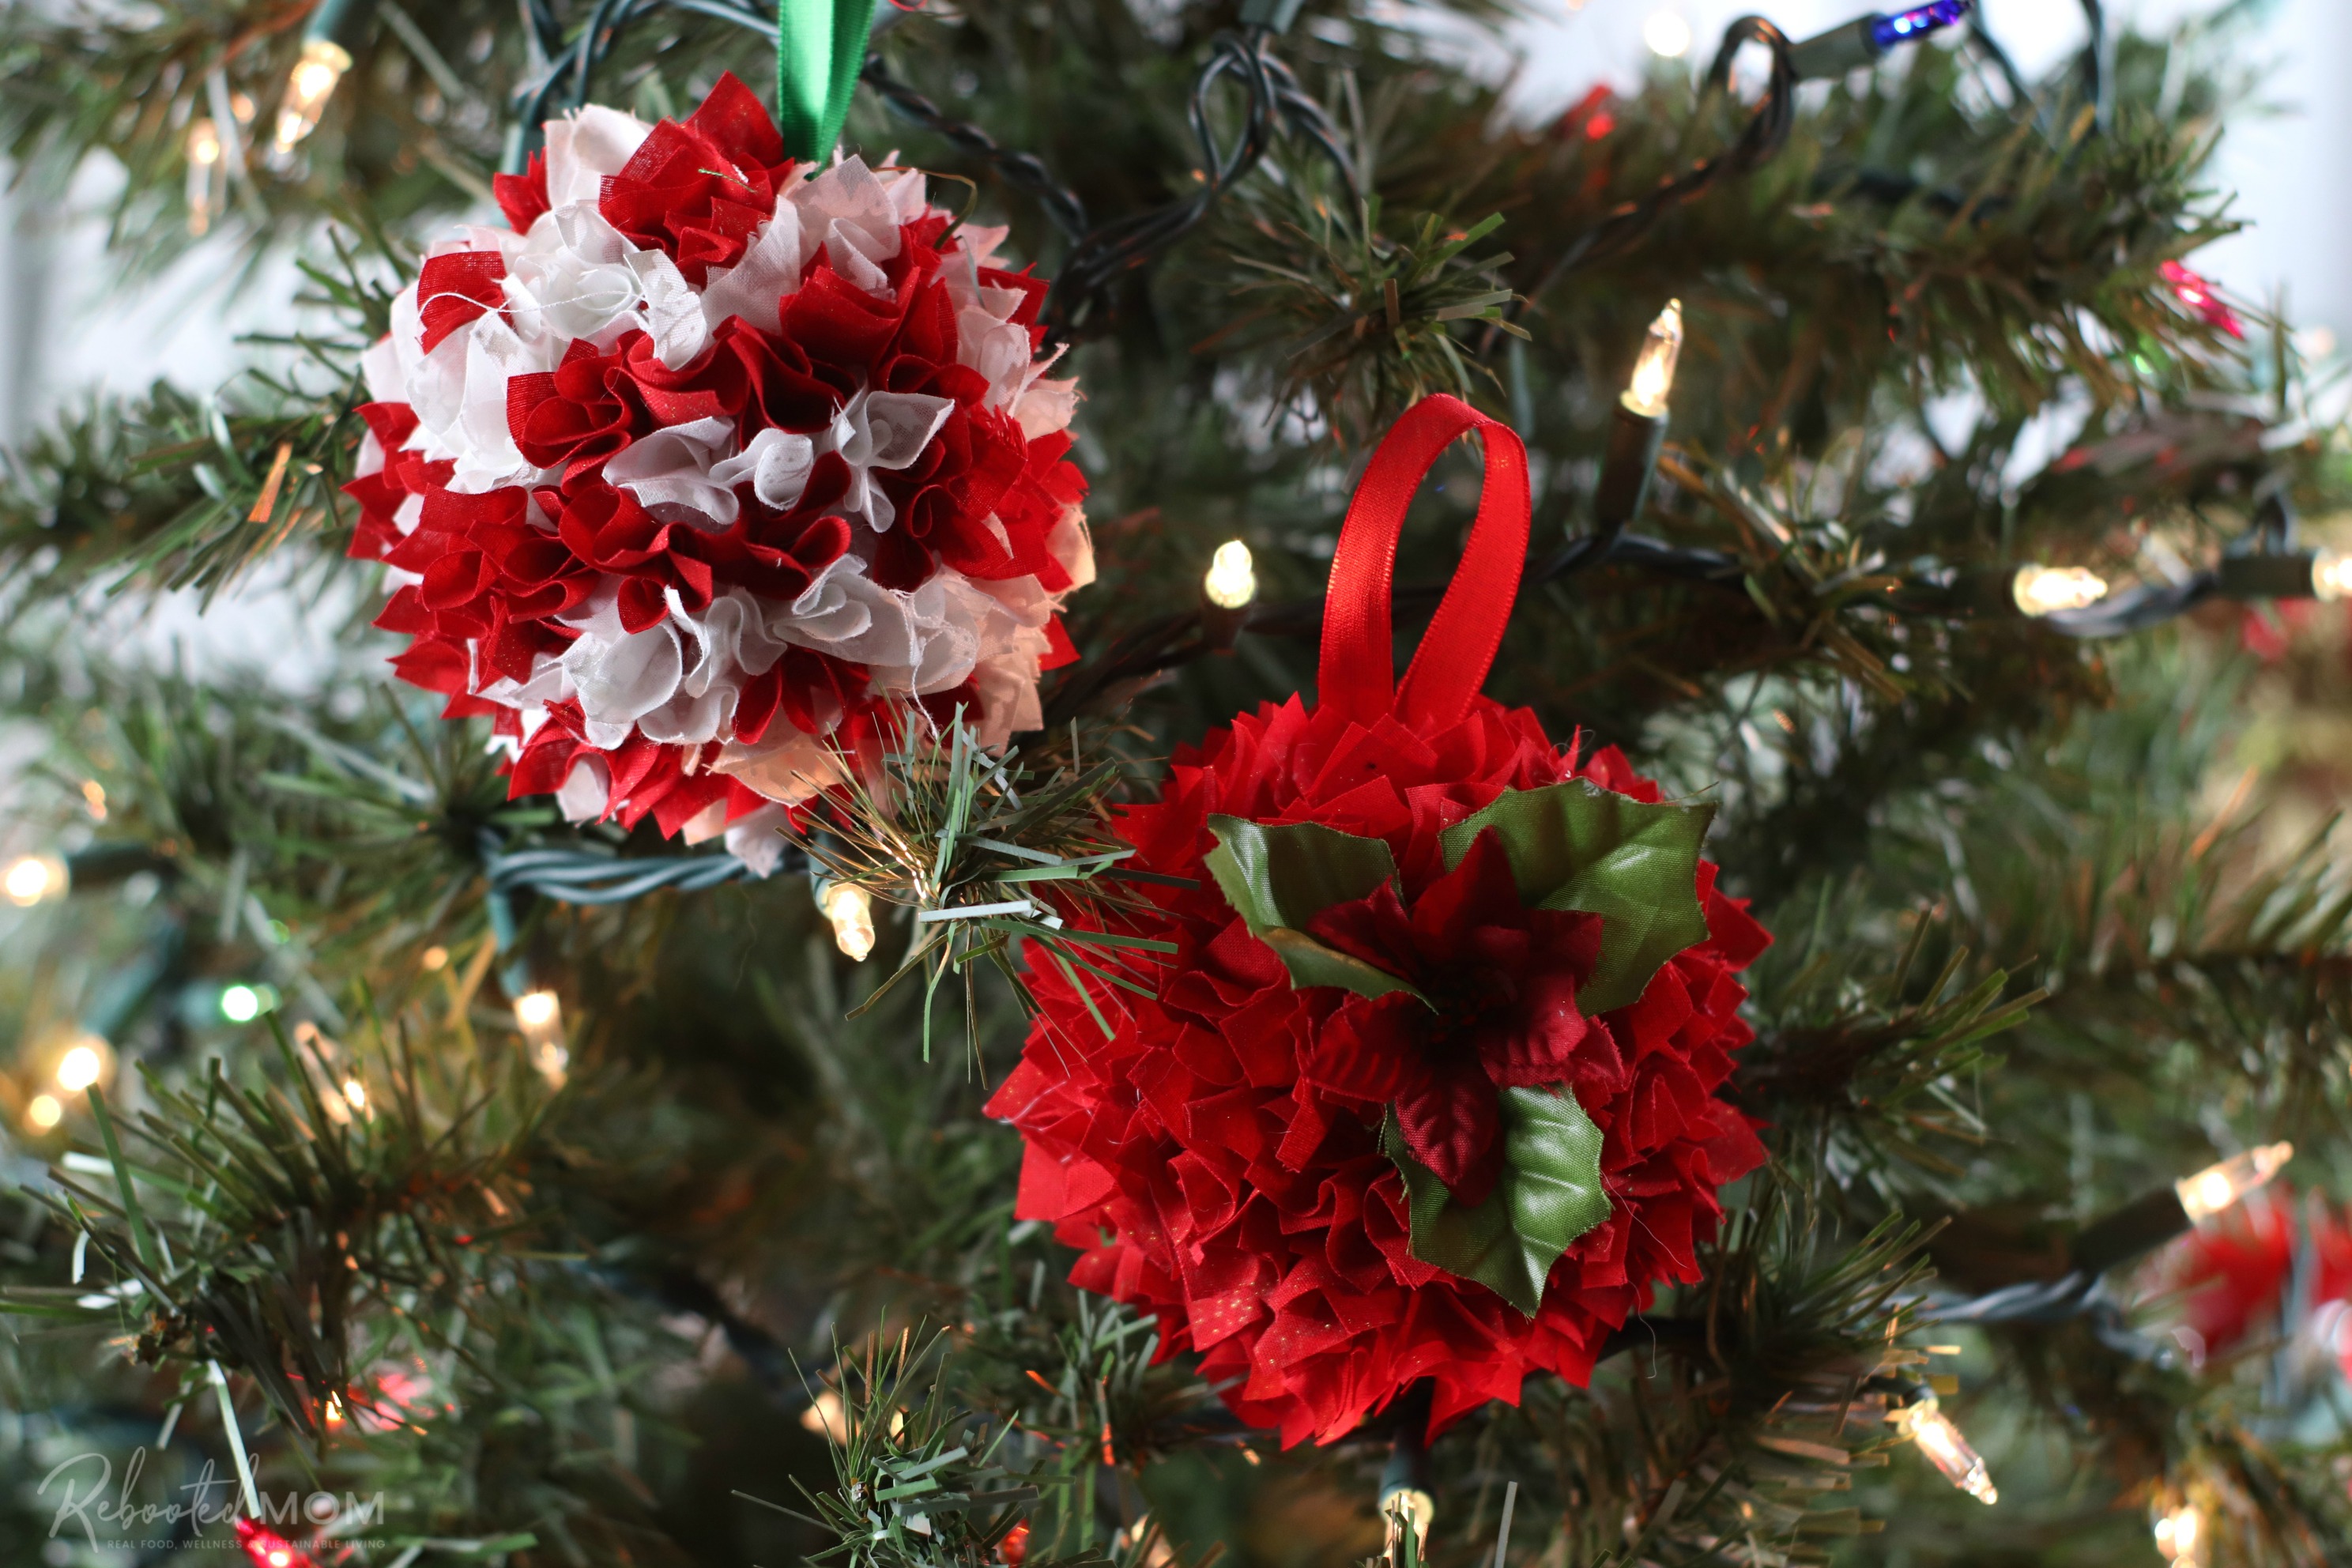
This is such a fun way to use leftover fabric that you normally would have tossed. Not to mention they almost give a country feel to the Christmas tree!
Remember to pack them up after Christmas and keep them to hang on the tree next year, too. Or, make a bunch and gift to friends and family.

can you use pins’ instead of pushing them into the ball ?
You sure can!