


One of my favorite things to do for my family is make our own soap – and one of the best things about making your own is that you can truly customize your soap to your liking. There are SO many possibilities!
I’ve spent the last few weeks making all different kinds of soap – soap for our face (activated charcoal and clay) and bastile soap for baby… and so many more. If you follow me on Instagram you have probably seen some of our latest soap creations, we have over 200 bars curing right now.
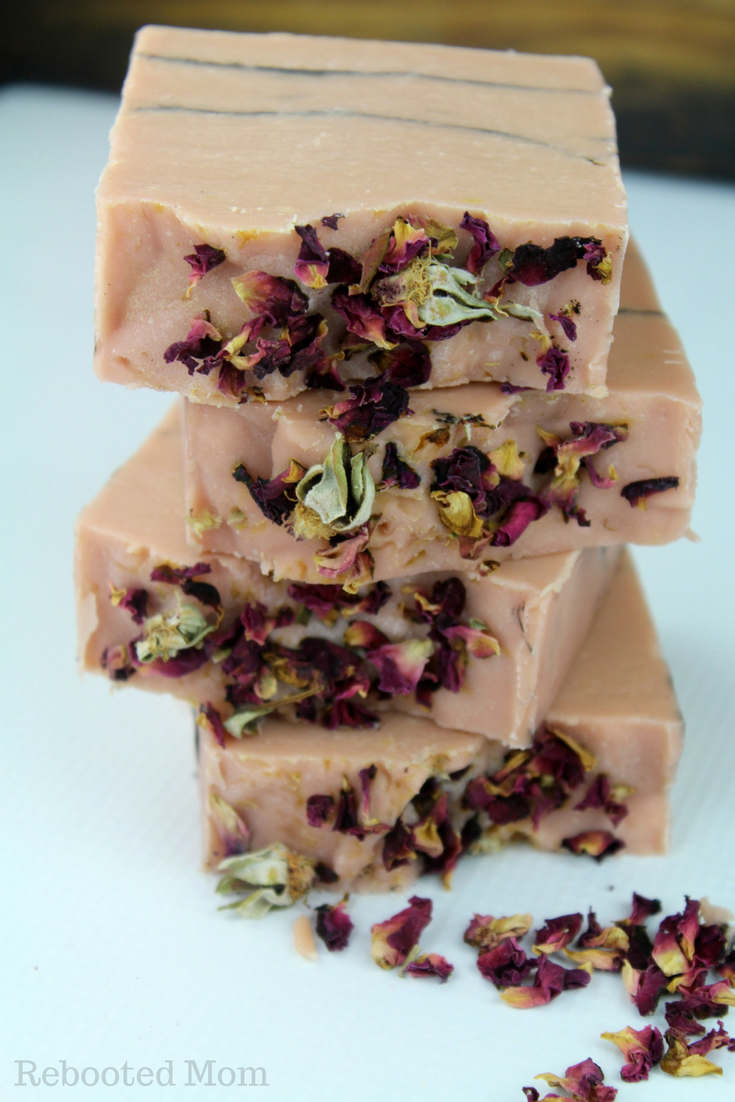
This particular soap is so gorgeous, I almost don’t want to use it! I made 20 bars of this gorgeous soap and now they are curing in my soap room in preparation for Valentine’s Day. If you are making this soap for gifts for family and friends (or, even to sell), allow yourself time – the soap will take 5-6 weeks to cure. The longer the cure the harder the final bar will be.
This soap is absolutely gorgeous – it’s made with raw milk and scented with a combination of Palmarosa (a cost effective alternative to Rose essential oil) and Orange essential oils. The base of the soap is palm-free and combines castor oil, coconut oil, olive oil, shea butter and avocado oil.
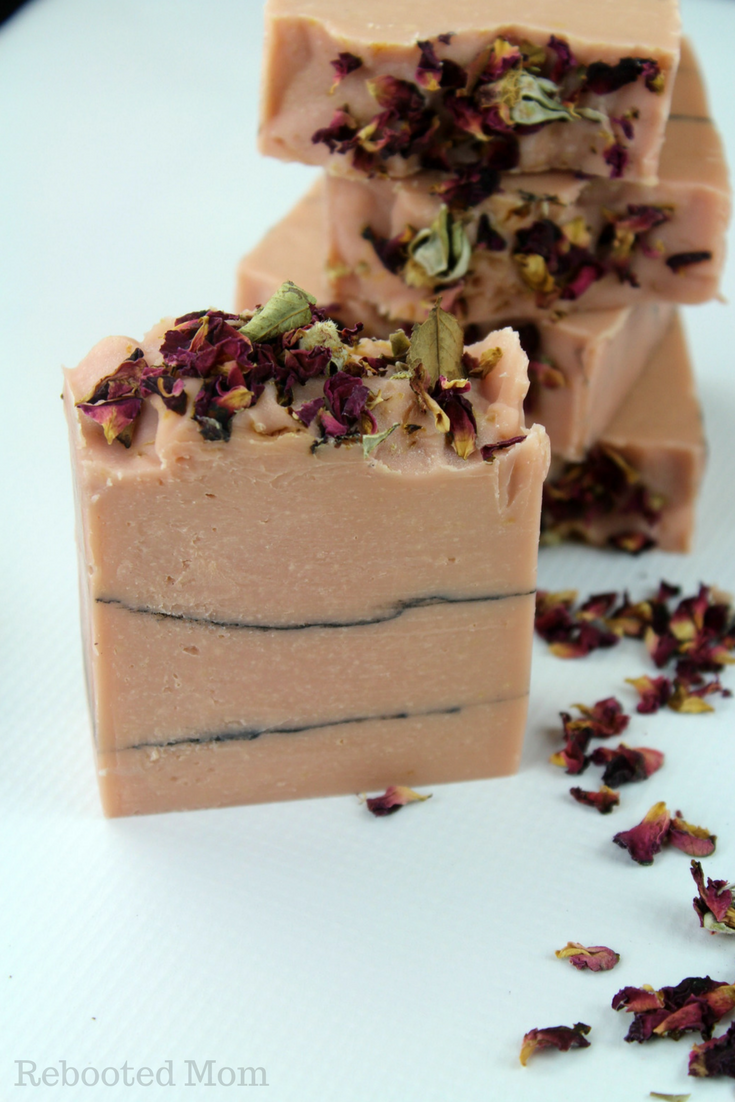
Coconut oil and castor oil give it great lather, while the avocado oil provides moisturization – the soap smells incredible! We put two hairline layers of activated charcoal in between as well.
If raw milk isn’t an option in your area, feel free to substitute your own choice of milk – whether coconut, almond, or goat’s milk. Using milk is possible in any cold process soap recipe – it just requires that you weigh the milk and freeze in ice cube trays prior to starting your project. Milk has a considerable amount of sugar, and those sugars have a tendency to burn when combined with the lye.
By freezing beforehand, you prevent the milk from scorching the sugars. We like to soap around 100 degrees or less, and then once the batter is in the mold, we throw in the very back of the freezer for 24 hours so it can avoid gel phase. If you are using water, you’ll want to promote gel phase, so soap between 120-130 degrees and place on a heating pad or surround with towels to keep that mold nice and warm.
Oils and Fats:
- 1.5 oz castor oil (4.4%)
- 16 oz extra virgin olive oil (47.1%)
- 9.0 oz coconut oil (26.5%)
- 3.5 oz shea butter, refined (10.3%)
- 4 oz avocado oil (11.8%)
Lye and Liquid:
- 4.7 oz lye
- 11.22 oz milk
Additions:
- 2 tsp rose clay
- activated charcoal
- dried roses
- Palmarosa essential oil
- Orange (Sweet) essential oil
#1: Suit up for safety. Put on goggles, wear gloves and don clothes that have long sleeves. Go a step further and make sure all distractions are out of the room/house – kids, pets, etc. Use a well-ventilated area (I like to use my kitchen sink because I have a few windows behind it that provide ventilation). I would not recommend doing anything outside because you run the risk of tripping with the lye/bucket/dishes by going back and forth.
#2: Weigh out the milk you will be using in a plastic cup or pitcher and pour into ice cube trays the day or night before making soap. Milk needs to be frozen in order to prevent scorching.
#3: Prepare all of your ingredients – and have everything set aside to start:
- Thermometer (one that you don’t use for food)
- Silicone Column Mold, 31 oz – I LOVE this mold!
- Pyrex 8 cup measuring device – not required, but so handy to have!
- Immersion Blender – you don’t have to spend oodles but you will want something reliable with a metal stick, not plastic.
- Lye – this is the brand we use
- Digital Scale to measure your ingredients
#4: Pull out the milk you plan on using in your recipe. If you have it frozen into ice cubes, place the cubes in a heavy plastic measuring cup or bowl, and set that bowl in another dish filled with ice. This will keep the milk as cold as possible while the lye works to break it down.
#5: Sprinkle the lye into your milk ice cubes, a little at a time. At first, there will be little to no reaction, but after 10-15 seconds, you will see the ice cubes start to melt. Stir slowly as you continue to add little bits of lye. Stir, but don’t rush the melting. You want to make sure everything is dissolved properly and that the lye is fully mixed in.
Once you have sprinkled all of your lye on the milk and stirred to combine, set the mixture aside towards the back of the counter.
#6: Combine your oils that you have weighed out. You will want to make sure your oils are between 90-100 degrees F – so you may have to use a digital thermometer (one that you do not use for food). If the oils are not 90-100 degrees, you can combine them in a pot on the stove and heat slowly.
If you heated your oils on the stove, allow them time to cool down considerably until they are in that range. Once cooled, blend in the rose clay with the oils (clay tends to absorb too much water and can result in cracking so I like to blend it in with my oils).
#7: Slowly pour the lye mixture into the oils. Use your immersion blender to stir the oil and lye together, making sure to pulse the immersion and take 15-20 second breaks – running it continually will cause it to overheat.
#8: Add the essential oil at this time. Bramble Berry has a really handy fragrance calculator – use that to determine how much of each oil you’ll put in your soap. Read how to blend essential oils safely.
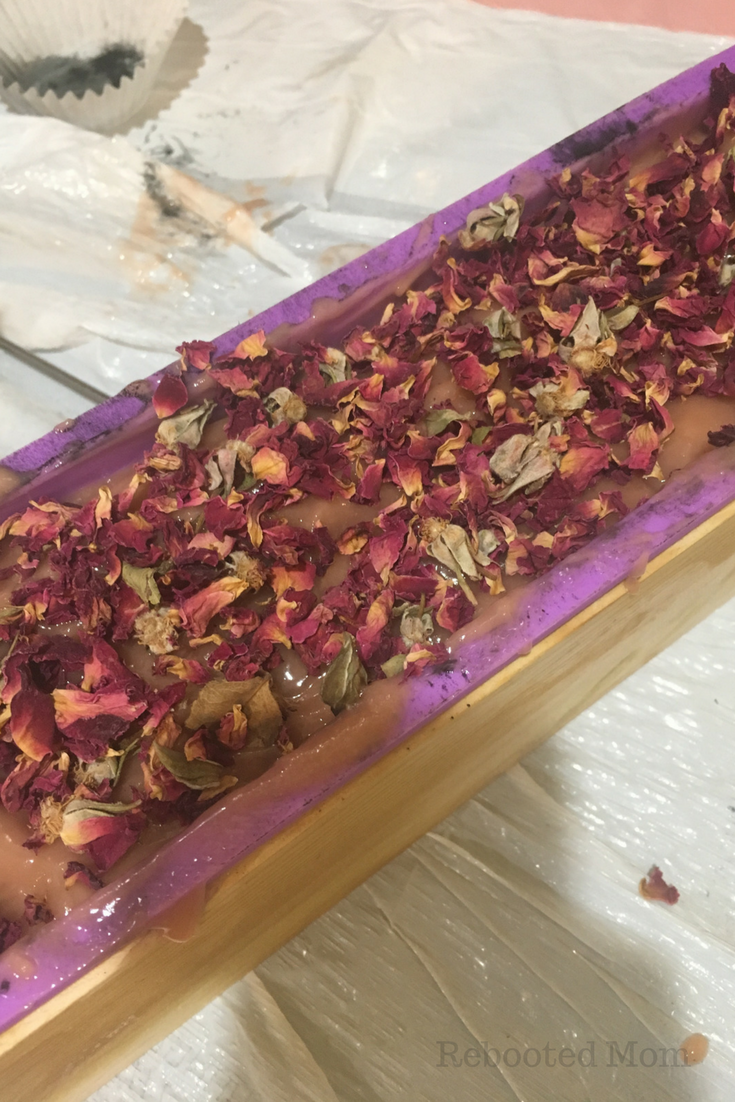
#9: Quickly pour a small portion of the batter into the mold evenly distributing from one side to another. Texture that layer (there is no right or wrong) to give it a varied height and depth – then use a very fine mesh strainer to dust that layer with a small amount of activated charcoal.
Once dusted, lightly spoon another layer on top of the charcoal, and texture just as before. Use that same mesh strainer to dust that with another small amount of activated charcoal (too much and the layers won’t stick together). Very gently spoon the last of the batter on top of that charcoal layer. Use a paddle or long spoon to swirl the top (if desired). Sprinkle your dried roses on the top of the soap, making sure to push down gently so they stick to the soap.
If the soap is too soft to swirl the top, then place in the freezer for a few minutes until it a hardens up a bit. Allow the soap to remain in the freezer for 24 hours to avoid gel phase. After that 24 hours, leave it in the mold an additional 24 hours before unmolding.
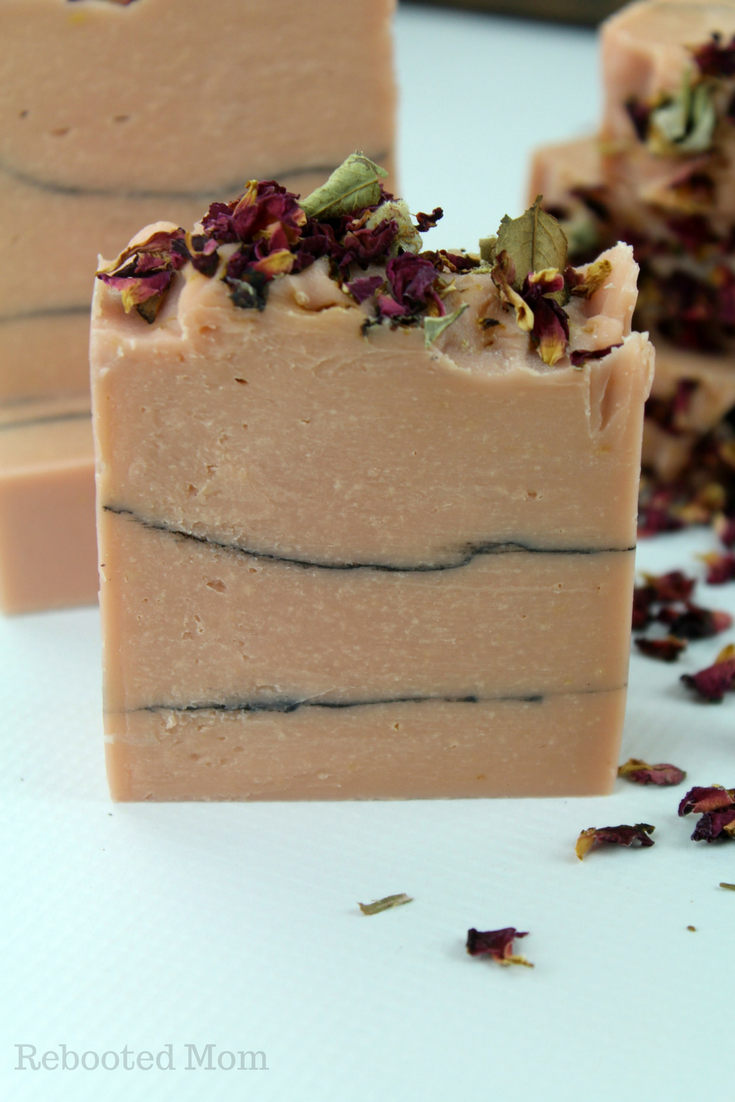
After that additional 24 hours, check your soap – if it’s still soft, leave in the mold another 24-48 hours before unmolding. Once you unmold, turn your soap on the side to cut (so you can avoid drag marks from the roses).
Allow the soap 6 weeks to cure.

Leave a Reply