


These step by step directions will help you create your own Loofah Soap that’s moisturizing for skin and perfect to gift to friends and family!

Soapmaking has become a really fun and creative outlet for me over the last year. I recently poured some loofah soap and not only was it quite neat to make, it’s even more fun to use.
Have you ever tried loofah soap?
I have a wonderful friend in New Mexico who has an Apothecary and homestead – she grew loofahs this past summer. Once she harvested them, she sent me some as a trade for other items. It was fun to shake the seeds out of the loofah and prepare them for making soap.
There are countless ways to make loofah soap — there really isn’t a right or wrong way. It’s best to experiment and find a way that works best given your situation. Once you find that sweet spot, hold onto it and keep it forever!
How to Make Loofah Soap
A loofah sponge is a natural product that grows in your backyard garden. Once it’s fully developed, you can peel the loofah gourd and reveal a loofah sponge. It’ll be long and tubular.
When they are dry, they are quite hard.. once they are introduced to water they soften up. Their scrubby texture is wonderful for skin.
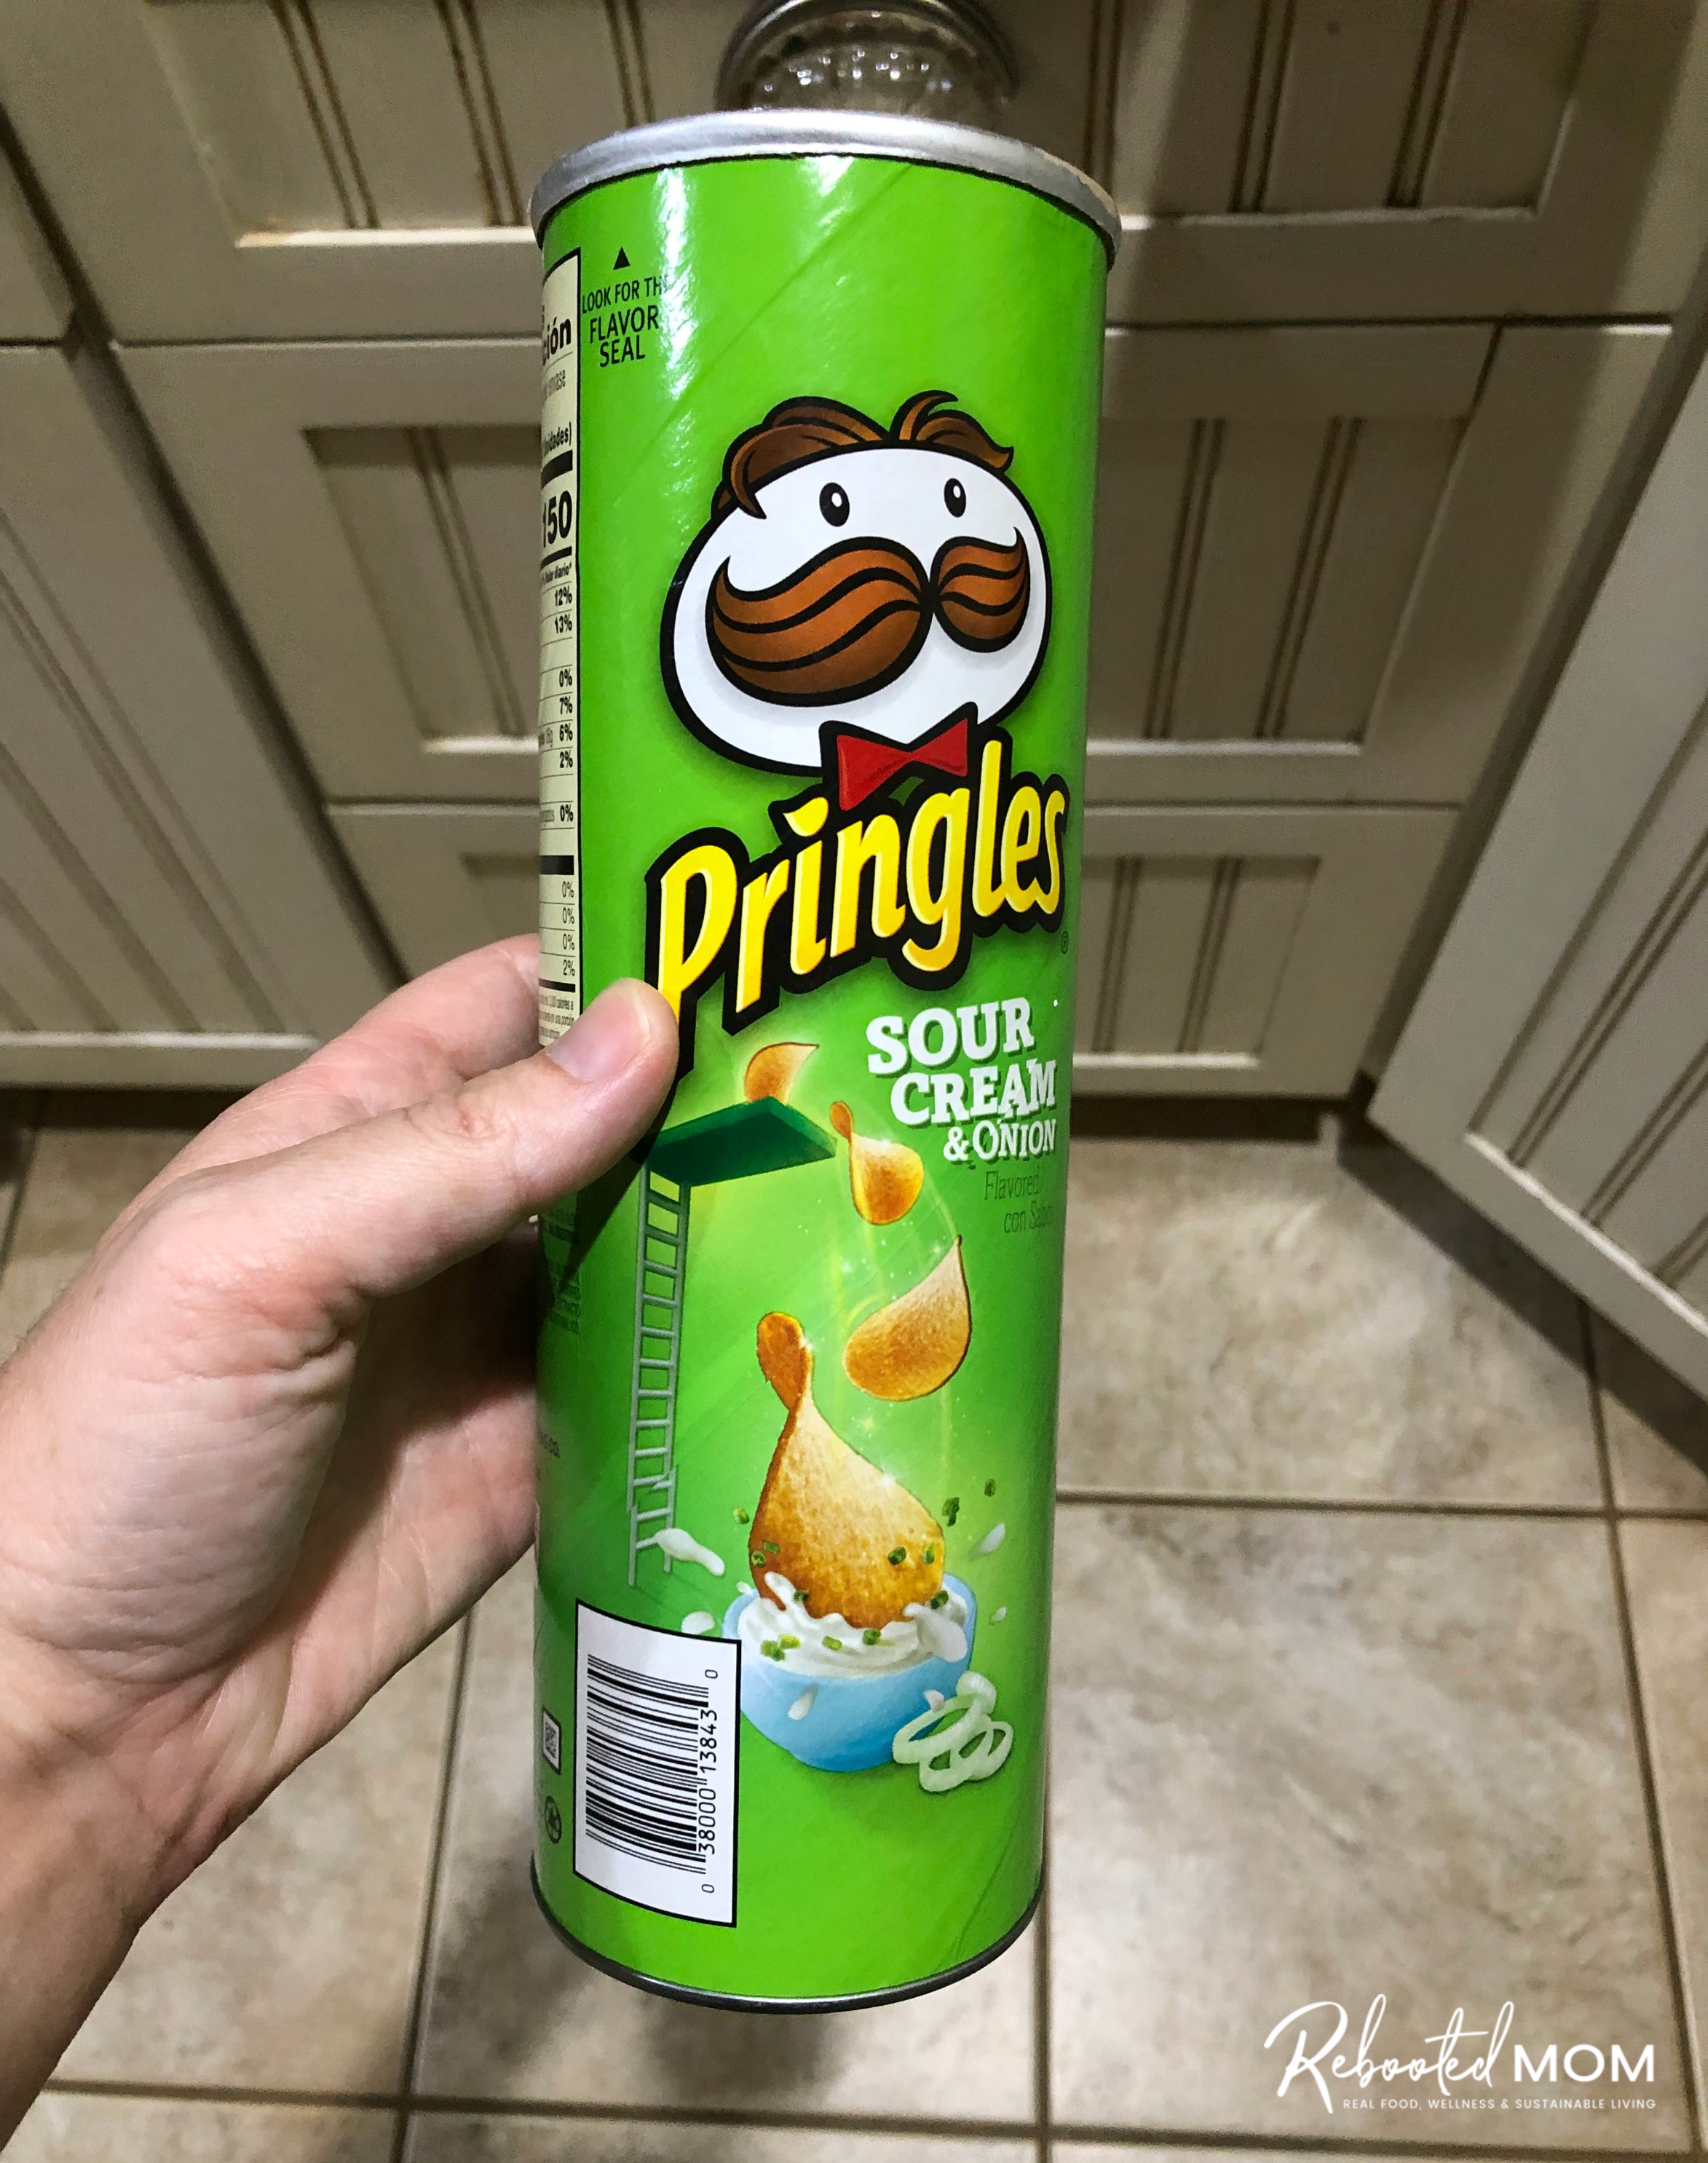
For this recipe, loofah sponges are kept whole, while some are cut and placed in a 6 ct round silicone mold. You can use a PVC Pipe, but an empty Pringles can works amazing for round soaps.
Our cold process soap recipe is created, and blended until a light trace – then poured over the loofah sponge and allowed to gel until it’s removed from the mold.
- We took one long loofah sponge and stuffed it in a cylindrical Pringles can (if your loofah is short, then stuff 2 in there).
- The remaining loofah was cut into pieces for the 6 ct round silicone mold. When you cut them, do so with a serrated knife, and ensure you size them higher than the height of the mold (so they stick out of the top slightly)
(Depending on where you purchase your loofahs, you might have to dunk them in water to get them to expand. I did not do this as my loofah sponges came directly from a homestead and were not flat. Once you dunk them in water, dry them as best as possible – the sun is best! – before making soap.)
Cold Process Loofah Soap Recipe:
If this is your first time making cold process soap, please review our tutorial on making cold process soap back here. We made this recipe with cactus paddles (we pick up from our backyard). We let the liquid and lye cool for one hour before combining with the oils.
If you are using milk, I would recommend freezing the liquid into ice cubes in advance.
Liquid and Lye:
- Lye: 4.6 oz
- Liquid: 10.99 oz
Oils and Fats (5% superfat)
- Avocado Oil: 3 oz.
- Coconut Oil: 8.5 oz.
- Castor Oil: 1.8 oz.
- Olive Oil: 10 oz.
- Rice Bran Oil: 2 oz.
- Tallow: 5 oz.
- Unrefined Shea Butter: 3 oz.
#1: Weigh out the liquid you will be using into a heat safe pitcher or bowl. If you are using milk, be sure to weigh the milk and freeze beforehand in ice cube trays.
#2: Prepare all of your ingredients – and have everything set aside to start:
- Empty Pringles can – rinsed out and dried
- 6 ct cavity round silicone mold
- Immersion Blender – you don’t have to spend oodles but you will want something reliable with a metal stick, not plastic.
- Digital Scale to measure your ingredients
#3: Combine the liquid with the lye and set aside until it cools to 105-115 degrees.
#4: Weigh your oils, fats and butters. Add them to your lye + liquid. Give it a buzz with the immersion blender in 15-20 second increments until the mixture comes to a light trace.
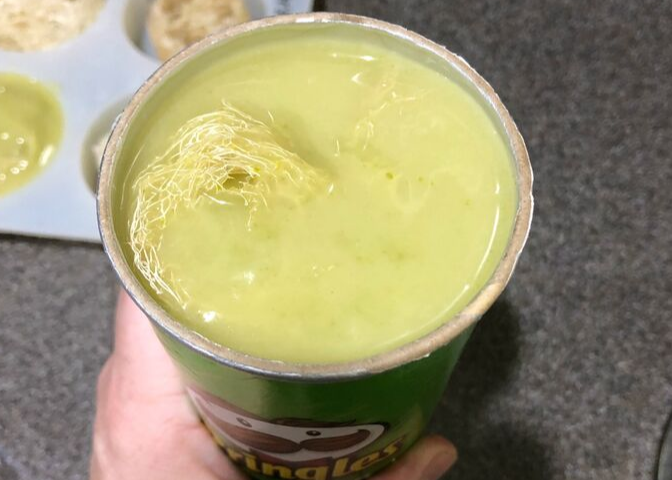
#5: Slowly pour the batter into your Pringles can, taking care to tap the can on a hard surface to allow the batter to settle. It’ll take some time for the batter to truly soak through the loofah.
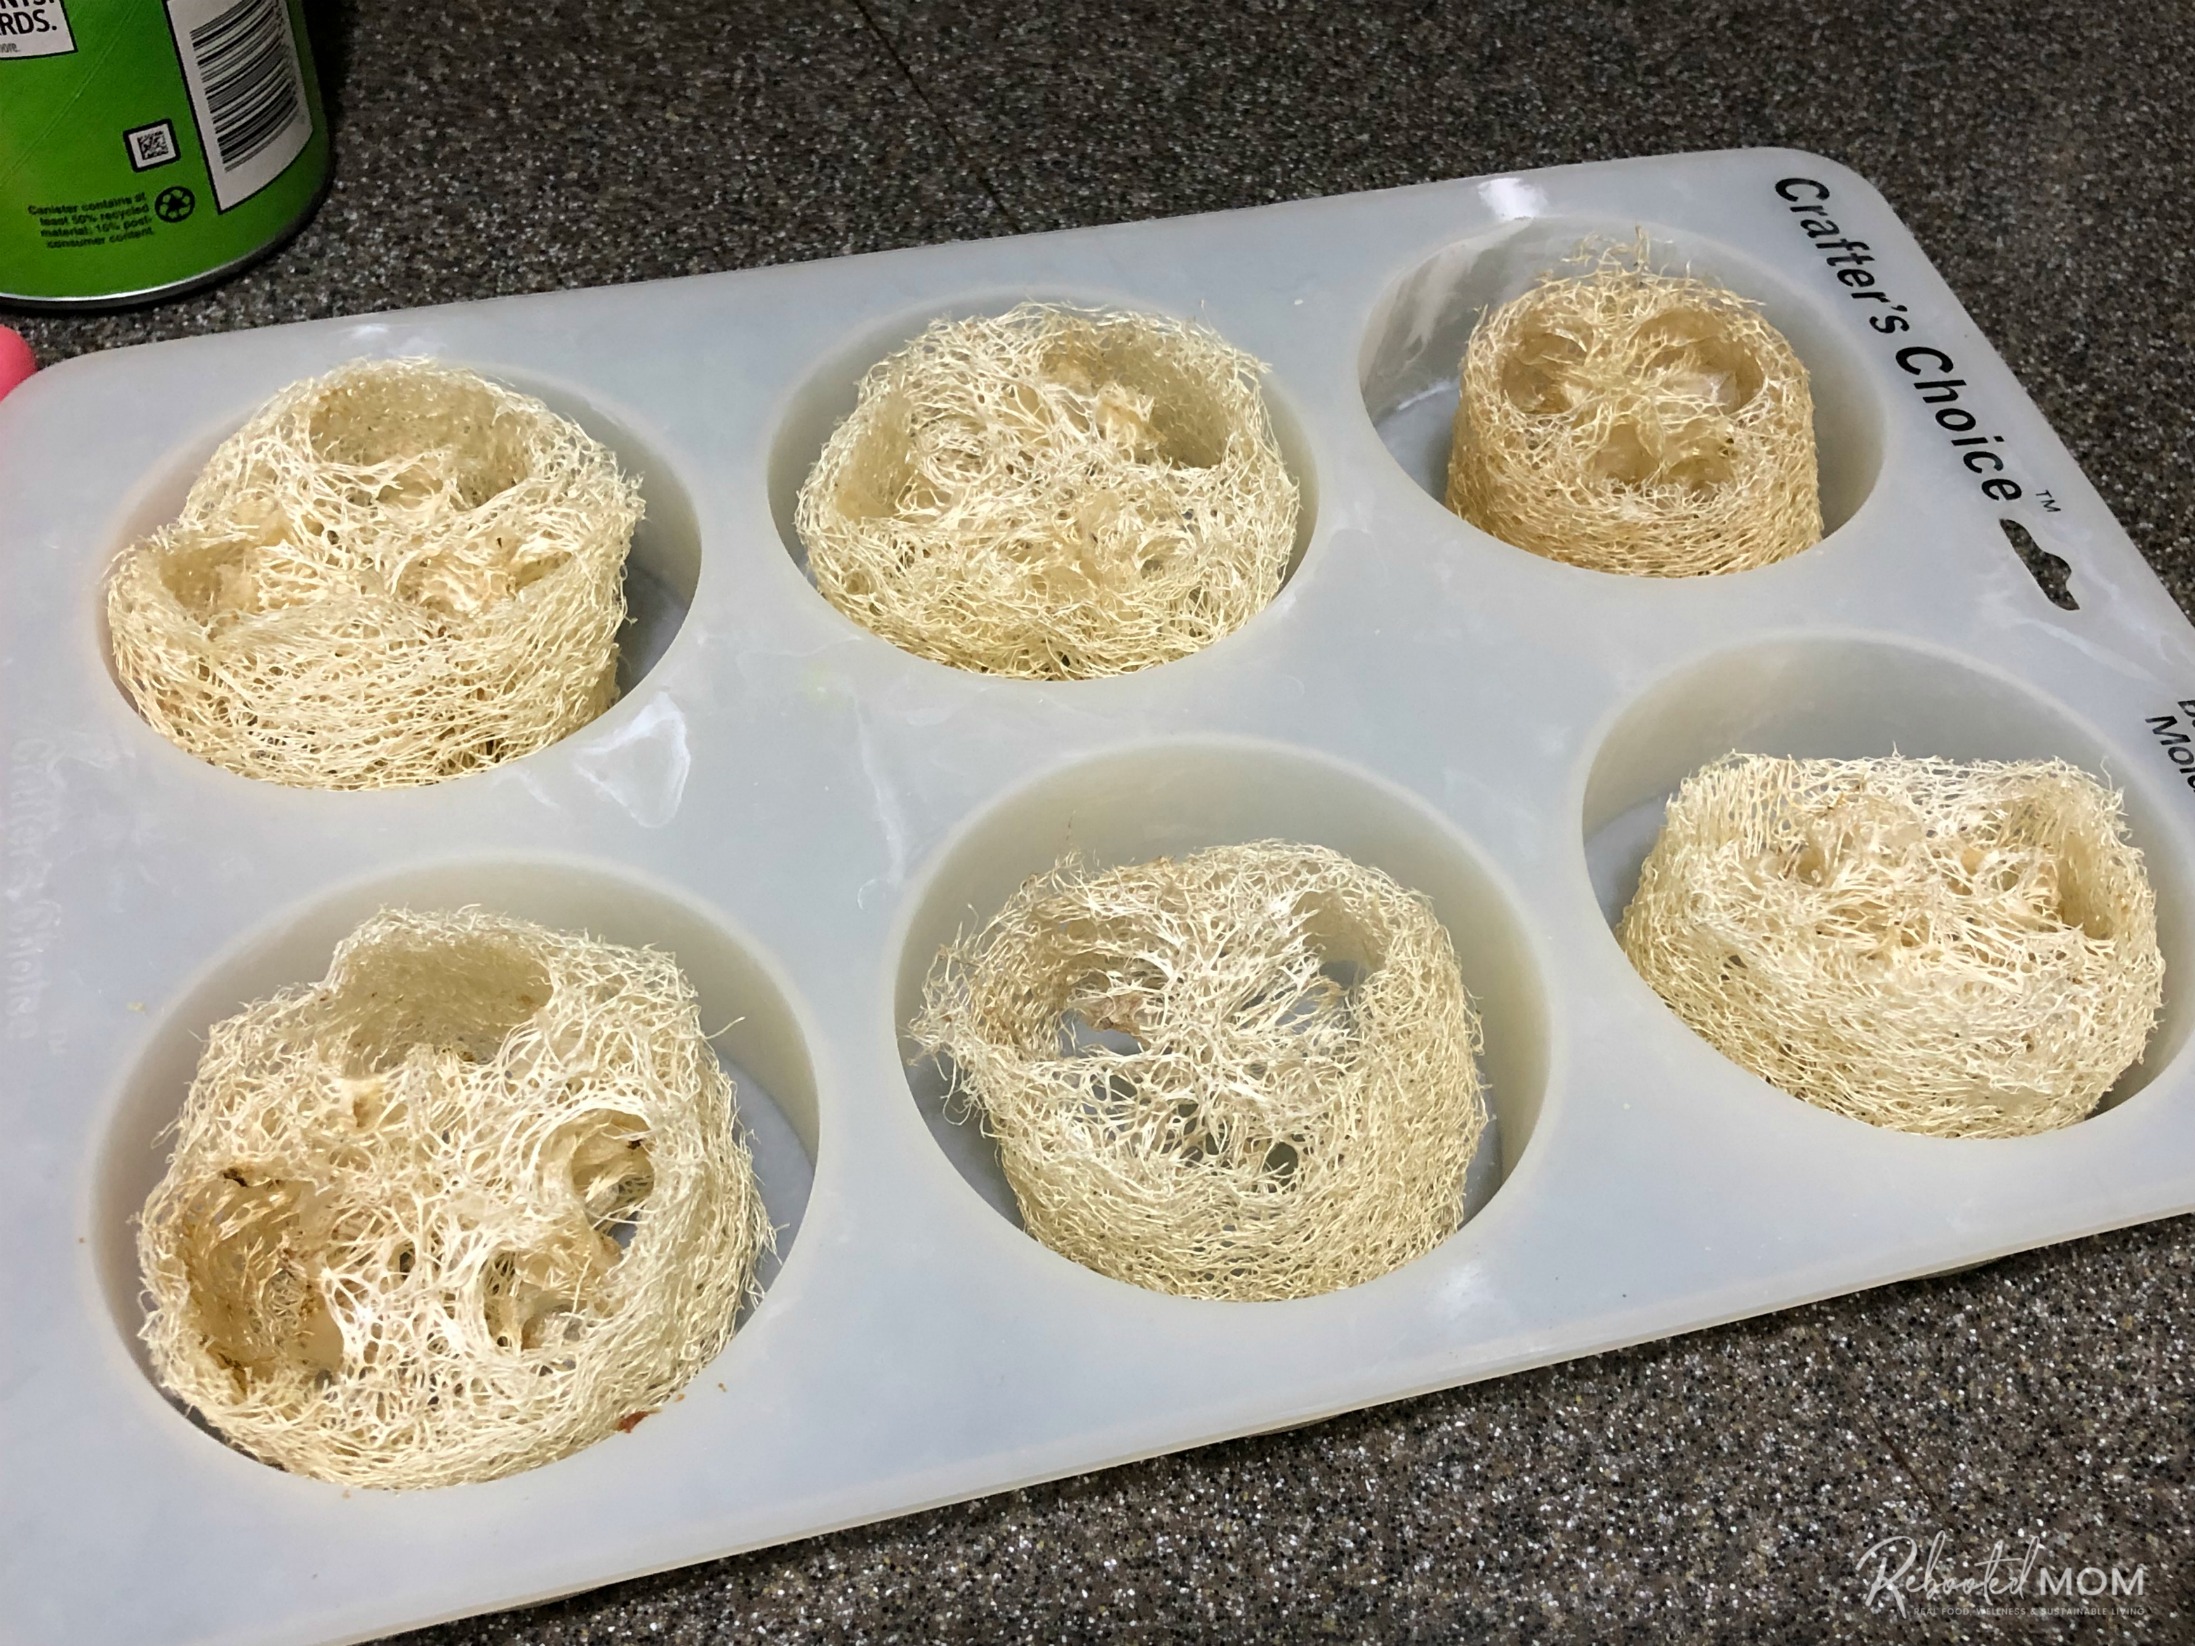
#6: The batter that is remaining should be enough to fill up 3 of the round cavities in the silicone mold that lays flat. Pour a little bit of batter in each of 3 cavities, then gently push the loofah in each cavity. Top off with more batter – make sure you allow the loofah to stick out a little bit from the top of the batter.
Allow it to Gel and Then Cut into Bars
Let your soap sit for 24-36 hours to gel. After 24 hours, take a serrated knife and gently cut the top of the Pringles can enough to peel it away from the cylinder of soap.
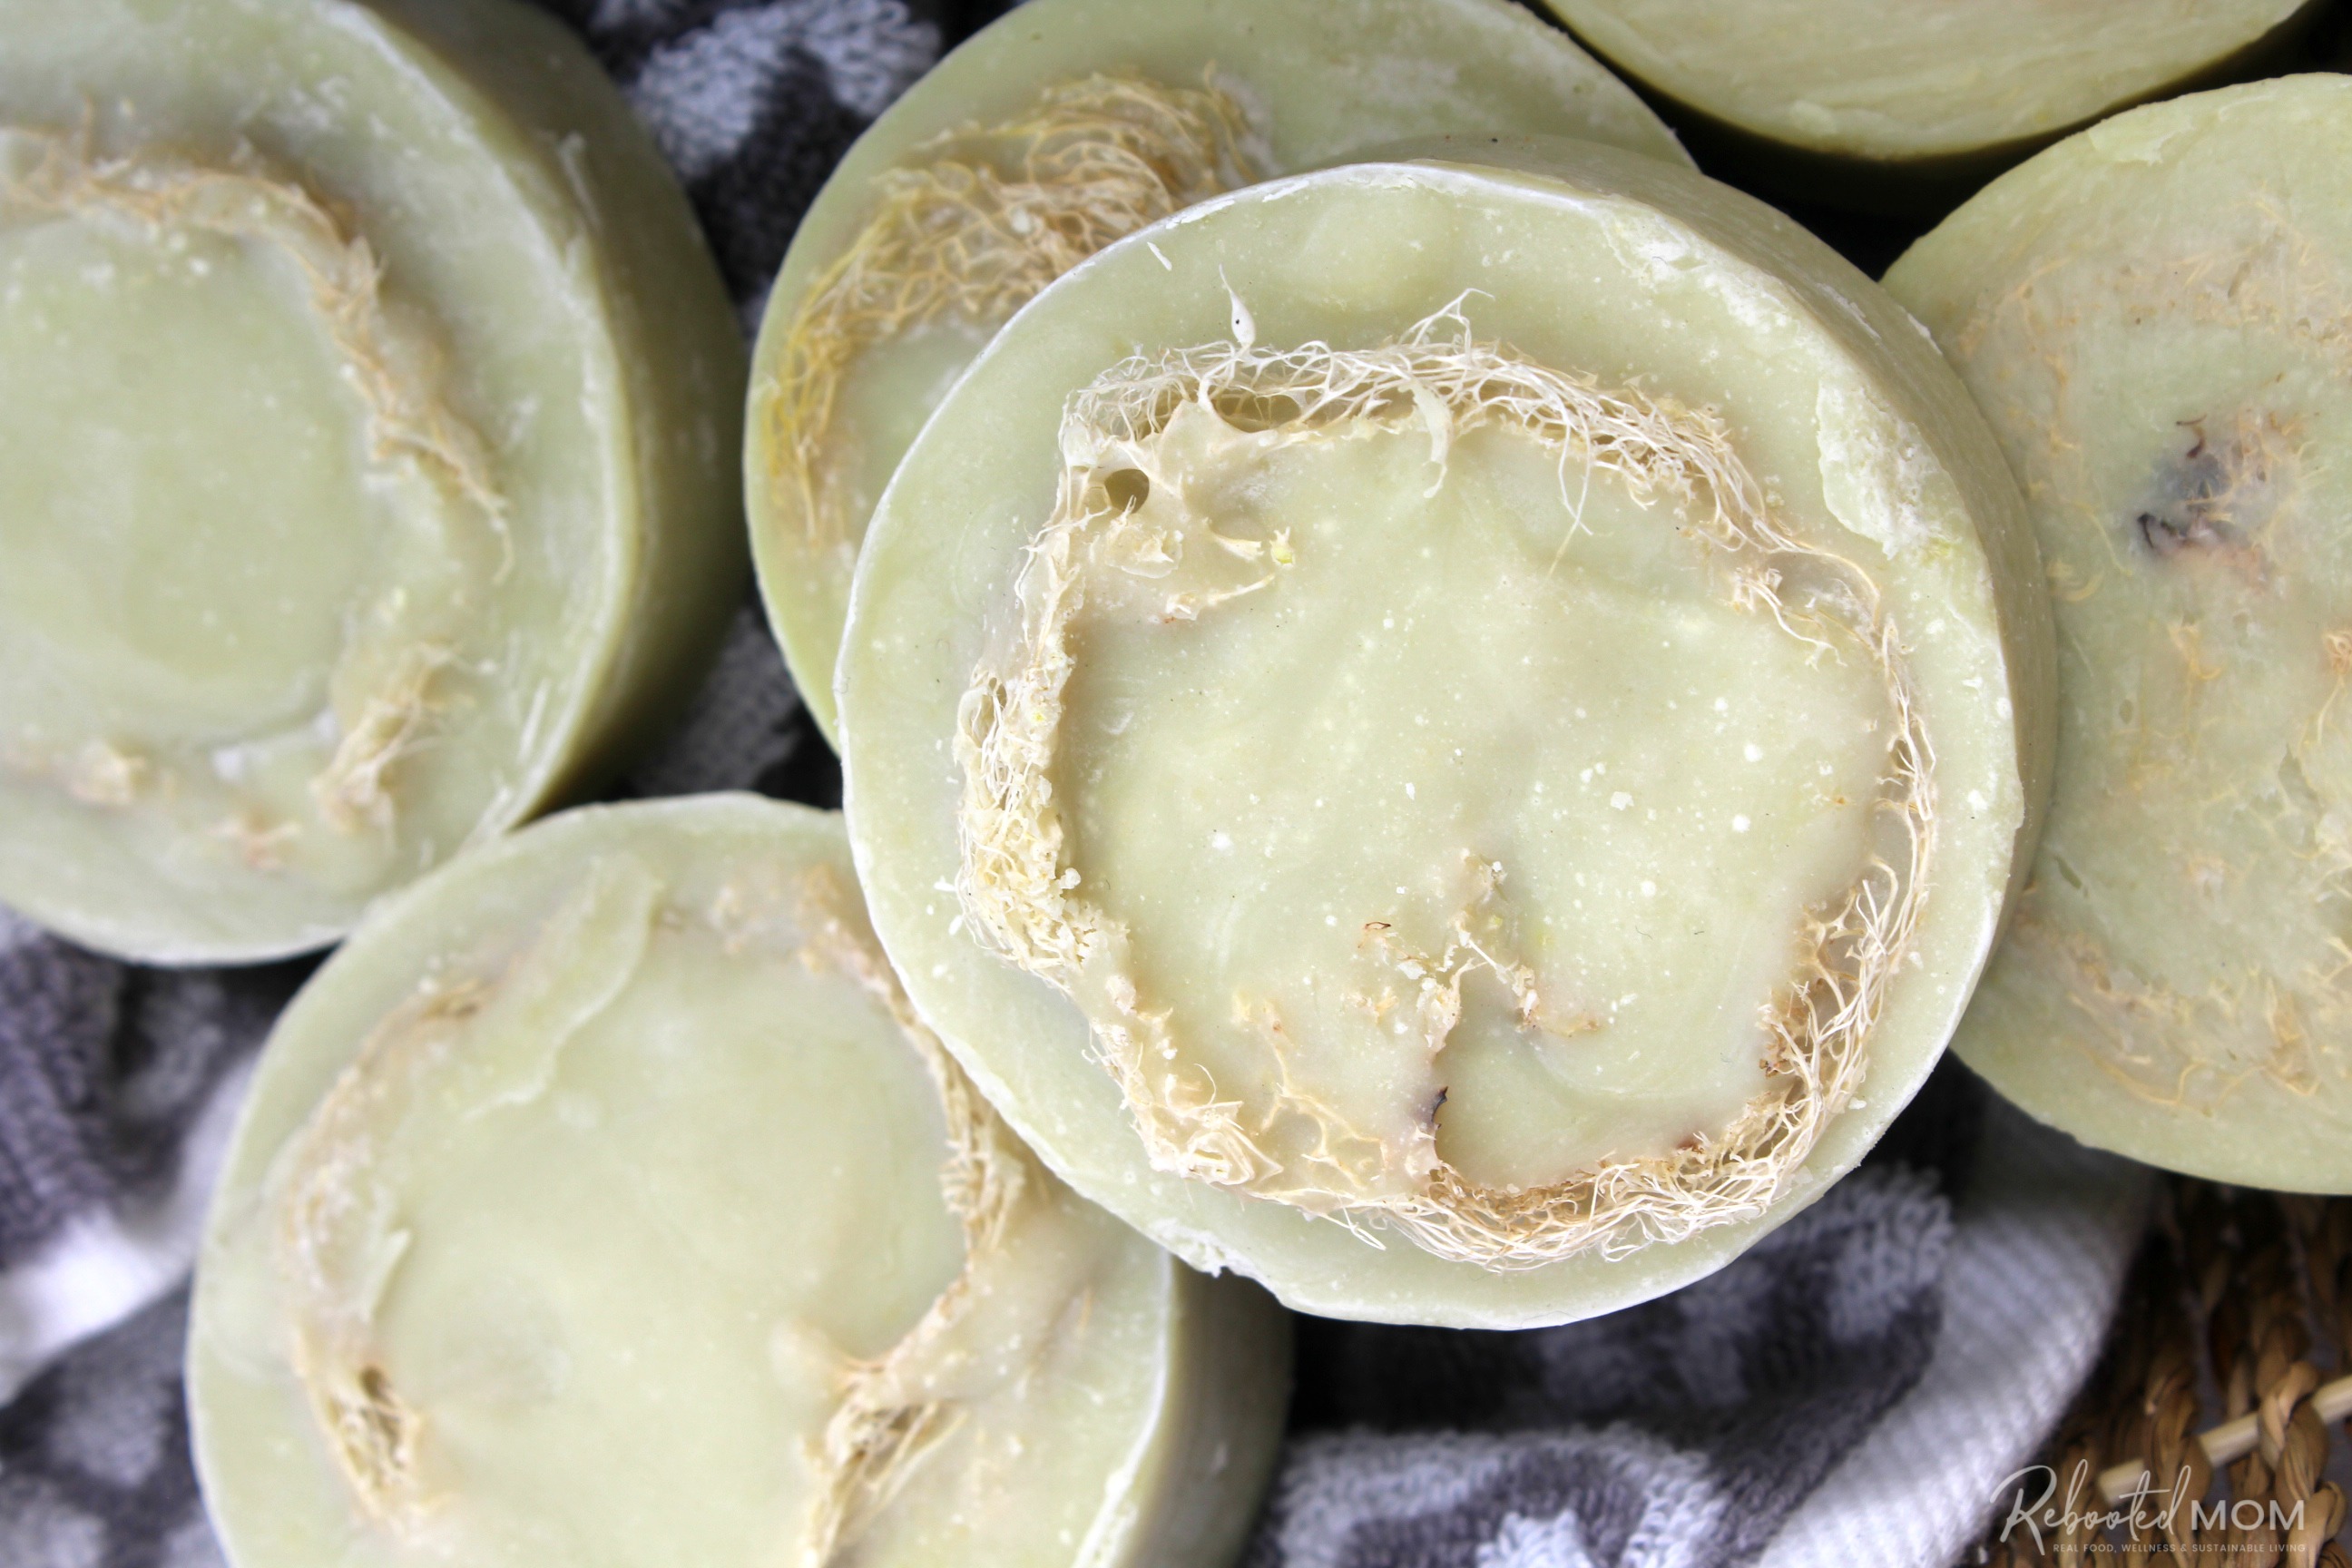
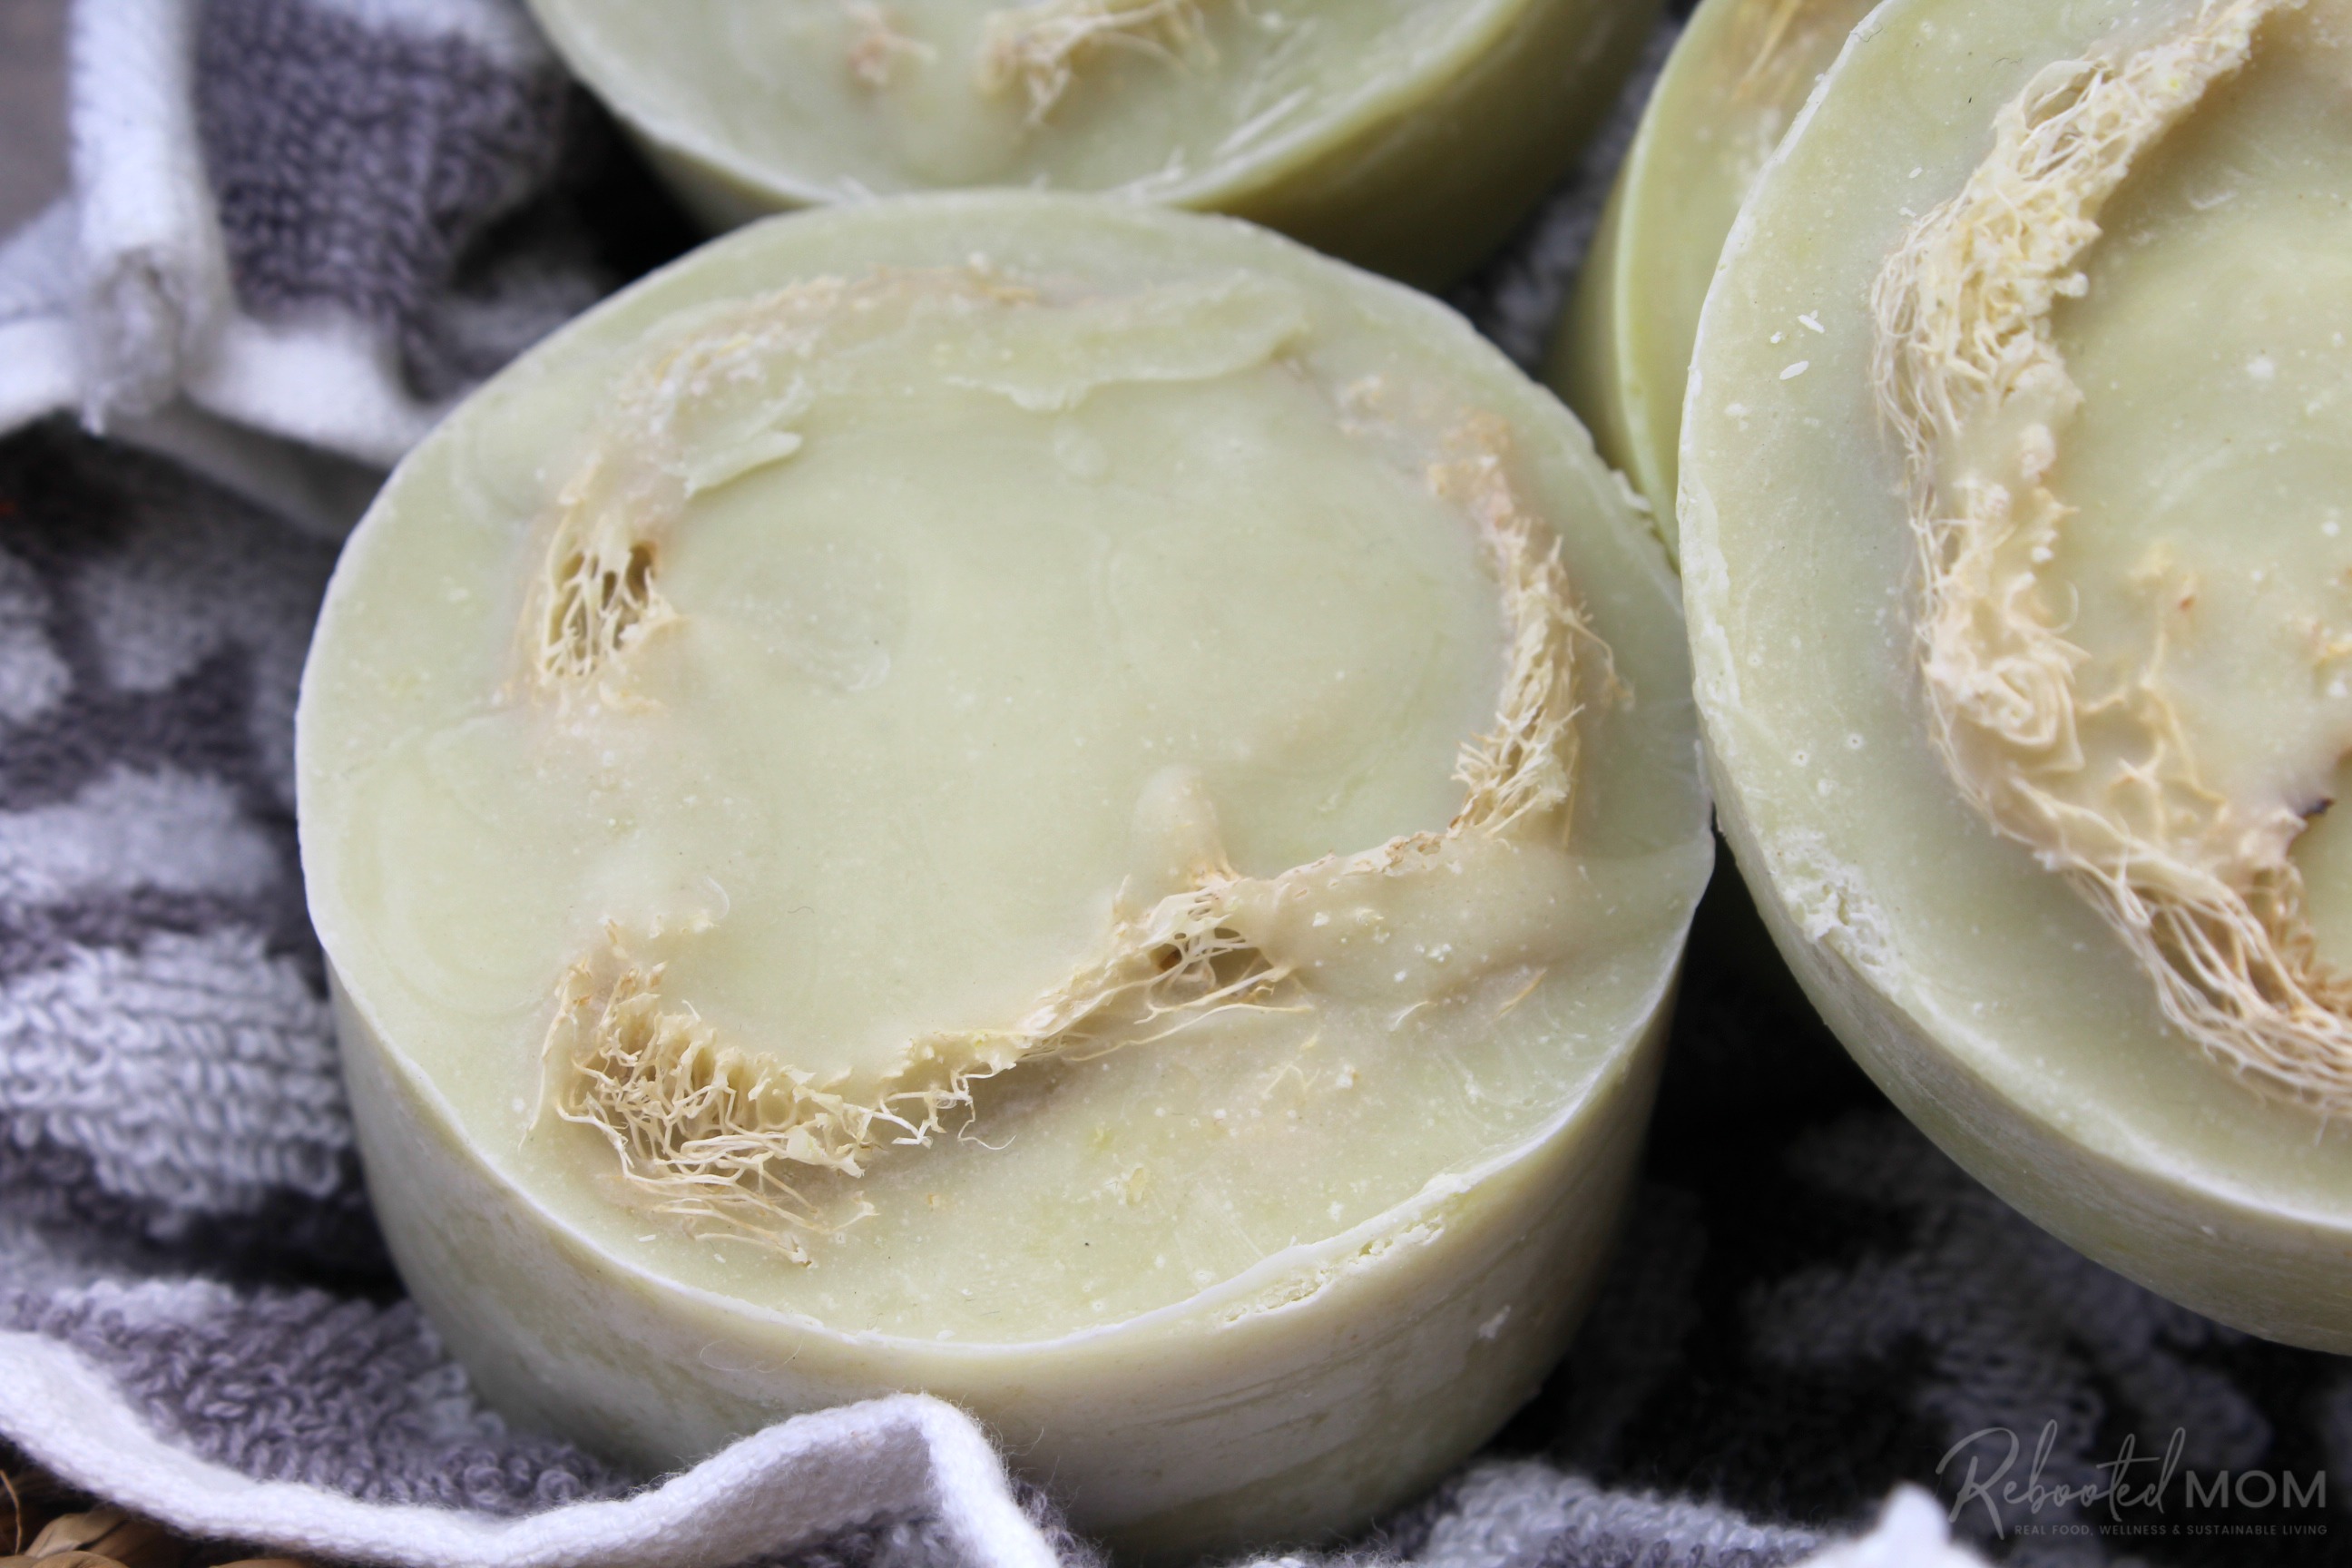
Then allow that cylinder of soap to sit for an additional 24 hours before slicing (with a serrated knife) into rounds. Remove the soaps from the cavity mold as well, they should just pop out.
Let the soap cure for 4-5 weeks until ready to use.

I don’t see any date on this recipe. I don’t have a few of the specific oils listed. Can I use ANY cold process recipe to make this? I grew amazing luffas last summer and have been saving them for this.
Thank you1
You can use any cold process soap recipe! Give it a try. I have a soap recipe I usually lean on 99.9% of the time and that is what I use. Good luck!
I want to try this recipe with cactus paddles. Never used them before. How do I use them in this recipe?
You can use cactus in soap- I have done it often. You’ll want to remove the prickles and then chop the cactus, throw it in the blender with a little water. Just use that blended cactus as your liquid in your soap making recipe. Pureed cactus is very thick and gloopy, but the best part is, that the color holds up when you add the lye. So it’ll result in a beautiful green!
Thank you very much. This sounds exciting and I will try that.
Ingrid, let me know how it turns out for you!
RE: “We made this recipe with cactus paddles (we pick up from our backyard)”
Could you please share your recipe for using cactus paddles in soap?
Thank you!
I sure can. Send me an email at fourpeakssoapery@mail.com and I’d be happy to respond with my cactus soap recipe so you can make it with cactus paddles, too.