


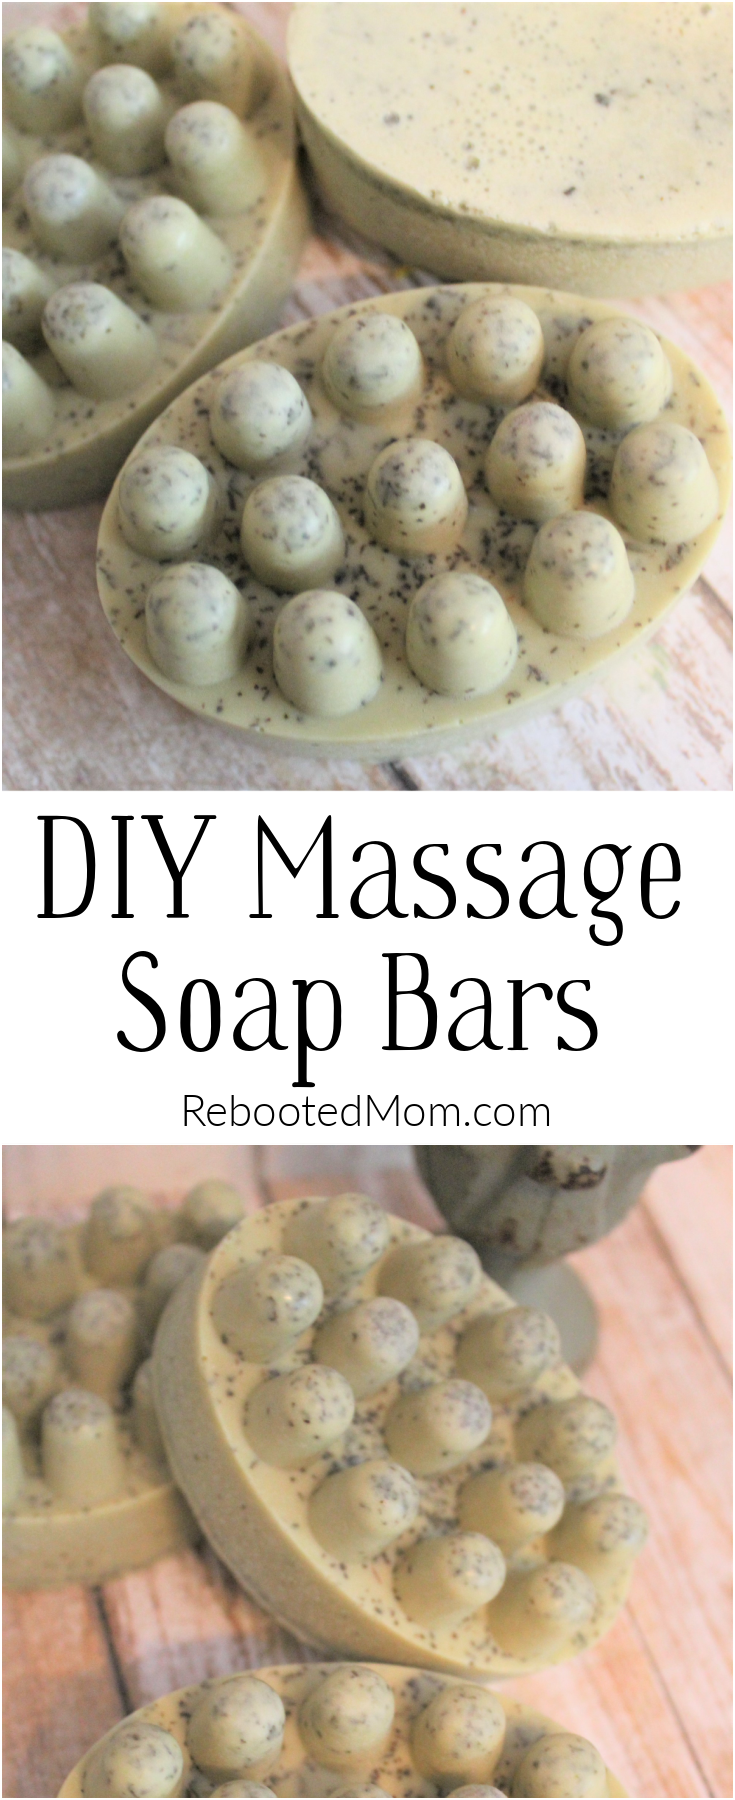
Follow this simple tutorial to make your own DIY Massage Soap Bars with a refreshing uplifting essential oil combination that smells amazing! These bars make wonderful gifts!
Making your own soap may sound like a daunting task. However… if you enjoy making other natural products & using essential oils, then this recipe may surprise you. It has minimal ingredients and is not time consuming or difficult.
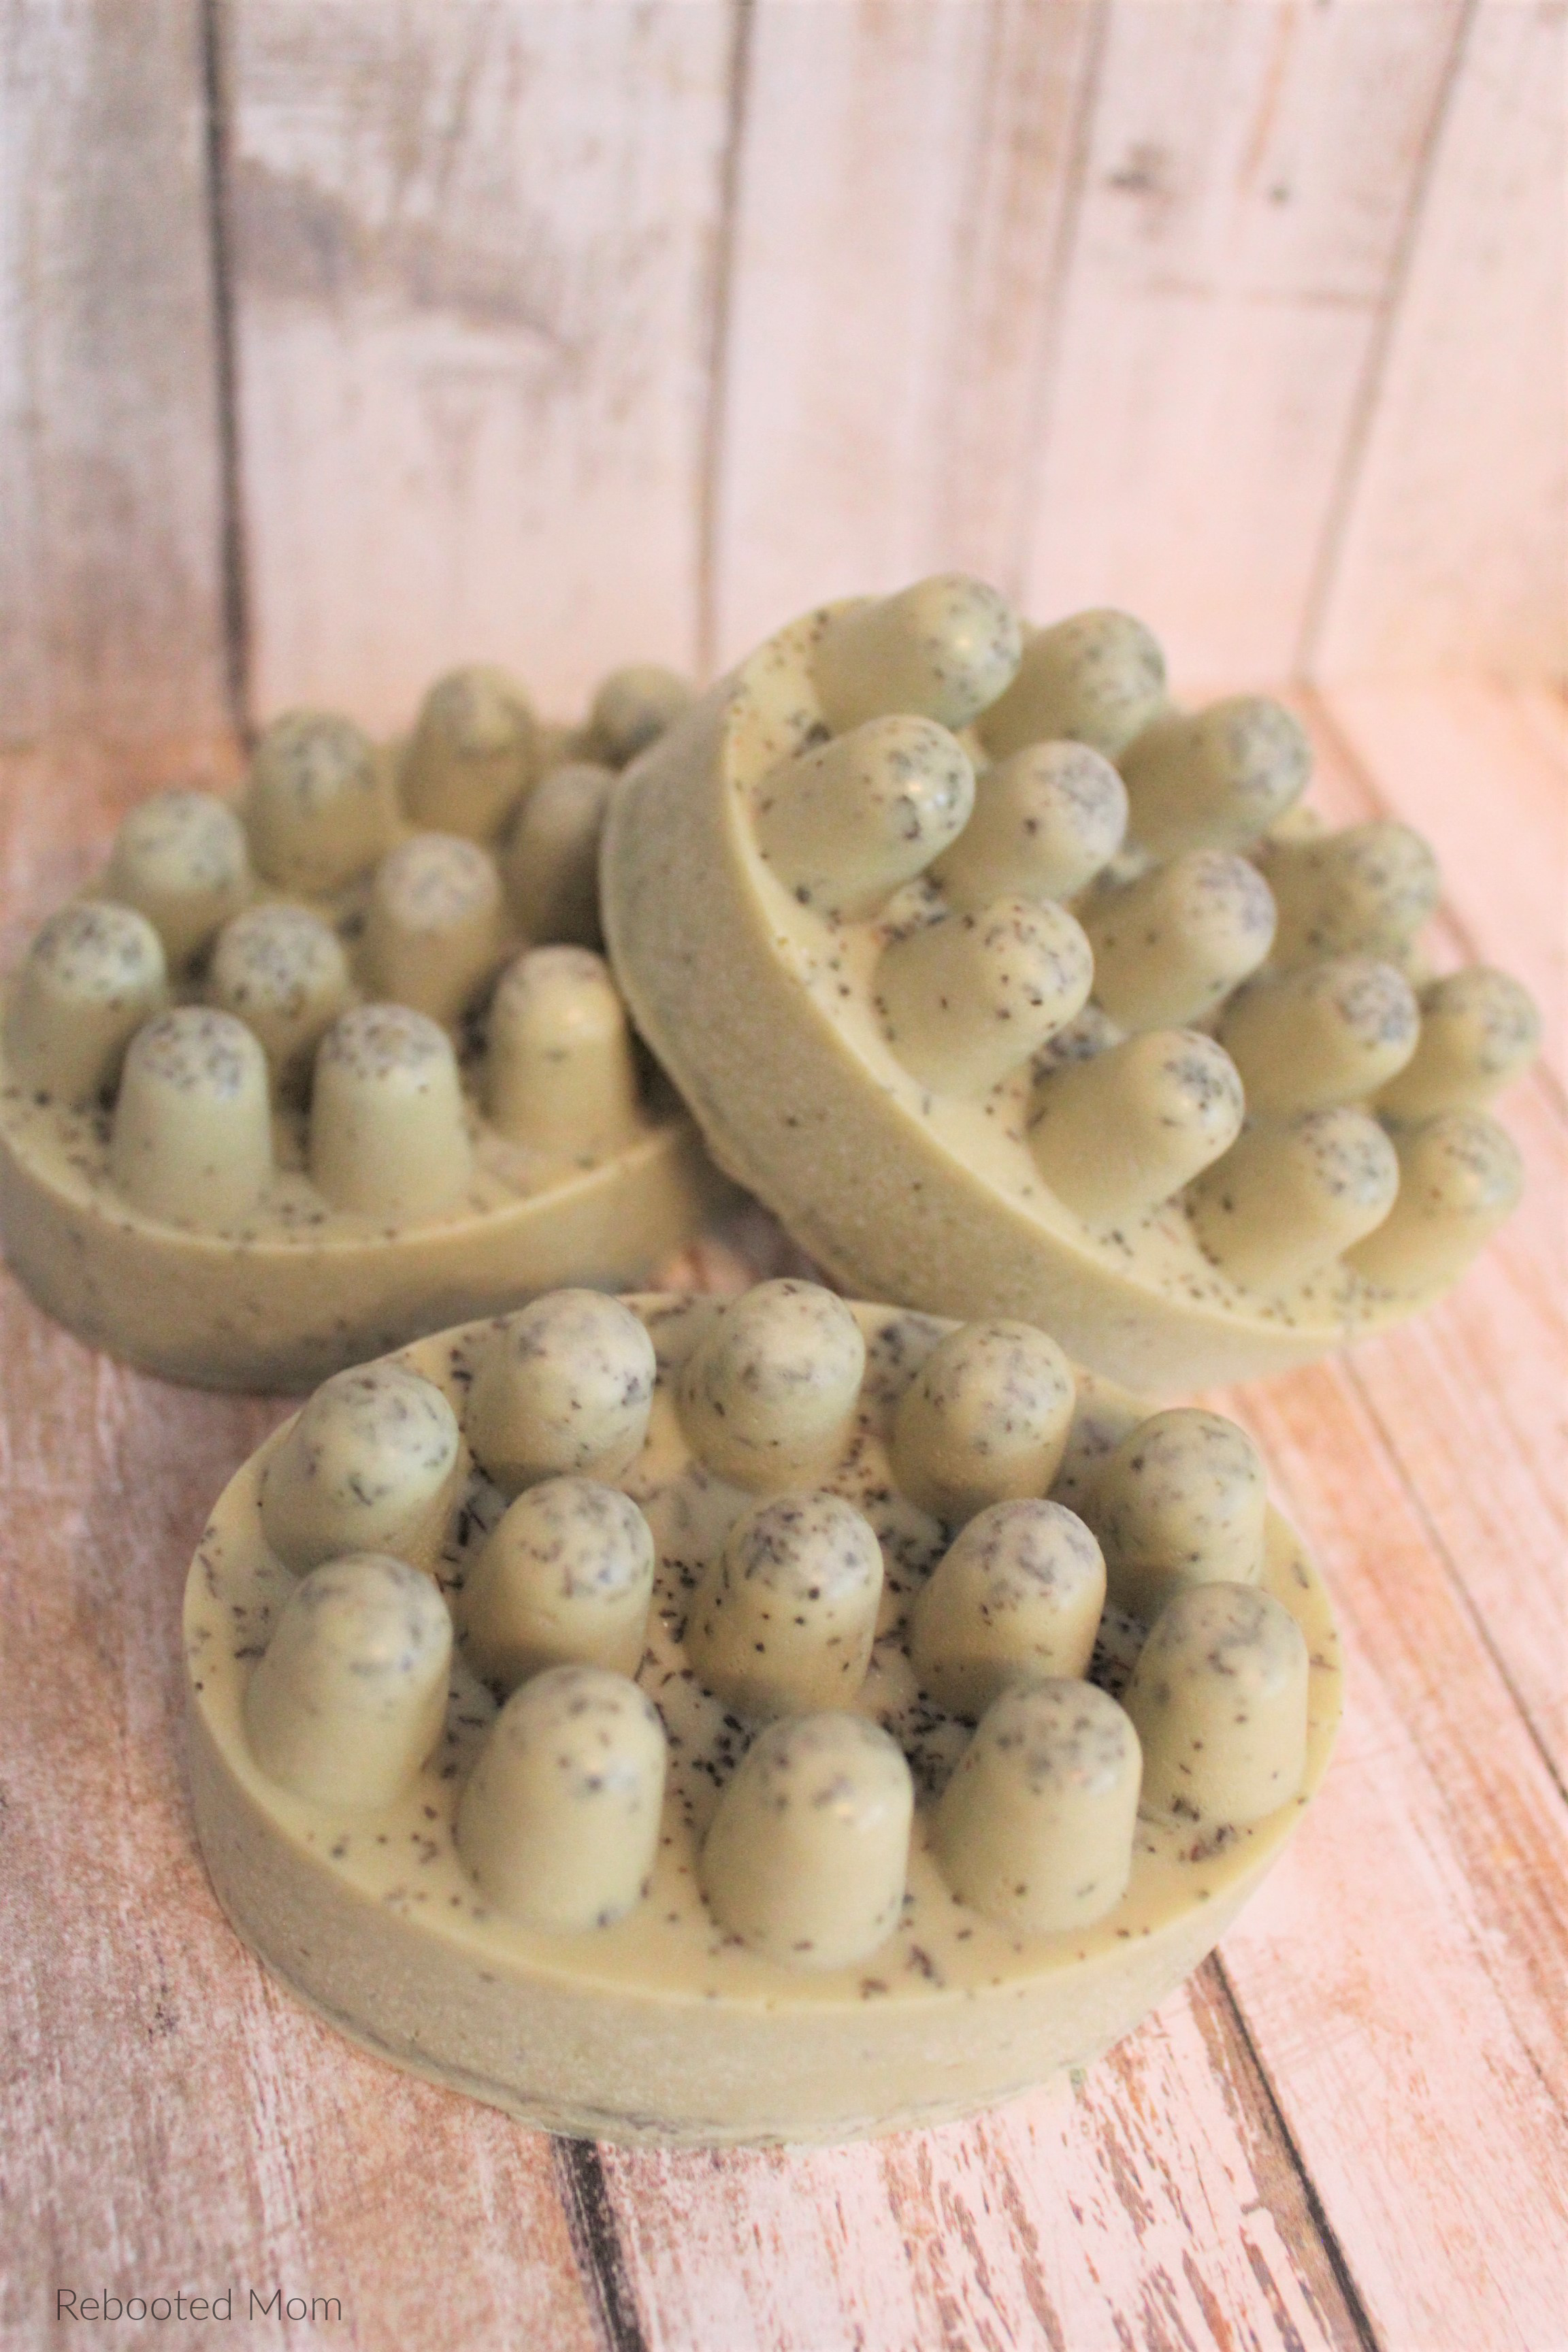
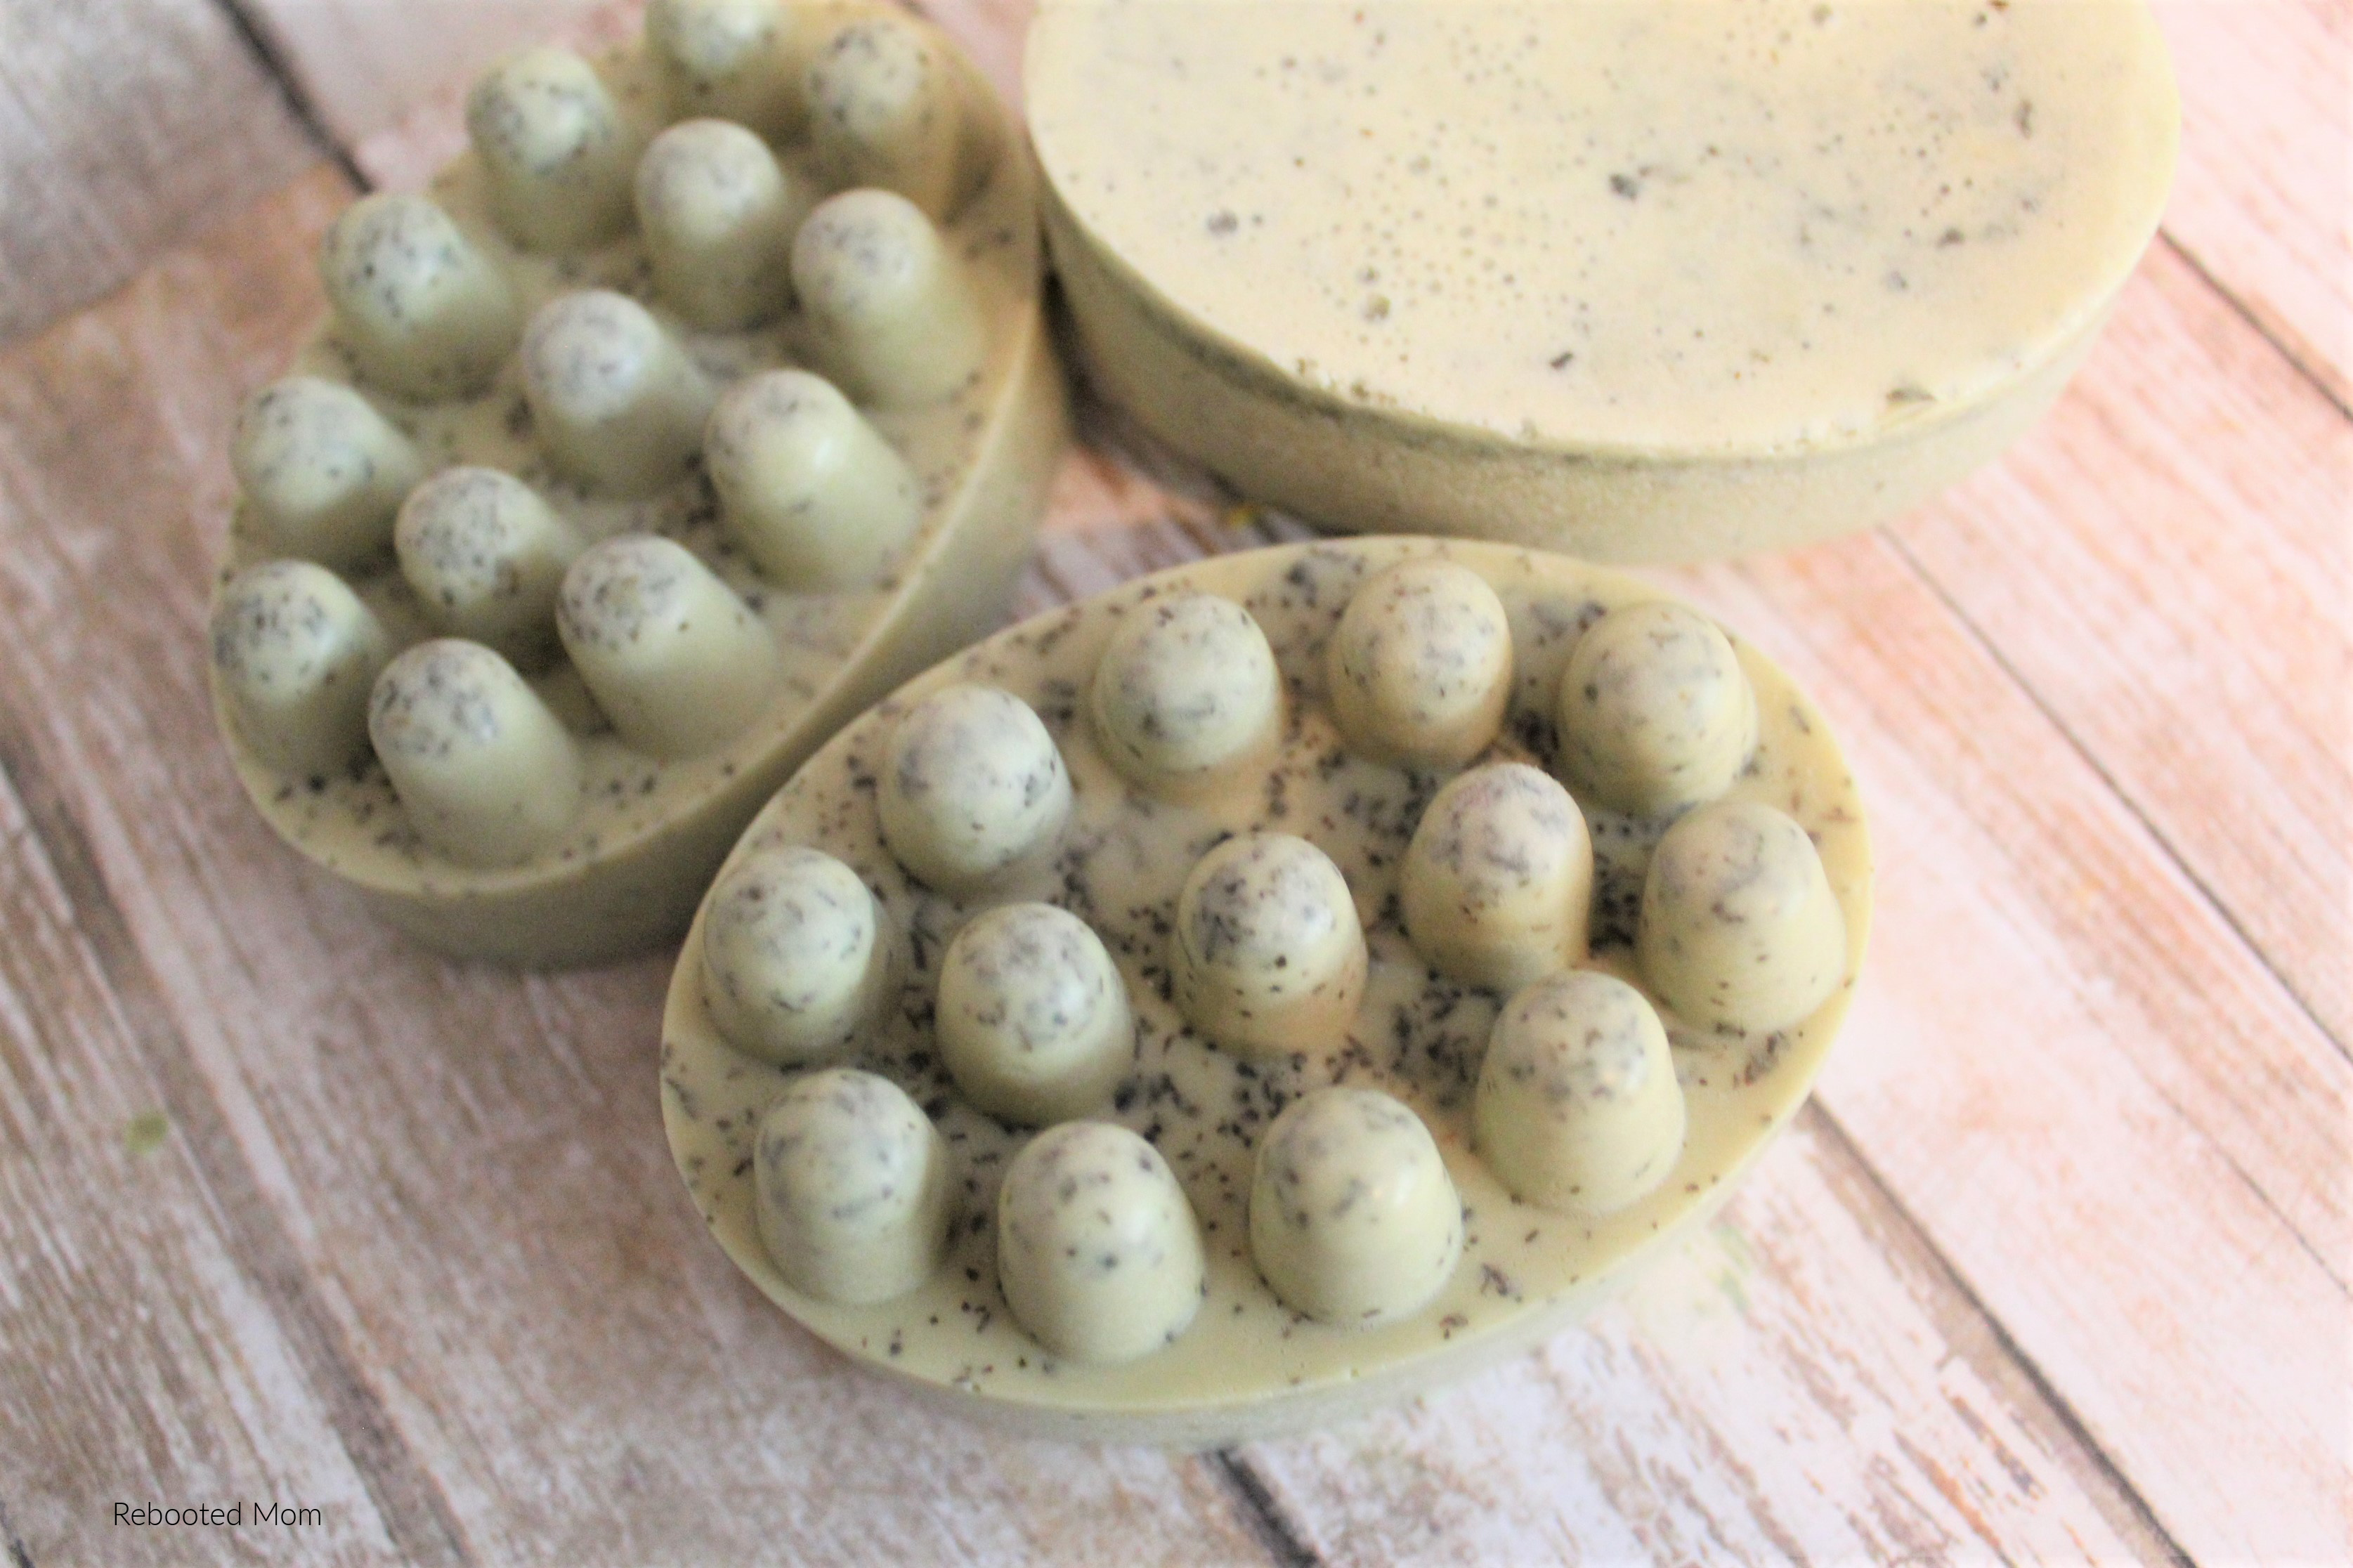
The mold used is a larger sized bar with the massage bumps built in. The mold makes for a long lasting and great bar of soap. However, if you have another mold you prefer, don’t hesitate to try it instead of passing this recipe up.
Essential Oils in Massage Bars
This DIY uses a natural shea butter soap base. The base has great ingredients that make for a smooth, moisturizing soap. Not to mention it is very easy to work with.
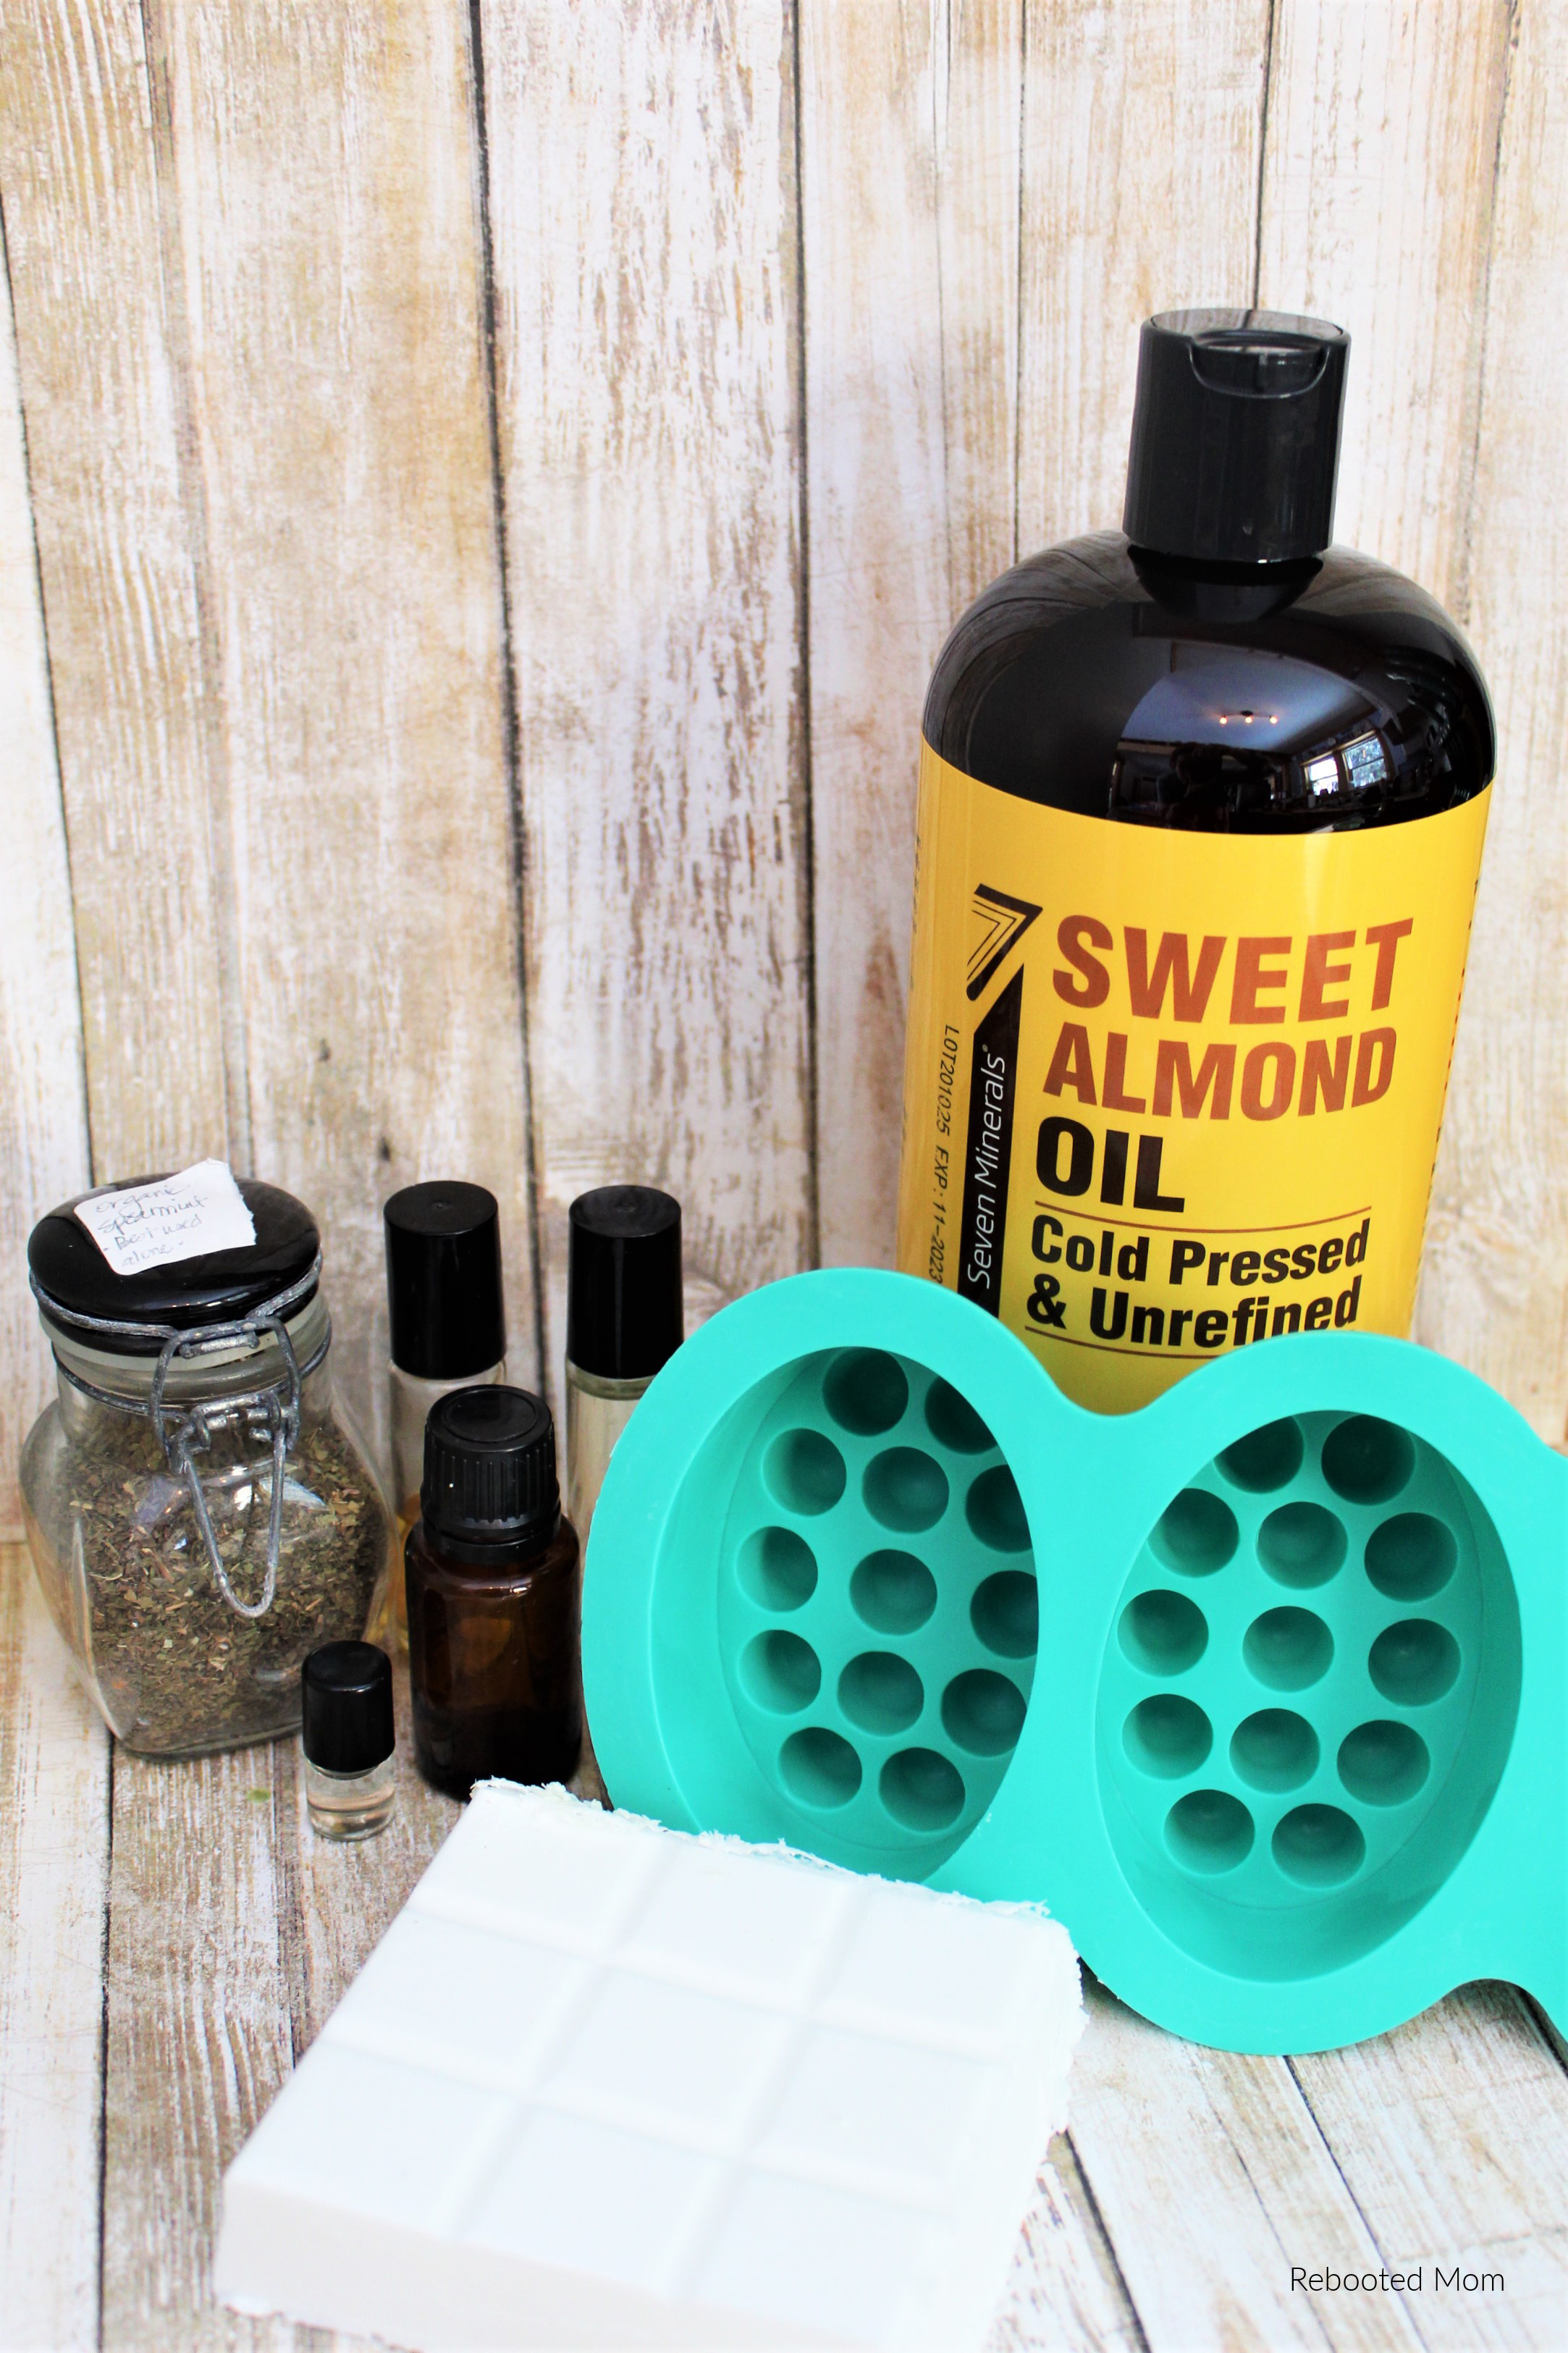
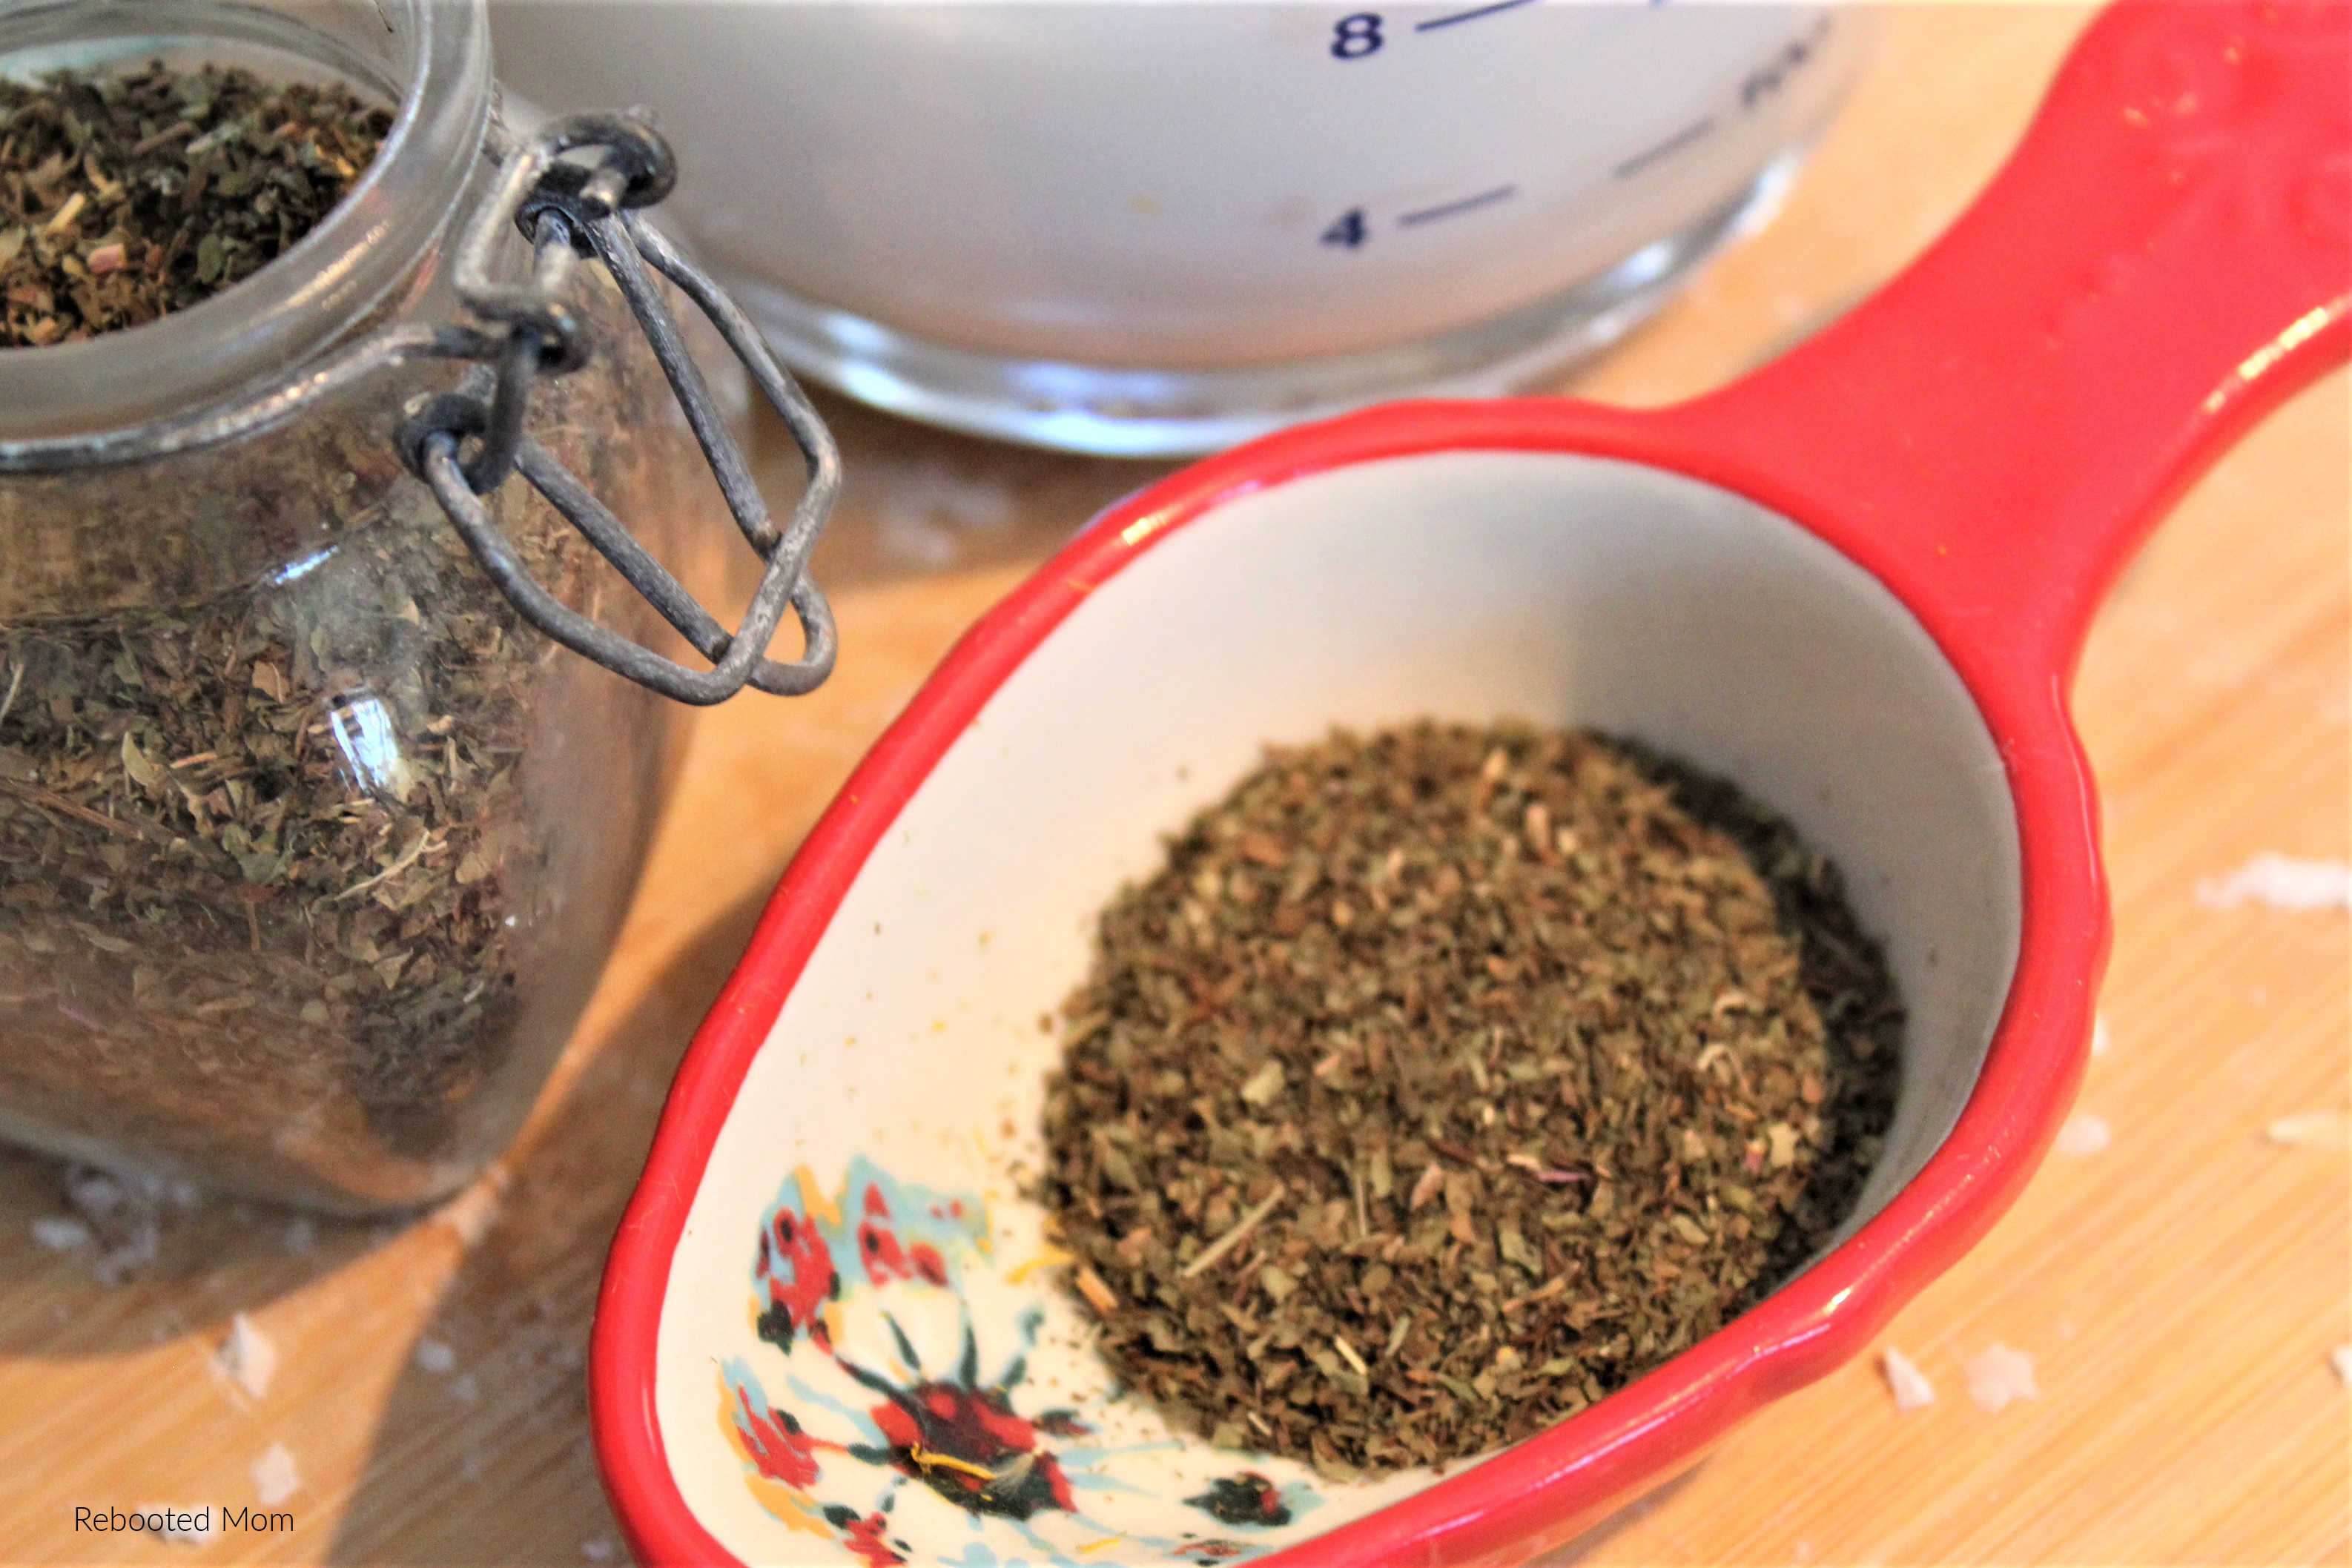
Also included in ingredients is organic spearmint, which adds scent and exfoliation to the bars in addition to the health benefits of the spearmint. Mint sweetens the scent too, which is great with the combination of the essential oils used. You can substitute for the essential oil itself, or use peppermint or wintergreen for a similar effect too.
Spearmint can support respiratory issues. It is also used as an anti-oxidant, and can aid also in stress reduction.
As part of the base ingredients for the soap I have also added sweet almond oil. This can be substituted for another similar type of oil like jojoba or olive oil if you have that on hand instead. I prefer the almond oil and use it in many of my DIY skincare recipes (to include this lovely Beard Balm!)
Sweet Almond Oil helps keep clear skin, gives relief for skin issues, reduces oily skin, and helps reverse sun damage.
Choosing the Right Essential Oil Combination
The essential oils used in this soap all have great scents and when combined they accent each other well. The combination also provides an invigorating, fresh scent.
The first is Frankincense. This oil is known as the King of all essential oils because of its powerful benefits and it is great at supporting healthy skin.
The second essential oil used is grapefruit, which is easily a favorite citrus oil and for good reason. It has a fresh, uplifting scent that has just the right amount of sweetness. It helps balance and uplift mood, is antibacterial and antimicrobial, and it helps reduce blemishes and keep the skin clear.
The last essential oil used is Douglas Fir. This oil has a sweet, woodsy undertone that can stand well alone. If you don’t have it on hand, you can substitute it in this recipe with another fir, a spruce, or cedarwood.
Douglas Fir is known for its cleansing and purifying benefits so it is perfect for a soap blend.
Overall, this soap has a wonderful combination of scents that will benefit your body as well. These make great gifts too!
DIY Massage Soap Bars
Ingredients required:
(This makes 3 bars of soap in the full/larger size mold)
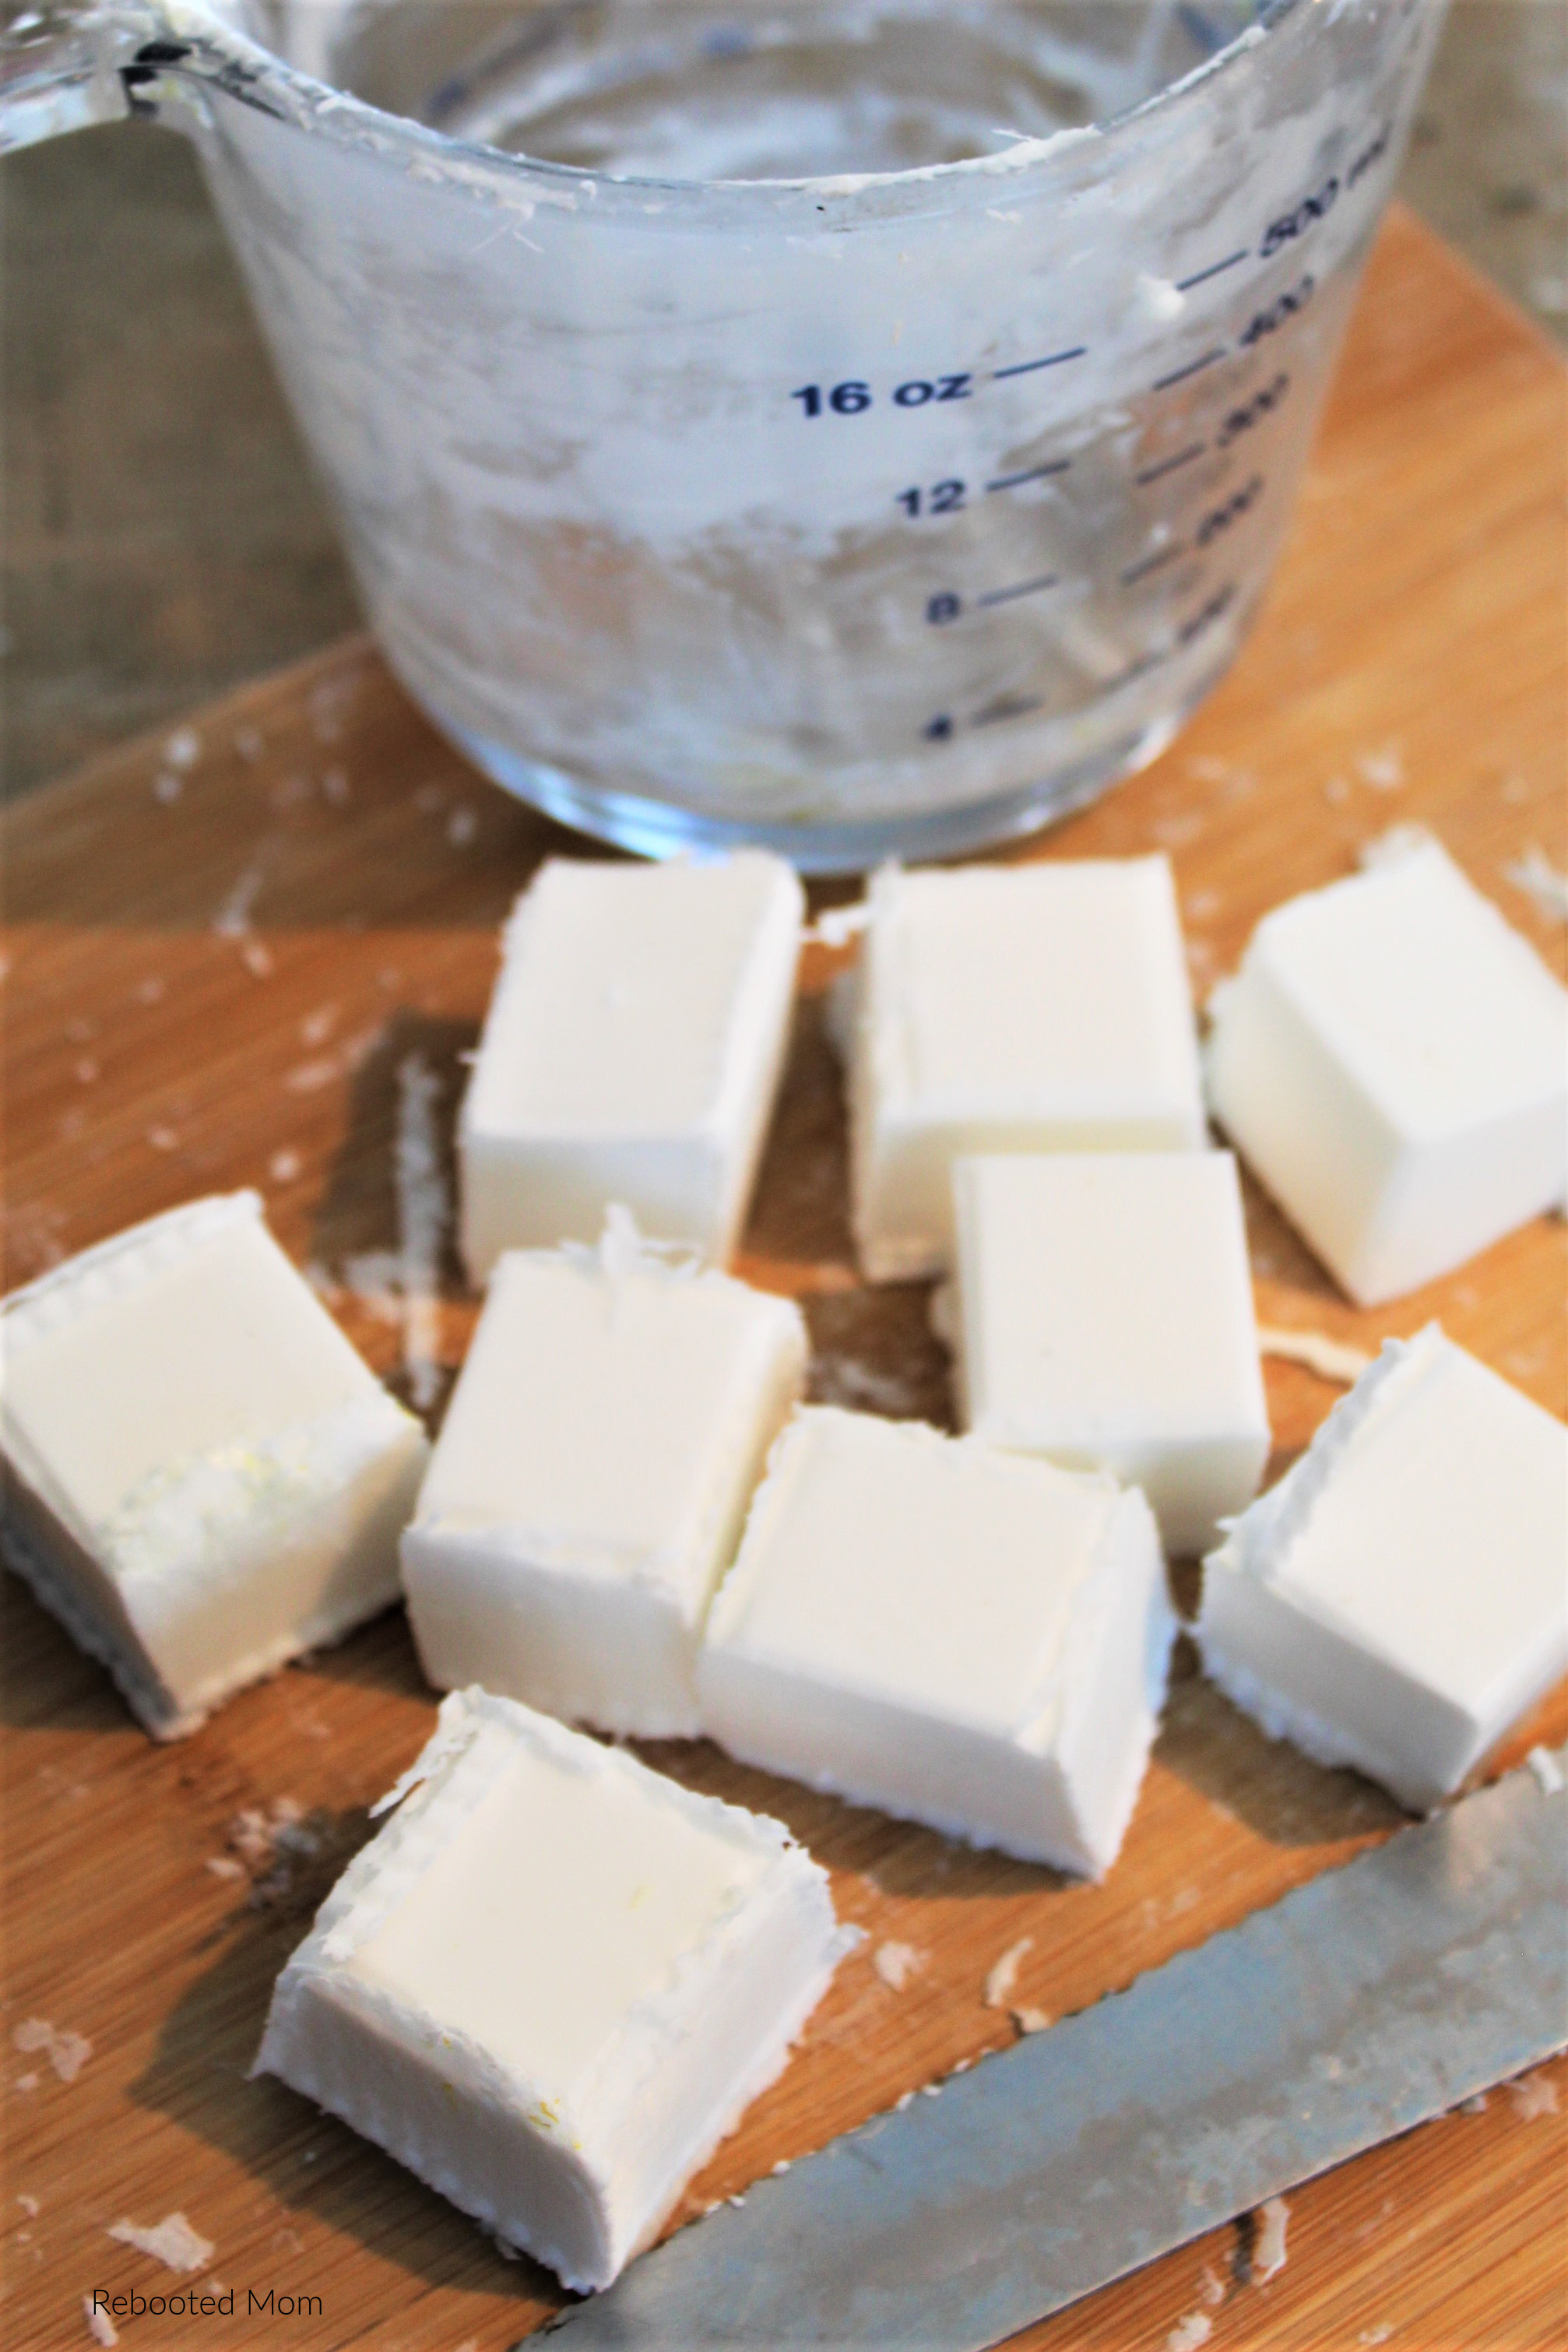
- 9 cubes of shea butter soap base
- Silicone molds for at least 3 larger/full sized bars
- 2 tbsp. Sweet Almond oil
- 1/16 cup organic spearmint leaves (or if desired, up to 1/8 cup)
- 22 drops grapefruit essential oil
- 18 drops frankincense essential oil
- 20 drops douglas fir essential oil
Directions:
The soap base comes in a brick that is normally 2 lb. in size and it has pre-scored cubes. You will need to cut out 9 of those cubes for this recipe.
Use a larger, sturdy knife as the soap is thick. (I keep one set aside for this type of recipe so I’m not using my cooking knives.)
Melt the Soap Base
Place the soap base cubes into a glass dish large enough to do your mixing in afterwards. I use a large measuring cup and it is perfect.
Microwave for one minute, and then use a rubber scraper or spatula to stir well, scraping excess off sides as you go.
Please note: This is the only time you will do a full minute in the microwave. After this keep it at thirty seconds or under or it has a tendency to overflow and puff up and spill.
After you stir well, place back in for another thirty seconds.
Now, measure out your sweet almond oil and add to the soap base. Stir in thoroughly.
Add the Essential Oils
Next, add in each essential oil, stirring well between each one. The soap base will start to thicken and set as it cools, and this does not take long at all, so working quickly helps the process and it helps keep more from sticking to the sides of the bowl for you to scrape off later.
All three of these oils are thin in consistency and they can easily run out of the bottle fast, giving you twice what you need. So take it slow or use a pipette to help you count the drops.
Place back in the microwave for thirty more seconds, and then stir well and scrape the sides and bottom to be sure any lumps get out and back into the mixture. If you have alot of lumps, add it back in for 10-15 seconds and stir again.
I found that it builds up along the top edge of the bowl and I would have to peel or scrape that and add it to mix again.
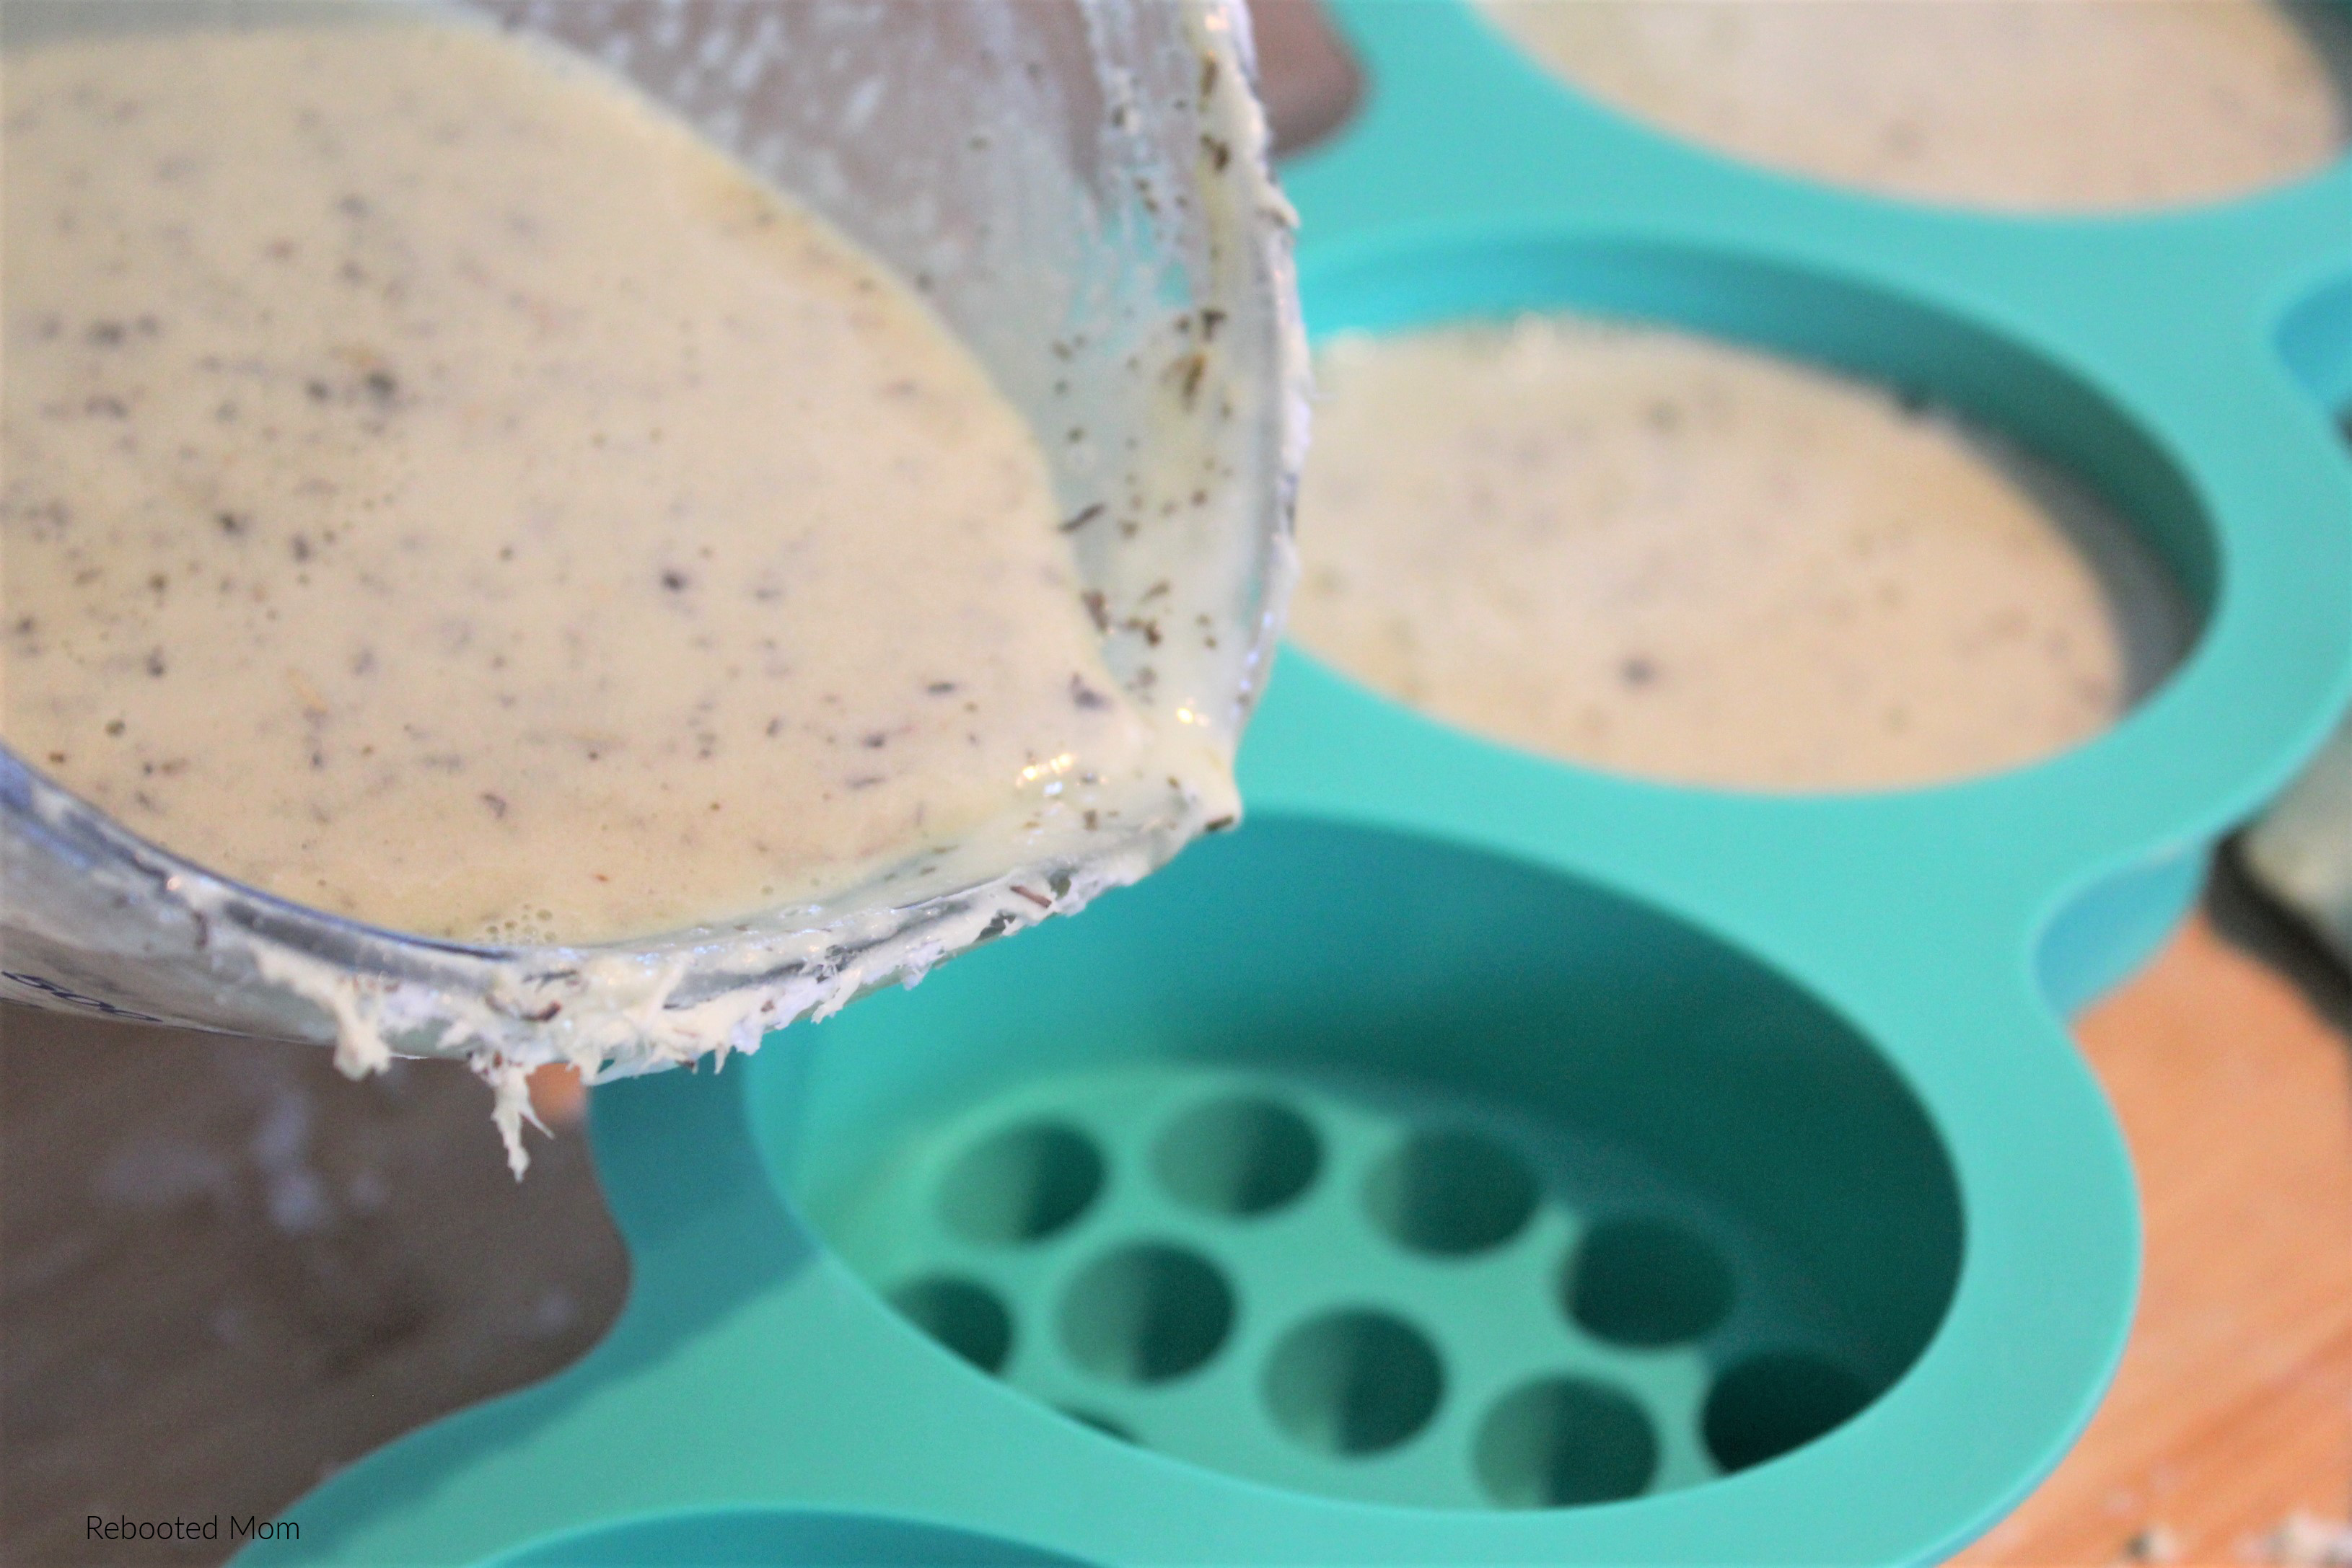
Add the Spearmint, Pour into the Molds
The last ingredient is the spearmint leaves. Mine were chopped very finely which is what you want, but if yours aren’t, I would do so before adding them in. You will want to add them in slowly, stirring as you do so to be sure they get evenly dispersed through the soap. I used about 1/16th of a cup and found it worked well, but if you want it a little heavier you could go up to 1/8th of a cup.
Now, give it one last zap in the microwave, for about 10-15 seconds. Then stir to be sure it is all smooth. If it is, you can go ahead and pour into your molds. If it is not, give it another 10 seconds.
Check your molds to be sure they are clear of any debris so that doesn’t end up stuck to your soap, and then go ahead and carefully pour it in.
I would leave a little room at the top as I go, and then if there is enough left of the mix, top them off. You want to do this as quickly as you can; don’t let the soap sit before pouring or it will be too thick to give you a smooth finish.
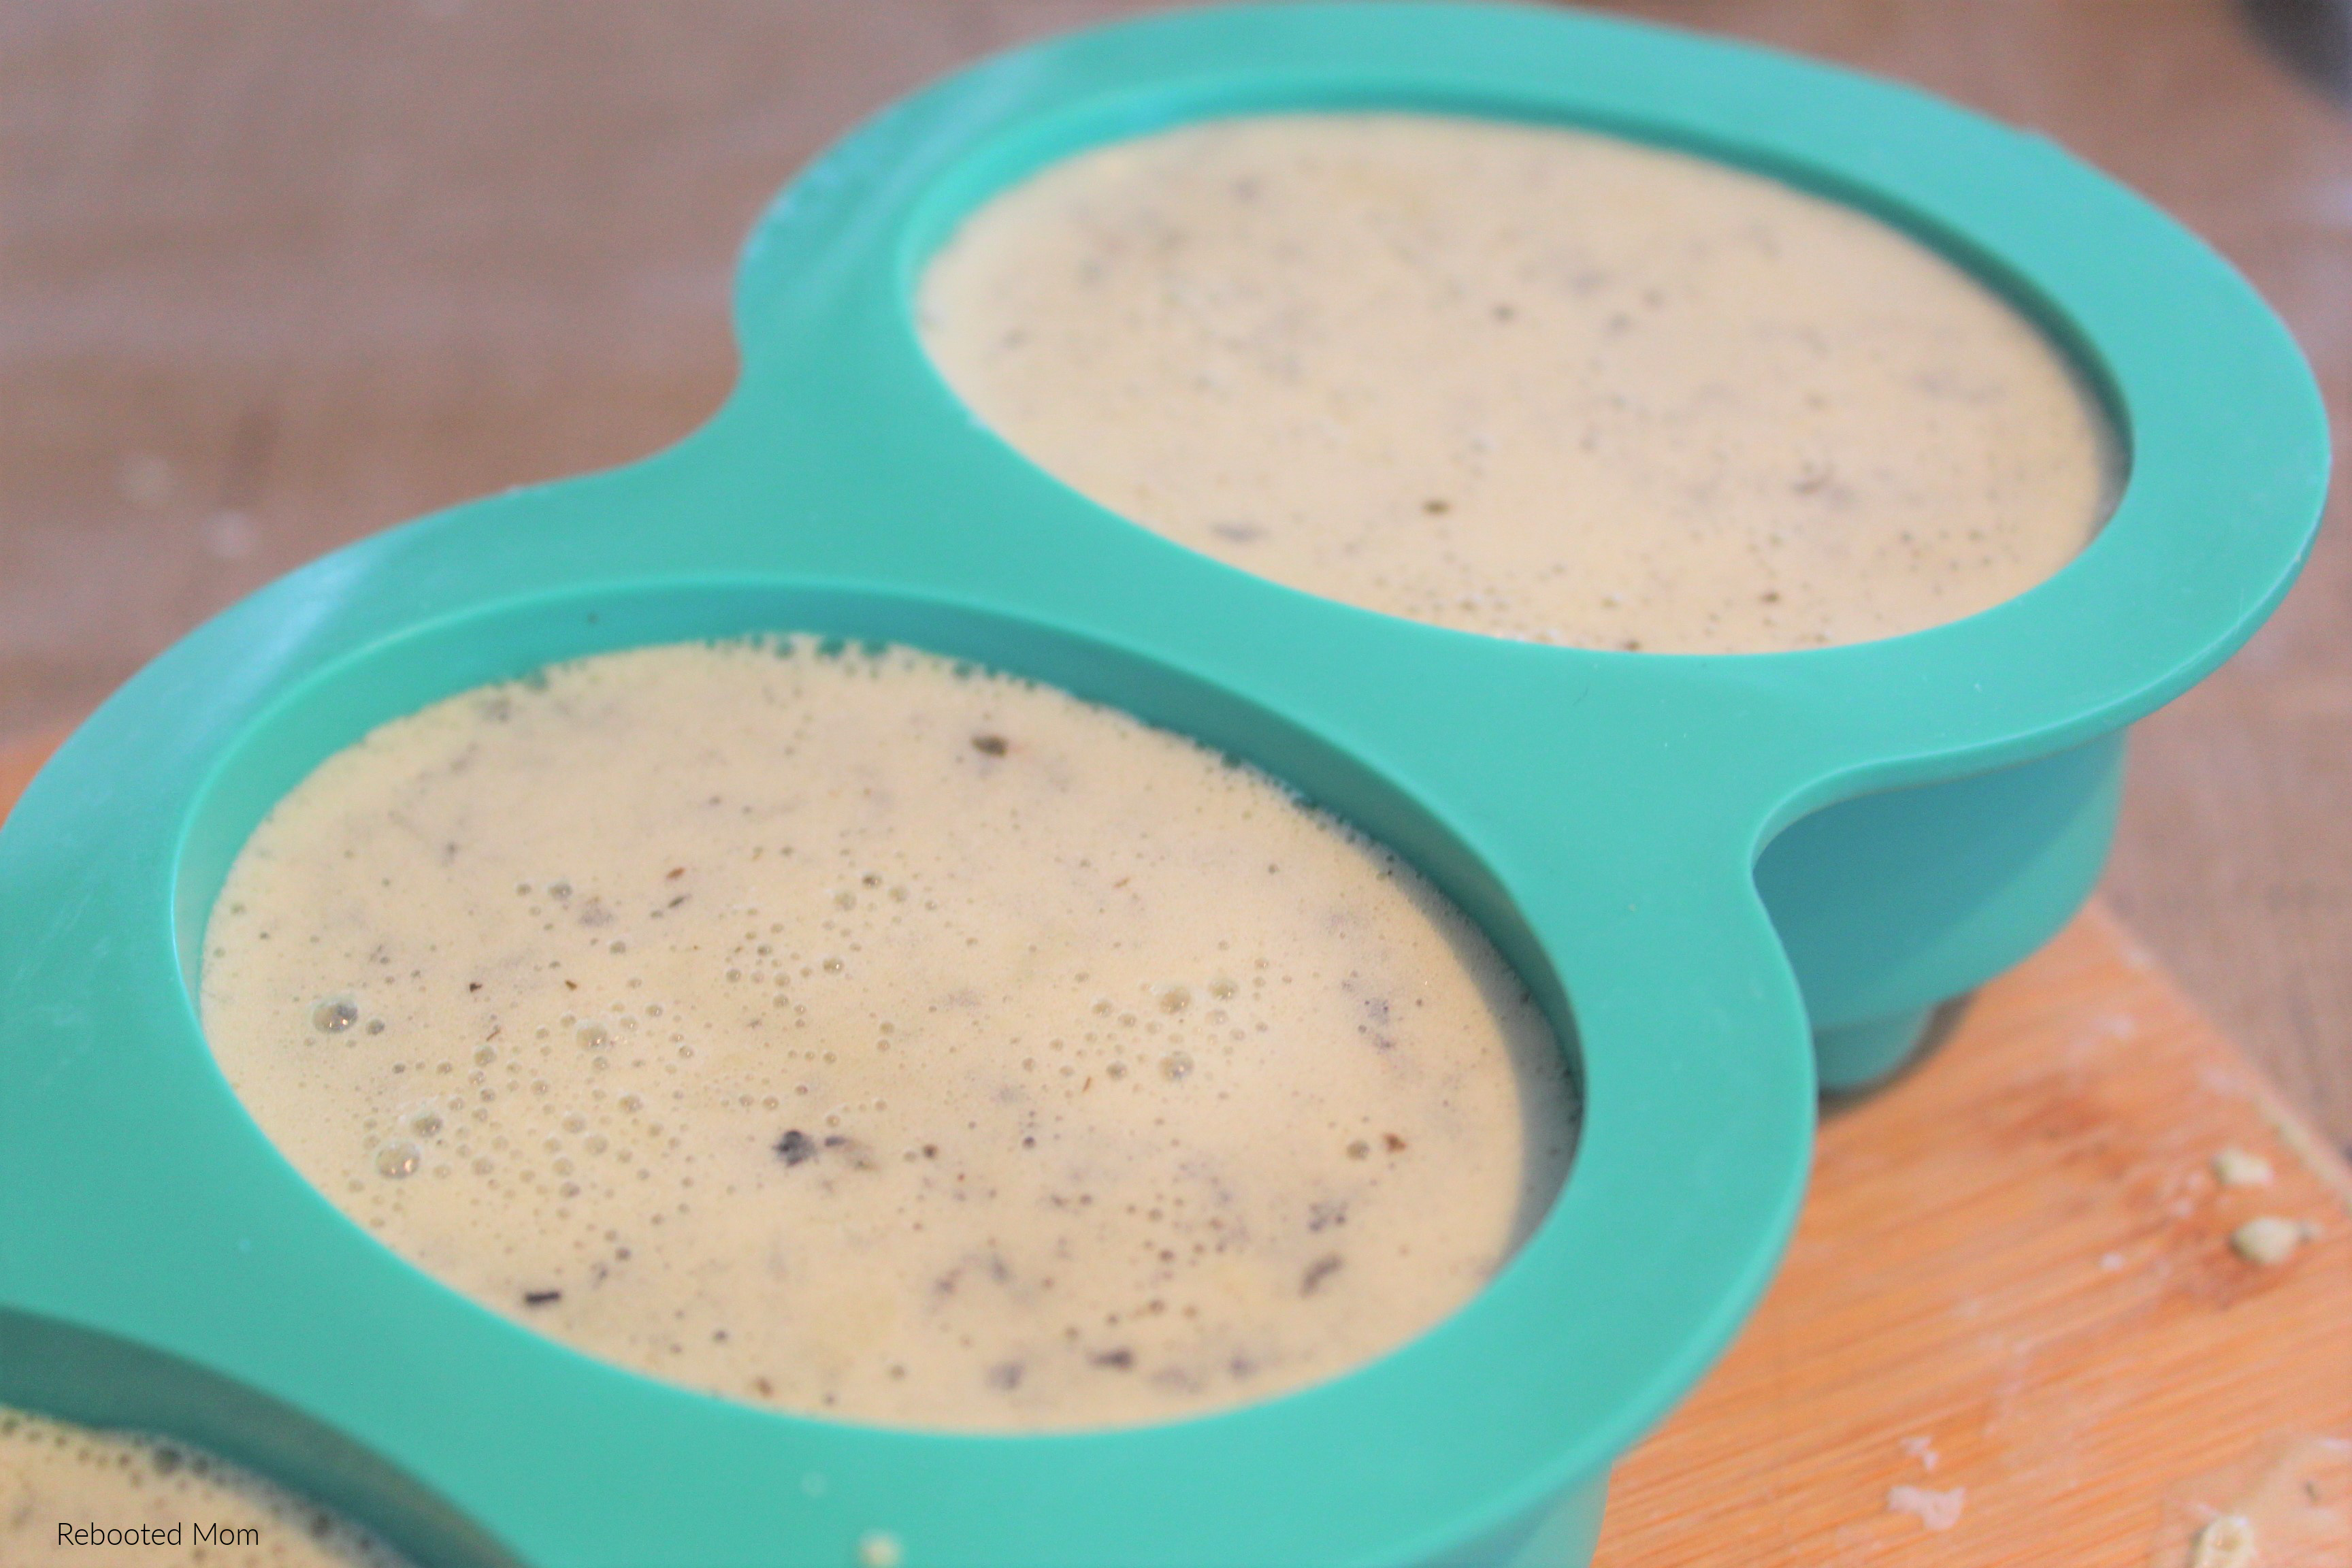
Let the soaps cool for a few hours. Avoid disturbing them, to ensure that they turn out without any issues. The middle part of the soap stays warm longer and it can spill to the top and ruin the smooth shape.
Feel the center of the mold on the top and bottom if needed to see if it has cooled completely. Then when it has you can go ahead and peel it out of the mold.
Remove from the Molds
If you have the type with the massage bumps, or a pattern in it, it is easier to use one hand to peel off the silicone and one to hold it steady. These types of molds are super flexible and it won’t hurt them to bend at all.
I usually let mine sit out awhile after taking them out of molds if they didn’t sit in them too long, just to let them air out a bit more.
Now you should have some lovely soap bars!
Can I make these as Cold Process Soap?
You can definitely make these as a cold process soap. Before doing so, you’ll want to measure the mold in ounces, then use a reliable cold process soap recipe and re-size it to fit the mold.
Looking for more soap recipes?

Leave a Reply