


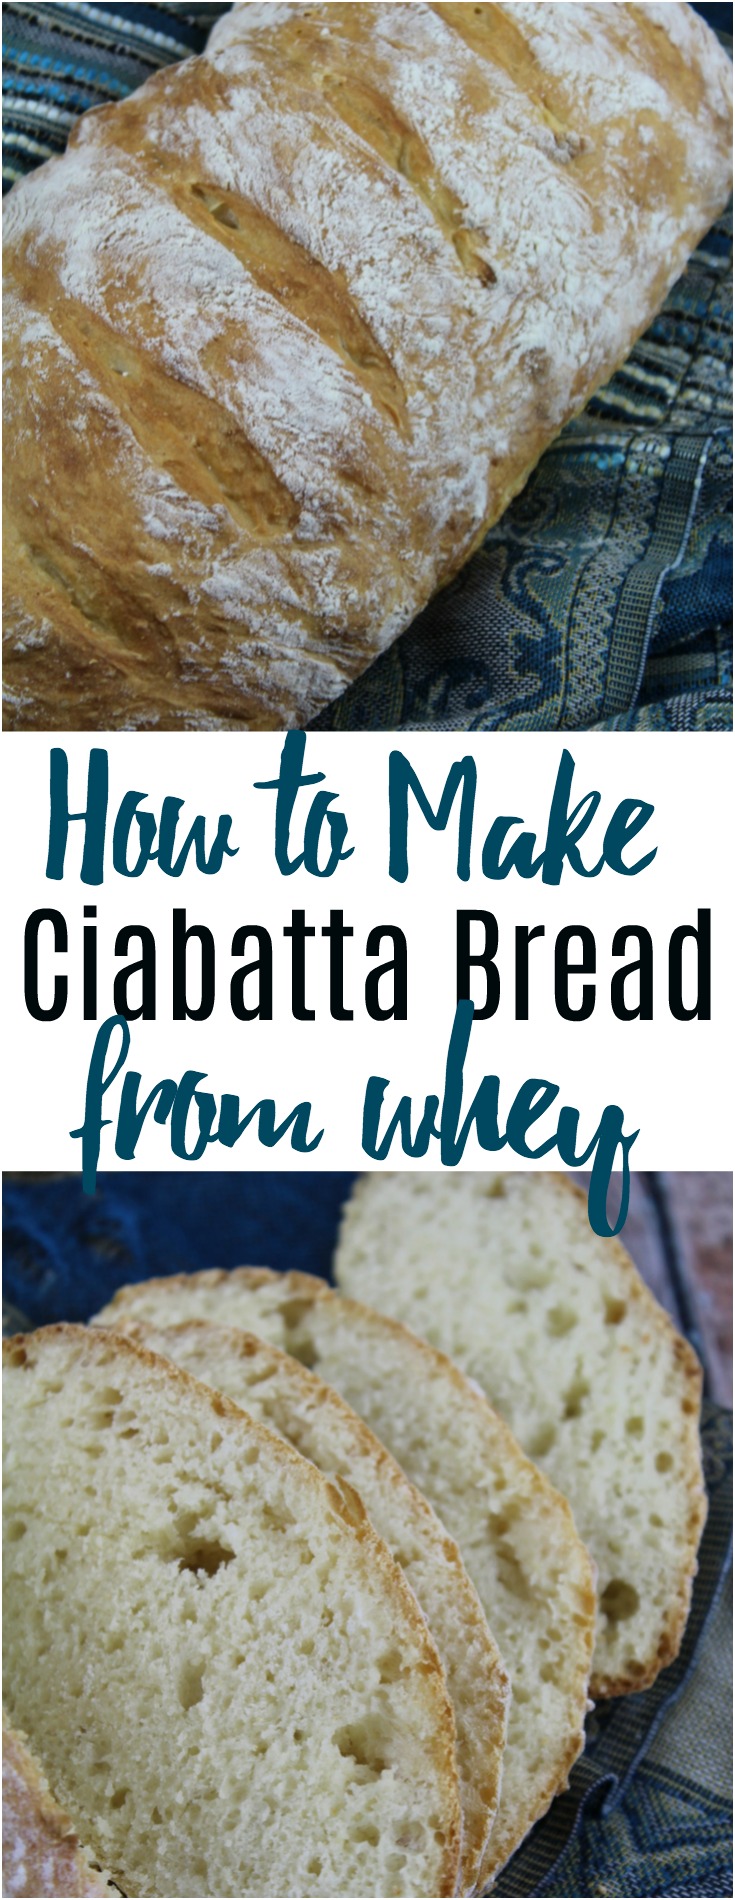
Learn how to make a beautiful loaf of crusty ciabatta bread from whey leftover from cheesemaking or, homemade yogurt.
After making fresh cheese last week, I ended up with quite a significant amount of whey – almost just as much whey as the cheese. As much as I love cheese, I absolutely love having an abundance of whey. (I have also made this bread with whey leftover from homemade yogurt, too!)
In most cases, I will use it to soak grains (rice, beans, lentils) but every so often I’ll use to rinse my hair in the shower (it’s not disgusting, I promise!), and even feed my garden plants. But this time I had so much whey that I couldn’t bear to toss it. I figured maybe, just maybe, I could use it to make a delicious loaf of ciabatta bread for dinner.
The yeast in the bread were tickled pink that they had lots of lactose to eat up from the whey, because the dough grew to a monstrous proportion. If you take the initiative to make this whey ciabatta recipe, make sure that you understand that the whey will produce an above average rise. In fact, the rise will be a ginormous proportion that may overflow your bowl and escape across your kitchen.
Normally I preheat my oven to 170, then turn off, and place my dough to rise in there. But.. this time I didn’t. Last time I did that, the dough grew to a ginormous proportion and my entire oven was a sticky mess.
This time I decided to allow it to rise on my counter top. Here in Phoenix our temps are a little warmer than other areas of the country, so my dough tends to rise a little faster than if I was living up in Minnesota.
I have lost count how many times I have made this bread. But here are few things that help me achieve a successful result.
- Oil the plastic wrap that you cover the dough with (because it will grow to substantial proportions and the greased wrap will make sure it comes away from the dough easier when you are ready to bake the bread).
- Once the dough has risen (after 9 or so hours), don’t knead. Dump it on a lightly floured surface. If you knead it, you will ruin the large air pockets that have been working in the rise. Be as gentle as you can.
It might seem weird to just “dump” the dough on a floured surface and lightly envelope it onto a tray, but it will rise perfectly when you bake it moments later.
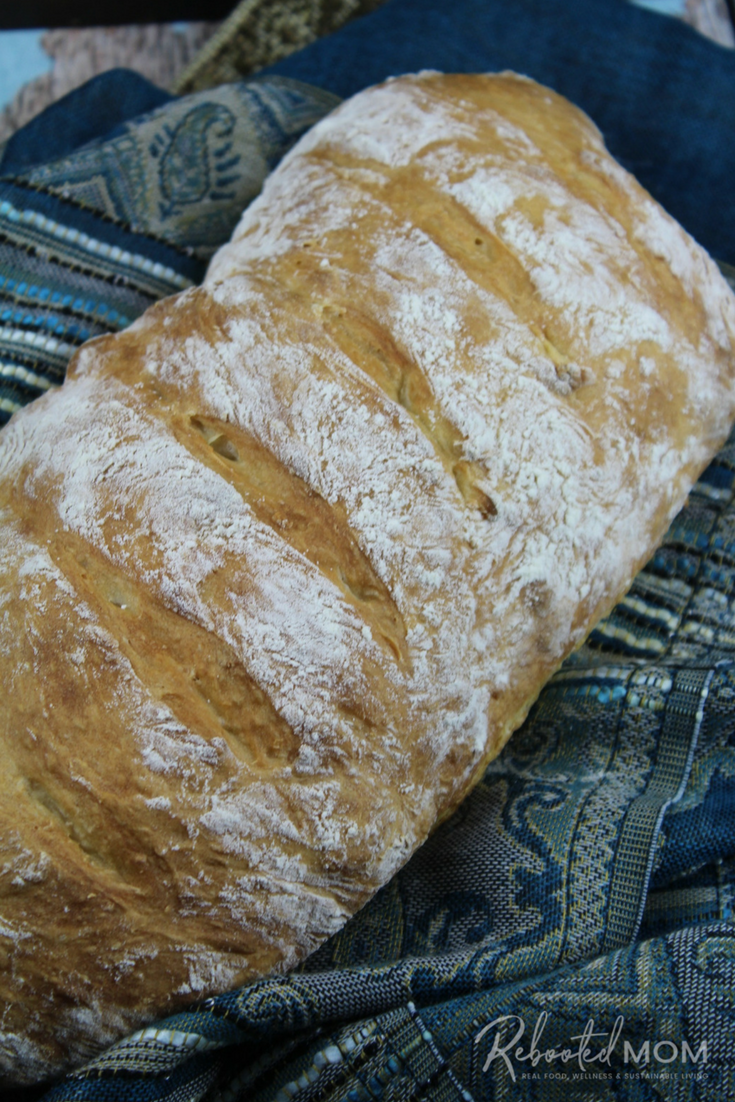
How to Make Whey Ciabatta Bread
To get started, pull out your whey and allow it to come to room temperature. Then, mix all of your ingredients in a very large bowl — the dough will be hard to mix. Knead the dough for 5 minutes. Leave the dough in a lightly greased bowl.
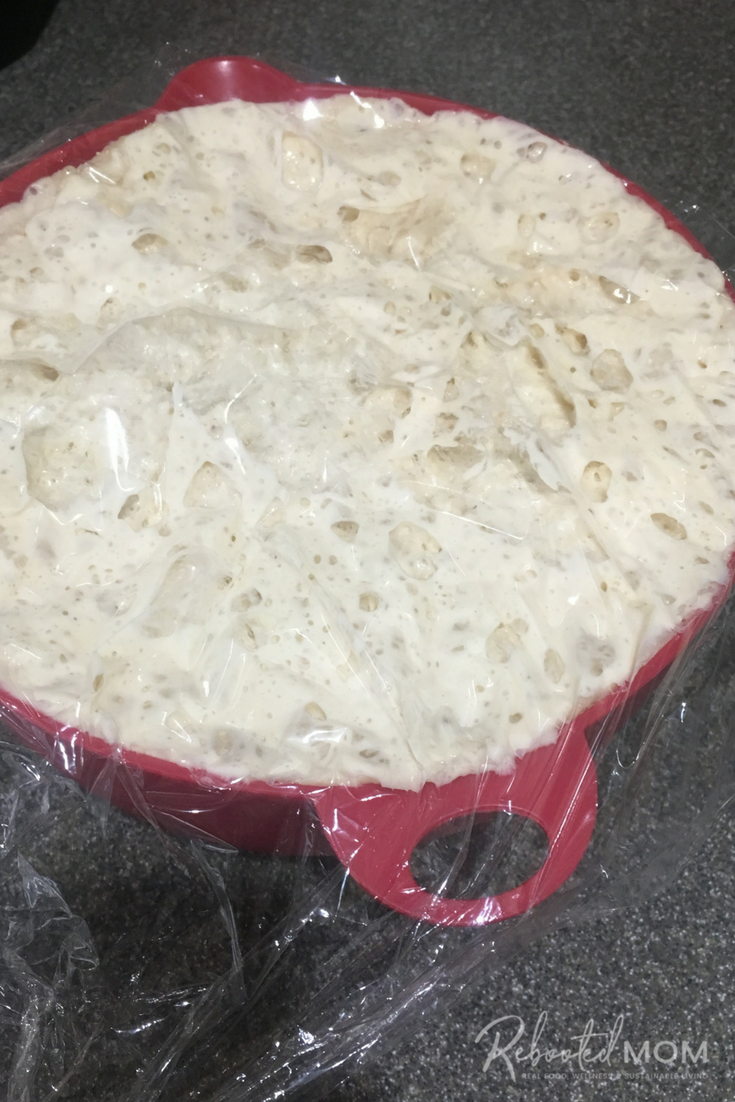
Oil up the underside of some plastic wrap, and then cover the bowl with that plastic wrap and push it to a warm spot in your house/kitchen. Allow that dough to sit, undisturbed, for 8-9 hours or better yet, overnight while you sleep.
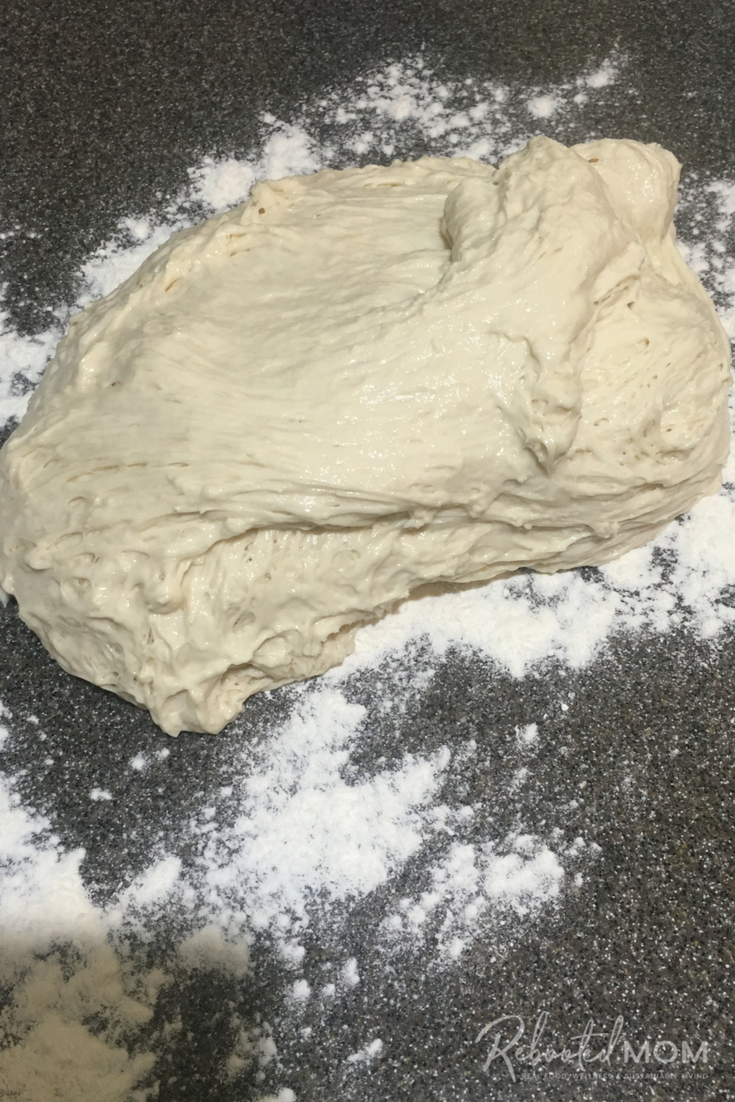
A sloppy mess of wet dough that I dumped on a floured surface
Once that 8-9 hours has passed, the dough will be substantially larger. Dump (literally) it out on a lightly floured surface, and pull into a long oblong shape. Don’t knead it, and be careful not to be too rough with the dough – it’ll be very loose and that’s ok.

Pull into an oblong shape – don’t knead and be gentle with the dough.
Place the dough onto a baking sheet lined with a baking mat, and cut some slices into the dough – either diagonal or horizontal across the length of the dough. You don’t want the slashes too deep, so perhaps about 1/2 inch.
Place the bread in a 375 degree F oven (preheated of course), for 35-40 minutes. The outside will brown and sound hollow when tapped. Remove and allow to cool.
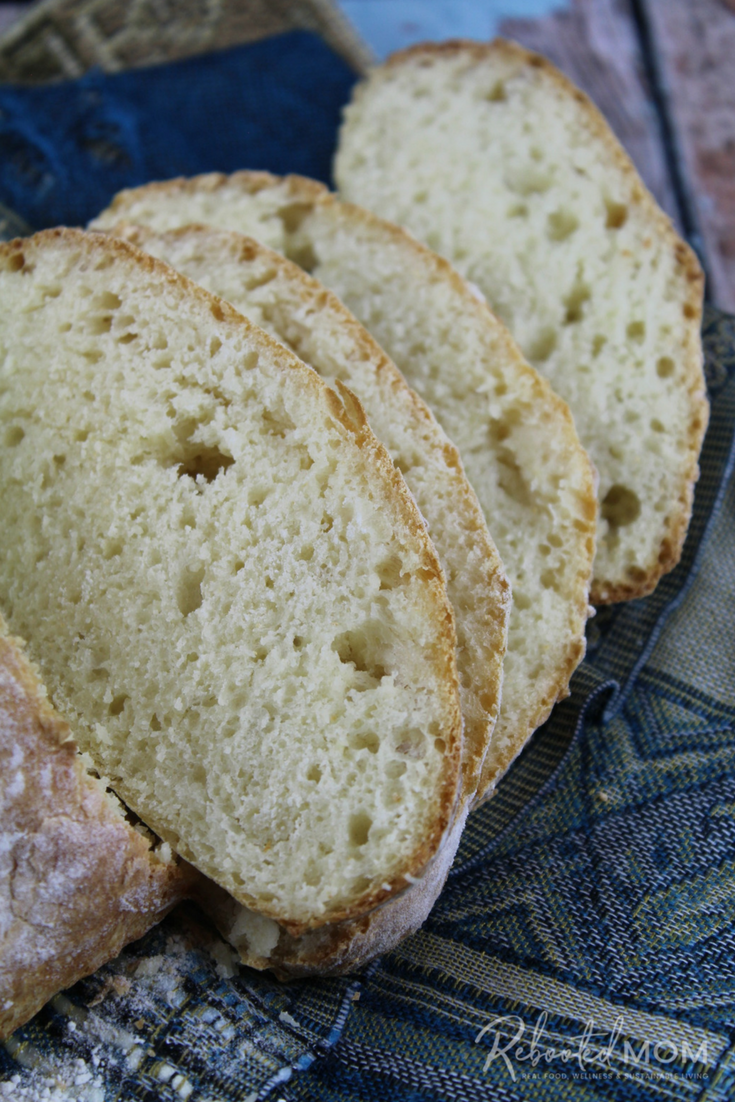
I love love love this bread toasted and especially served with butter! I’ll be honest and tell you that I could finish the entire loaf myself if my kids didn’t stop me. I hope you find it as enjoyable as I do!
Whey Ciabatta Bread
Ingredients
- 2 Tbsp melted butter preferably unsalted
- 1 tsp sea salt
- 3 Tbsp sugar
- 1 tsp active dry yeast
- 2 C. whey
- 5 C. all purpose flour
Instructions
- Mix the ingredients in a large bowl. Dough will be sticky and challenging to mix. Knead for 4-5 minutes and then place in a lightly oiled bowl.
- Cover with plastic wrap that has been lightly oiled (so as not to stick to the rise). Allow to sit, undisturbed, for 8-9 hours in a relatively warm area.
- The dough should at least double if not triple in size. After that 8-9 hours, dump the dough onto a lightly floured work surface. Do not knead the dough and don't be tempted to "punch down" the dough. Be gentle with the dough as you don't want to destroy the air pockets that have worked so hard to develop.
- Once you "dump" it on the floured surface, pull it into an oblong shape - nothing perfect. You do not want to "form" it into a loaf, ciabatta is not a perfect bread.
- Place the rather loose, oblong mess of dough on a baking sheet lined with a silicone liner or lightly greased. Cut a few shallow slashes in the top of the bread.
- Preheat your oven to 375 degrees F, and bake your bread for 35-40 minutes until browned. Bread will sound hollow when tapped.
- Remove and allow to cool.
Nutrition
If you loved this Whey Ciabatta Bread recipe, I would be so appreciative if you it a review and leave a comment to let me know how it turned out!
For more great recipes, follow me on Pinterest, and Facebook!

Thank you for this recipe! This bread was delicious!! Admittedly, I only left it to raise for 2 hours in total, but its become my new favourite bread, family favourite actually! Crusty on the outside, and soft and slightly sweet inside…I’ll make it again and let it raise for the full 8 hours.
Tina, I’m so glad you love it!
I made this bread and am really enjoying it! I let it rise over night, and then dumped it onto a prepared pan in the morning, and barely shaped it! (That was easy!) Mine took around an hour to bake, and I had trouble with the middle getting done. I’m thinking of making two loaves next time, instead of only one.
Thanks for the recipe!
Brittany, so glad it worked well for you!