


I love having lots of raw milk and am ever-so-grateful for having access to a local, pastured raw milk dairy here in the Phoenix area. But I’ll be the first to tell you that sometimes I get myself in a pickle with a ton of extra milk. Though we drink about 7-8 gallons a week, sometimes the farm will have 4-5 extra gallons to give us and it stresses me out to have too much in the house.
In the process of having so much milk, I normally turn to yogurt-making (by way of my Instant Pot) or cheese-making (mozzarella or farmers cheese) – which leads to a lot of leftover whey.
I then turn around & use the whey to make those things that most others would probably buy in the grocery store… Not just sourdough, but whey caramel, and ciabatta bread.
It’s invigorating – to be able to make your own successful recipes, with your own hands, and sometimes, with the help of your kids. I can’t think of a better way to learn, than through real life experiences.
I have been wanting to make english muffins for a while. Let me rephrase that: I have made english muffins for what seems like forever. But I wanted to make our english muffins by soaking our grains. I started months ago, by experimenting with our acid whey… but the result was always somewhat “ok” on the outside, but then gooey middles, even though I did throw them in the oven to finish baking.
I can’t tell you how many bags of flour I blew through and how many frustrated attempts I made only to disappoint the kids – who could smell fresh bread in the oven, but cut through to a less than stellar disappointing copycat.
Nothing is more frustrating than seeing my kids get excited, and then suddenly push the plate away and say “these are awful.” (And believe me, they are pretty honest creatures!)
Using google as my search helper, I found this old The Elliott Homestead and it has been our go-to ever since. My goal was to avoid having to use a sourdough starter and use our raw milk or at least our whey to get the right consistency, and this recipe worked perfectly.
These english muffins are incredibly easy to make – and no sourdough starter is required. Mix up the first set of ingredients, let that dough sit 12-24 hours as the raw milk works on those grains while the bowl is covered with saran wrap.
(Please do not use pasteurized milk to make these – you cannot safely allow pasteurized milk to sit out at room temperature for an extended period of time. If you cannot locate raw milk in your area, use whey from yogurt making and skip the additional acid – whether vinegar or lemon juice).
After that time, add the baking powder, yeast and salt – mix well, and re-cover. Allow to sit a minimum of two hours – if you get busy and allow 6-7, perhaps even 8 hours to go by, that’s ok too (it will still turn out well.)
Why Soak your Grains?
Soaking your grains is nothing short of traditional food preparation – we soak our beans and grains when we prepare, and although it’s not challenging, it does require advance preparation.
That can be a detractor for some, but it’s oh so worth it.
Grains, beans and legumes contain phytic acid – an anti-nutrient which binds up minerals preventing your body from fully absorbing them. Although it’s not required for anyone to soak their grains, it’s a wise choice if you would like to maximize the nutrient value of your food.
Soaked Grain English Muffins (No Sourdough Starter Required)
- 3 C. organic, unbleached all purpose flour (or whole wheat)
- 1 3/4 C. raw milk (can also use acid whey from yogurt-making)
- 2 Tbsp vinegar or lemon juice
- 2 Tbsp organic cane sugar
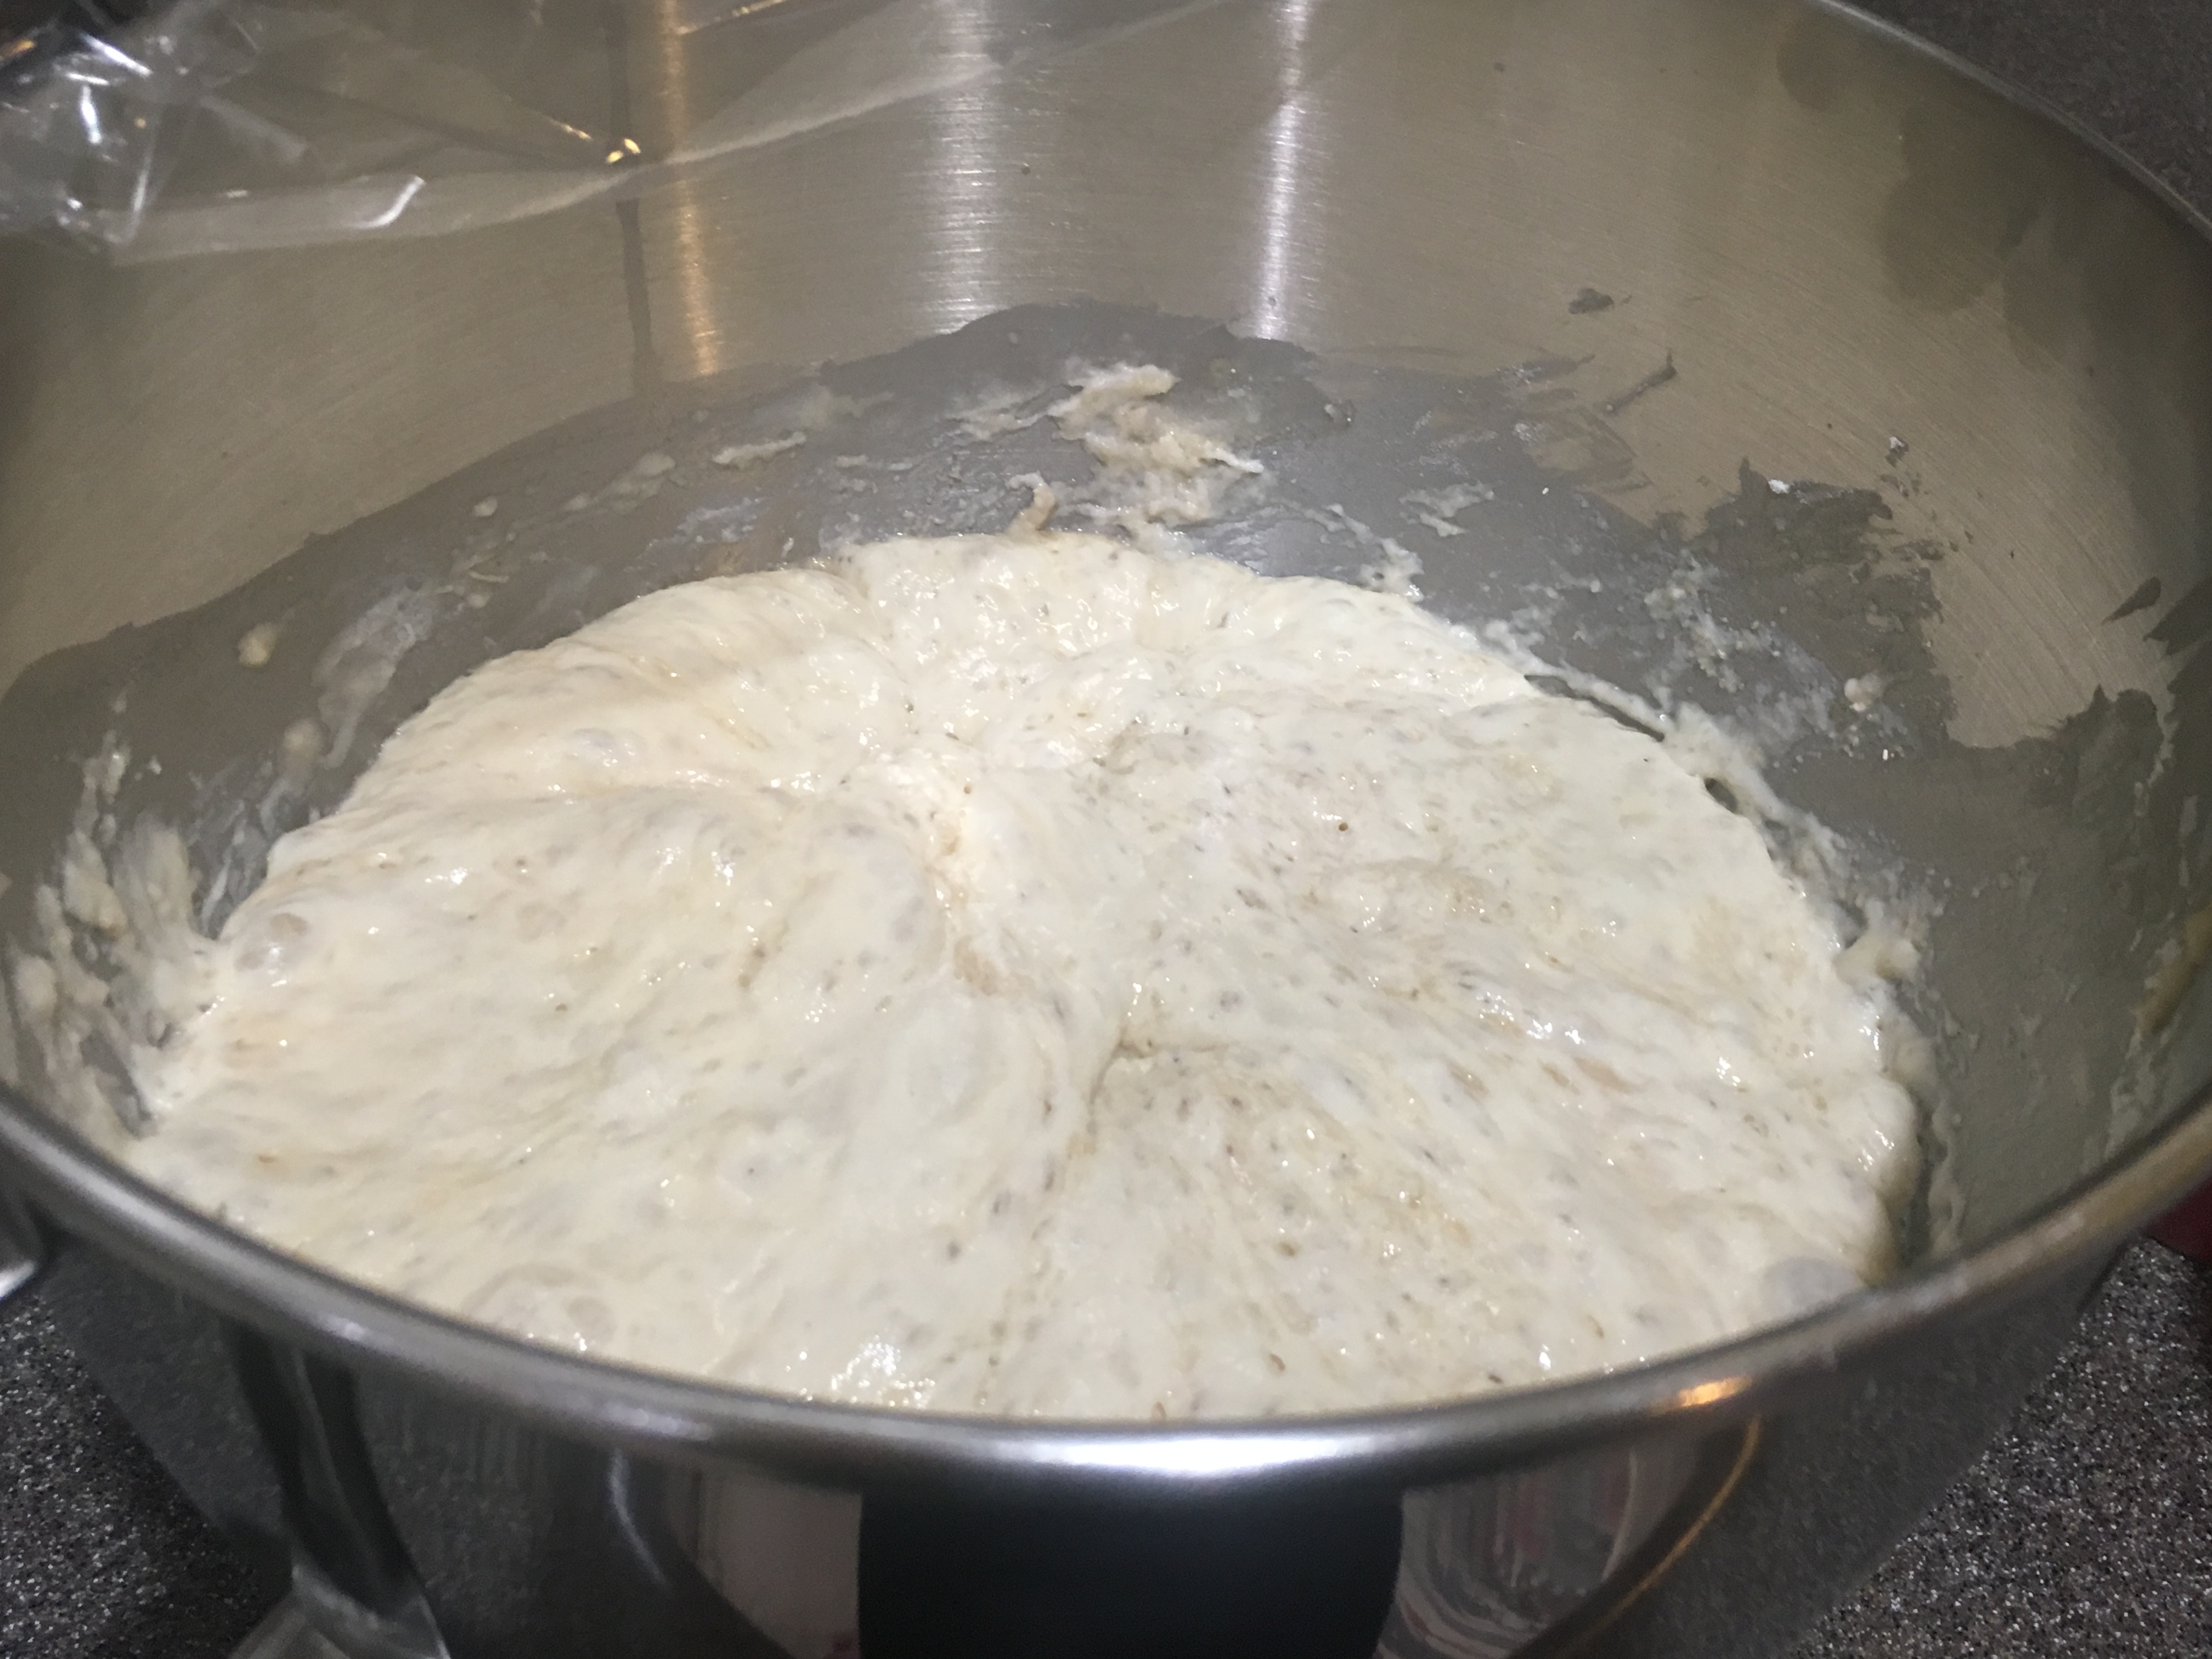
Combine those three ingredients and mix well until you have a sticky dough. Cover the mixer bowl with plastic wrap. Allow to sit for 12-24 hours. The dough will get very loose, bubbly on top and be almost like a thick cake batter.
After that long soak, add to that mixture:
- 2 tsp sea salt
- 2 tsp baking powder (preferably aluminum free)
- 3 tsp active dry yeast
Mix those ingredients in as best as you can. Allow that batter to sit for 2-3 hours – if you get busy and end up letting that dough sit for 6 or 7 hours, don’t worry. It’s ok – I have done that and there is no harm done. The dough just gets more loose over time.
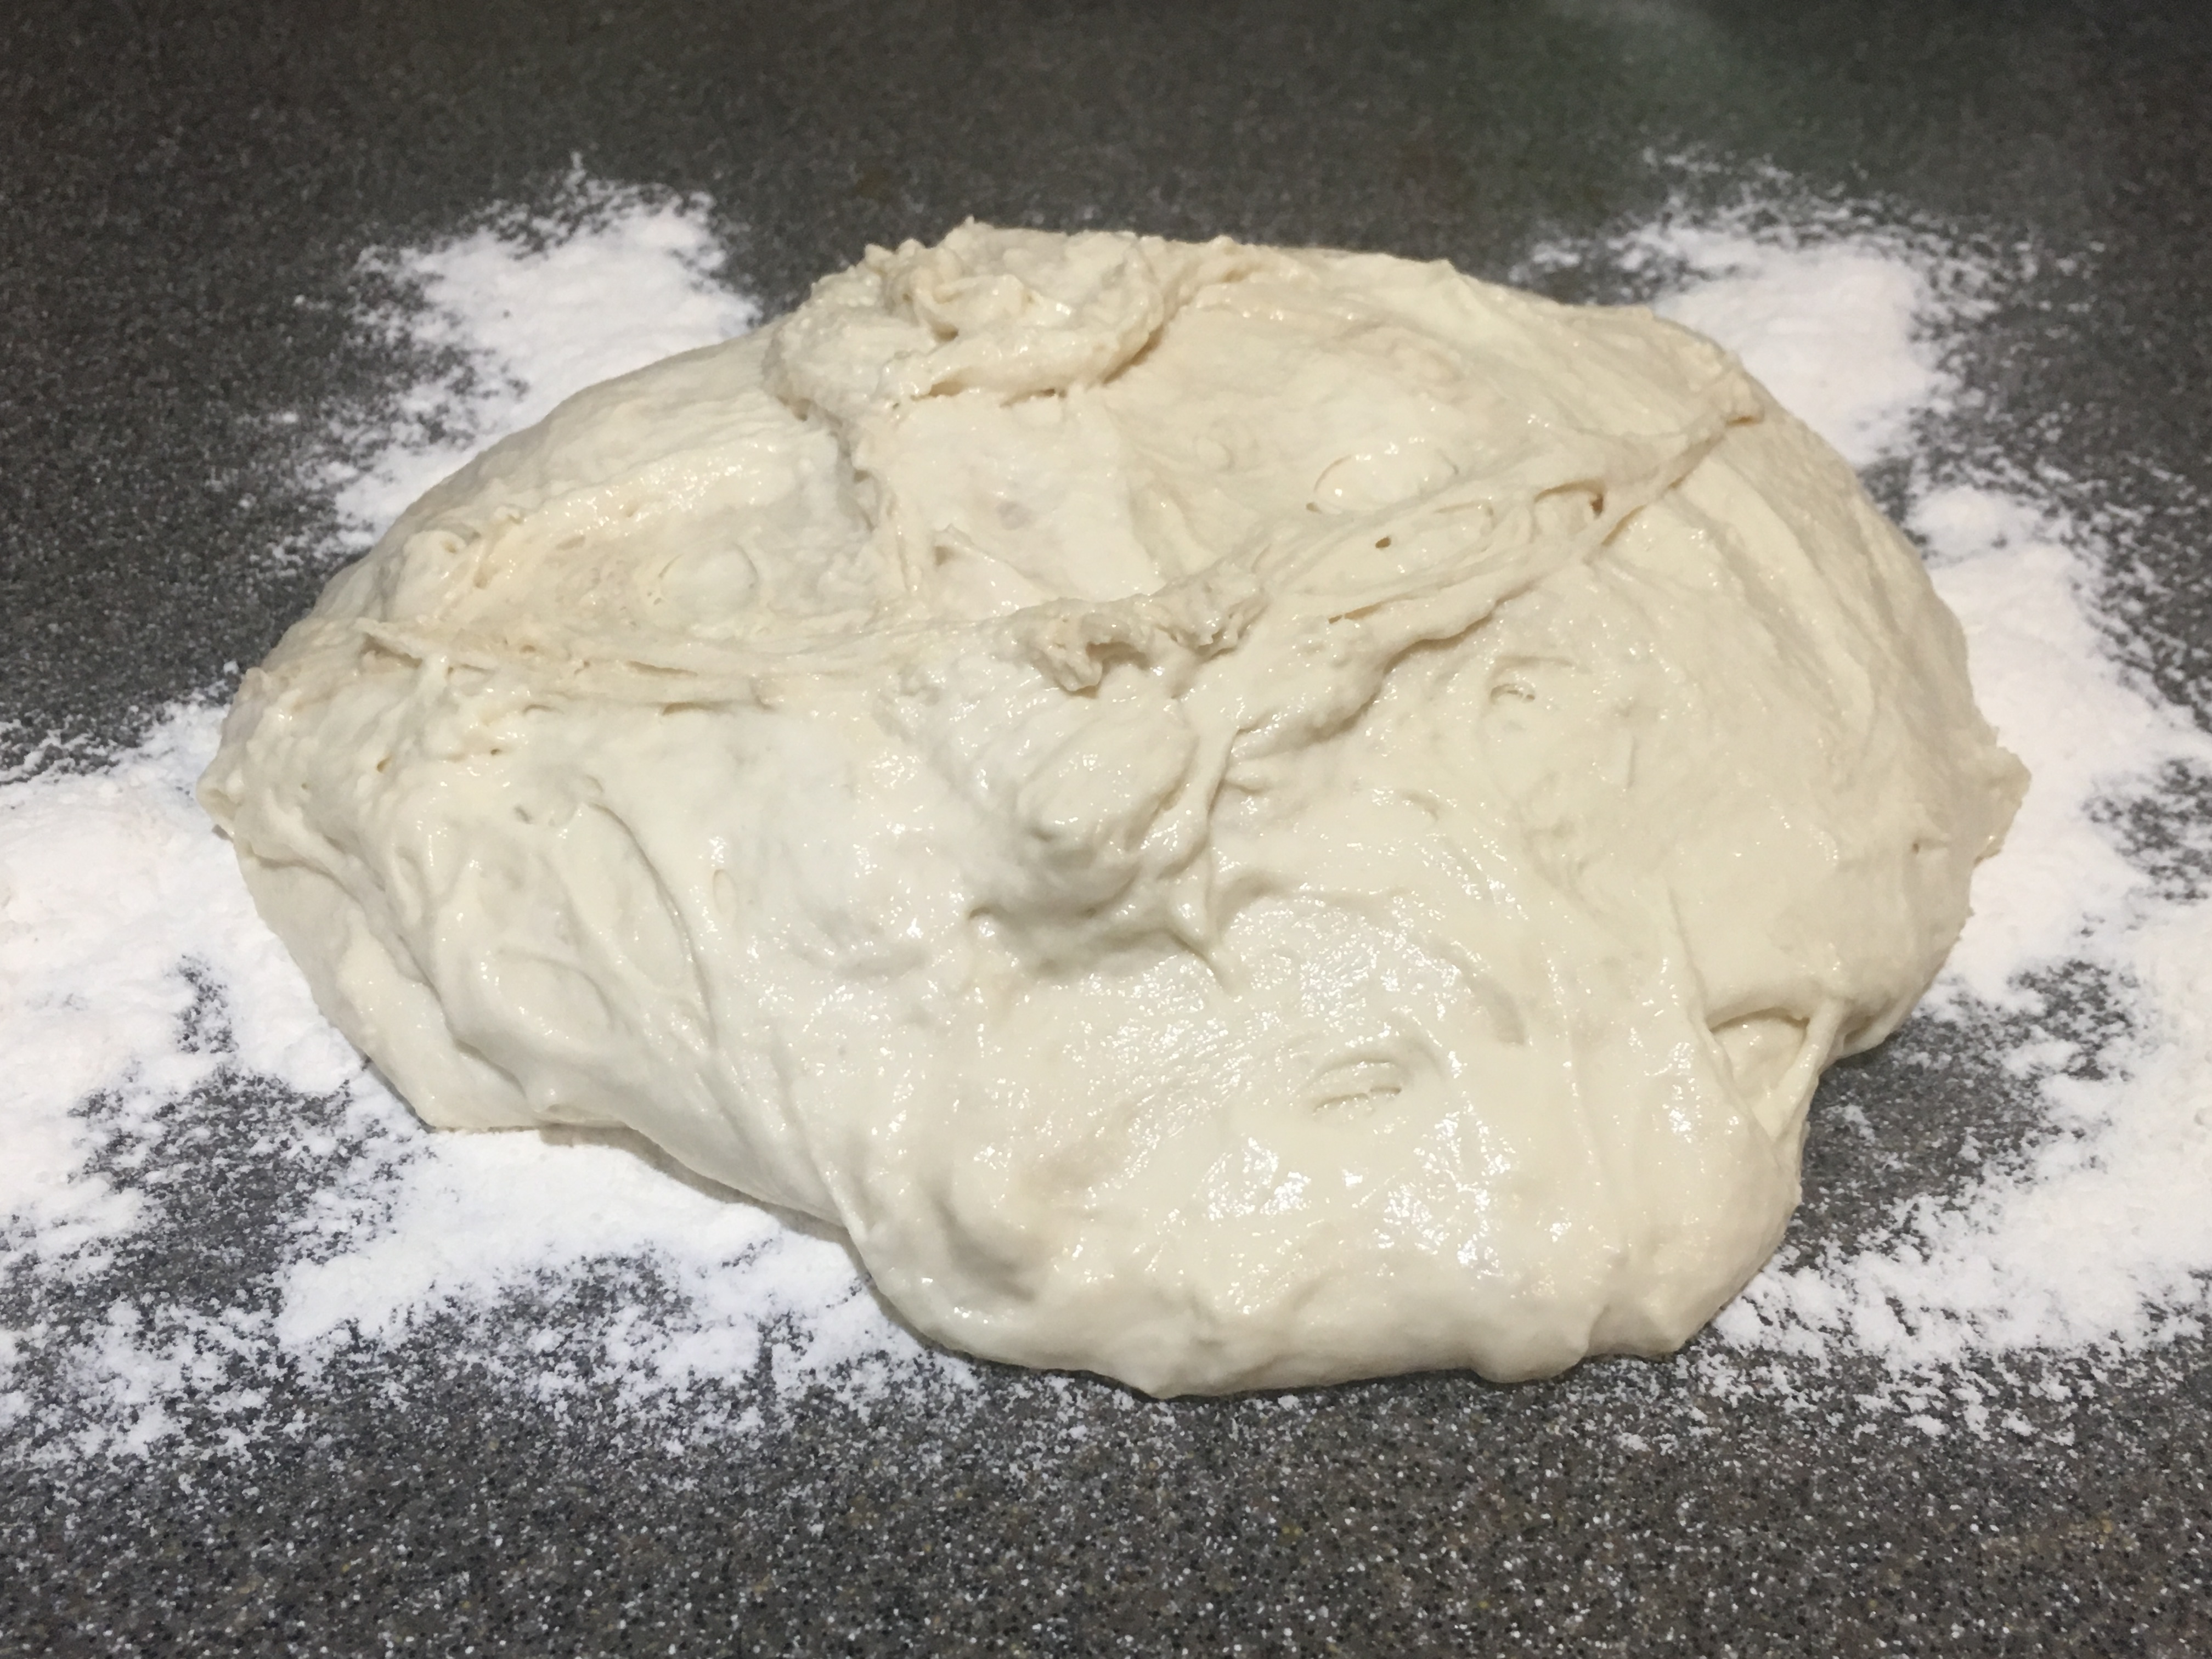
After that second lengthy sit of batter, generously flour your counter top, and turn out the dough. It’ll be messy, sticky and kind of globby – that’s ok.
Fold the dough over a few times to smoothen it out, and then gently flatten it like you would if you were cutting biscuits (I know this is a challenging way to describe it – I’m doing my best here!)
If you flip the dough around a few times and carefully fold the sides in, eventually it will be a pretty glob of dough that you can gently flatten. Just don’t be too rough!
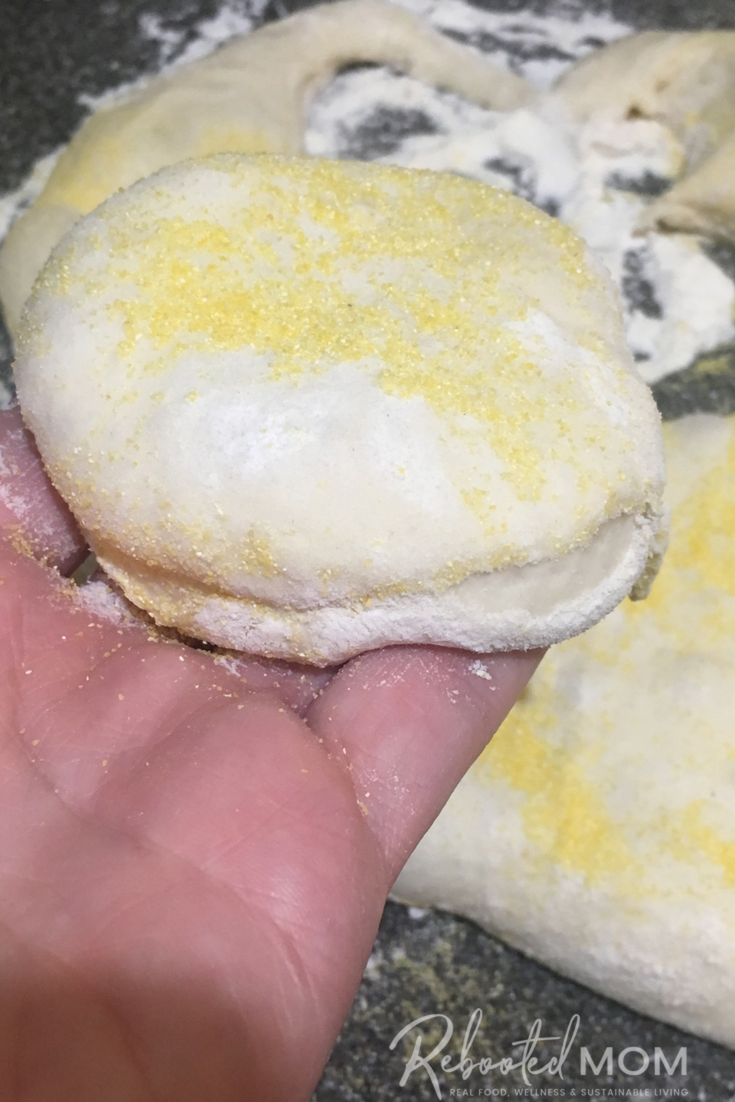
Grab your cornmeal and sprinkle the top of your dough. Use a wide mouth canning jar to cut circular english muffins and then transfer them to a griddle. I use a griddle that stretches across 2 gas burners – and I set my burners between low/medium.

Cook them on each side for 2-3 min, just until lightly browned (you will finish them off in the oven so don’t over-do the stovetop).
Transfer them to a cookie sheet lined with parchment and bake for 10-12 minutes.
You can split these easily with a fork or slice in half with a knife and toast in your toaster, smear with butter or use in your breakfast prep with eggs and breakfast sausage.
I might be biased, but I love these better than what you would find at the store – my kids think the same too!
These soaked grain english muffins are a testament to traditional food preparation. Combine simple ingredients, soaked over time, to produce a wonderful, homemade english muffin that your family will love!
Ingredients
- 3 C. organic, unbleached all purpose flour (or whole wheat)
- 1 3/4 C. raw milk (can also use acid whey from yogurt making and skip the vinegar/lemon juice)
- 2 Tbsp vinegar or lemon juice
- 2 Tbsp organic cane sugar
- 2 tsp sea salt
- 2 tsp baking powder (preferably aluminum free)
- 3 tsp active dry yeast
- 1/4 C. organic cornmeal
- 1/4 C. flour, preferably organic, unbleached all purpose or whole wheat
Instructions
- Combine the first set of ingredients, mix well until combined. Leave the dough in the bowl and saran wrap the top. Allow to sit, at room temperature on your counter, for 12-24 hours, undisturbed.
- After that 12-24 hours, remove the saran wrap, and add the second set of ingredients. Mix well until combined. Re-cover with saran wrap and allow to sit for a minimum of 2 hours (I allow mine to sit for 5-6).
- Generously flour your counter (third ingredient, above) and dump out the dough. It'll be very sticky, and messy. Fold the ends over and try to smoothen it out as best as you can without kneading it. Gently flatten out into a rectangle or as close to.
- Turn on the griddle, and aim for a spot between low and medium heat.
- Sprinkle that doughy mass with cornmeal (third ingredient, above), be generous. Use a wide mouth canning jar to cut circular english muffins. Toss them on the griddle - your goal is to lightly brown on each side (2-3 min per side, max). Lightly brown, flip. Lightly brown, then transfer to a baking sheet.
- Once you throw the last one on the baking sheet, bake at 350 for 10-12 minutes until done. Split with a fork or knife and toast in your toaster to enjoy.
Notes
Do not use pasteurized milk in lieu of raw milk. You cannot safely allow pasteurized milk to sit on the countertop for 24 hours. If raw milk is not available in your area, you may use acid whey, a byproduct from yogurt making. If using acid whey, there is no need to add additional vinegar or lemon juice.


[…] you are looking for an unbelievably wonderful, easy, delicious bread, then this is it. English muffins are wonderful in all of their glory. Take those english muffins and transform them into a loaf of […]