


This tutorial will teach you how to sew a wristlet keychain quickly and easily – this DIY makes a great gift and is a simple way to use fabric scraps!
Last fall I found myself buried in tons and tons of fabric scraps… While overwhelming at times, it was actually such a blessing. It gave me an opportunity to teach my homeschool kids how to sew and create an endless amount of simple sewing projects.
Lots and lots of sewing projects.
We did everything from:
- lavender sachets, to
- zippered pouches
- zipper pouches keychains
- reusable cotton rounds
- simple baby receiving blankets
- large cuddle blankets
- baby blocks
- Even a really cool pillow bed
That pillow bed was a hit for all the kids at the holidays!
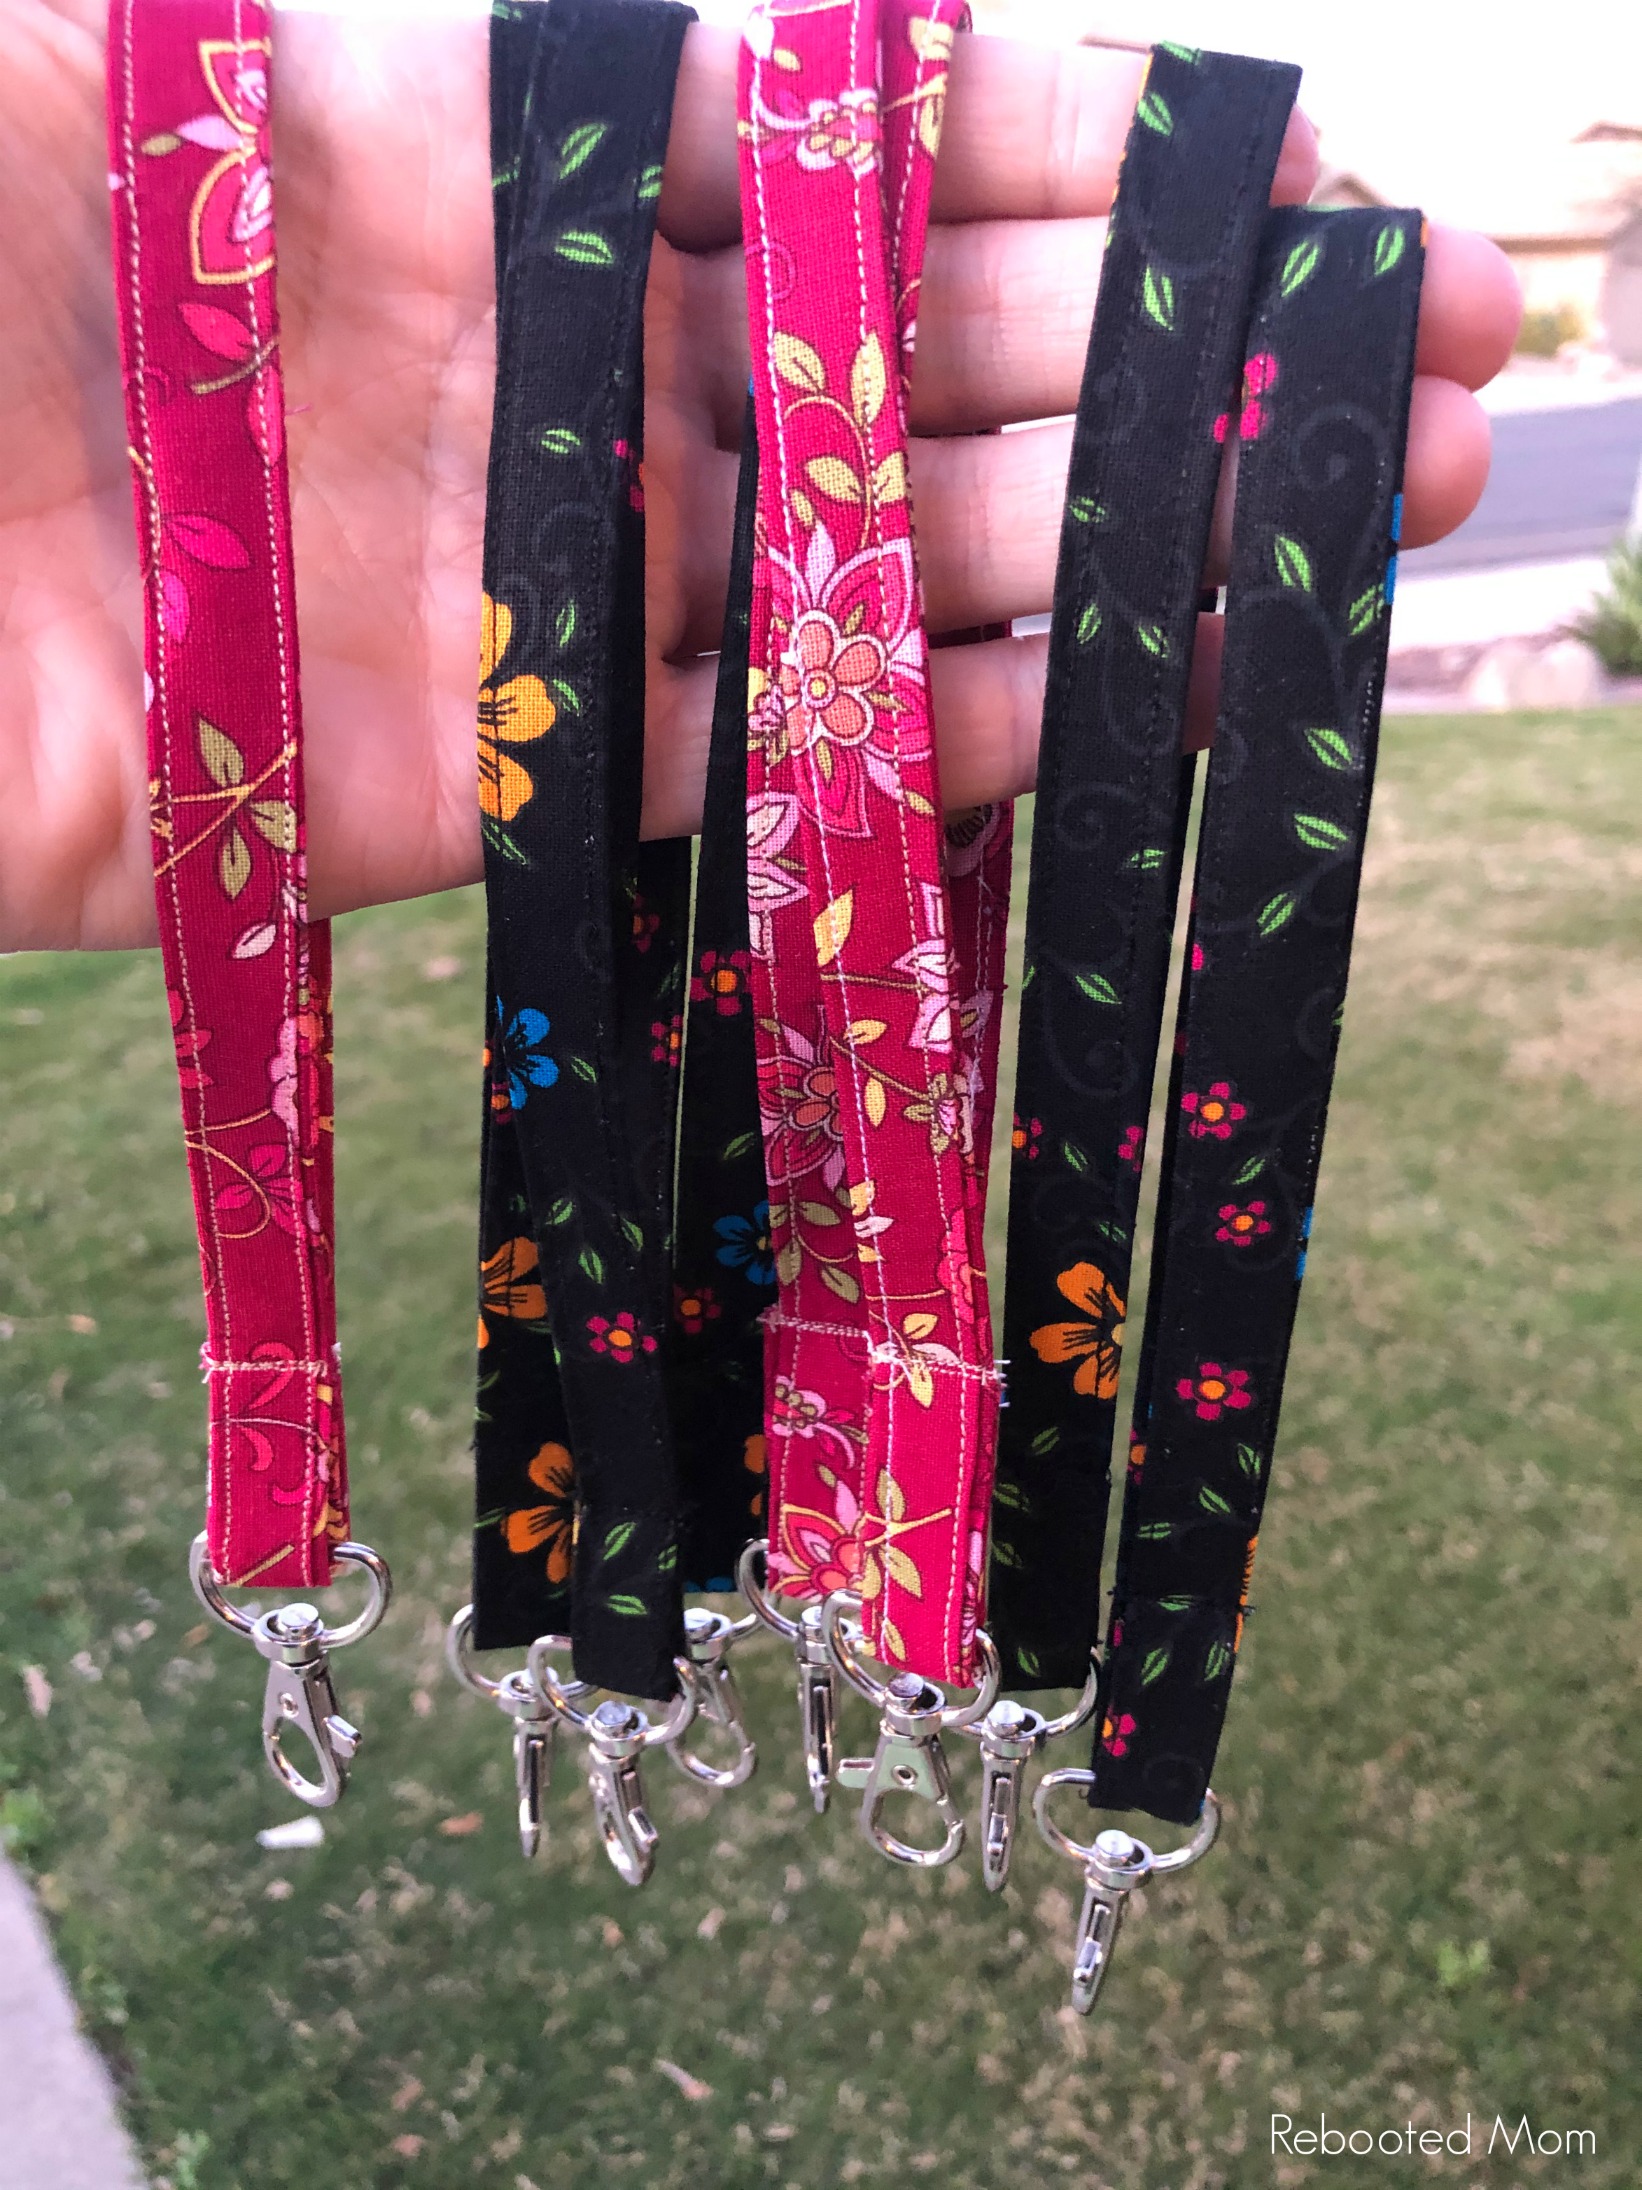
Sewing a wristlet keychain is a wonderful project for any beginner sewer. They make great gifts for family, friends or just because.
Gather up all your fabric scraps and sew a bunch .. pair with a zippered pouch for the ultimate, personalized, handmade gift.
How to Sew a Wristlet Keychain
Materials needed:
- 3 x 18 piece of cotton fabric (scraps work well)
- matching thread
- metal swivel clasps (these are 1 5/8 x 1) – pack of 50 is a great bargain
- sewing machine
Get started by ironing your 3 x 18 strip of fabric in half (right side out) and ironing a crease.
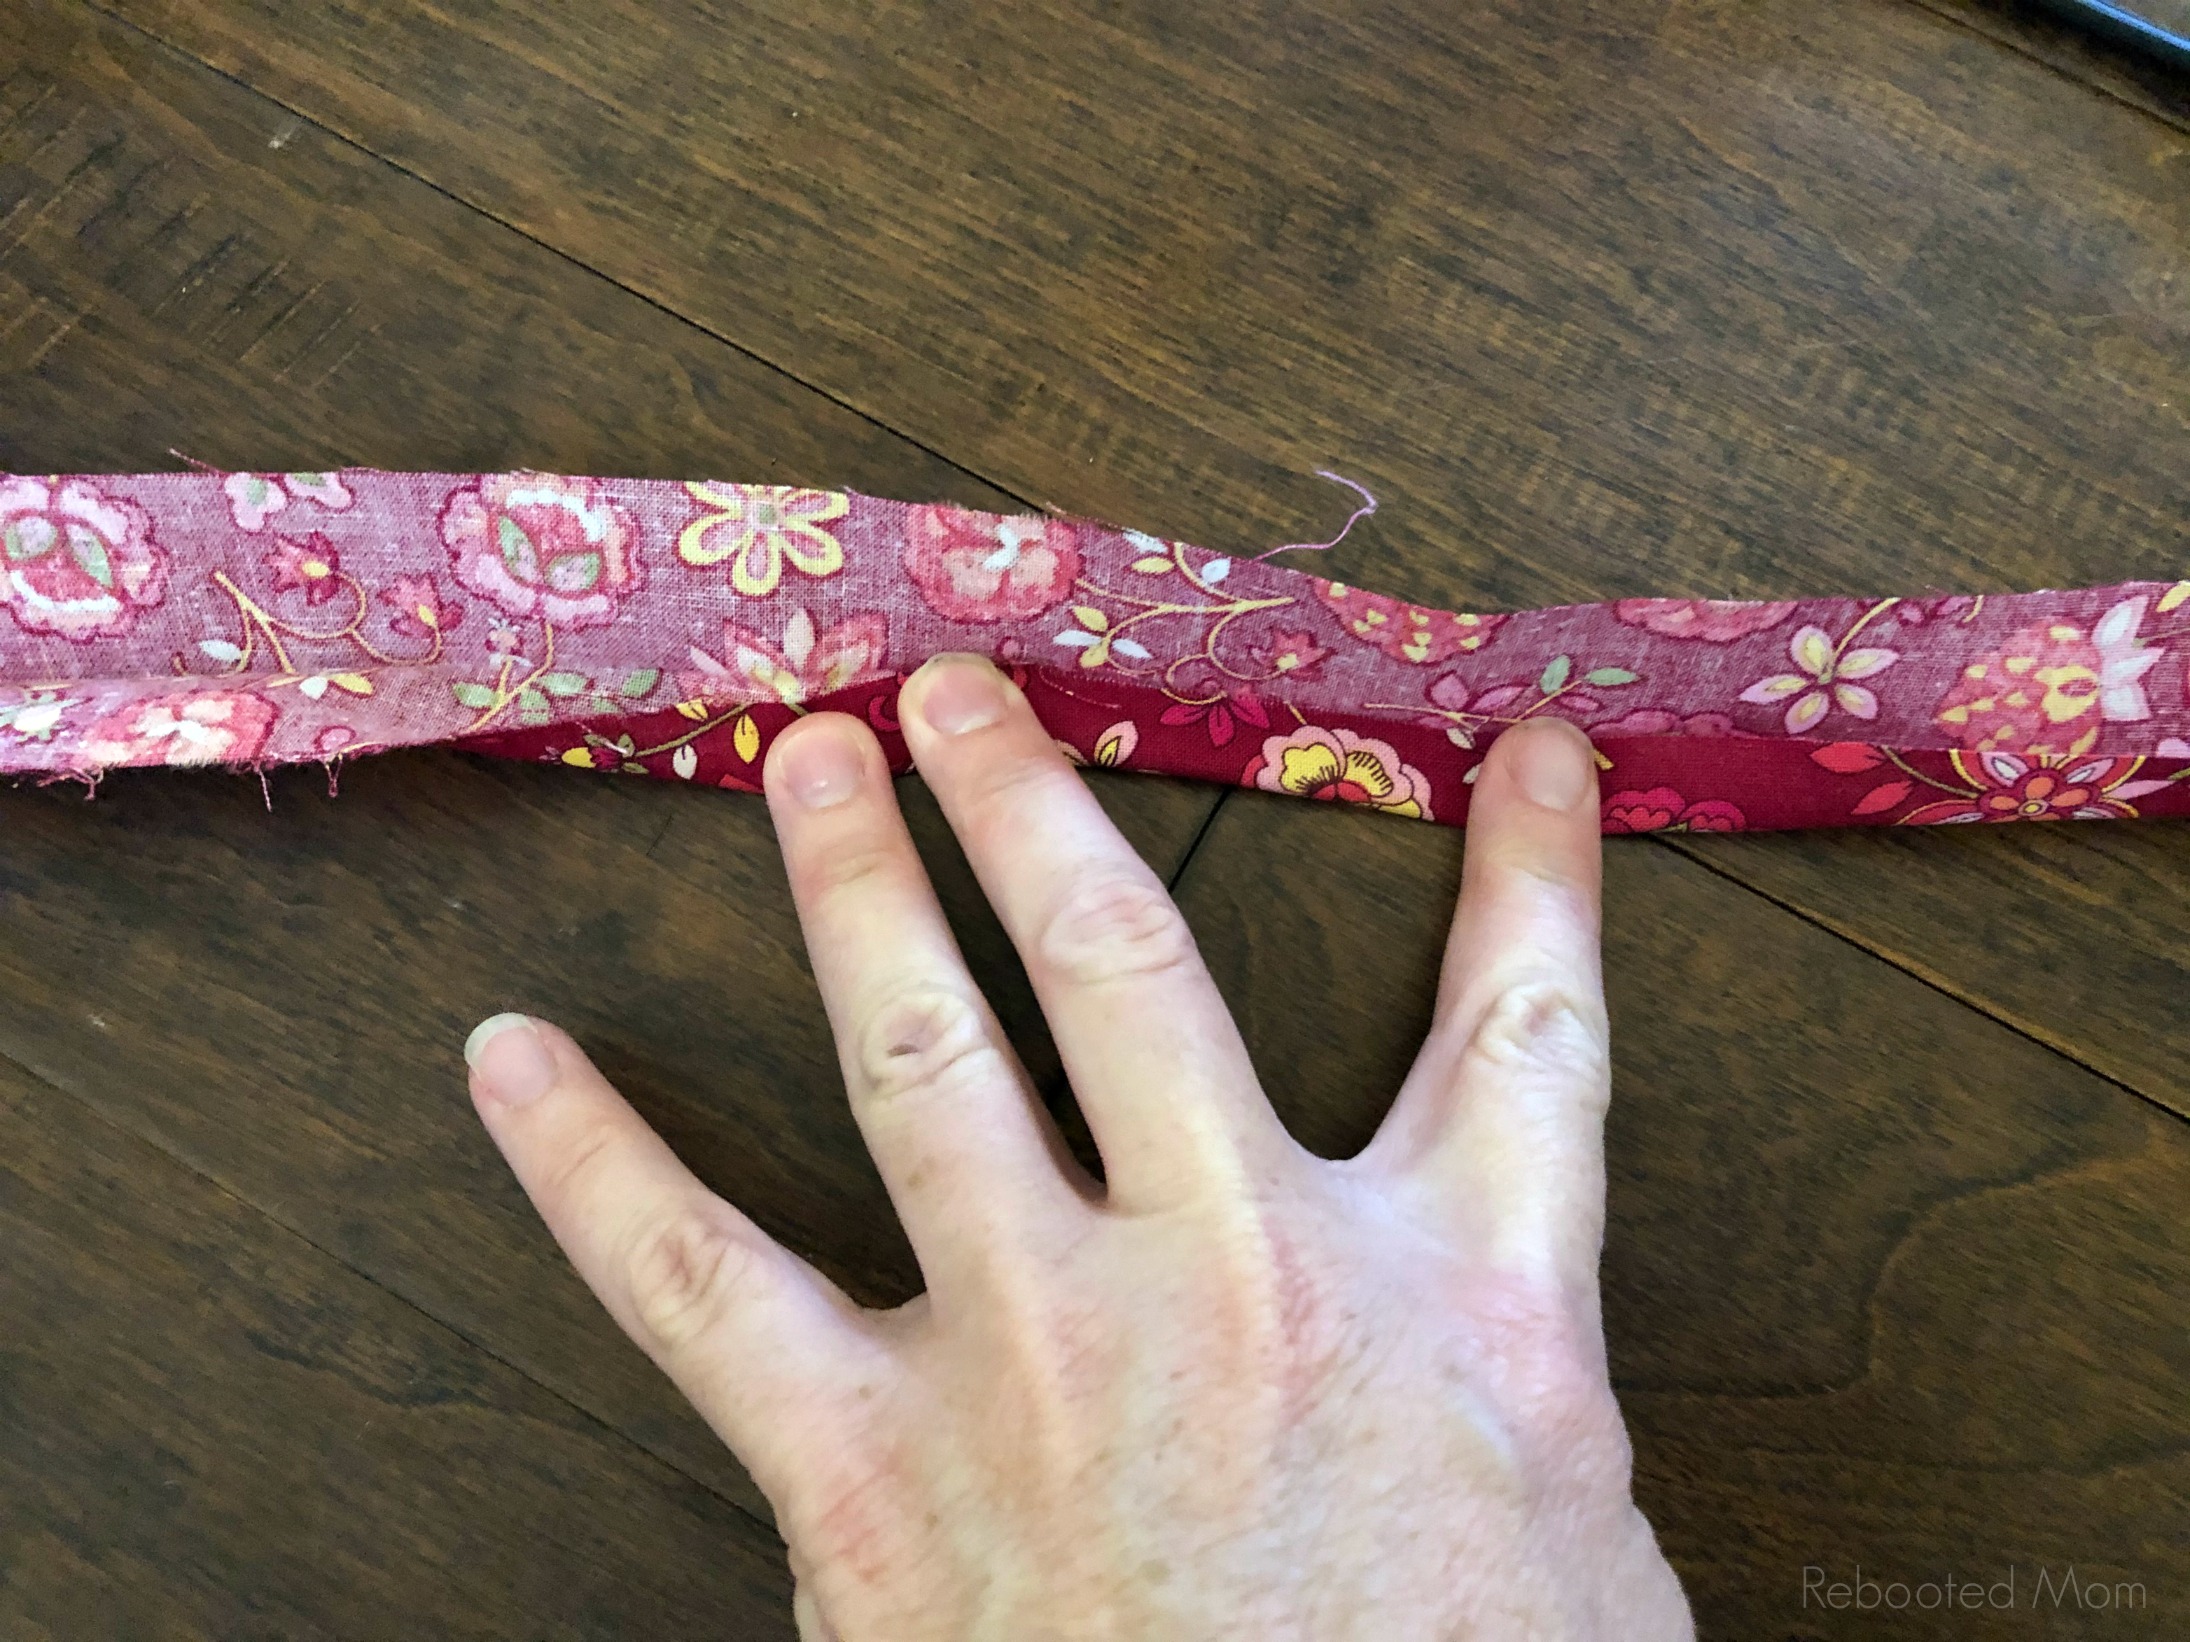
Unfold, and fold each edge into the middle. Iron once again to crease the fabric. Once you have done that, fold the piece as a strip and sew down the length of each side (a single straight stitch is fine, use a 1/8″ inseam).
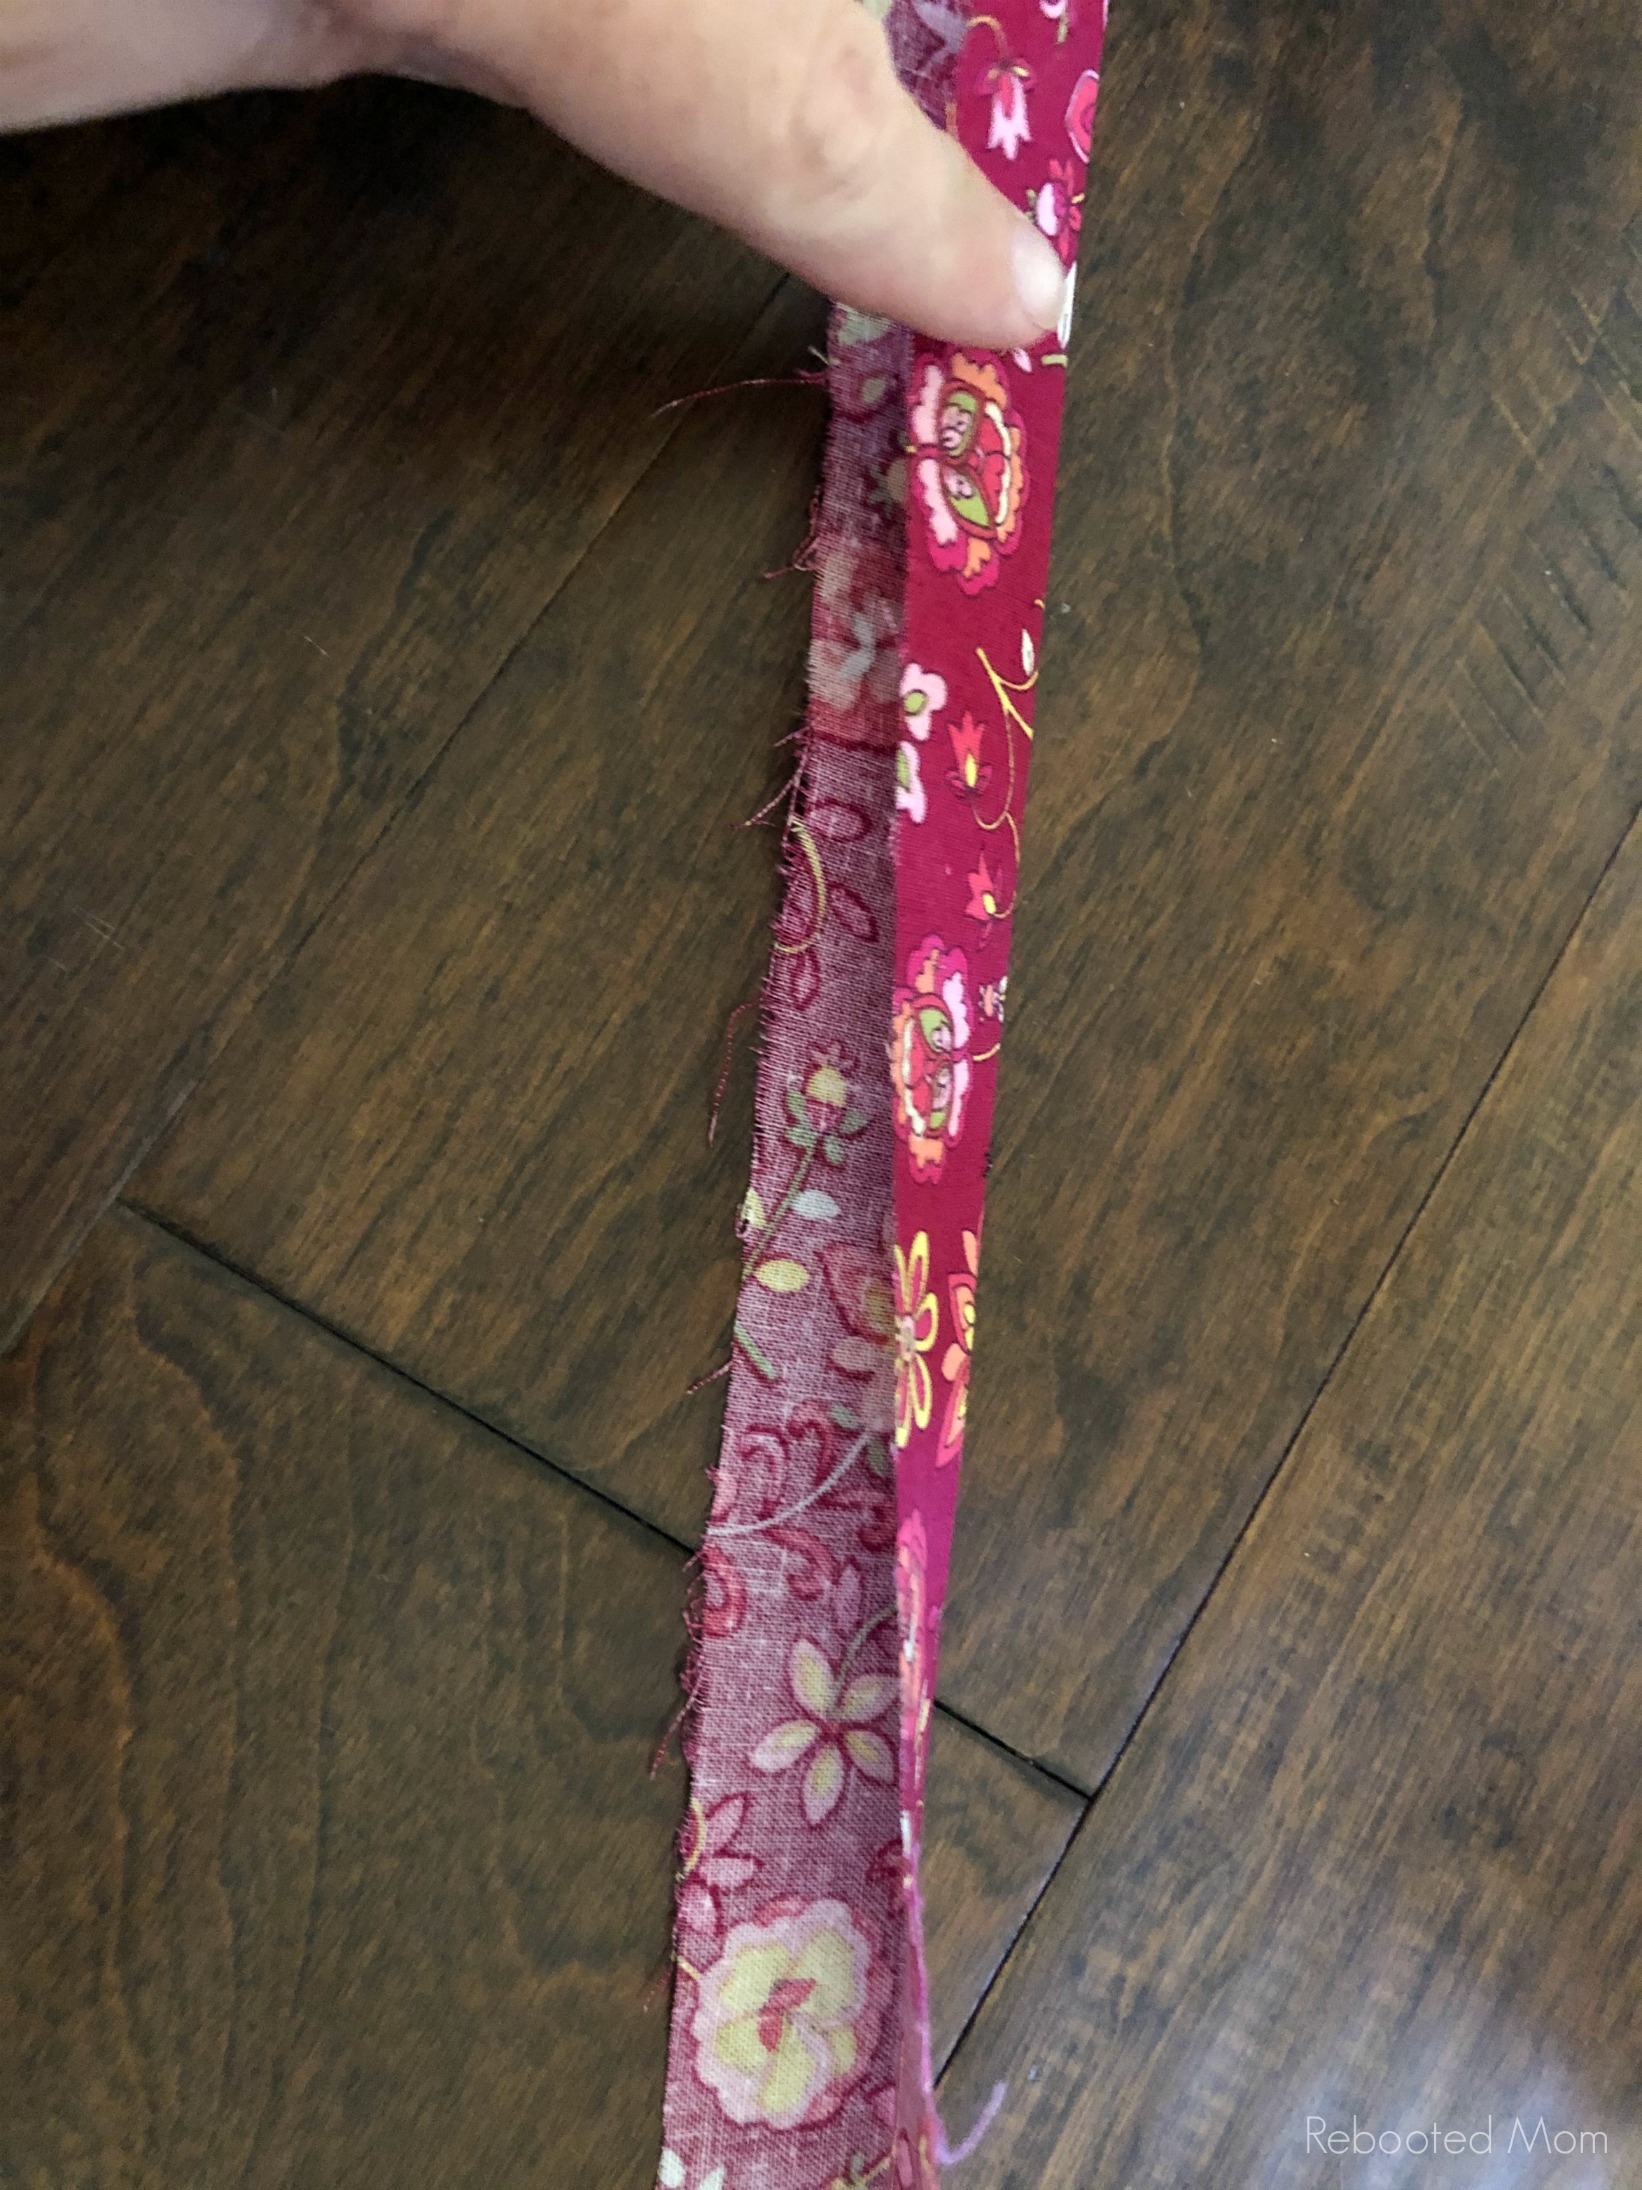
If you don’t have an ironing board, a simple folded towel on the floor works well too.
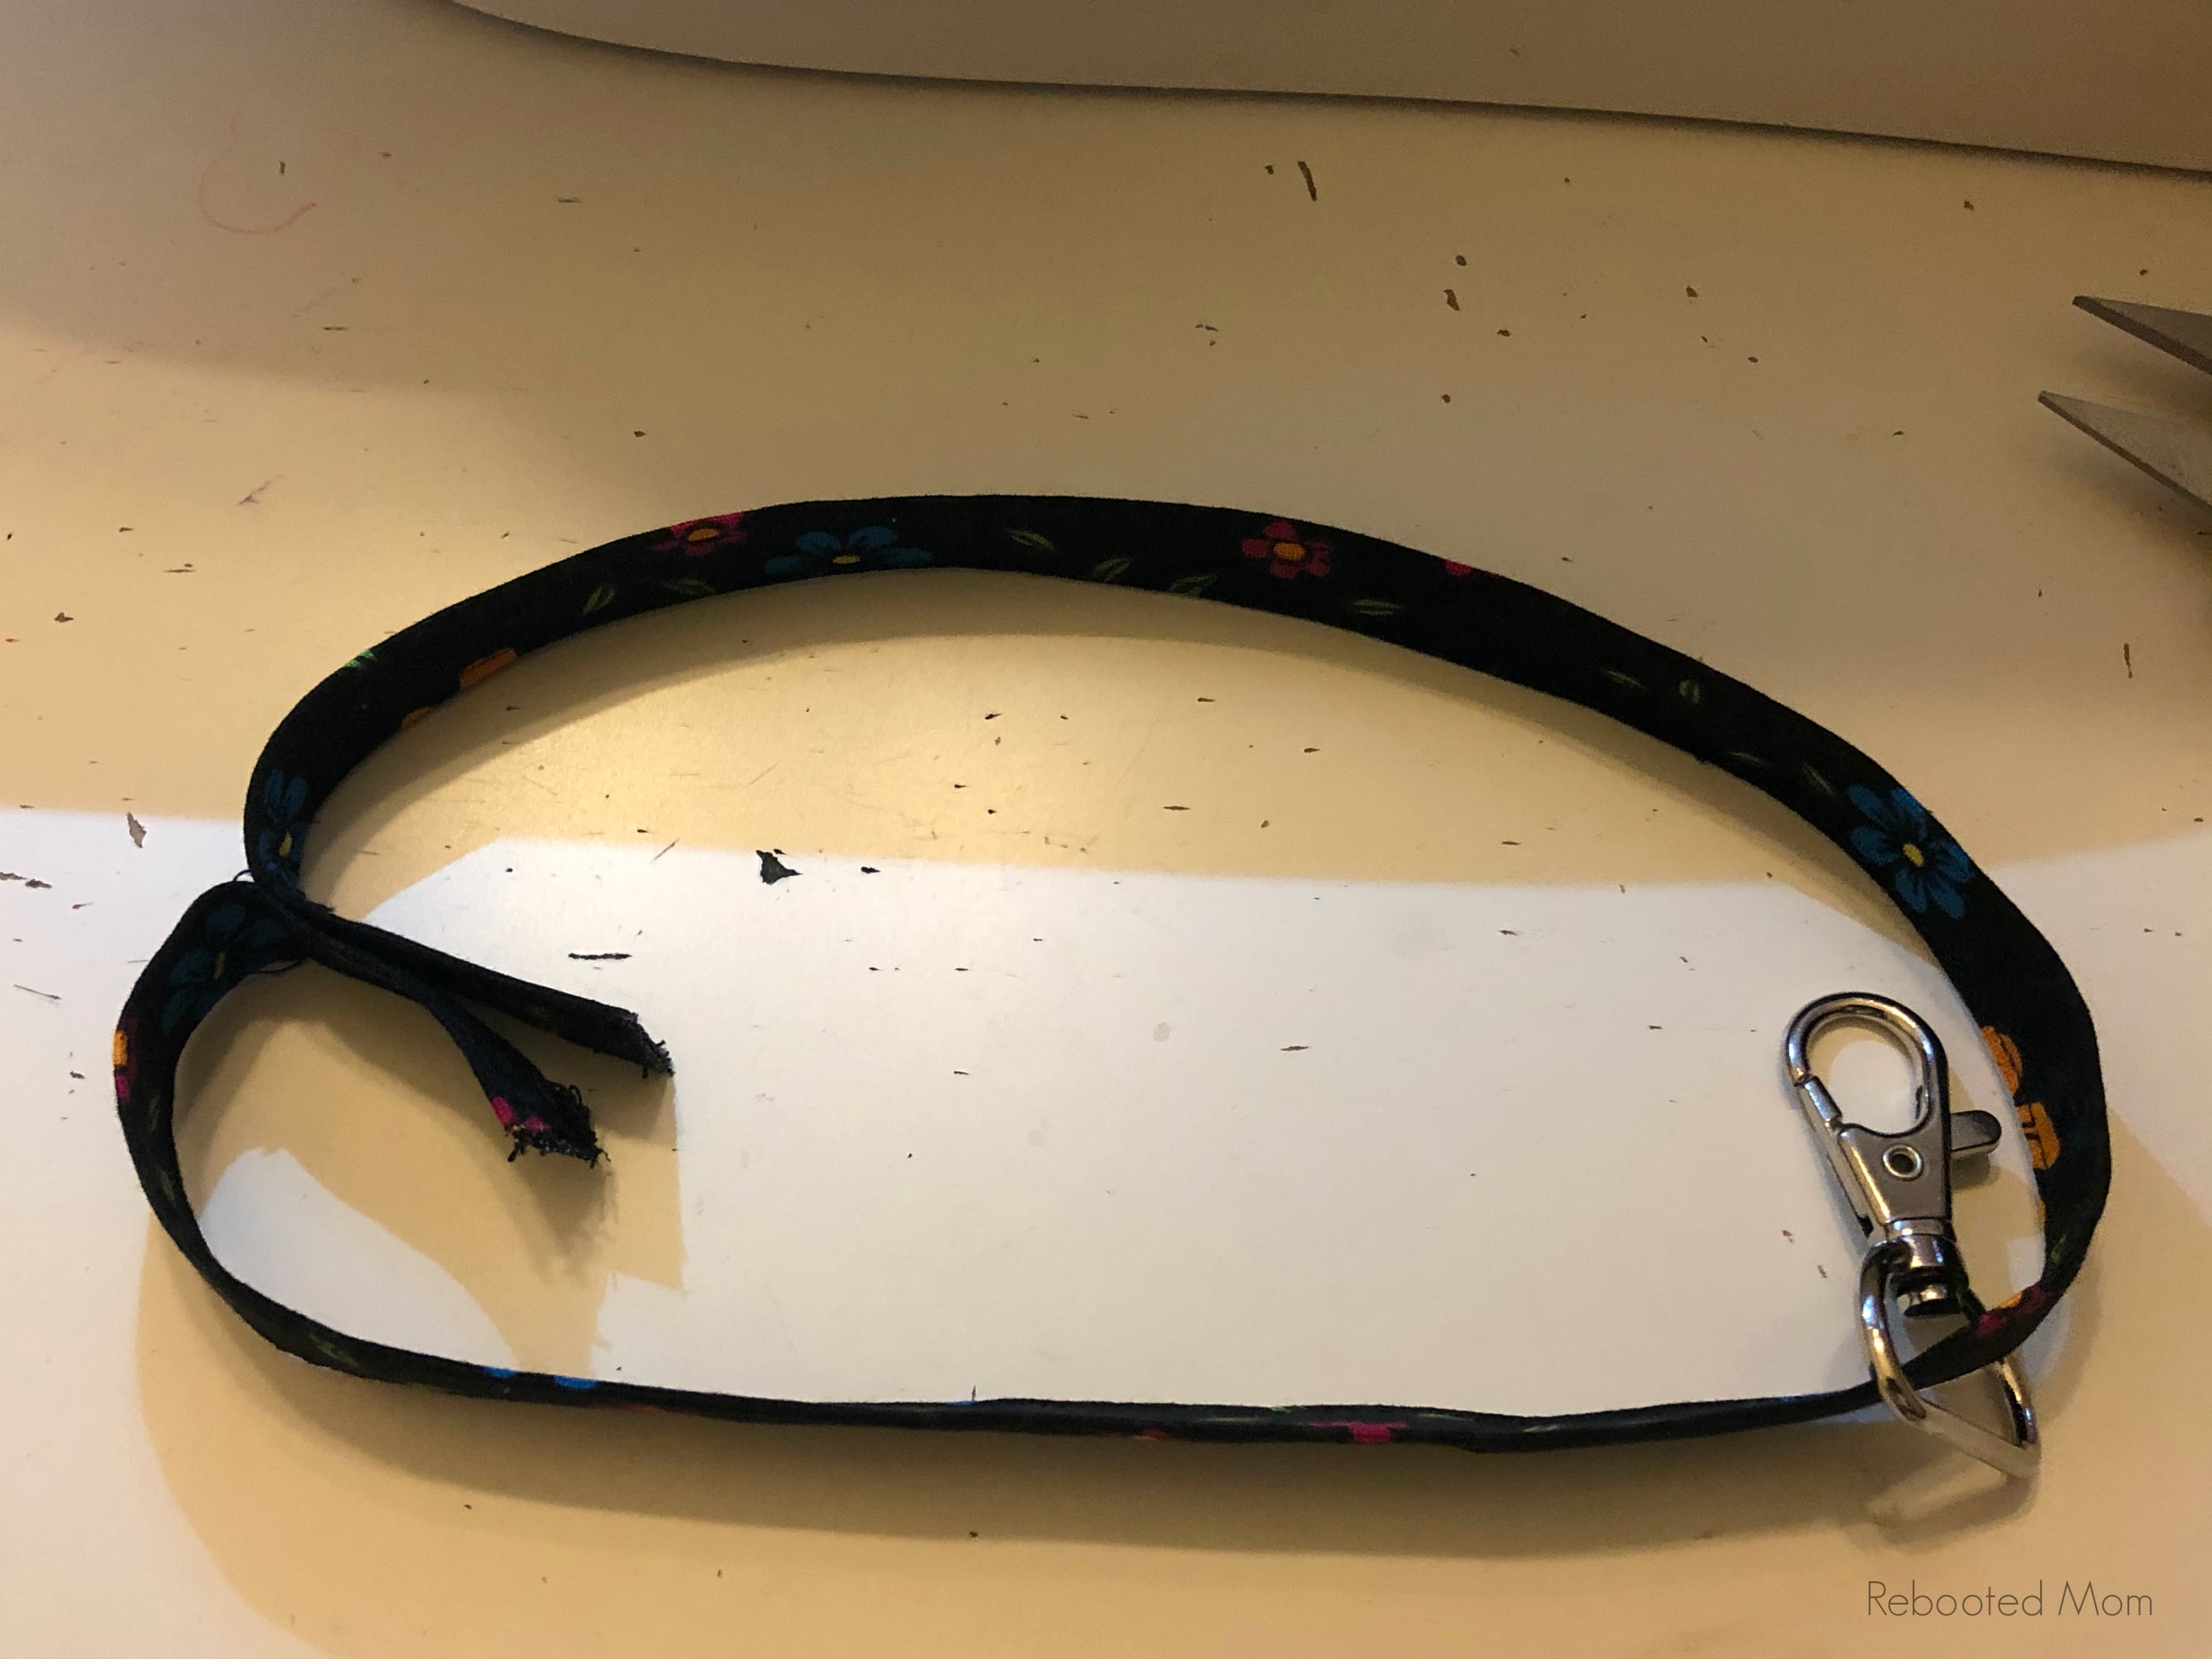
You should now have one long strip of fabric, with a straight stitch down the length of each side. Trim the excess thread from the ends. Thread your metal clasp on the strip and then lay just like this in front of you.
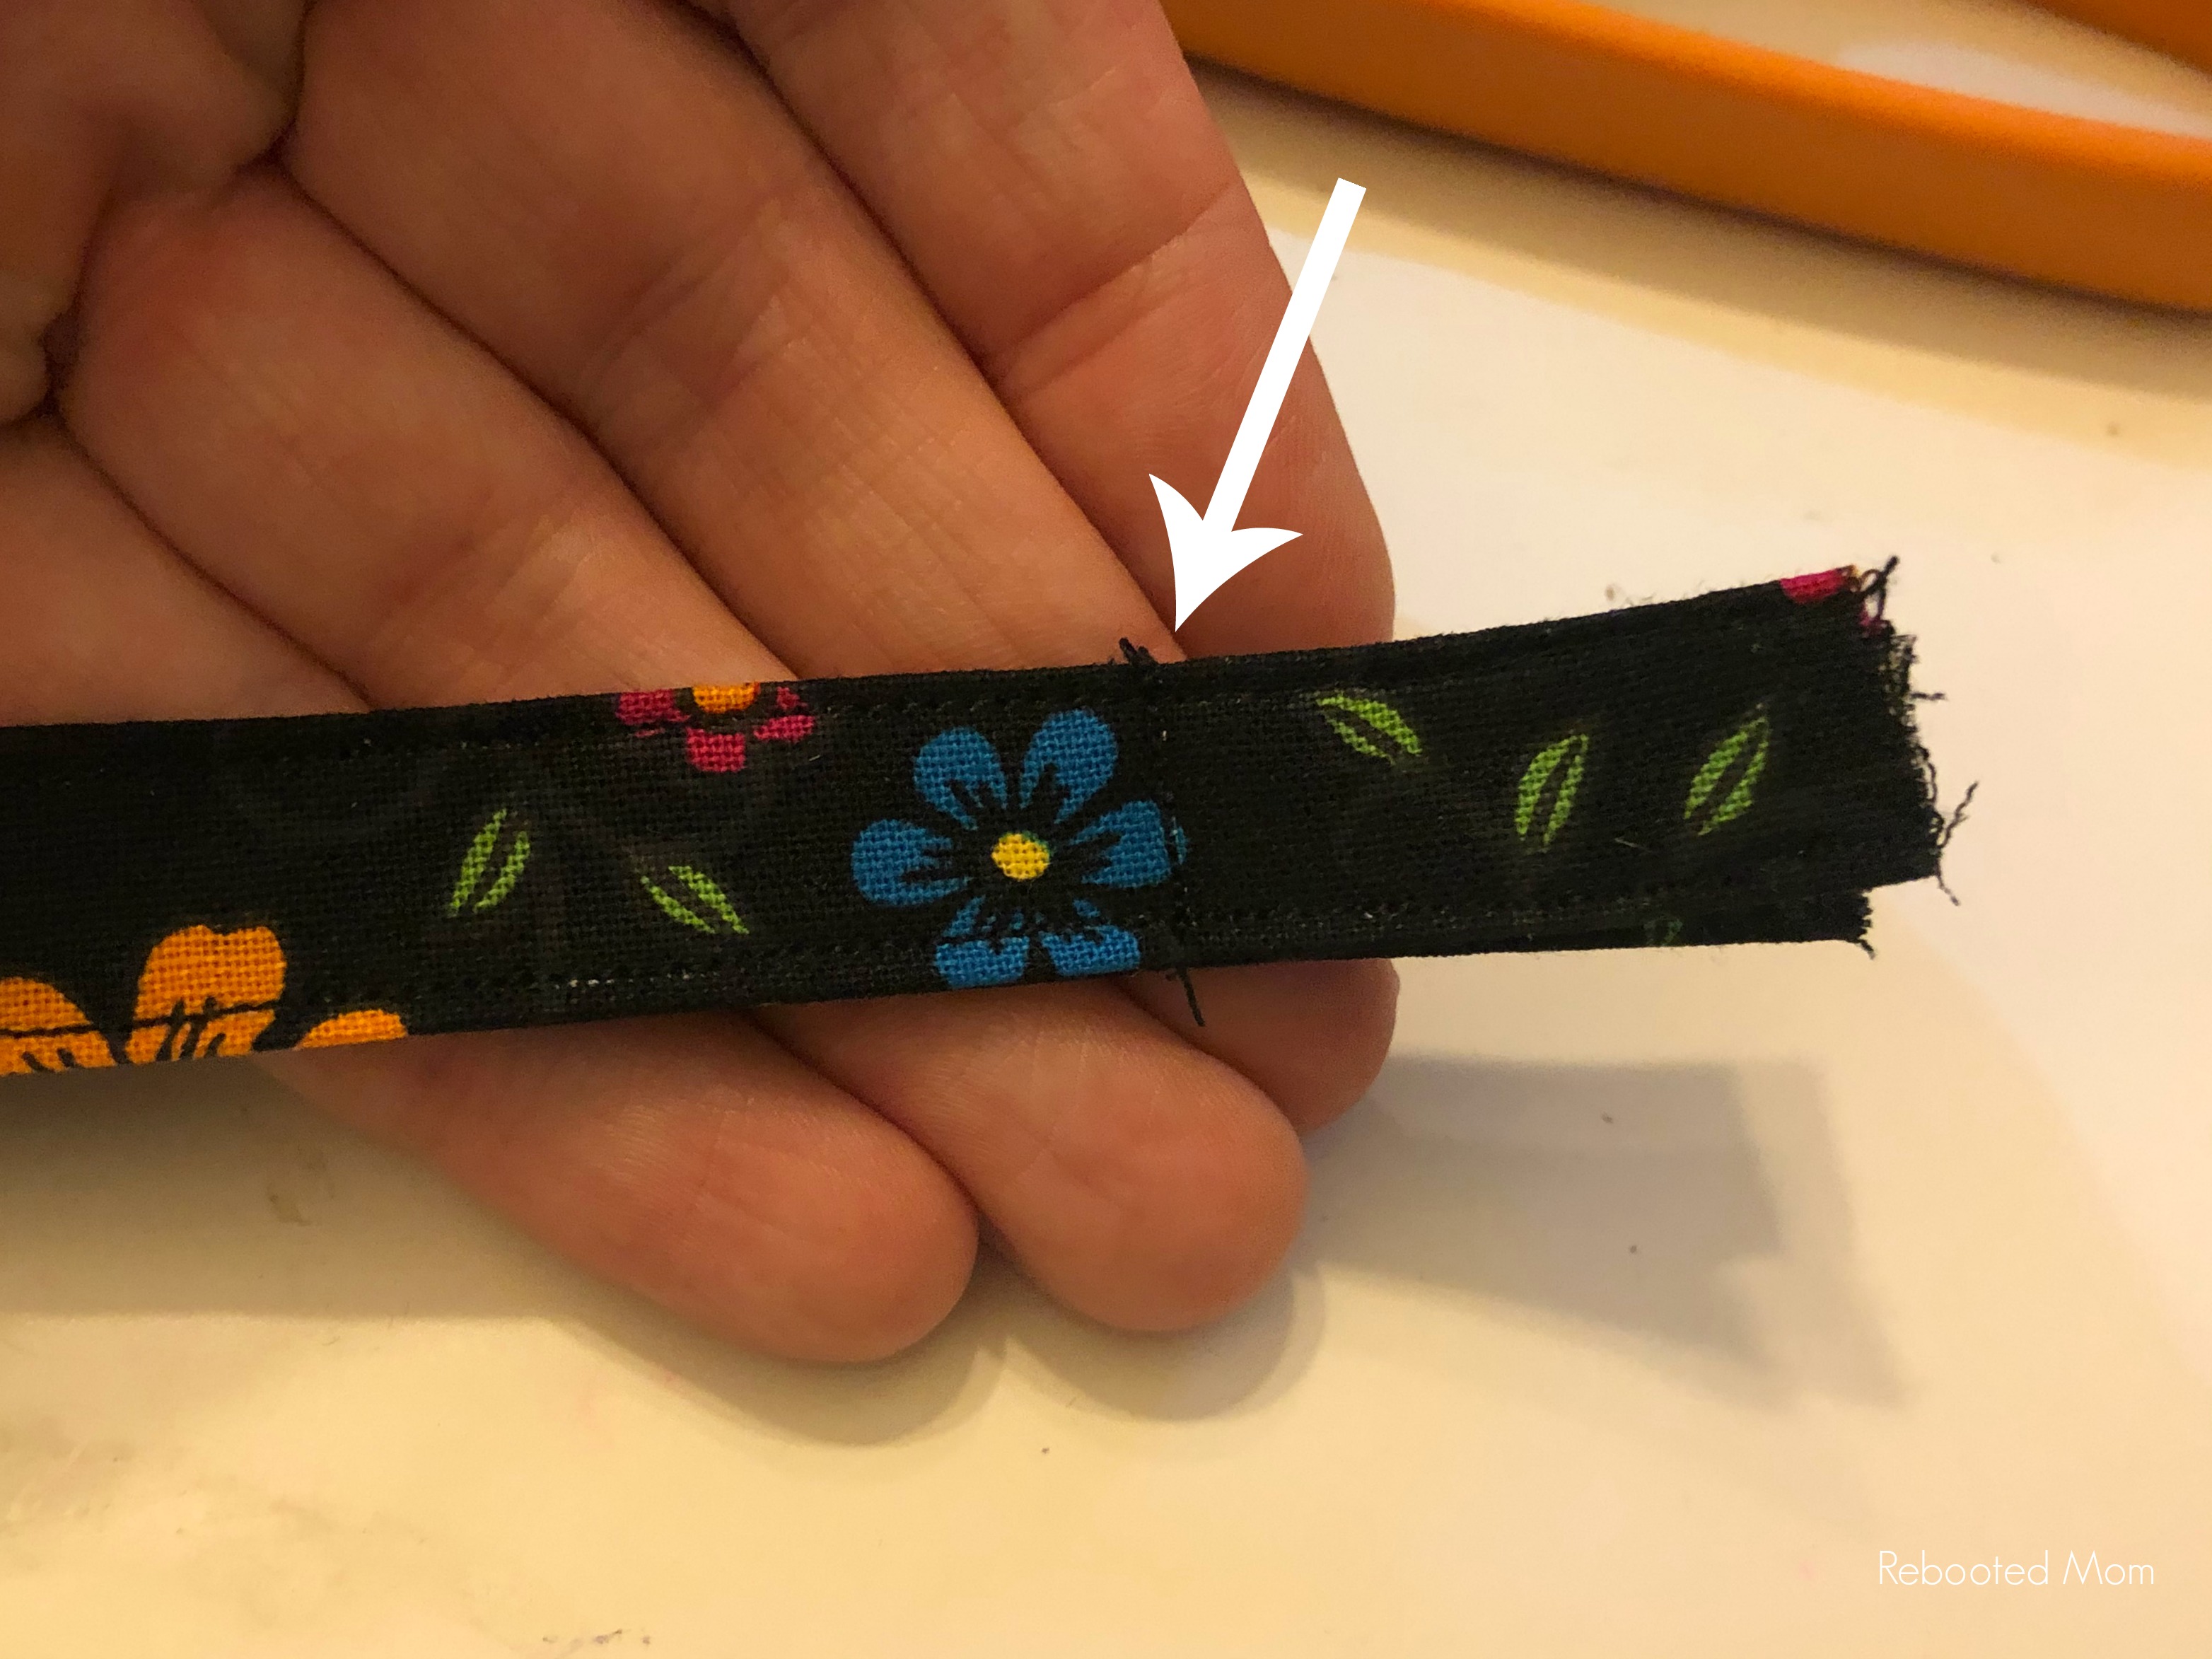
Line up the two ends so that they are even. Sew the pieces together with a straight stitch (sew, reverse, sew again). You’ll want to do this about 2 inches from the end.
Flip your project inside out – the two ends you sewed together should be now on the “inside” of the keychain.

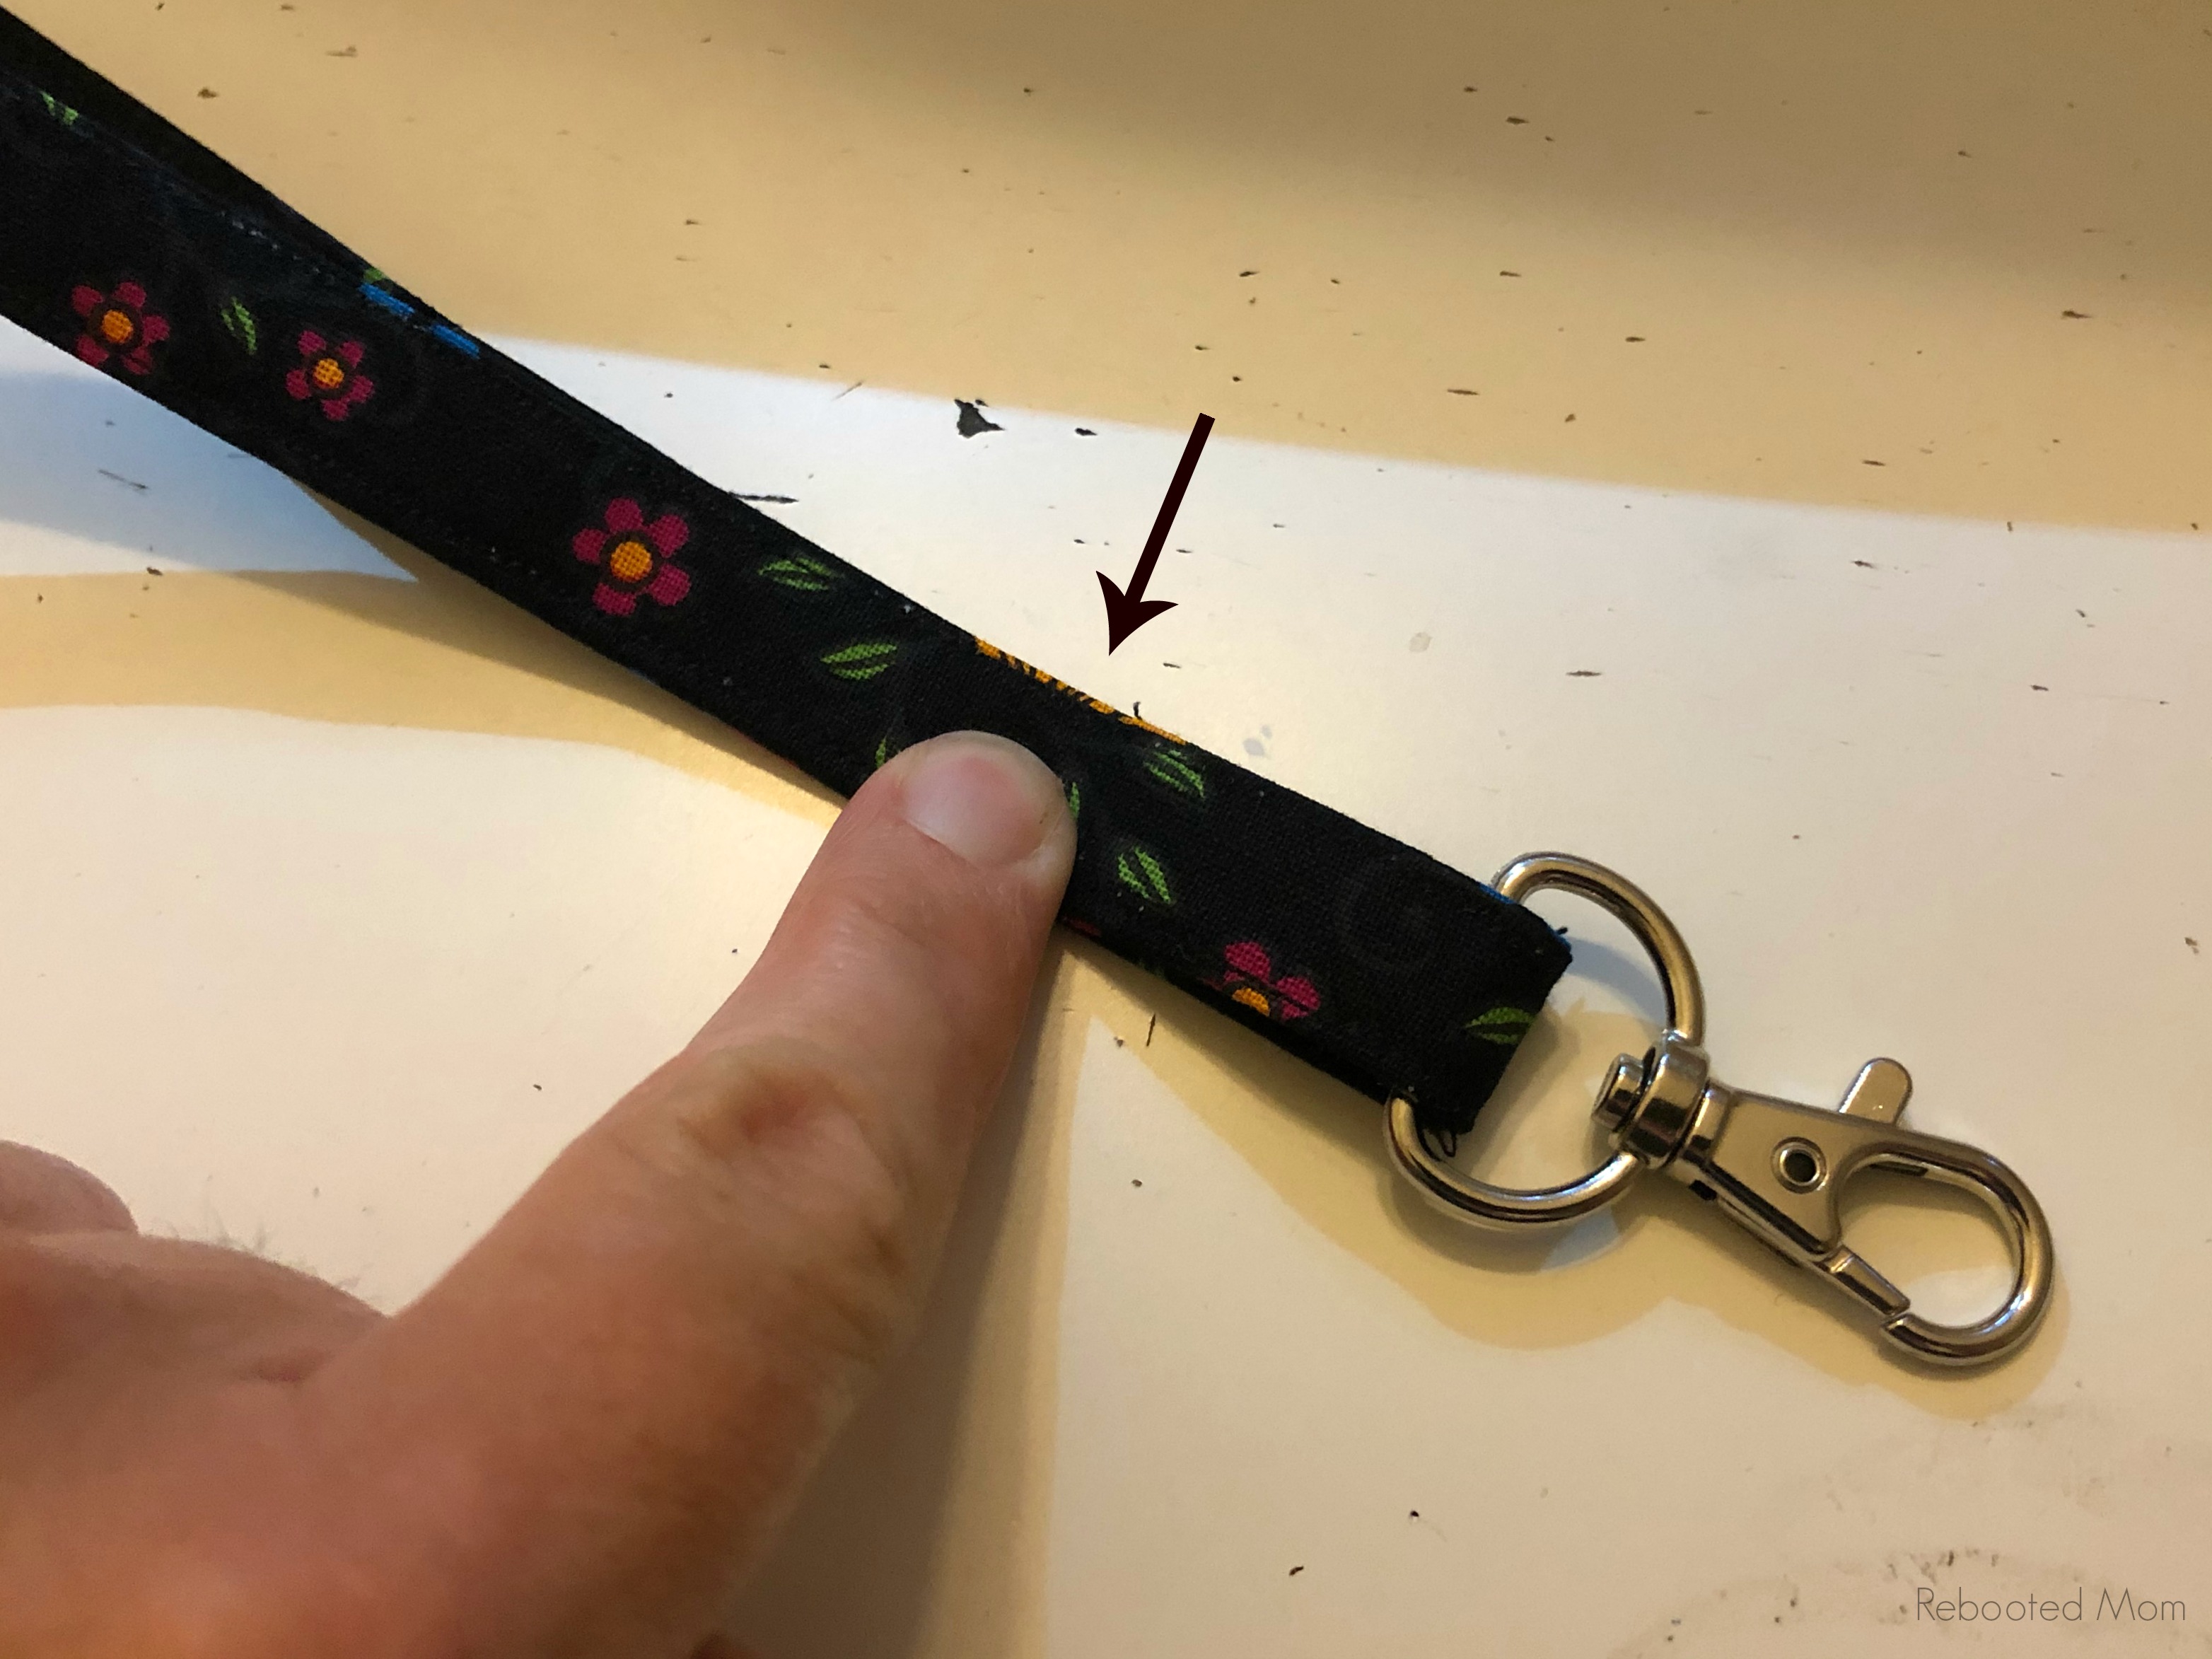
Your goal now is to get the flat part of the metal swivel clasp in between the two ends. Once you have that flat edge snuggled in there, you’ll want to sew the two portions together just above that.
Sew, then back stitch, then sew again to ensure it’s strong.
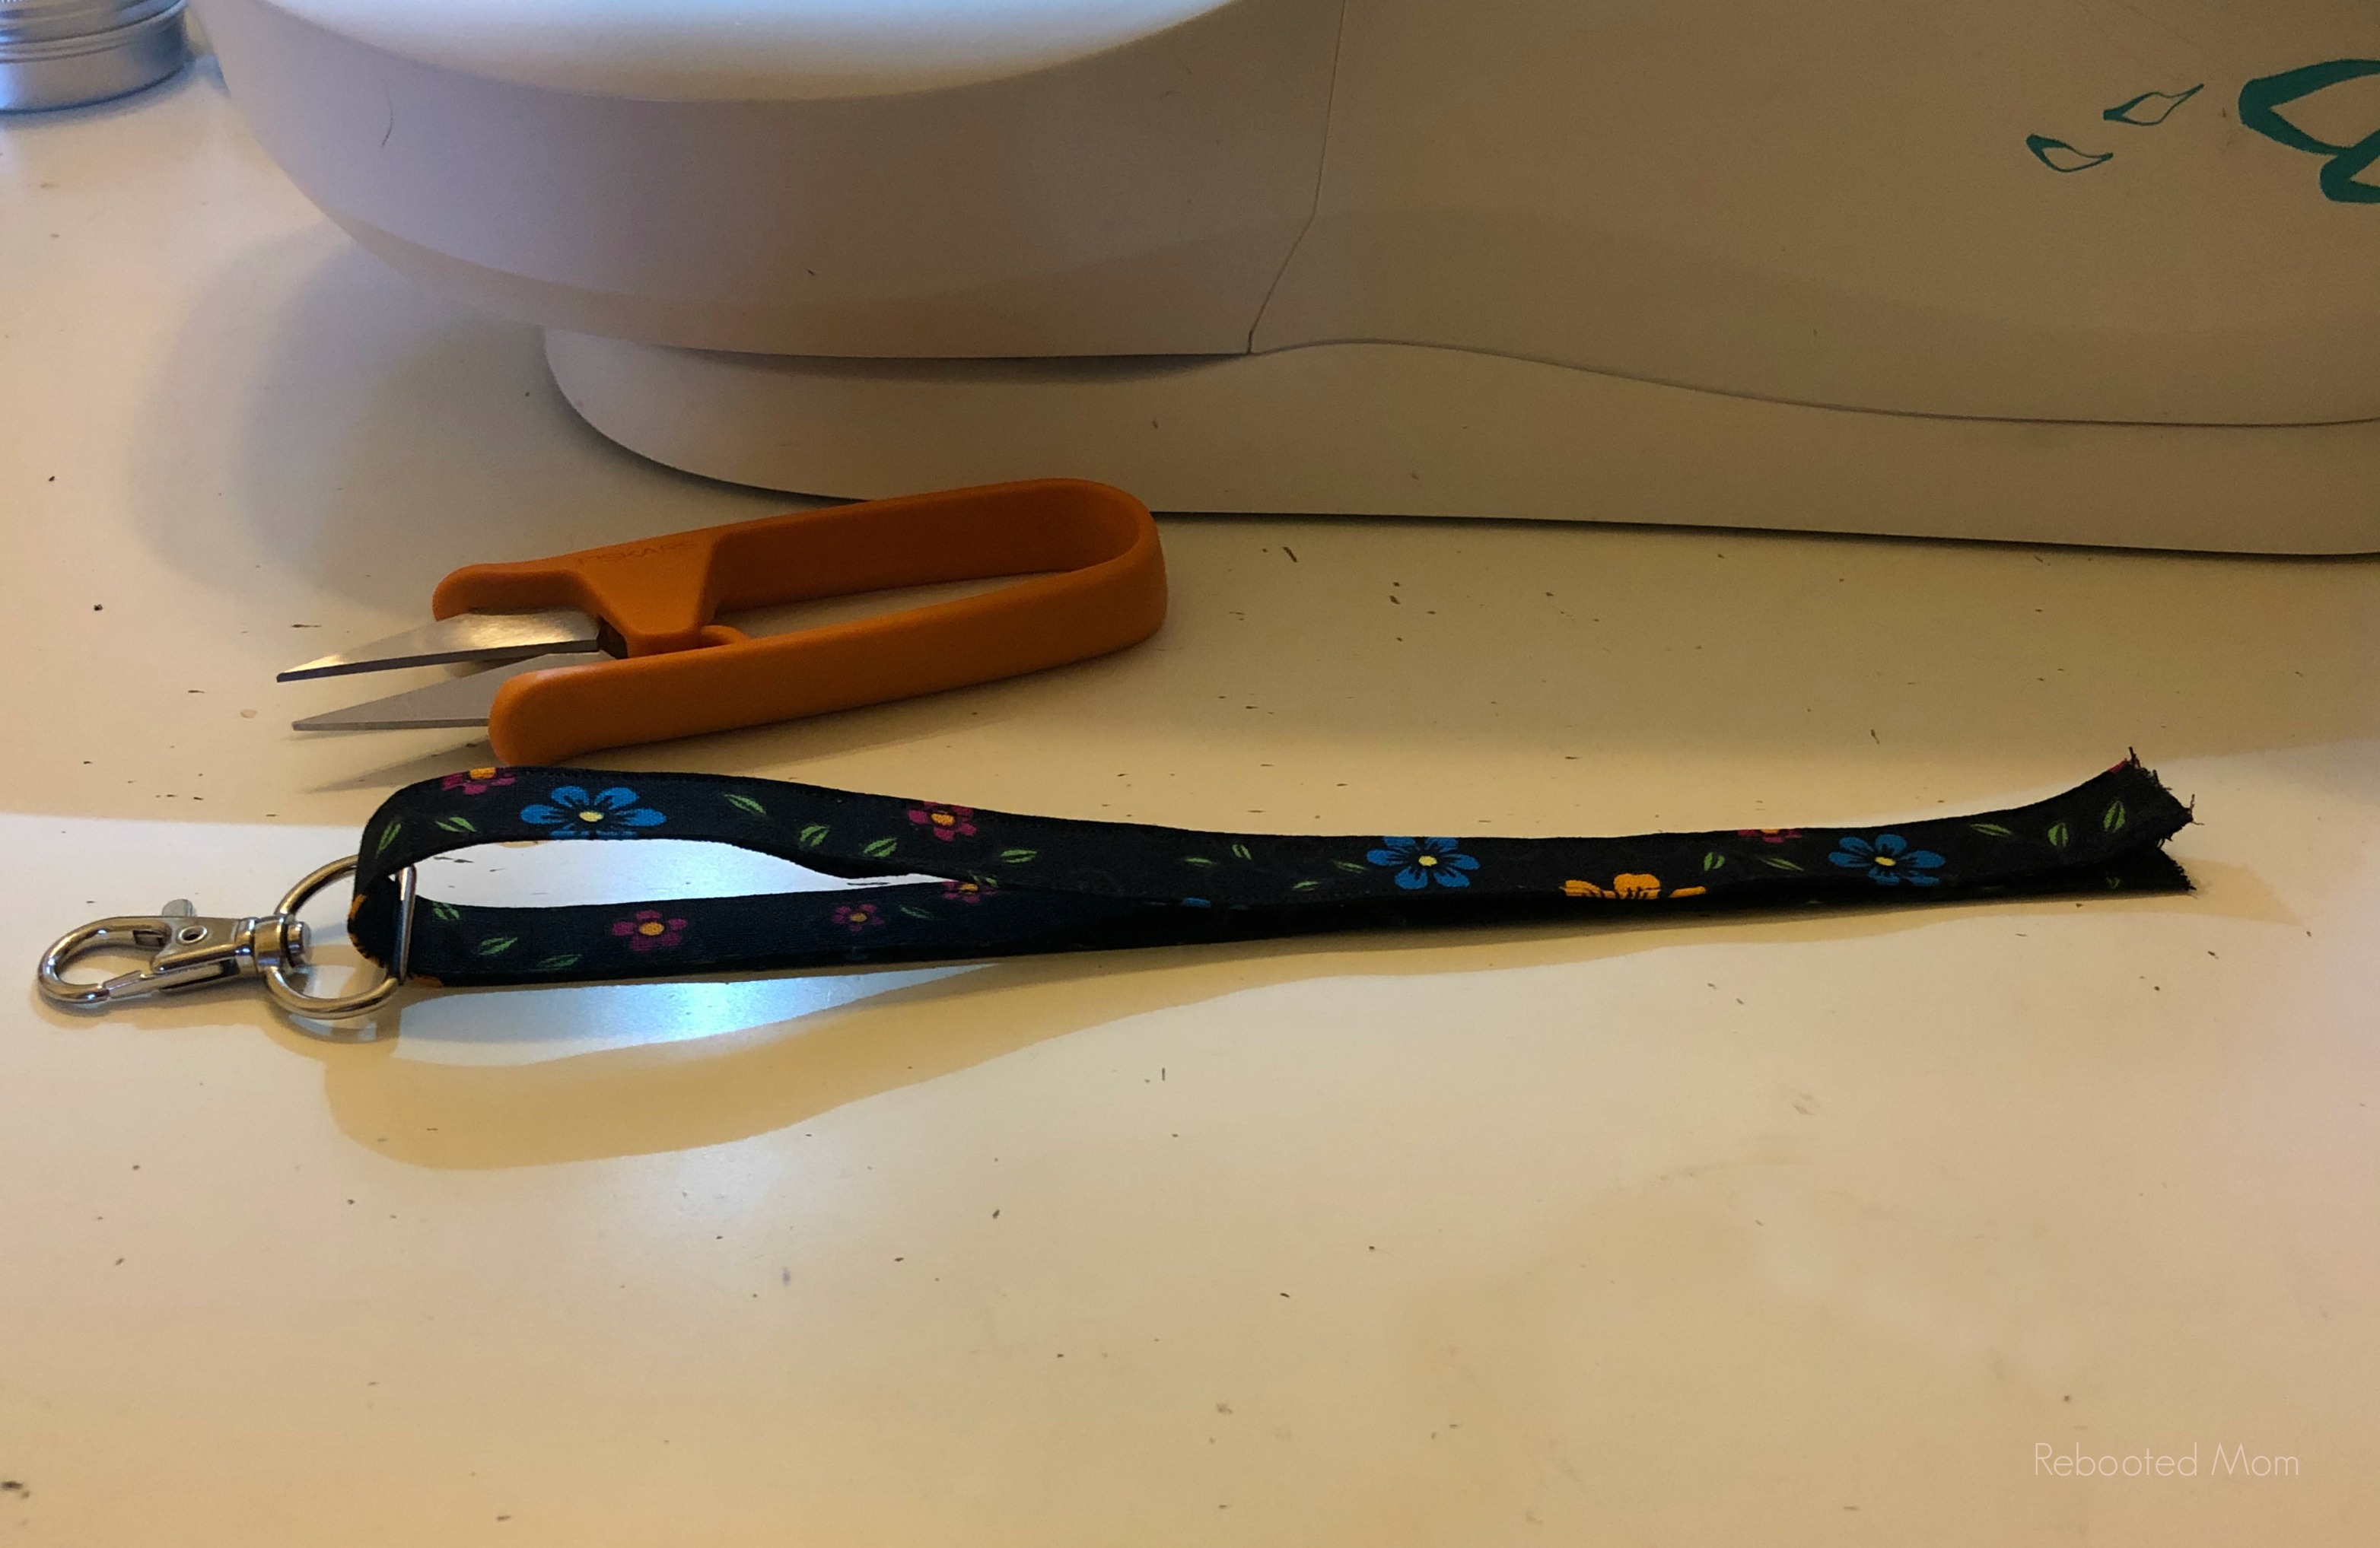
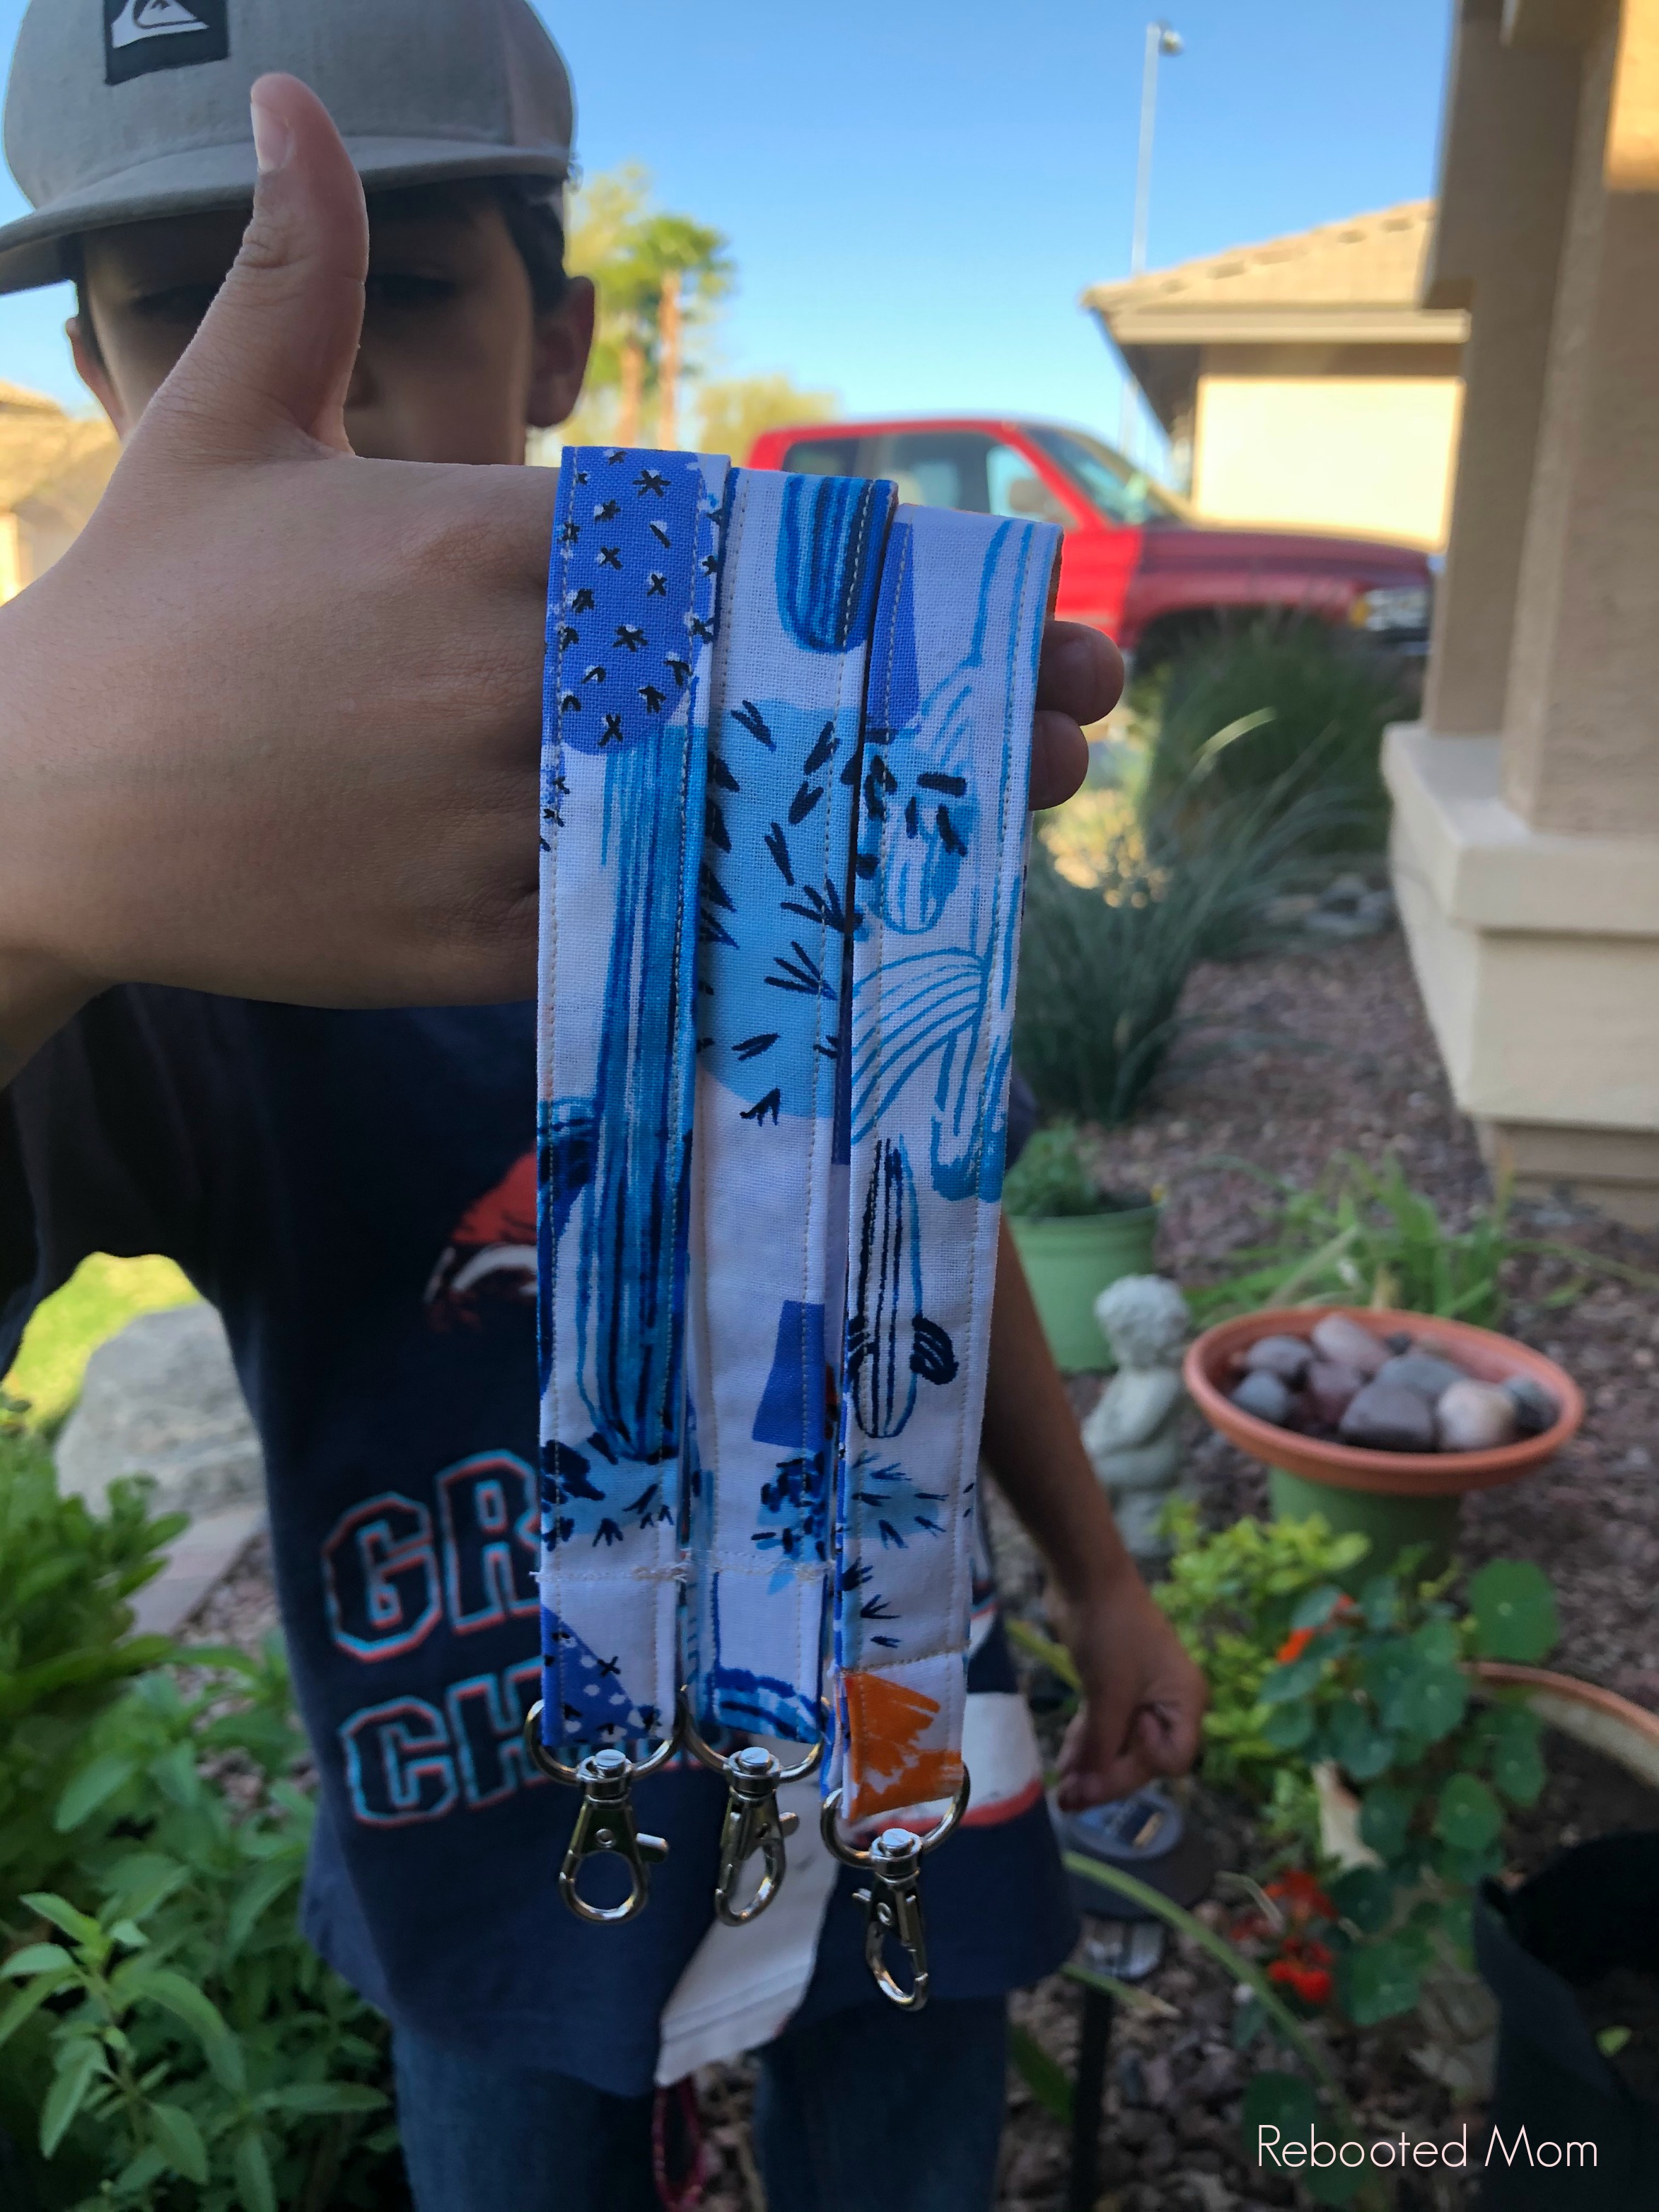
You’re done!
That’s it! Trim your threads and tidy up any loose fringes. You now have a wristlet keychain that is perfect to gift to family and/or friends.
If you loved this DIY, leave a comment and let me know!
For more great DIYs, follow me on Pinterest!

This is such a fabulous tutorial Sheryl. It was easy to follow and the end result is so cute! I’m pumping them out like crazy for Christmas gifts. Such an easy and useful gift. Thanks!
So welcome, Jen!!! You are SUCH a great friend!!!