


With a few special ingredients and a little bit of time, you can easily make your own crumbly feta cheese at home with this step-by-step tutorial.
Feta is one of the greatest varieties of cheese to make – it is relatively simple compared to many other varieties (like bacon and beer soaked cheese or even horseradish cheddar).
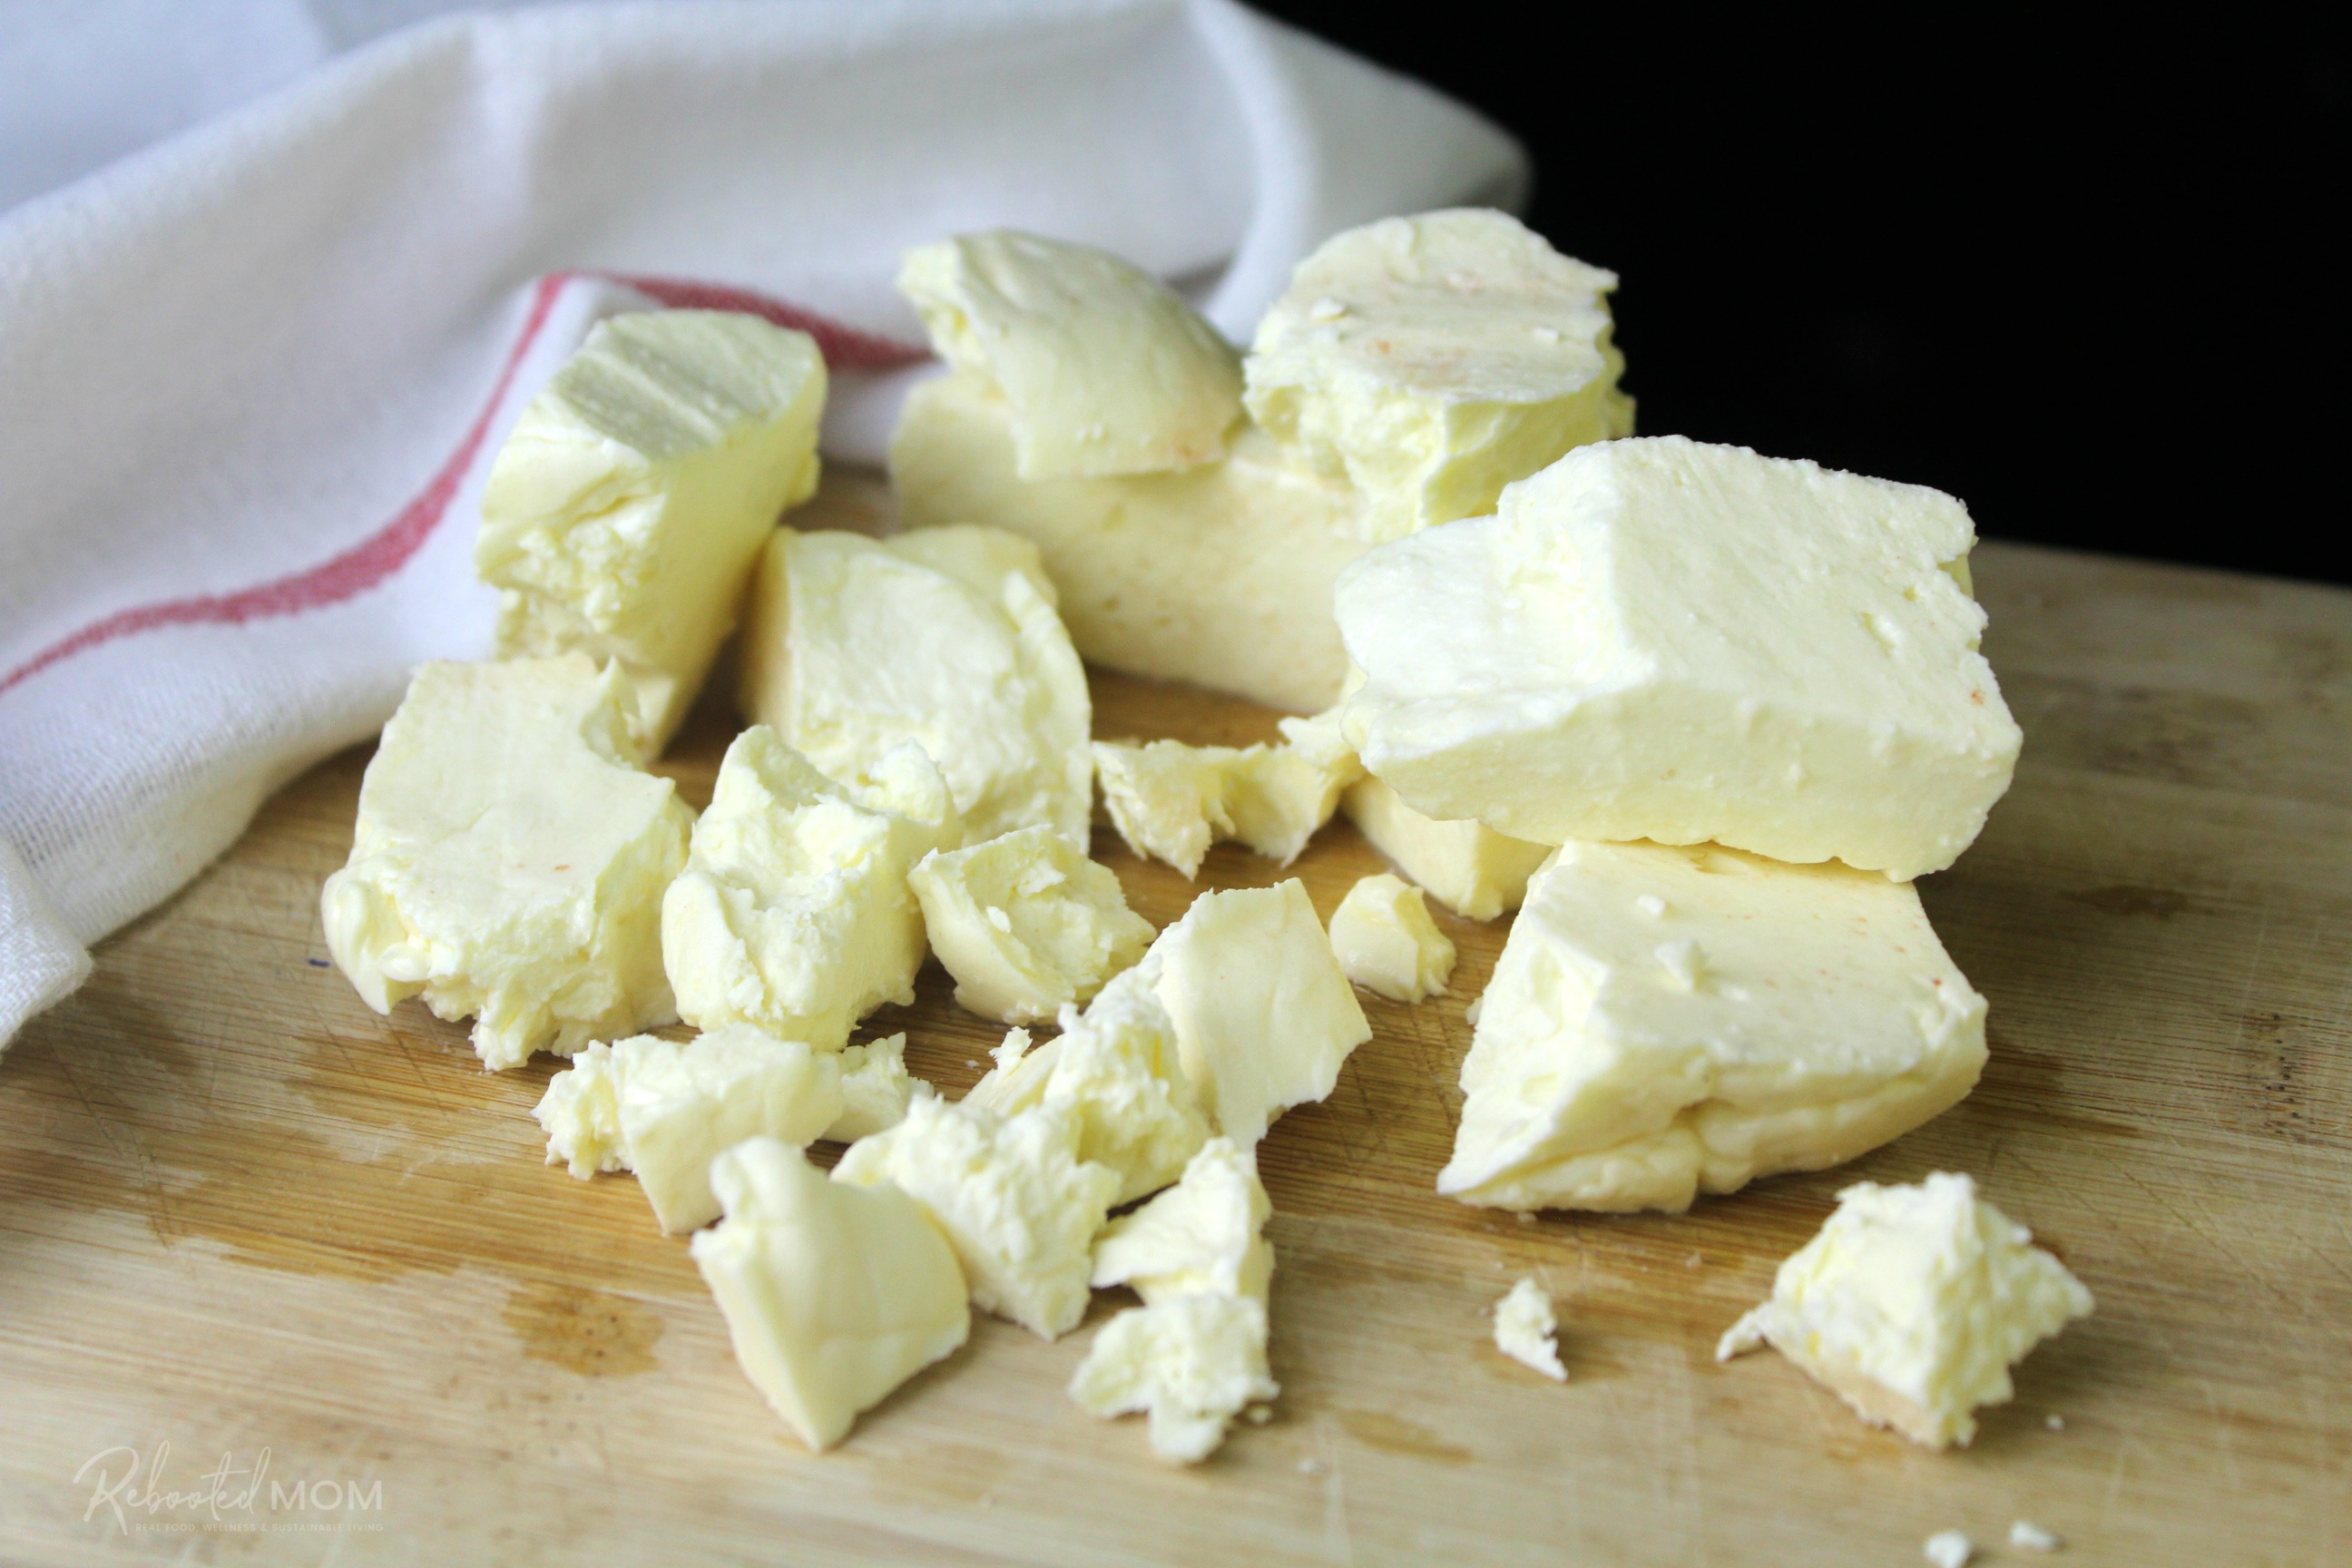
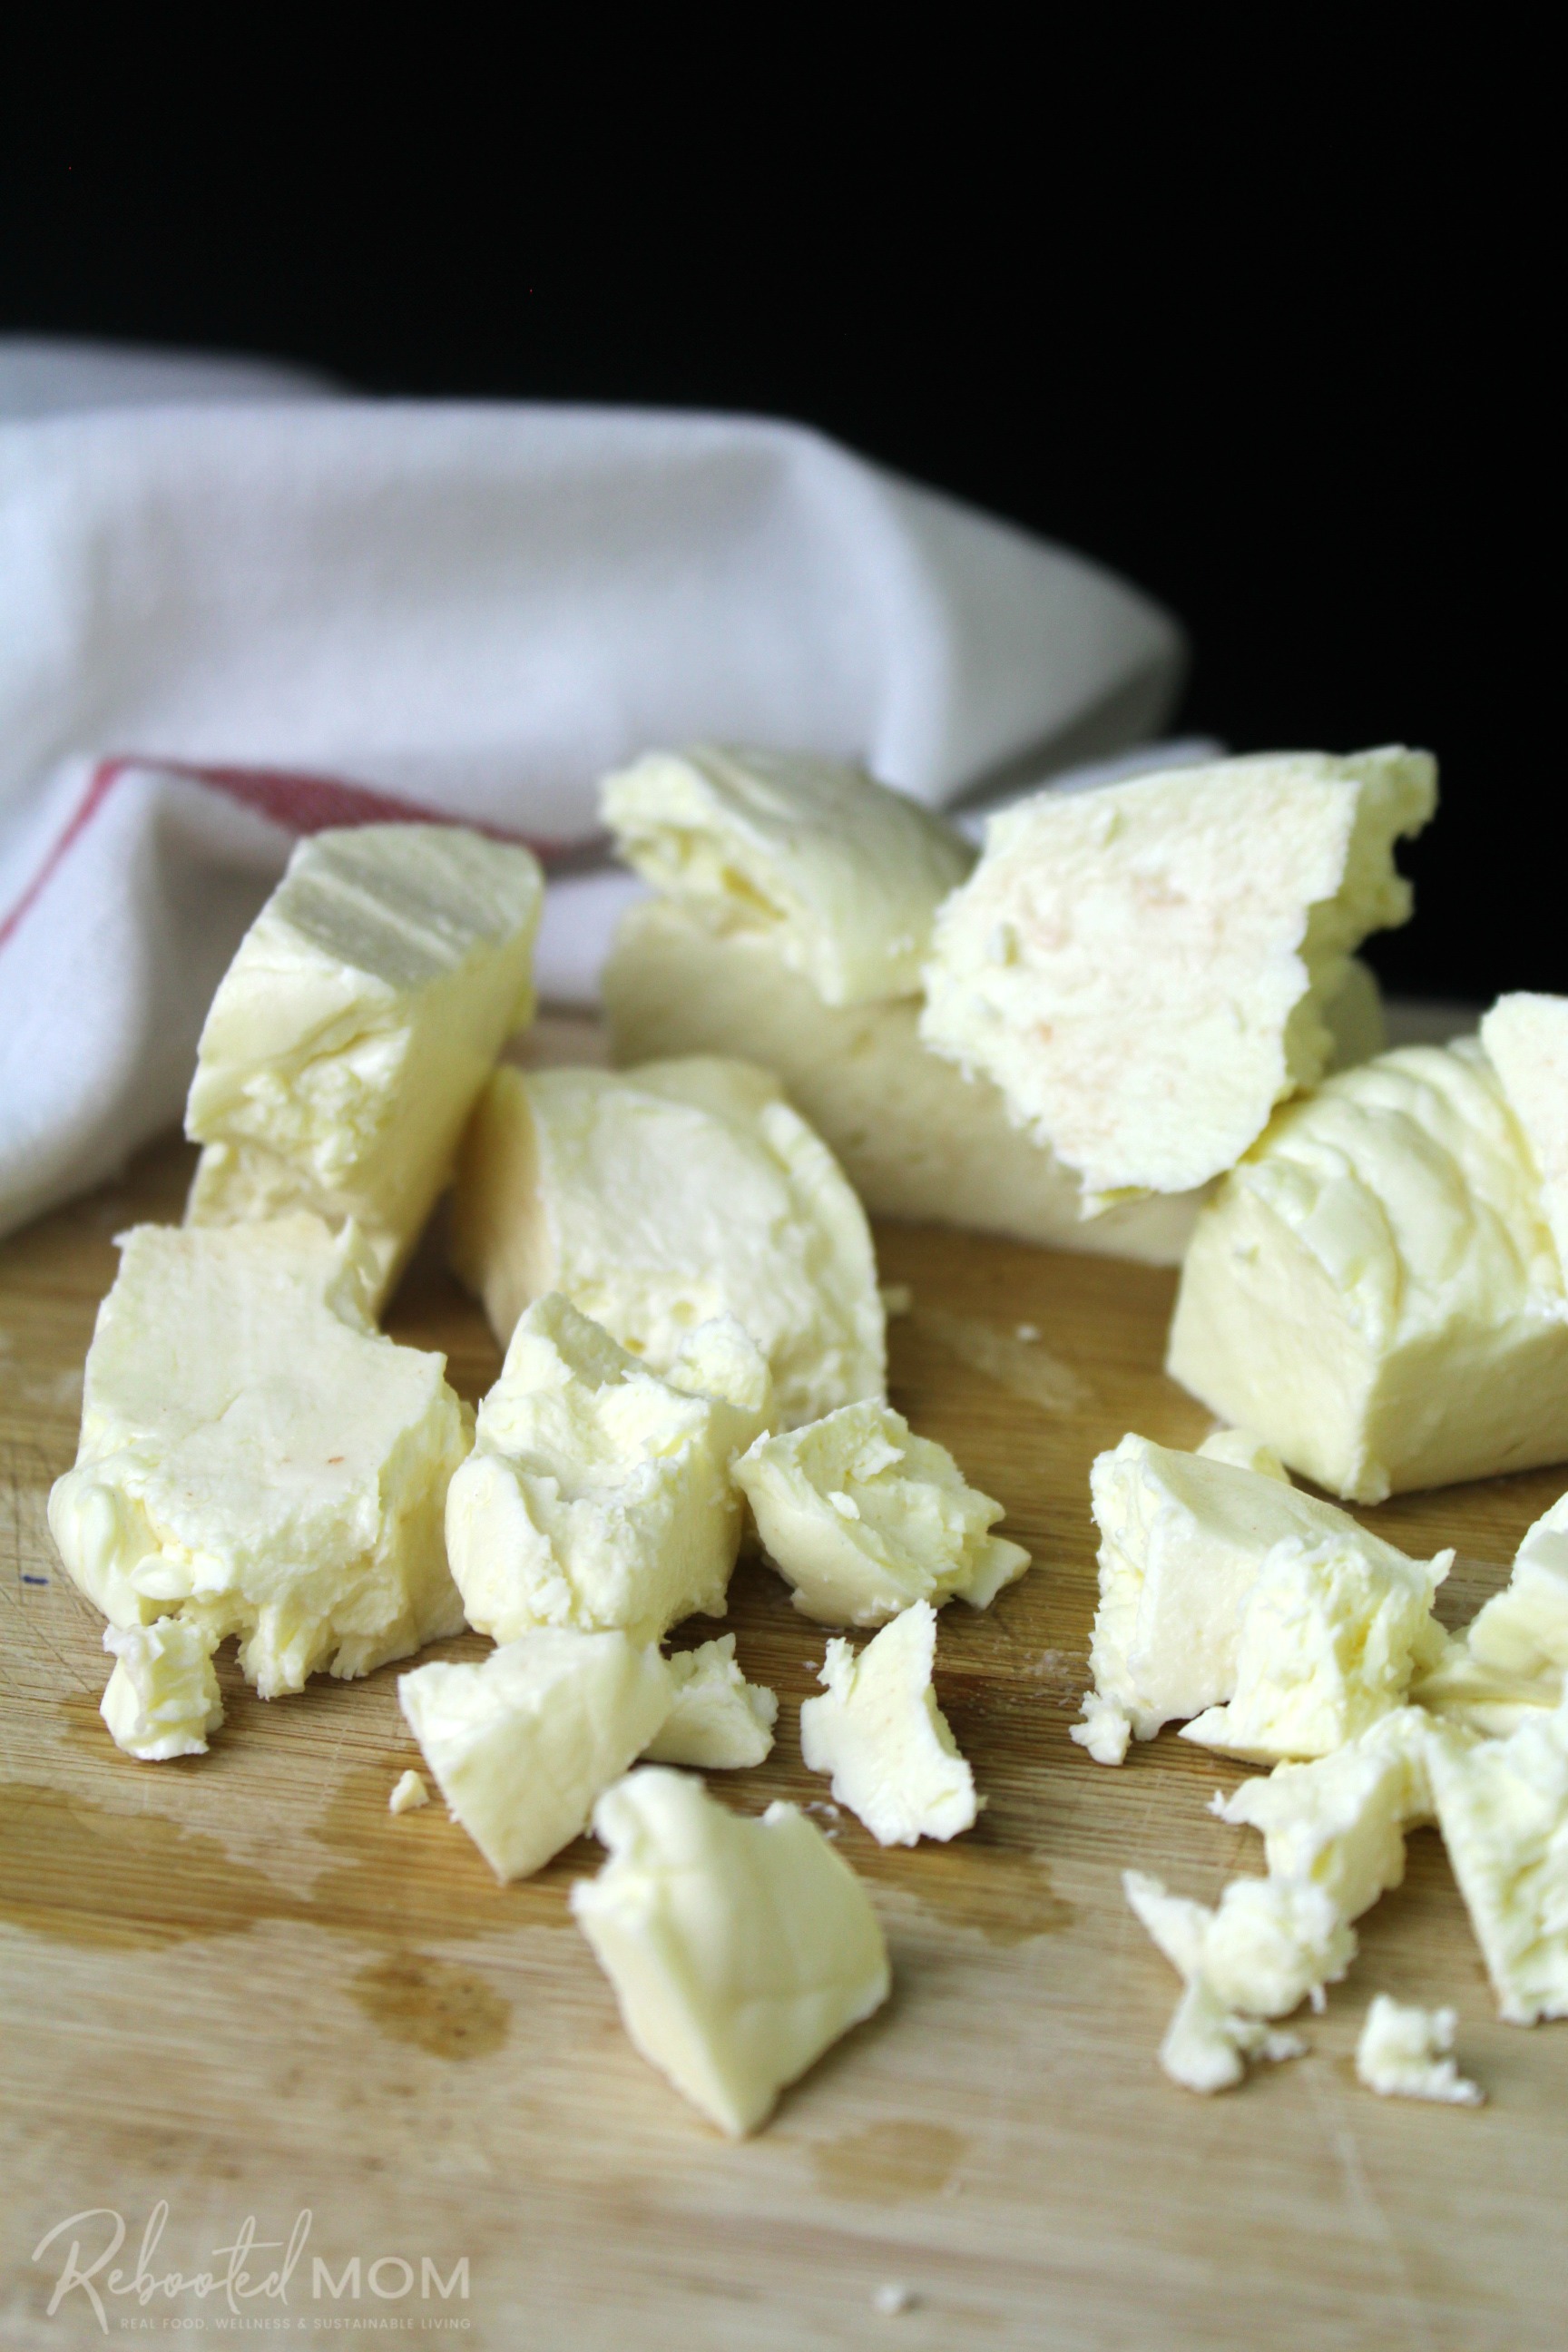
The results of homemade feta cheese are so rewarding. You can make your feta cheese quite firm or crumbly in texture depending on your preference.
Those who appreciate feta cheese commonly buy it at the grocery store where it comes in a small container for use on salads. Every so often you might even find it sold as a chunk cheese. At my local market, a chunk of feta is just over $11 (which seems expensive to me considering I can make it for less myself).

Feta spends a great deal of time in a salty brine, helping to draw moisture out of the cheese. As a result, the cheese is more crumbly, and used on salads or as a garnish on food. Since this cheese doesn’t easily melt, it can be added to salads or brushed with olive oil and grilled on skewers (similar to Halloumi cheese).
How to Use Feta
A dry feta that has had time to age is simply wonderful when grated. You can use a cheese grater or plop small chunks of feta in the food processor and give it a whiz. Toss it on your favorite flatbread with roasted red peppers and olives, or add some spicy jalapeño relish for some heat.
Feta will be saltier than the typical cheese due to the amount of salt used in the brine. You can always rinse it off before enjoying, cold water works well.
If you are looking for cheesemaking supplies, Cheesemaking.com is a great option. They typically ship relatively quickly (which is important if you live in a hot weather area).
How to Make Feta Cheese
This recipe makes one pound of Feta cheese.
Things you’ll need:
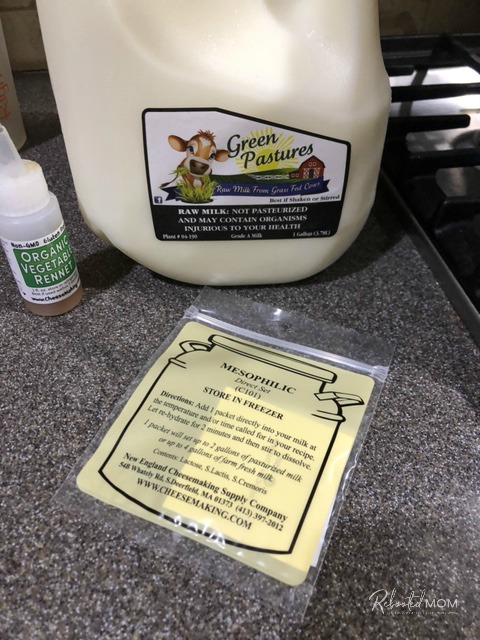
- 1 gallon raw milk (avoid using UHT or ultra-pasteurized)
- 1 pkg direct set mesophilic culture or feta cheese starter culture
- 1/2 tsp liquid rennet, diluted in 1/4 C. cool, non-chlorinated water
- 2-4 Tbsp flake sea salt or kosher salt
- 1/3 C. kosher salt
- 1/2 gal water
- optional: calcium chloride*
*The amount of calcium in milk heated for pasteurization is significantly lower than raw milk that hasn’t been heat treated. If you are using store bought milk, you might want to add 1/8 tsp of calcium chloride to help set up a stronger curd, and stir in completely as you heat up the milk.
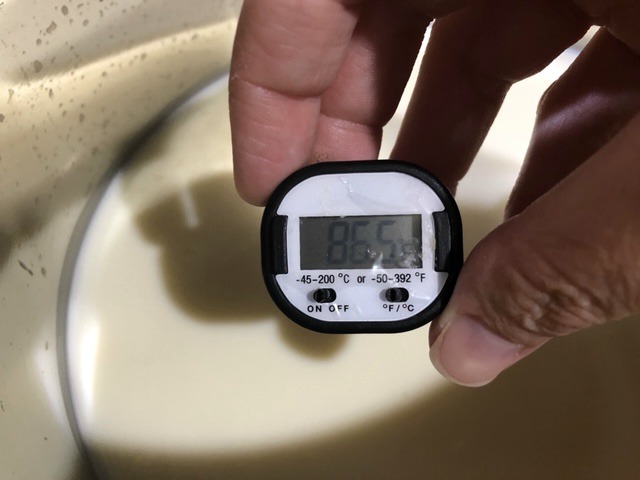
In a non-reactive pot, add the milk; heat the milk slowly (and as gradually as possible) to 86 degrees.
Add the Culture
Add the mesophilic culture by sprinkling over the top of the milk. Allow that culture to hydrate for 1 minute, then slowly stir into the milk for 30 seconds. Cover the milk and allow it to rest for 1 hour.
During that time, keep the milk at 86 degrees. I do this by wrapping the pot in a heavy bath towel. Alternatively, you could place the pot in a clean sink of water (86 degrees) – keep a thermometer in the sink during this time as well as one in the pot with the milk.
The temperature of the milk should remain steady during this time, but if it doesn’t, simply add more warm water to the sink to increase the temperature of the milk in the pot.
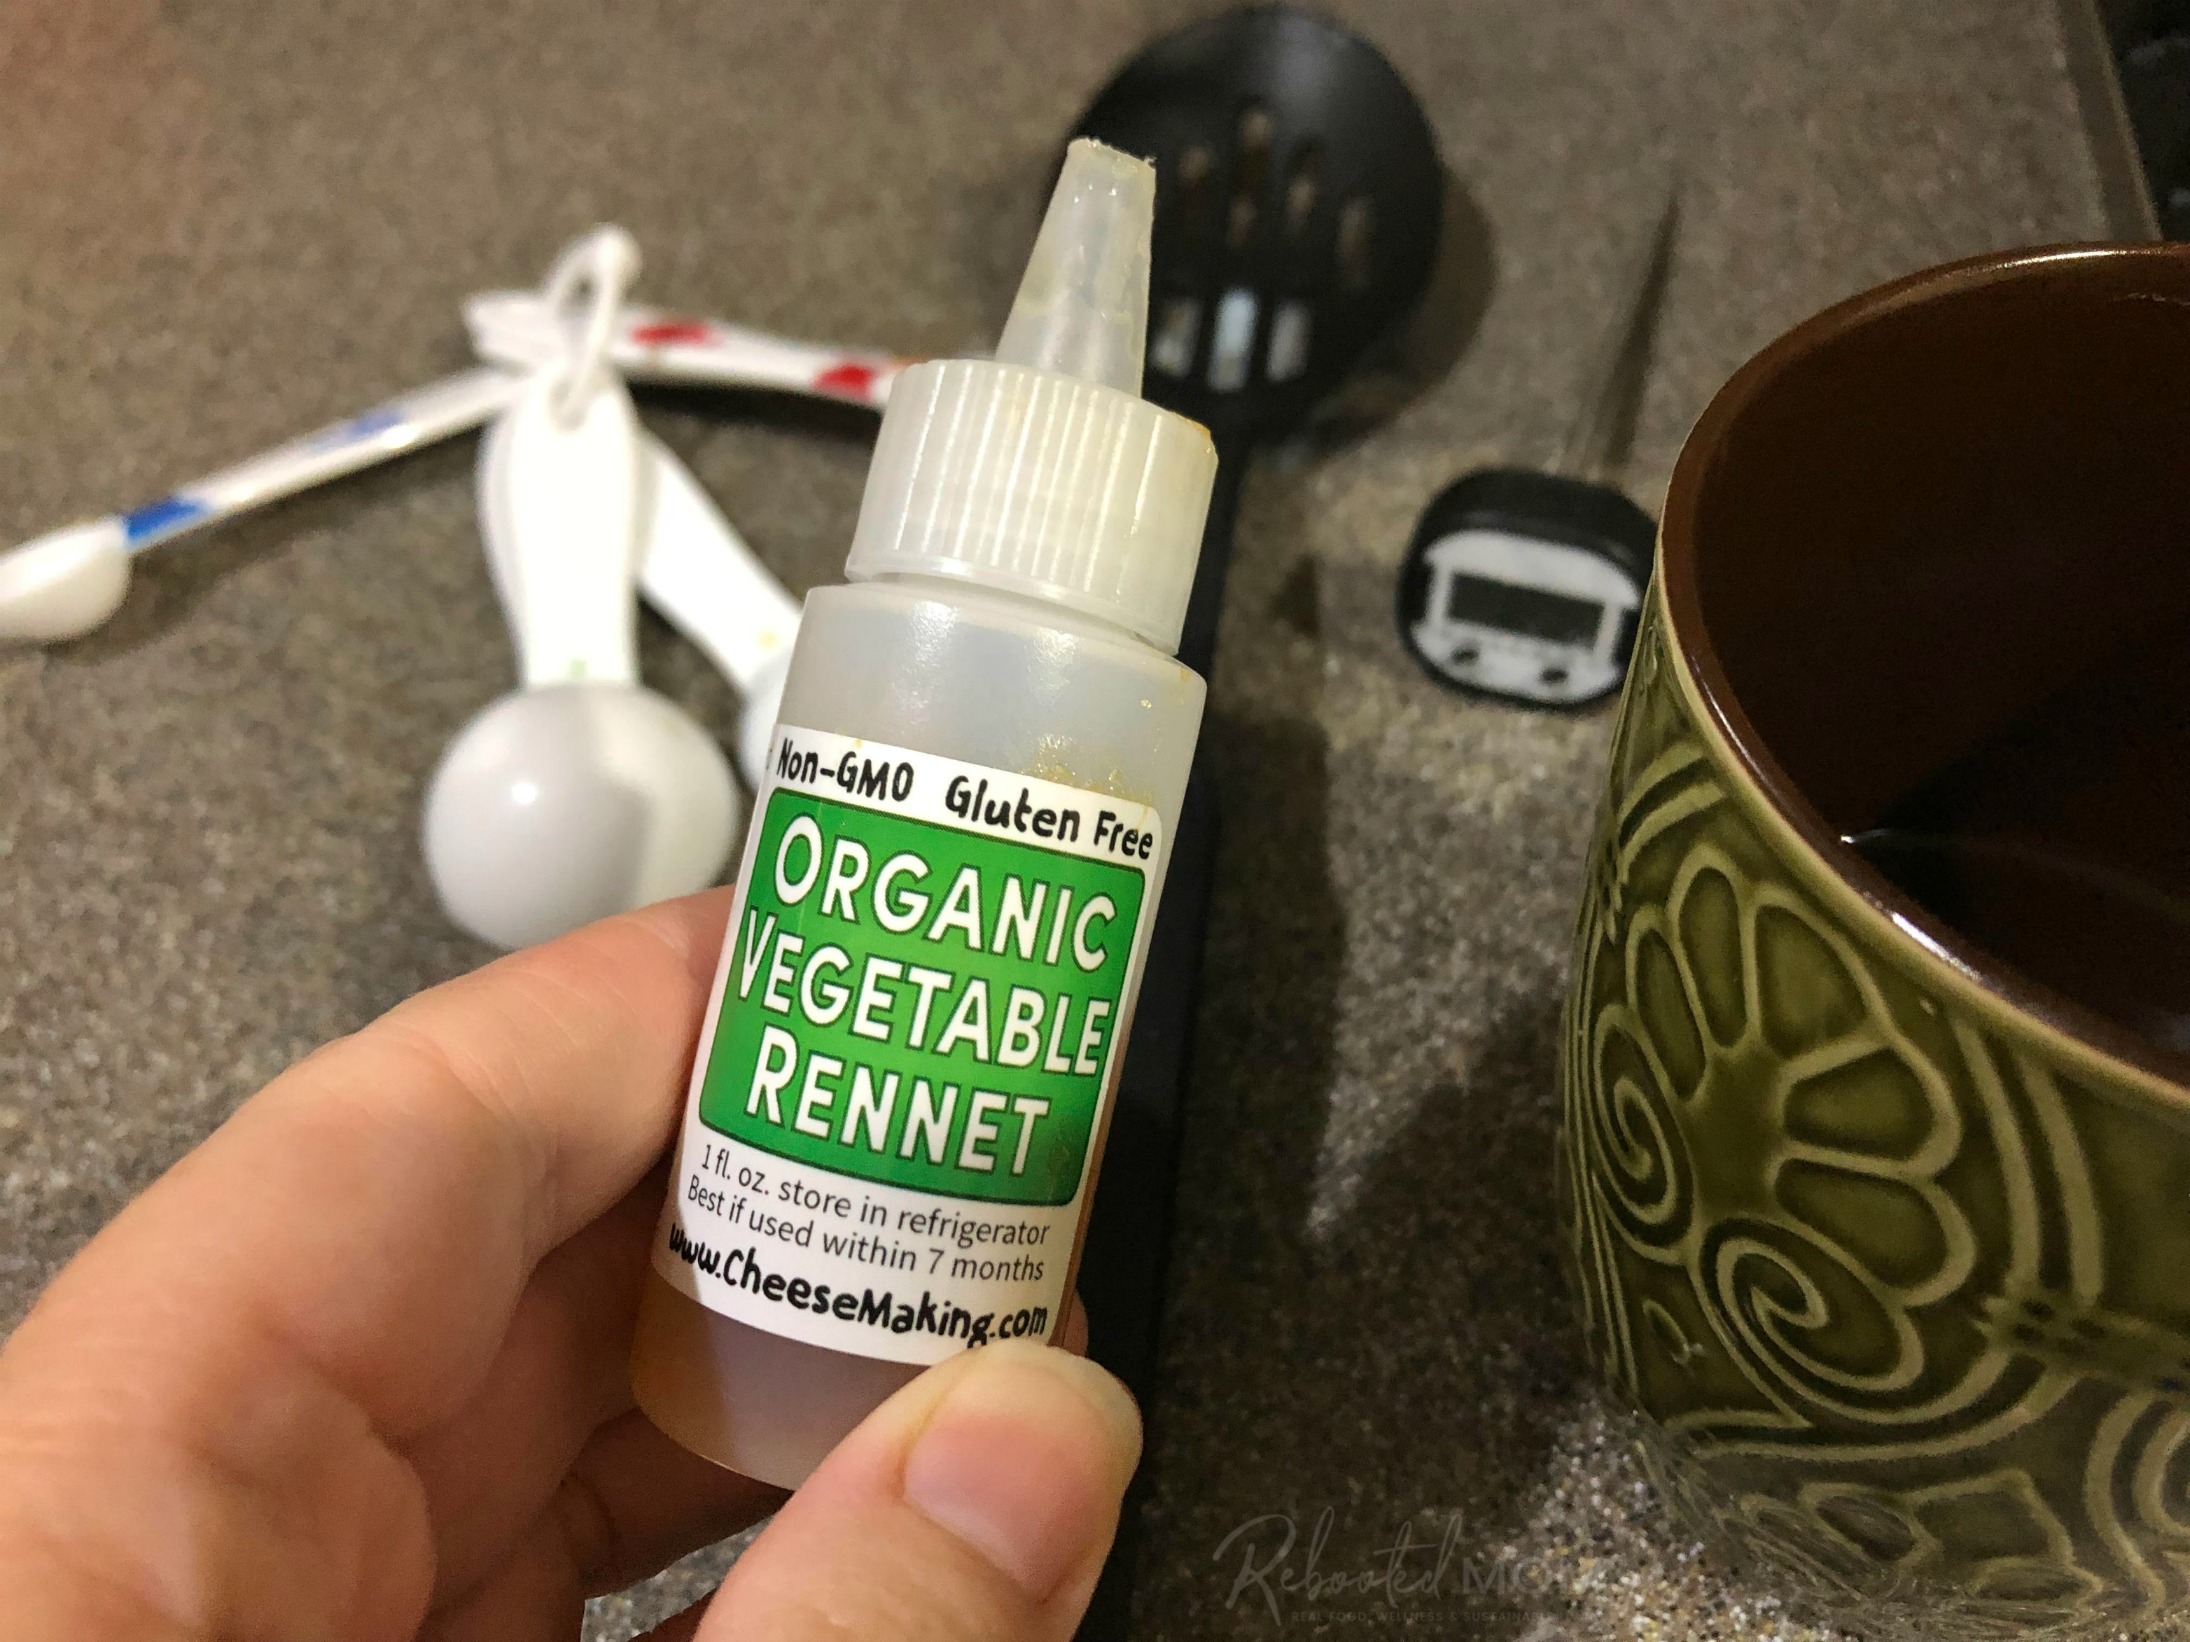
Add the Rennet
After that hour, add the rennet, making sure it has been diluted in 1/4 C. cool, non-chlorinated water. Stir up and down to distribute the rennet evenly.
Cover again and allow the milk to set for 45 minutes. Check for a clean break in the curd. If a clean break is not yet there, cover again and allow to sit an additional 10-15 minutes.
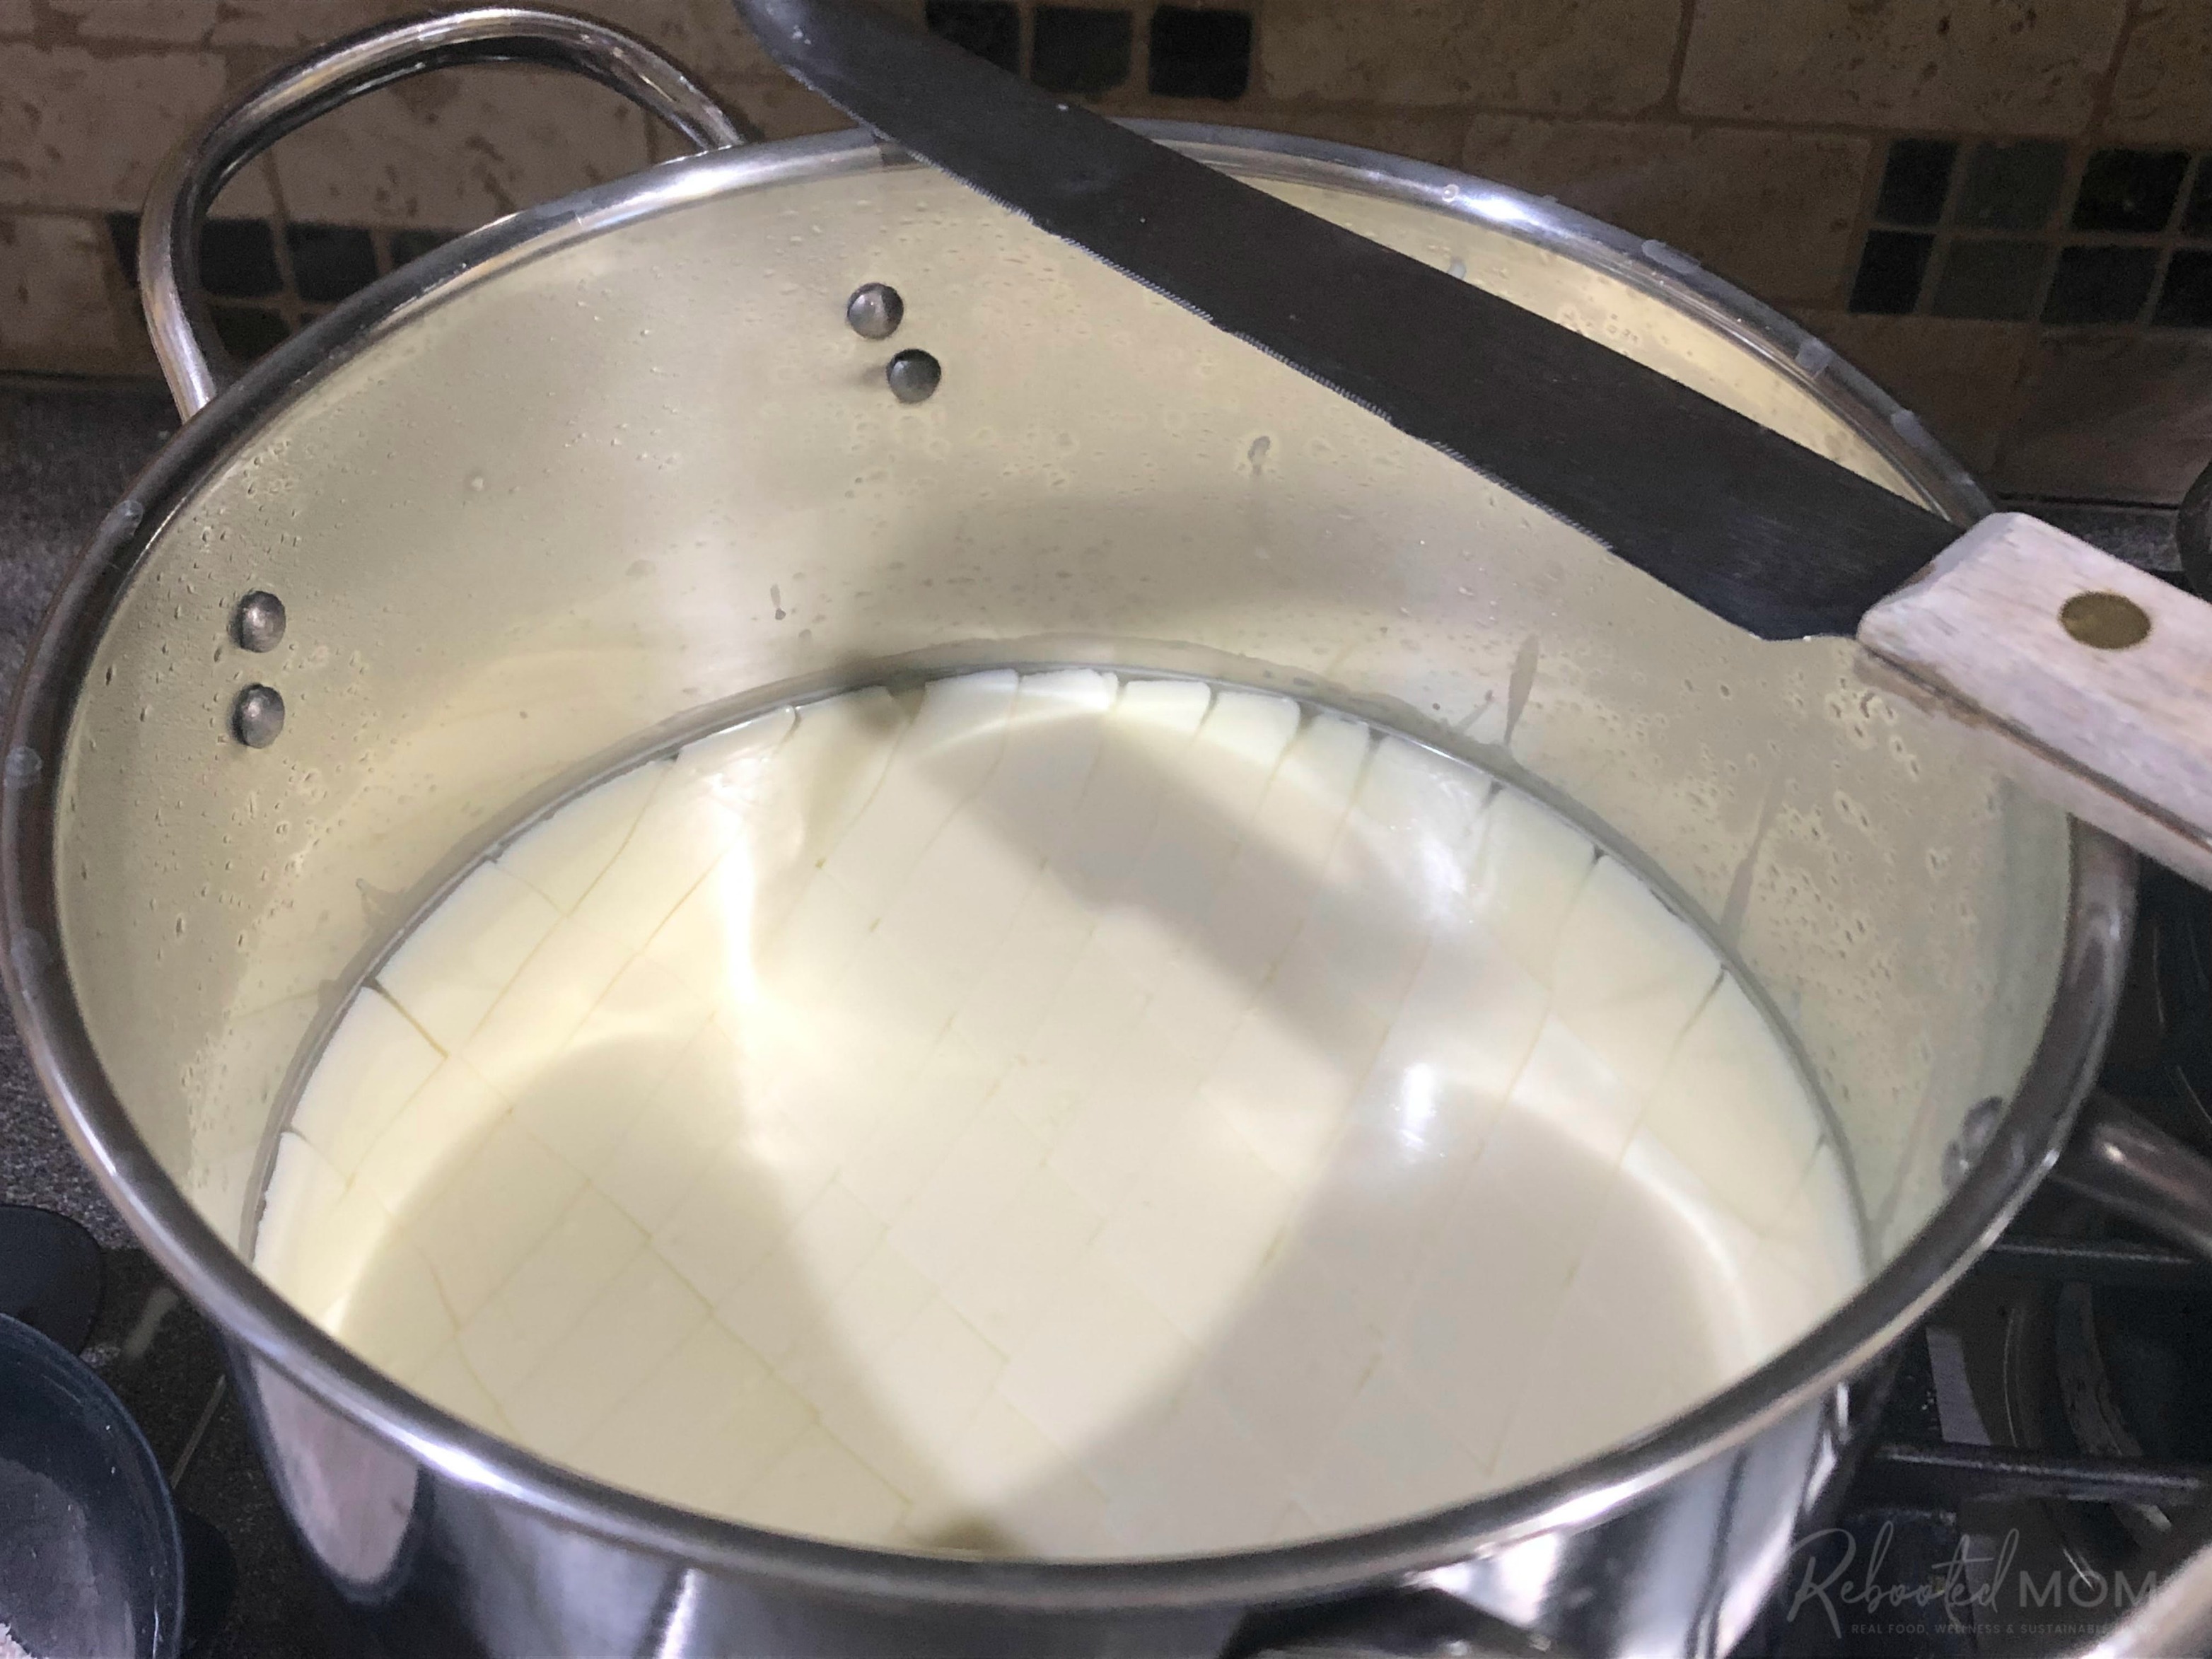
Cut the Curd
At this time, the milk will be a large, solid mass of curd (it may resemble tofu). Cut the curd into half inch cubes vertically, then again horizontally (like a checkerboard) at 1/2 inch intervals. Then hold the knife at a 45 degree angle and cut the curd horizontally to capture the curd under the surface.
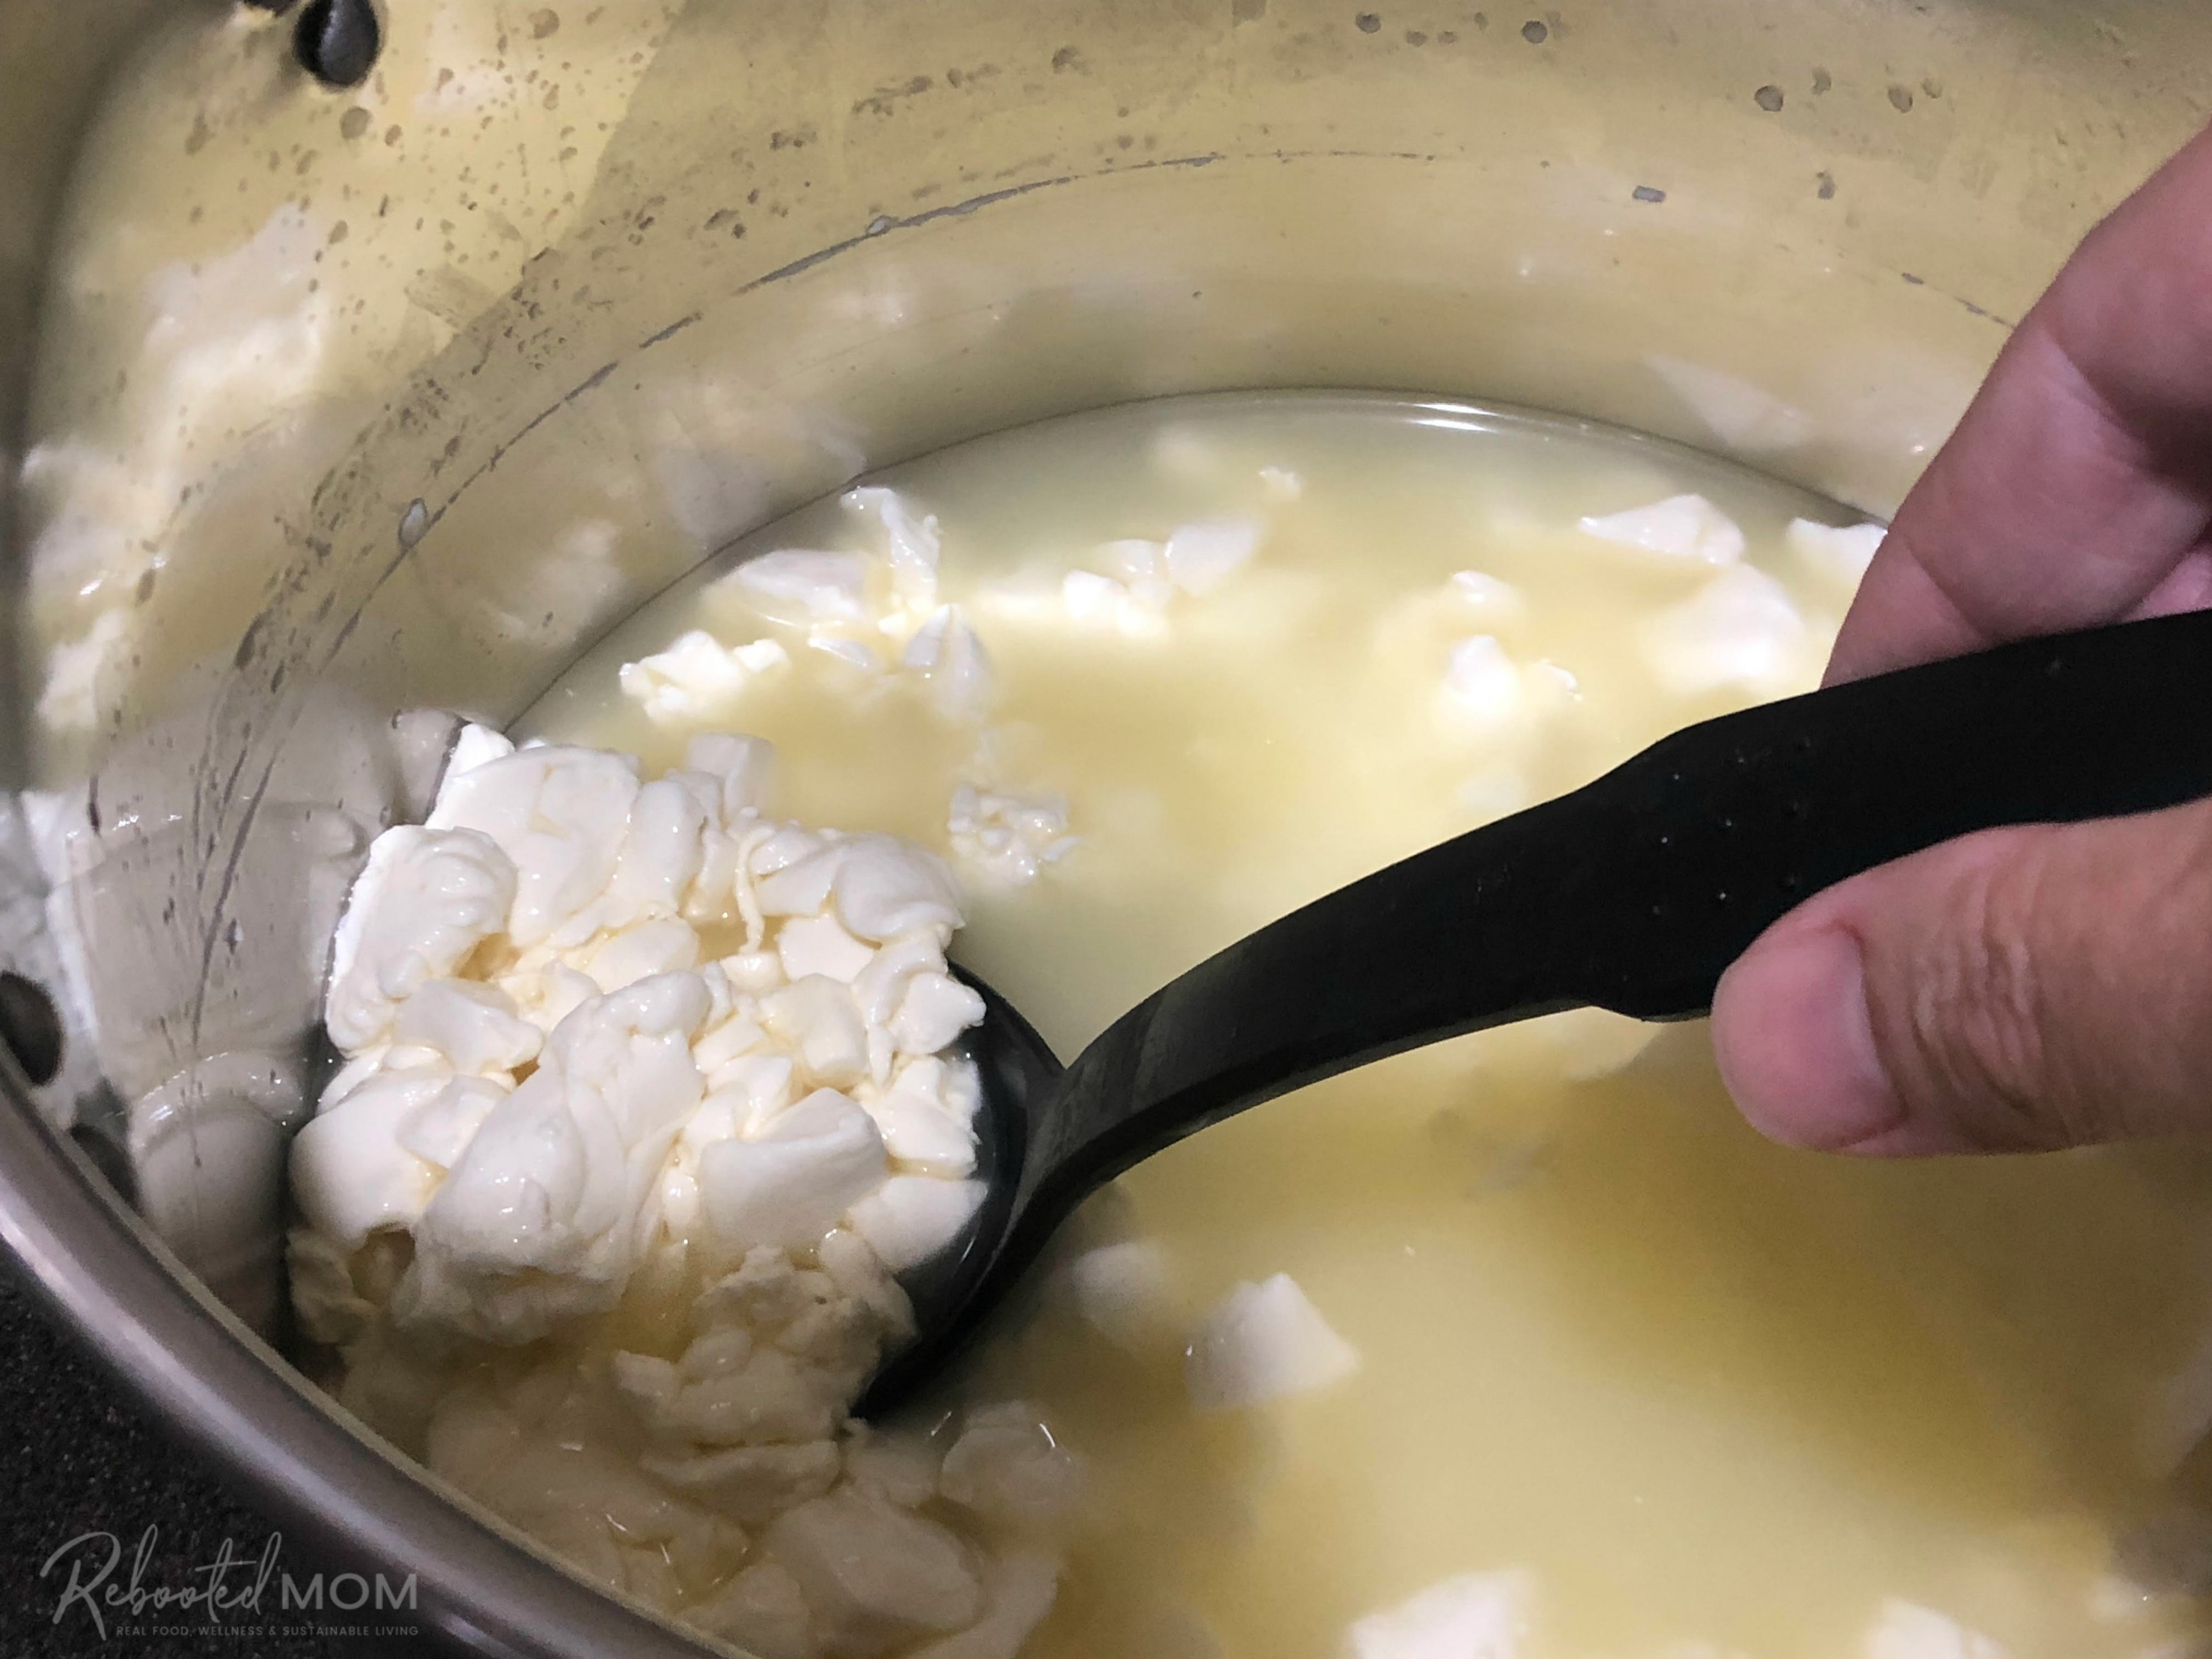
Let the curd rest for 10 minutes. Cutting the curd allows the curds to lose whey, and thus they will shrink as time goes on. With a large spoon, gently stir the curds over the next 20-30 minutes keeping them between 86-90 degrees. The curds should retract a bit.
Drain the Curds
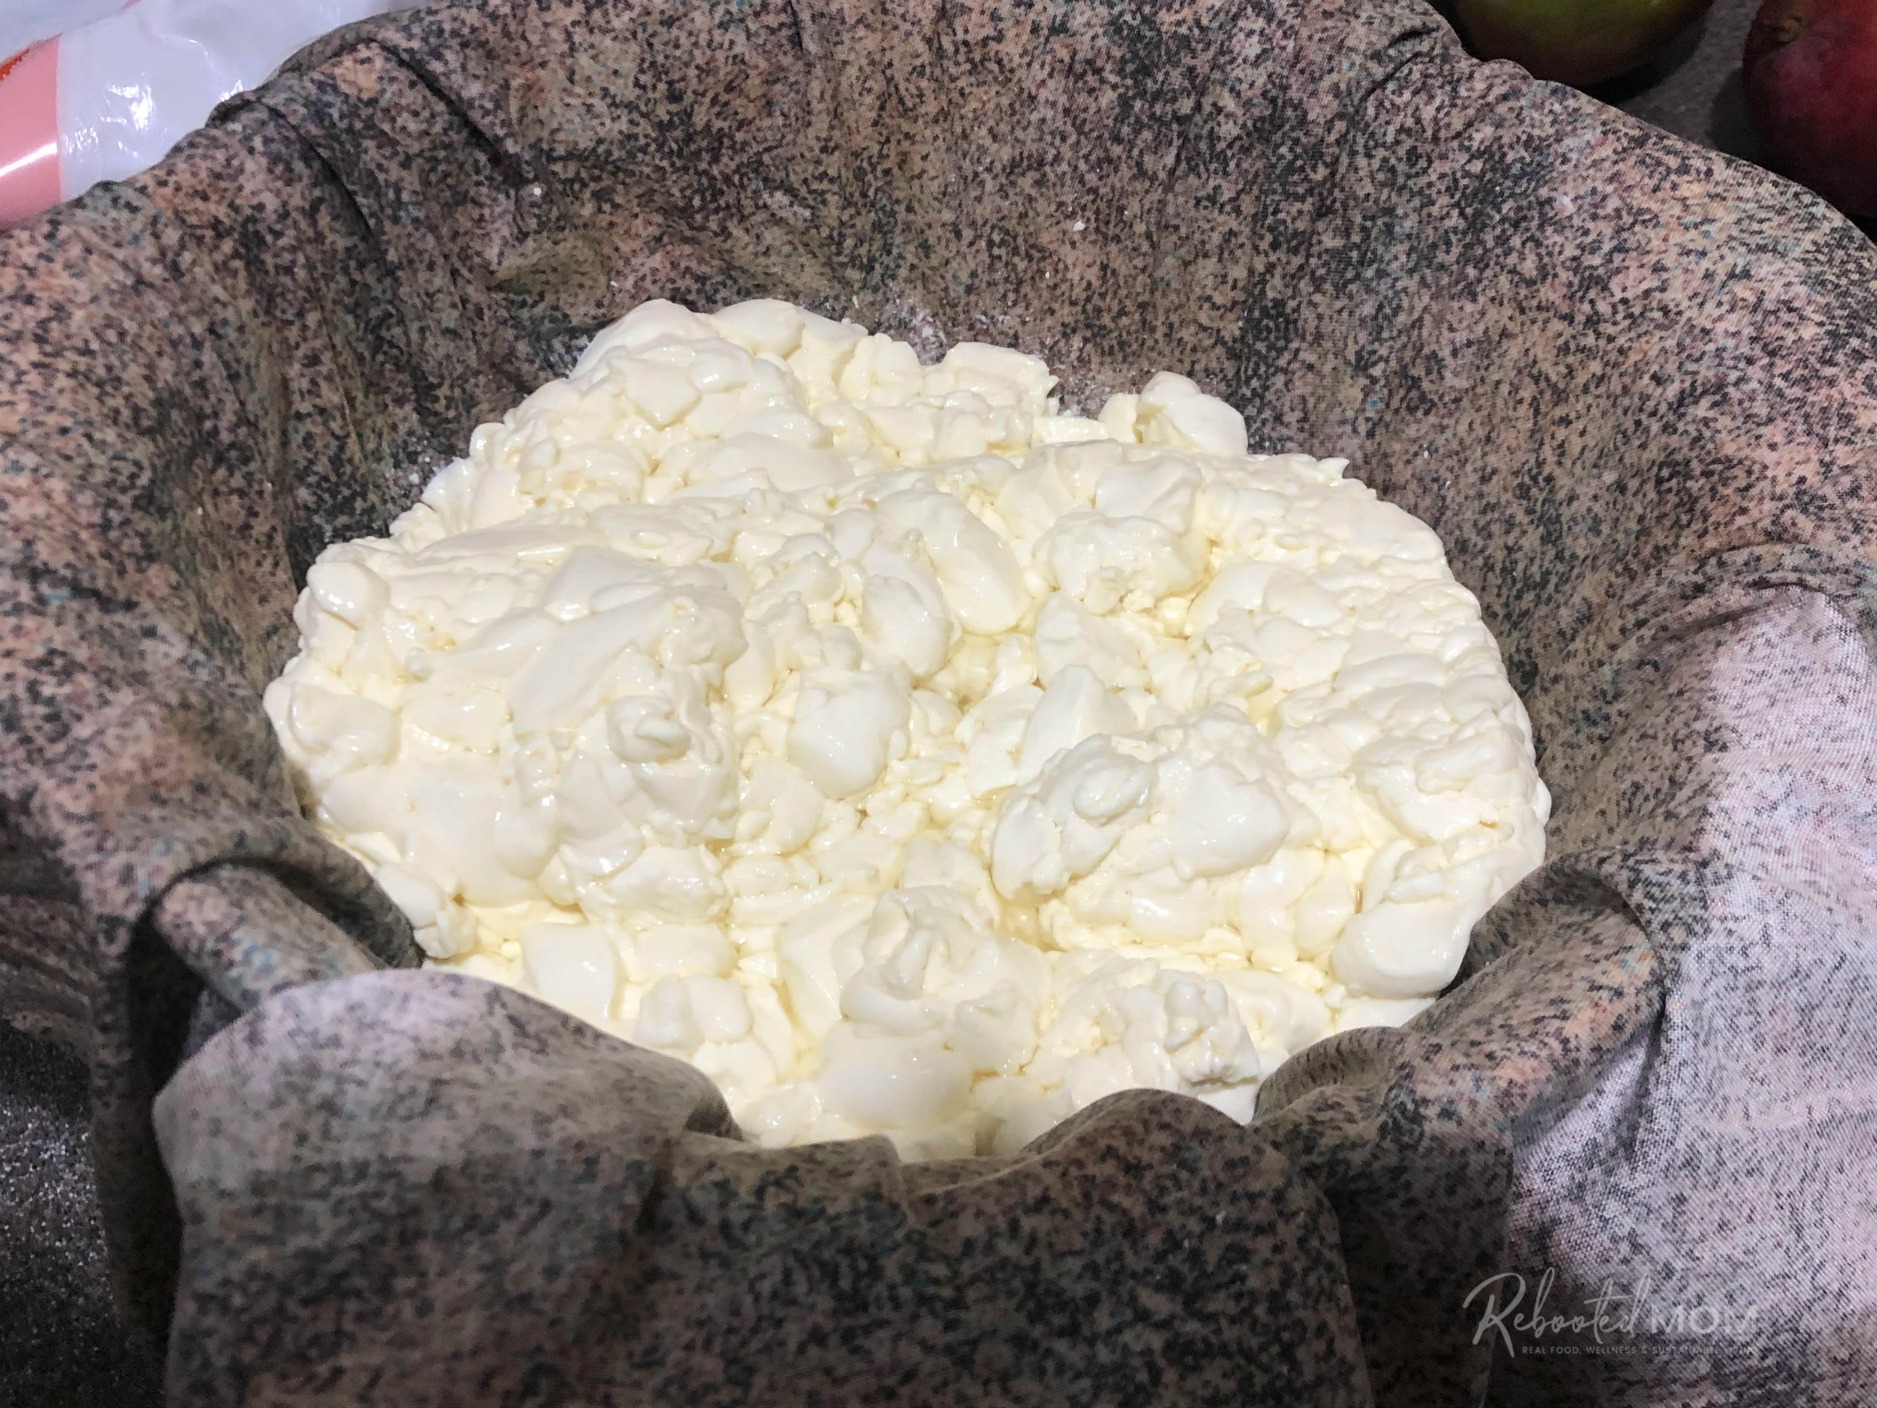
Place a clean dish towel, butter muslin or cheesecloth over a colander that has been placed over a large bowl (to catch the whey). Pour the curds in and allow the whey to drain off.
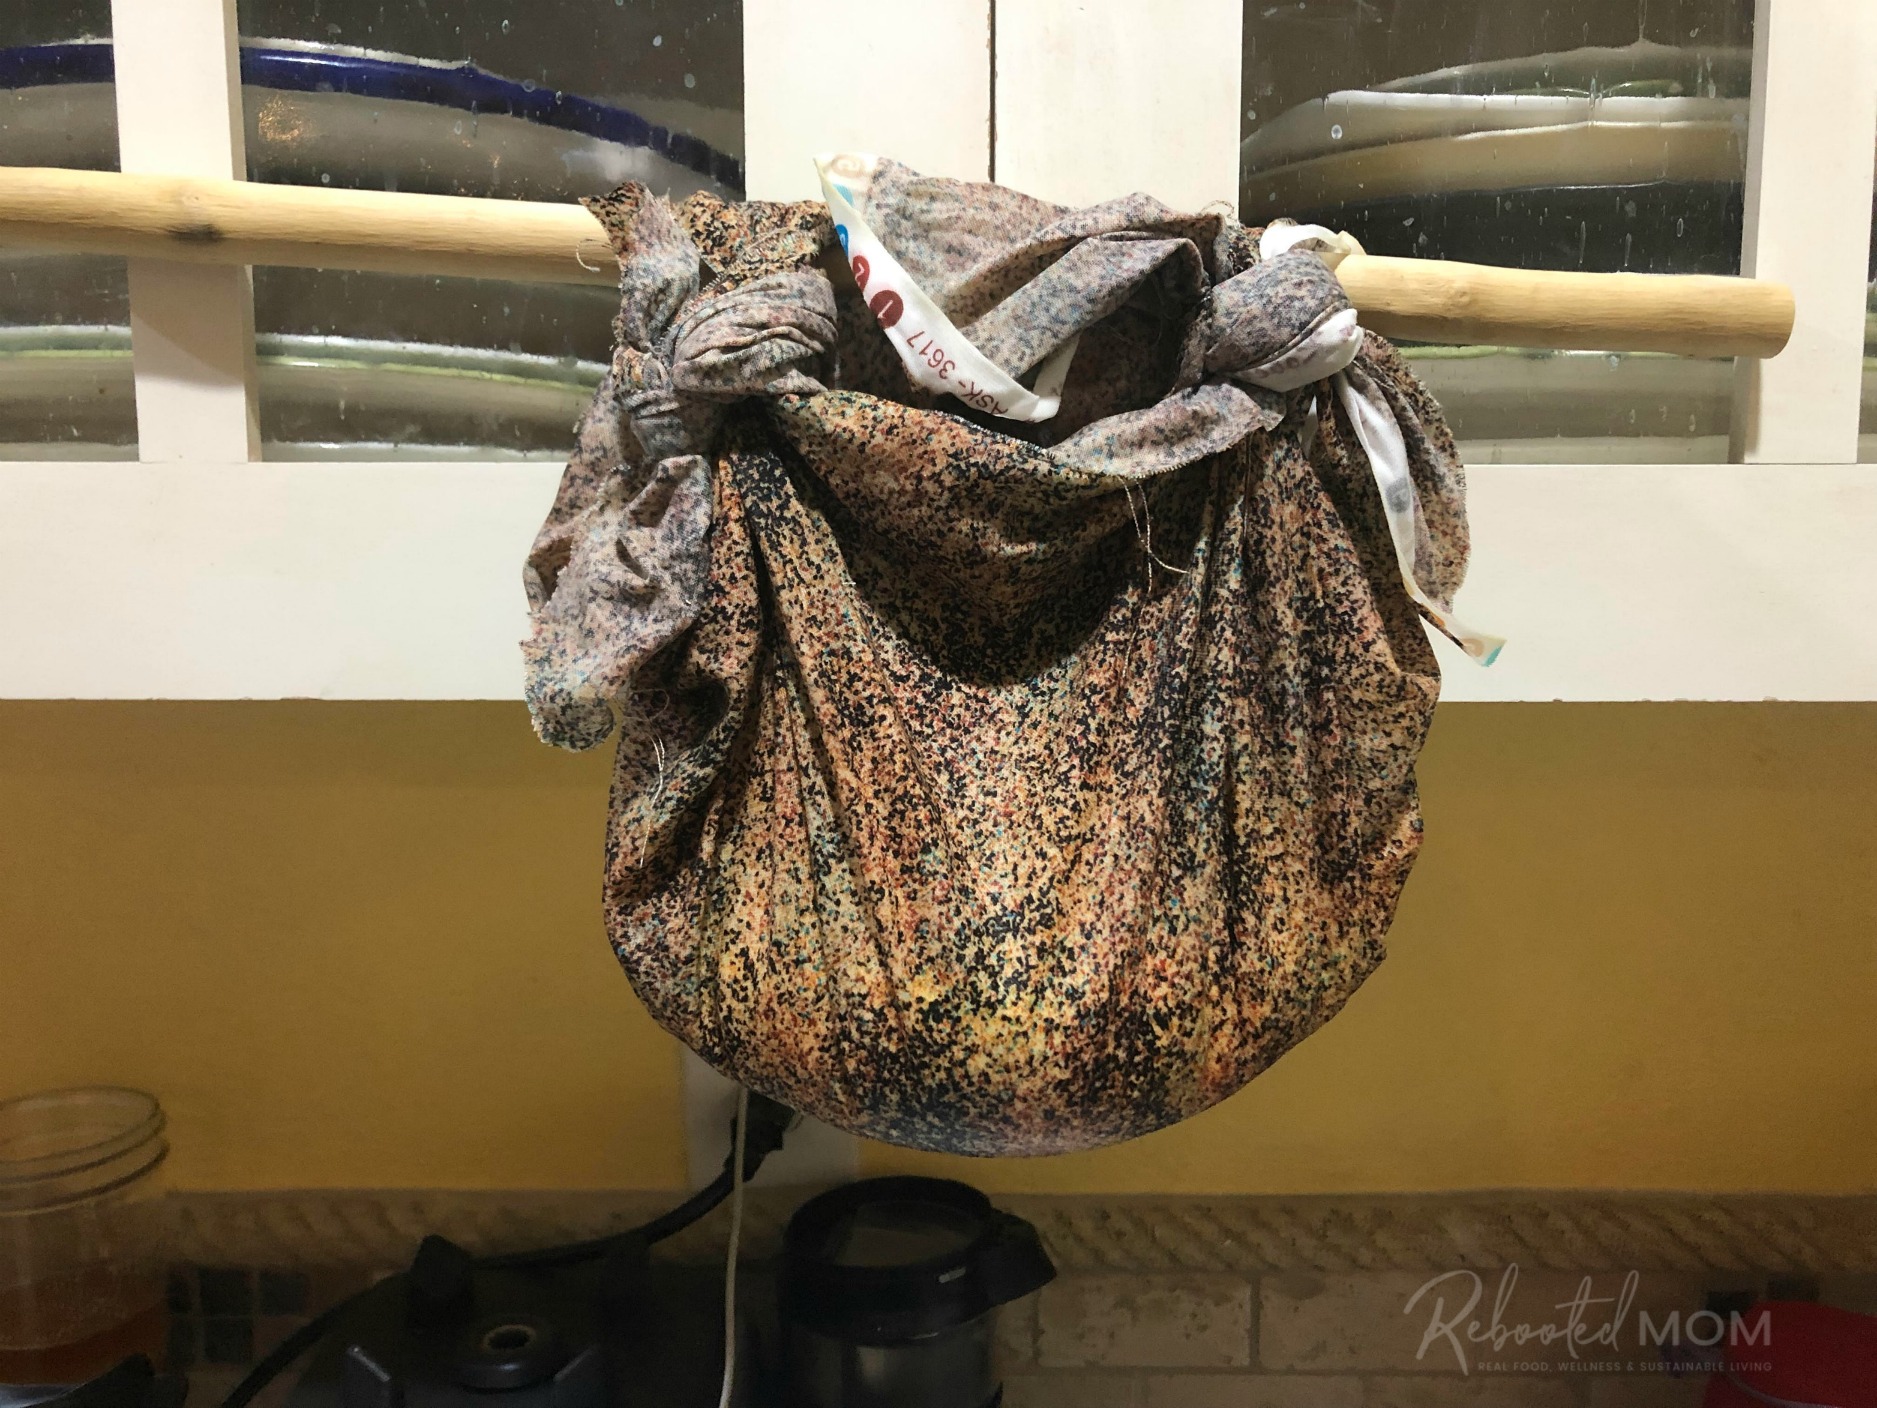
Once the whey has drained off, tie the cloth in a knot at the top and hang from the cabinet over a bowl (to collect the whey). Allow remaining whey to drip off over the course of the next 4-5 hours if not overnight (overnight is easier!)
Brine the Feta
At this point in time, there are a few different paths you could take. You can opt to cut the curd into 1″ cubes, then sprinkle with a few tablespoons of salt. Set the cubes in a dish in the refrigerator and cover loosely with plastic to age for 5-6 days.
Or.. remove the cheese from the cheesecloth and place into a round mold or in a feta mold, and press at 15 lbs for 6-8 hours (or overnight at best). If you don’t have a press, you can cover your cheese with a plate or large cutting board and place a hand weight on top.
(Several weights may be required if you are taking the latter route.)
One pressed, slowly heat 1/2 gallon of water with 1/3 C. salt until the salt is dissolved. Cut the cheese into large chunks and refrigerate in the brine for 5-6 days.
How to Make Feta Cheese
Ingredients
- 1 gal raw milk
- 1 pkg direct set mesophilic culture or feta cheese starter culture
- 1/2 tsp liquid rennet diluted in 1/4 C. cool, non-chlorinated water
- 2 Tbsp flake sea salt or kosher salt
- 1/3 C kosher salt non-iodized
- 1/2 gal water non-chlorinated
Instructions
Heat the Milk
- In a non-reactive pot, add the milk; heat the milk slowly (and as gradually as possible) to 86 degrees.
Add the Culture
- Add the mesophilic culture by sprinkling over the top of the milk. Allow that culture to hydrate for 1 minute, then slowly stir into the milk for 30 seconds. Cover the milk and allow it to rest for 1 hour.
- During that time, keep the milk at 86 degrees. (Either wrap a bath towel around the pot or put the pot in a sink of water at 86 degrees). The temperature of the milk should remain steady during this time, but if it doesn't, simply add more warm water to the sink to increase the temperature of the milk in the pot.
Add the Rennet
- After that hour, add the rennet, making sure it has been diluted in 1/4 C. cool, non-chlorinated water. Stir up and down to distribute the rennet evenly. Cover again and allow the milk to set for 45 minutes. Check for a clean break in the curd. If a clean break is not yet there, cover again and allow to sit an additional 10-15 minutes.
Cut the Curd
- At this time, the milk will be a large, solid mass of curd (it may resemble tofu). Cut the curd into half inch cubes vertically, then again horizontally (like a checkerboard) at 1/2 inch intervals. Then hold the knife at a 45 degree angle and cut the curd horizontally to capture the curd under the surface.
- Let the curd rest for 10 minutes. Cutting the curd allows the curds to lose whey, and thus they will shrink as time goes on. With a large spoon, gently stir the curds over the next 20-30 minutes. The curds should retract a bit.
Drain the Curds
- Place a clean dish towel, butter muslin or cheesecloth over a colander that has been placed over a large bowl (to catch the whey). Pour the curds in and allow the whey to drain off.
- Once the whey has drained off, tie the cloth in a knot at the top and hang from the cabinet over a bowl (to collect the whey). Allow remaining whey to drip off over the course of the next 4-5 hours if not overnight (overnight is easier!)
Brine the Feta
- At this point in time, there are a few different paths you could take. You can opt to cut the curd into 1" cubes, then sprinkle with a few tablespoons of salt. Set the cubes in a dish and cover loosely with plastic to age for 5-6 days.
- Or.. remove the cheese from the cheesecloth and place into a round mold or in a feta mold, and press at 15 lbs for 6-8 hours (or overnight at best). If you don't have a press, you can cover your cheese with a plate or large cutting board and place a hand weight on top.
- One pressed, slowly heat 1/2 gallon of water with 1/3 C. salt until the salt is dissolved. Refrigerate the cheese in the brine for 5-6 days.
Keep the Whey!
After you are done, you’ll likely quite a bit of whey. This whey is acid whey, and can be kept and used for many things. Refrigerate your whey, just as you would regular dairy items.
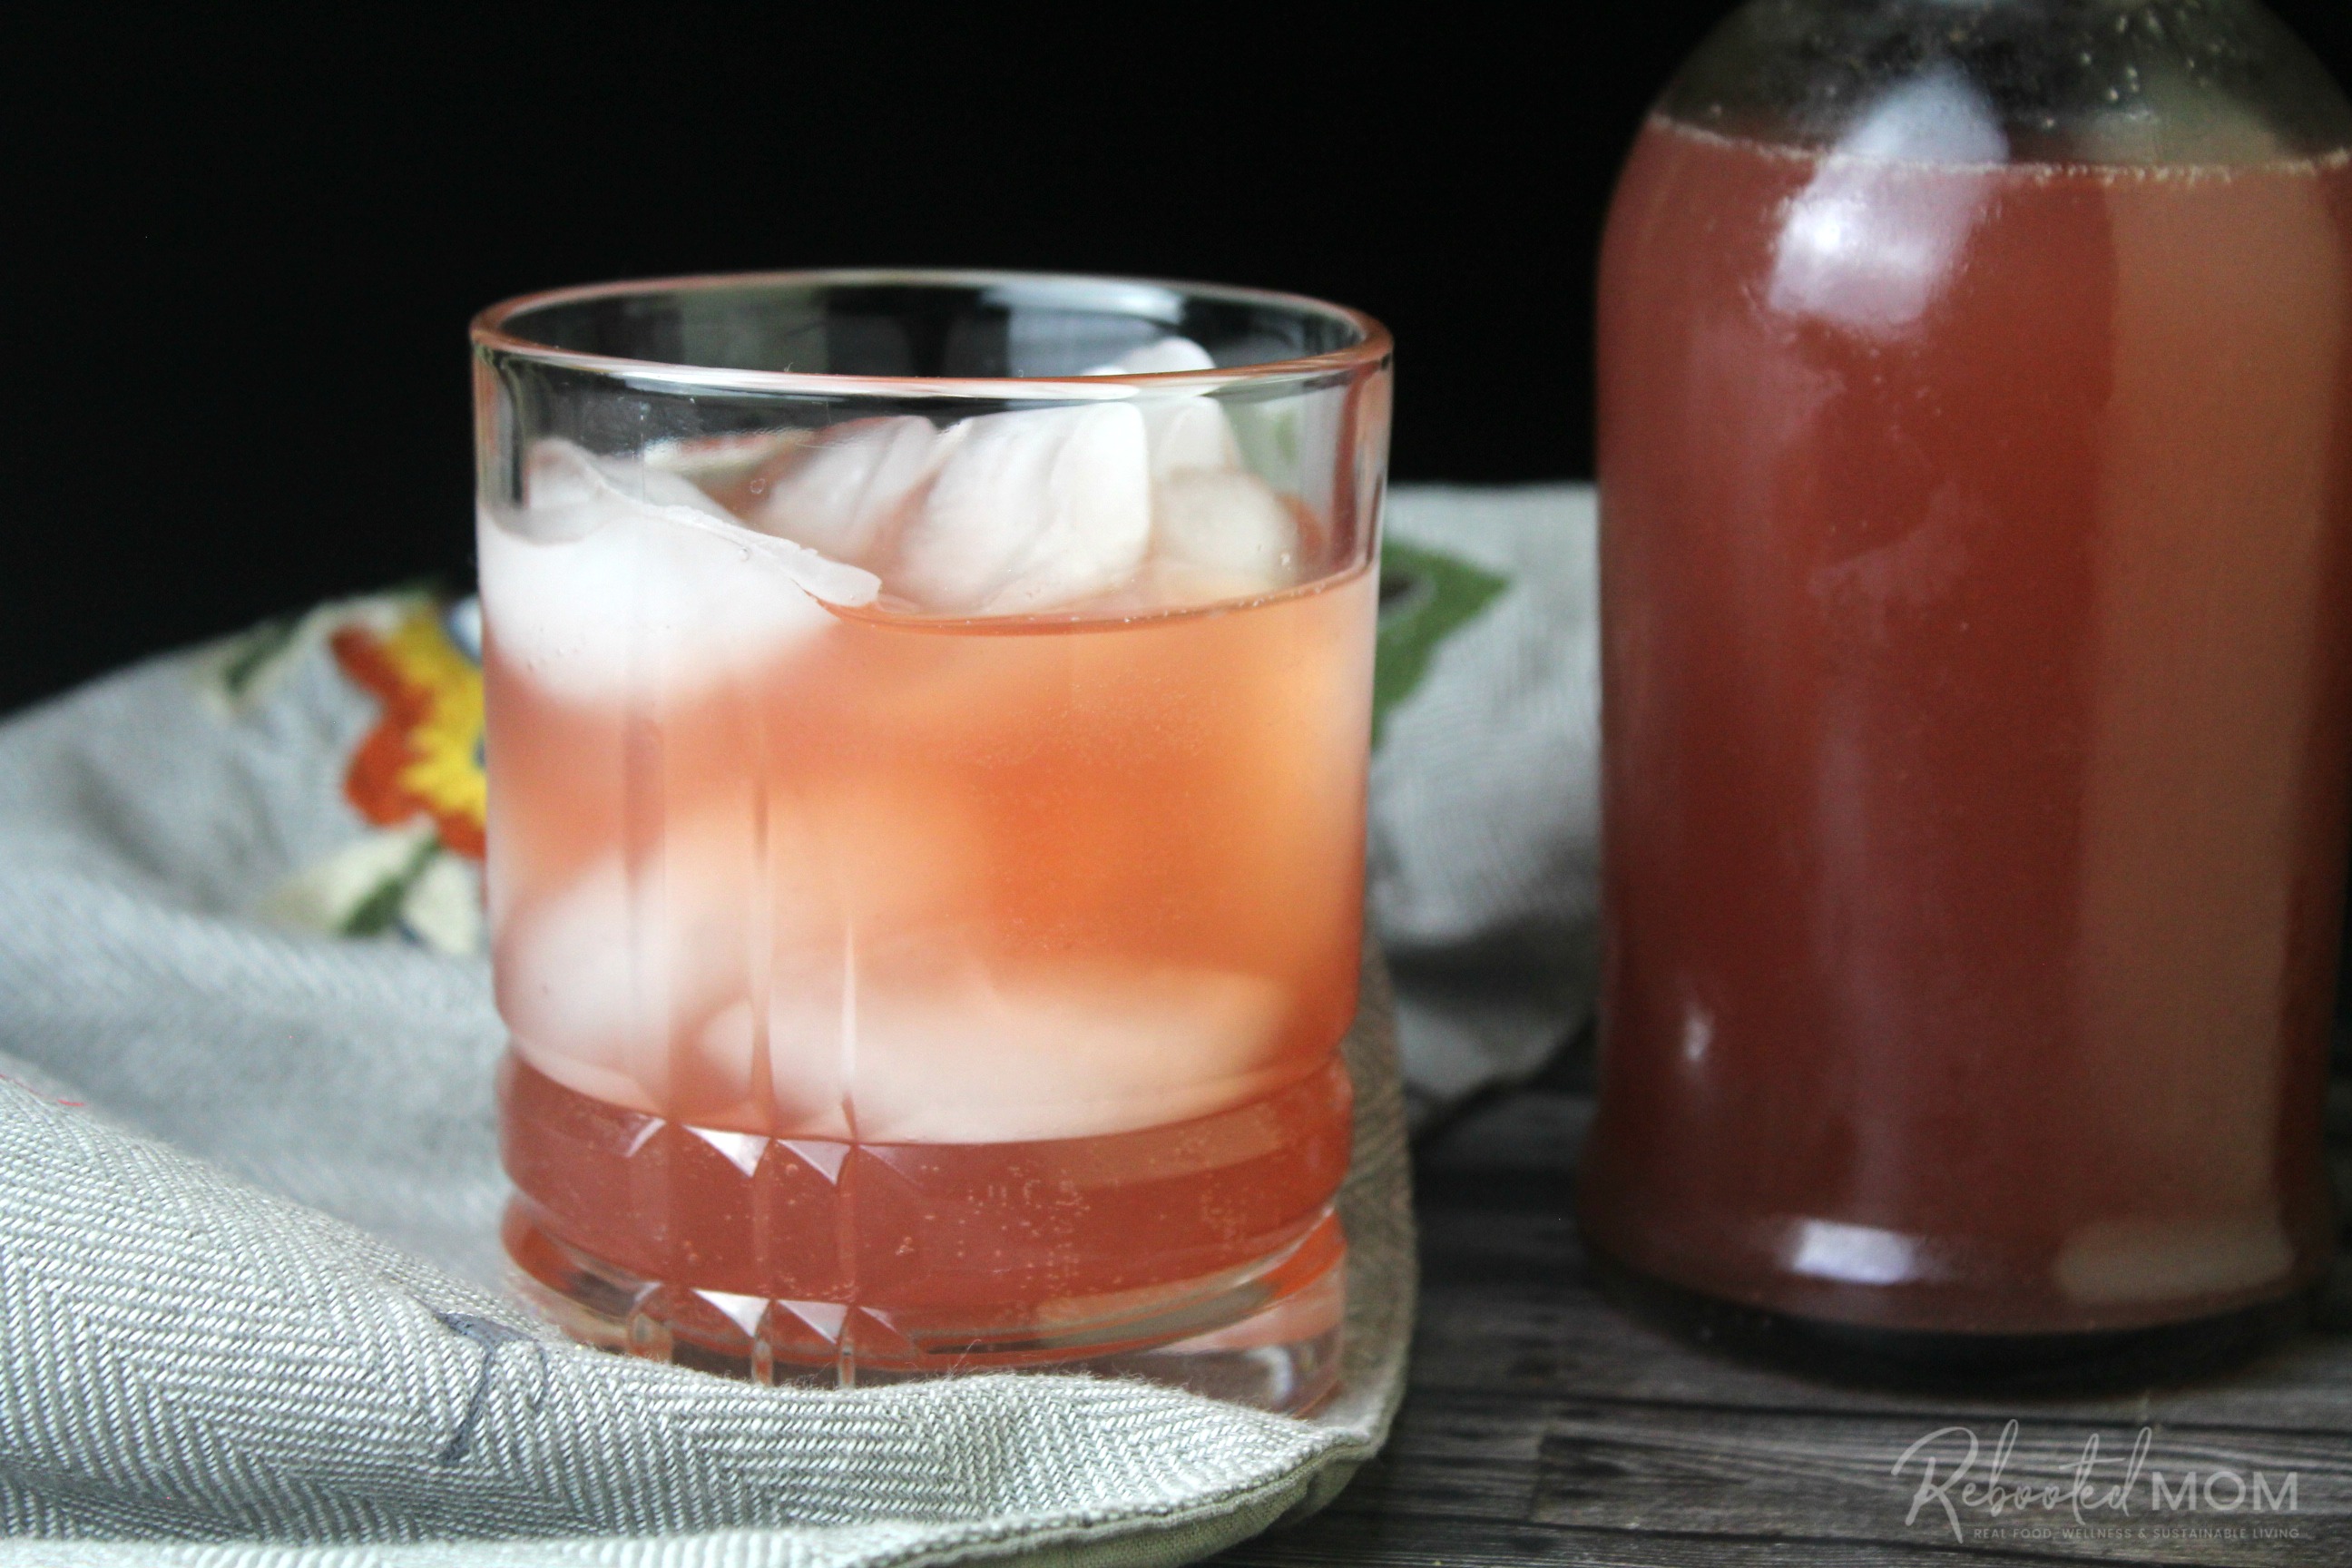
Acid whey should be used with caution in the garden as it can affect the pH of the soil and cause harm to plants if used in abundance. It should never be dumped down the drain – it can have adverse effects on the water system. Use it to cook rice, soak or cook beans, or make a delicious probiotic soda

I cannot buy raw milk in Newfoundland. Is there another kind I can use. I would love to try this recipe
I haven’t used any other milk .. so I hesitate to tell you that I have been successful with another type.
Hi!!! I make yogurt weekly. We love feta and buy large packages of it from Sam’s Club. It costs the same ($ 10-11) to buy approx 2 lb of feta, as it does to buy a gallon of raw milk here. So I am wondering, what the yield is of the feta? Any idea of cups/pounds? I would love to try making it, just wondering if the investment in the other ingredients is worth it? if the yield is similar to Sam’s? Though there is something to be said for making it fresh! Thank so much for sharing the process and your expertise! 🥰
Hi! 🙂 That’s great that you can find it at Sam’s. This Feta yielded for me two pint canning jars. What I did was place it in the jars, and cover with olive oil, and a few sprigs of rosemary and that’s how I stored it. If you want my honesty… if you have access to Sam’s and it’s inexpensive, go for it. I make it partly because I don’t have a membership (not yet anyways!) – Sam’s is so far for me to drive; and I am just really weird in that I love making cheese, so for me it was just the challenge of doing it myself (if that makes sense?) I am just a weird person in that way. I will be honest and say it does cost more to make yourself – my raw milk gallons here are $12, then the cost of all the other supplies (cheese press, etc.) add up quite fast. But.. I had those materials already so for me it wasn’t so much the cost, but for someone starting out, it would prob be more to make it than buy it.
I have access to raw dairy milk. Trying my first batch of Feta Cheese today, on the second hour of waiting right now before cutting the curd. Am doing an experiment, shesh on my first batch ever, must be feeling brave ! Added 1-1/2 T. of dried spices to the milk. Has anyone else added herbs to the feta cheese during the process instead of after ?