


Homemade fermented Fresno pepper hot sauce that yields a spicy, flavorful hot sauce that’s not only delicious but full of gut-healthy probiotics!
Summer is here and that means a bounty of beautiful peppers at the farmers market. Or, if you garden, it might mean lots of bright peppers ripening up in your backyard.
This is the best time of the year because there are so many fruits and veggies in season – tomatoes, to cucumbers, corn and even peppers..
So many peppers!
This is especially true if you are growing peppers in your backyard garden and looking for a new way to use them up. Peppers are one of my favorite plants to grow and there are so many varieties.
This time of the year, I always go a little overboard trying to grow as many pepper varieties as I can. Then I struggle trying to use up the bounty and find myself making things that I can gift to friends and family. There’s only so many peppers one can take before they get all peppered out..
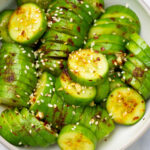
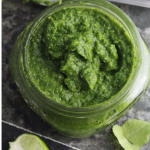
I have done roasted Fresno pepper pesto, fire roasted poblano & garlic pesto, fermented jalapeño hot sauce, and now.. this.
Fermented Fresno Pepper Hot Sauce
Anyone can make this hot sauce. It’s so easy to make, and it tastes delicious on everything. I find my oldest daughter dumps this on everything — because in her world, regular food is too “boring” without hot sauce. And if I don’t have this in the fridge, then I need to have Tabasco. And if I don’t have that… well, then I’m in big trouble.
One of the most important steps in making this hot sauce is allowing it to ferment. This process will help develop the flavors and also gives it a healthy boost of probiotics for your gut.
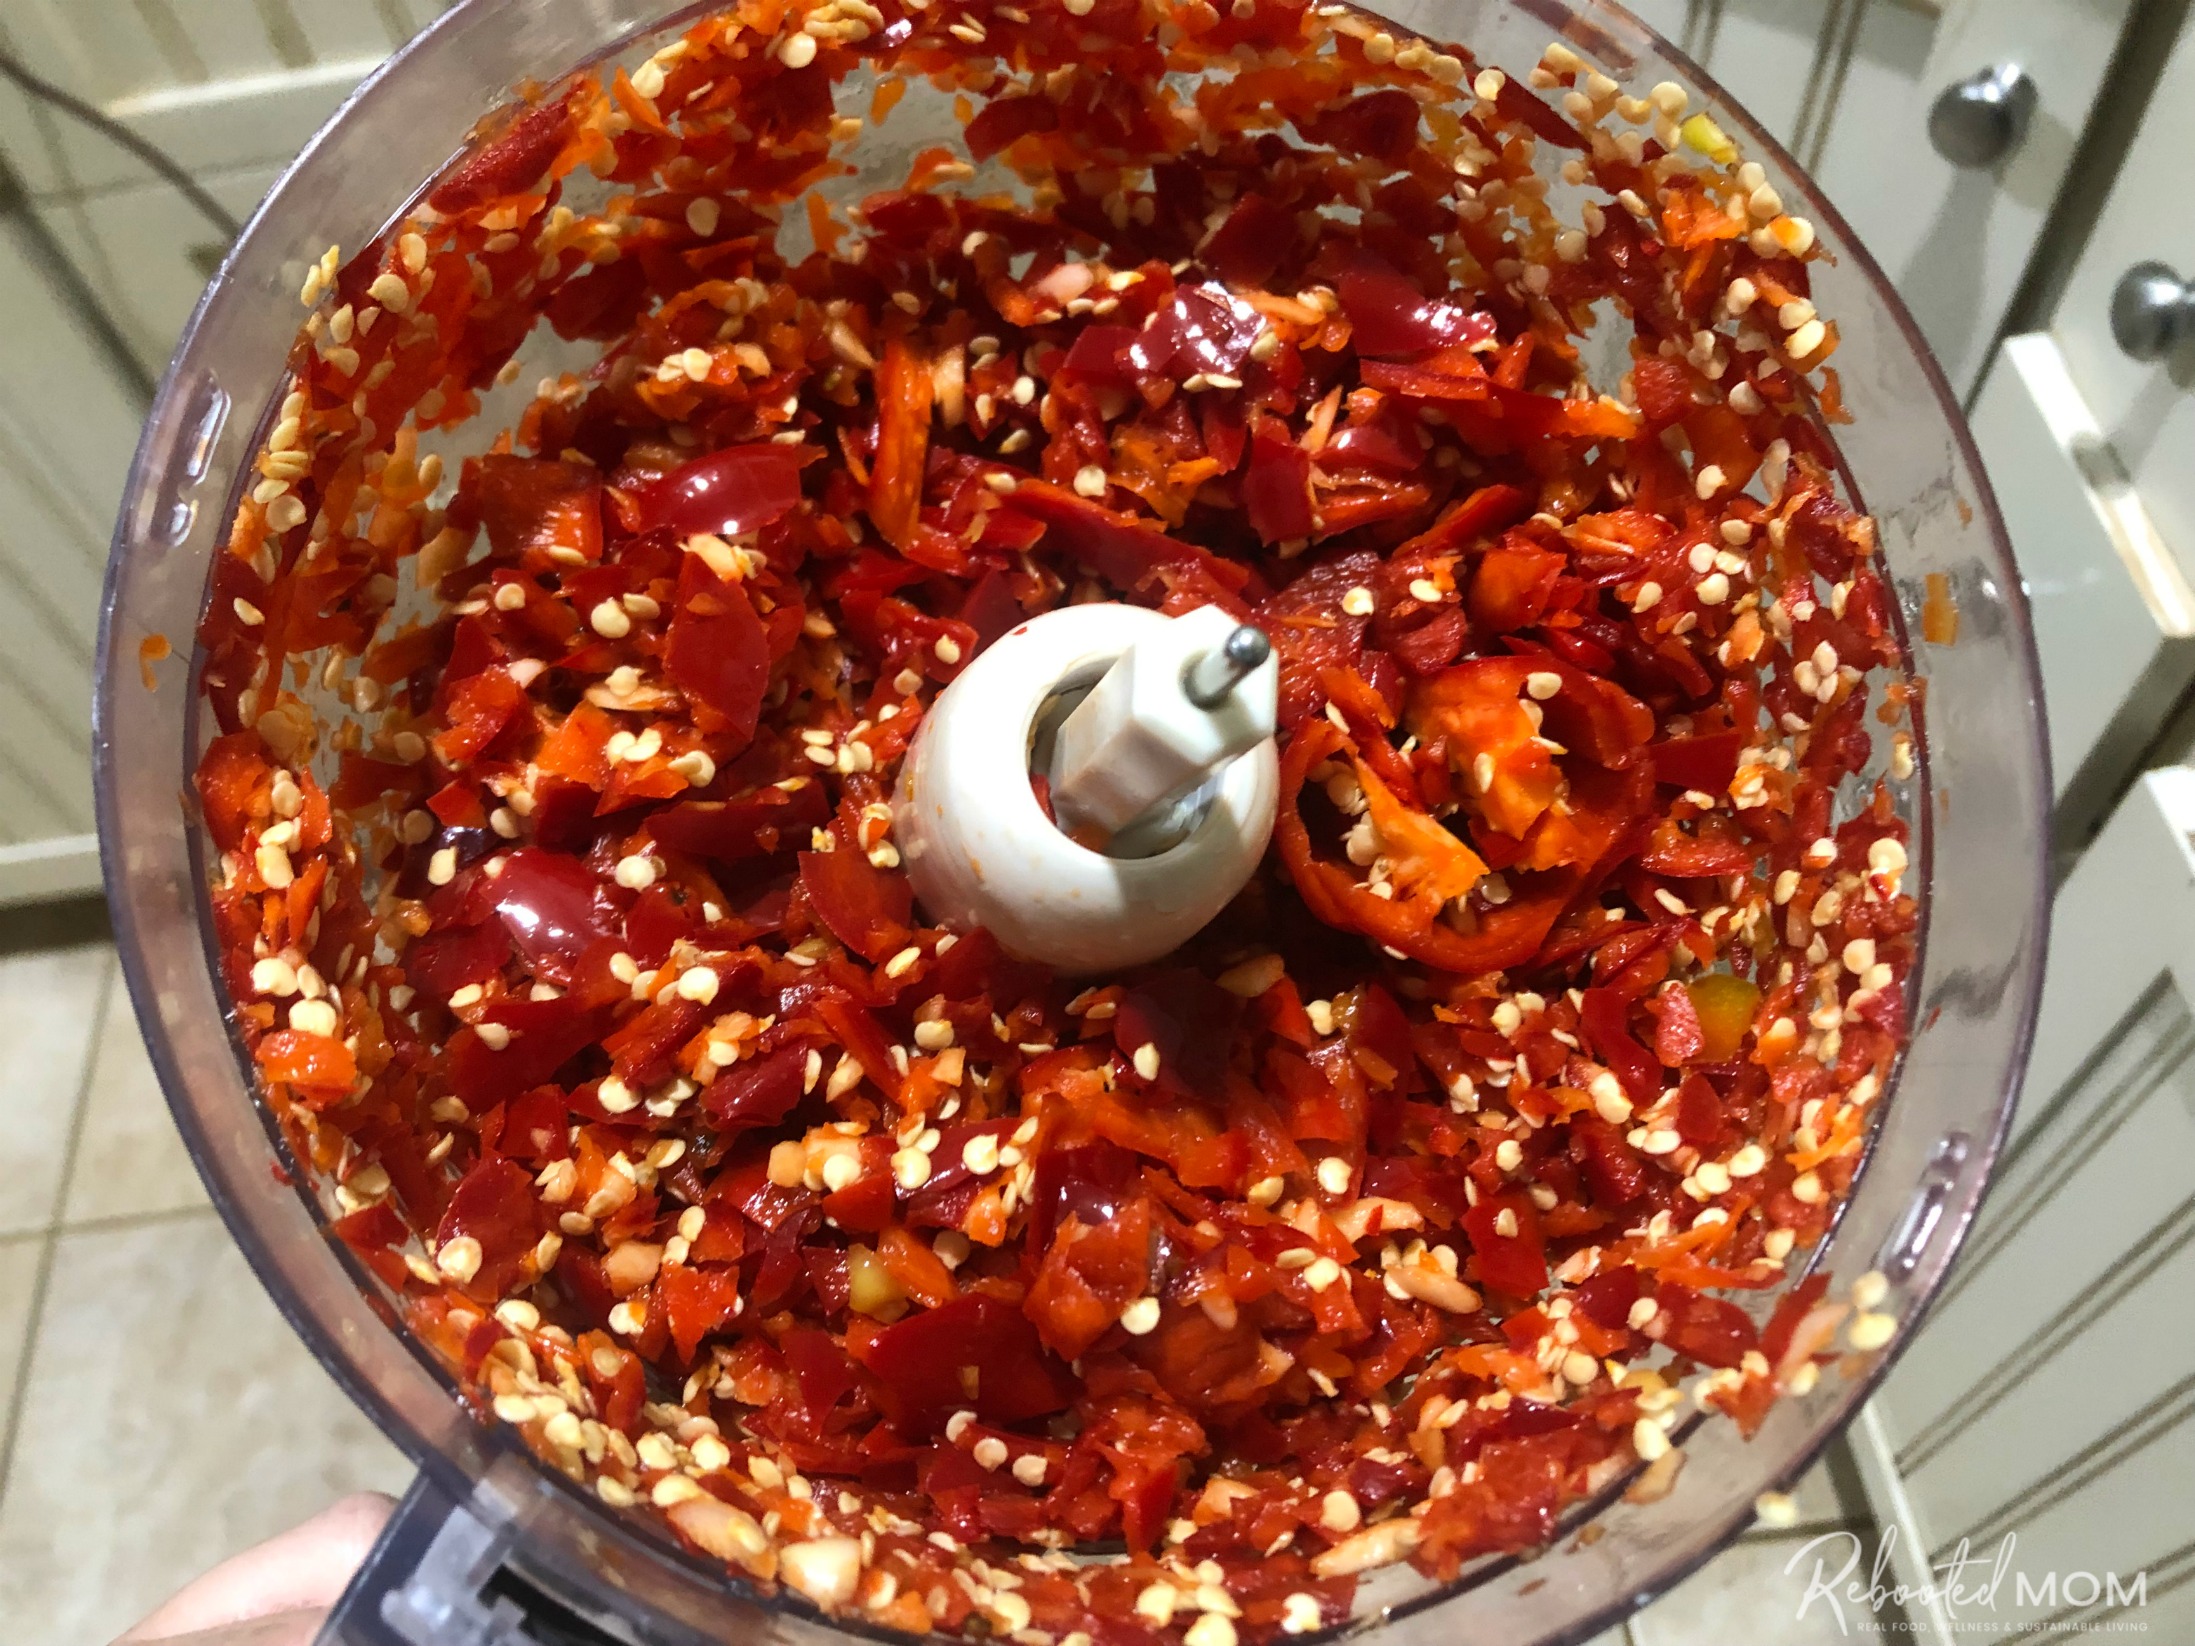
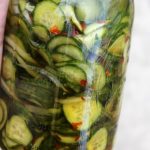
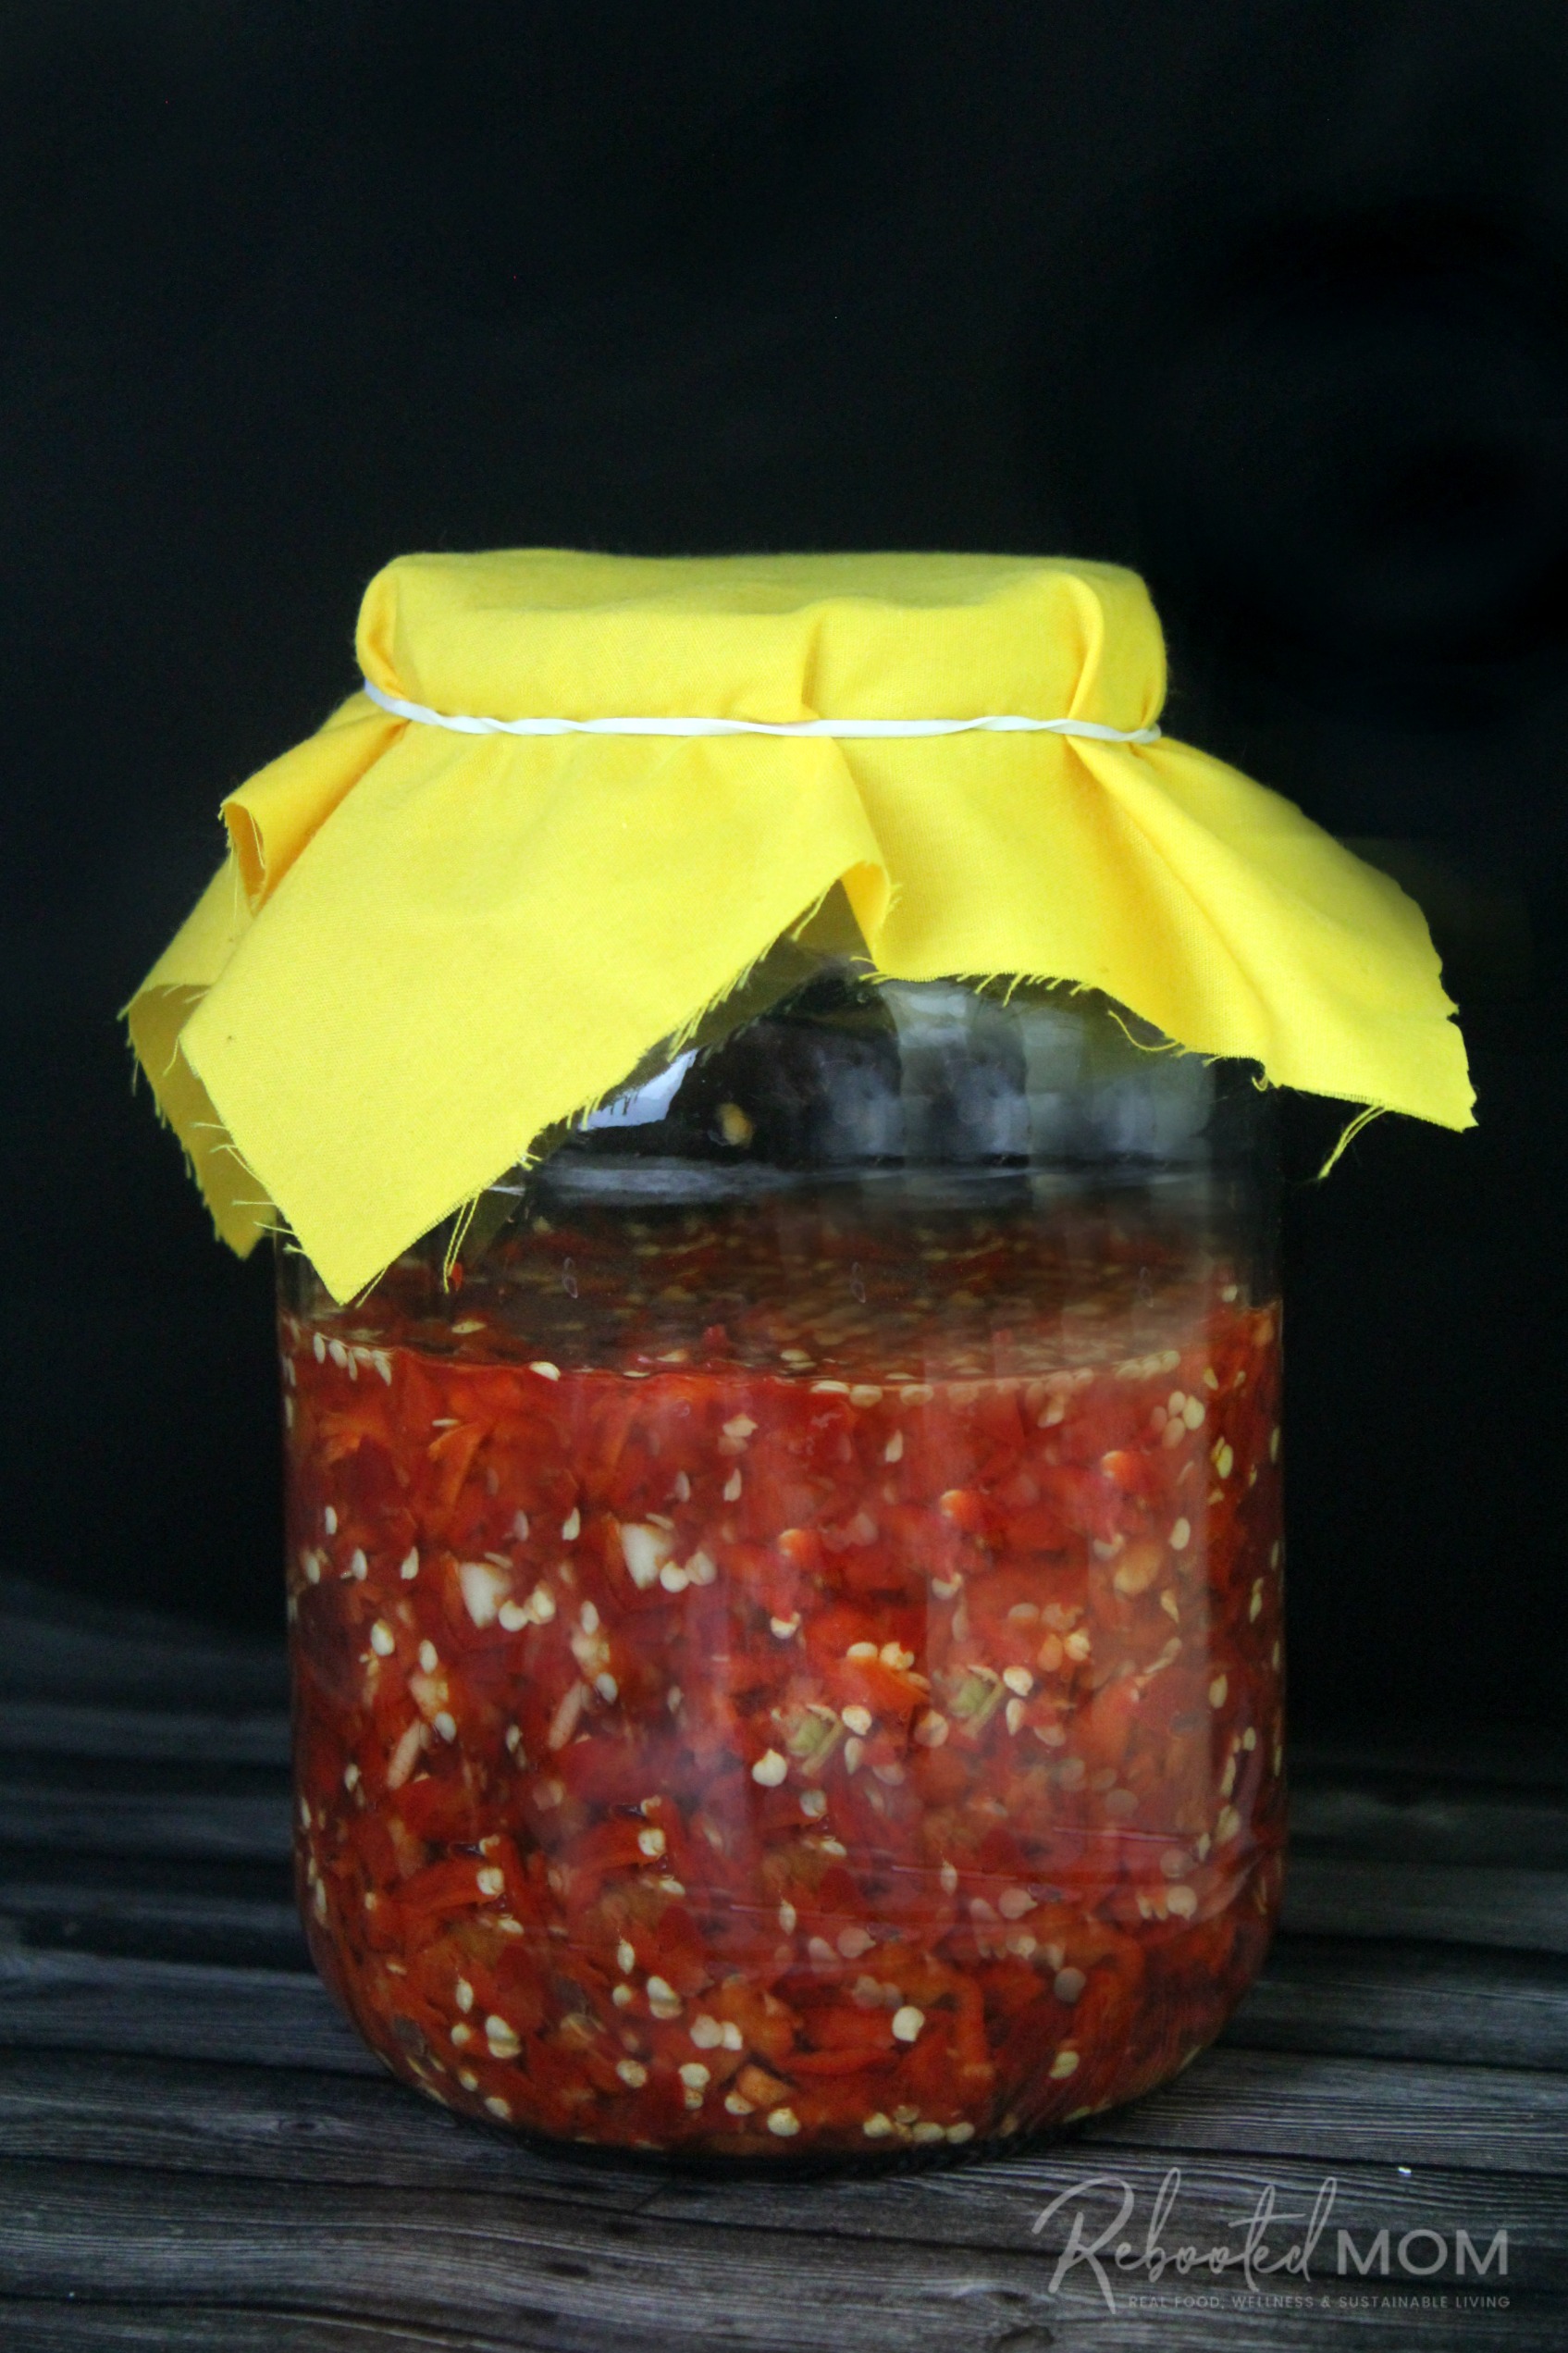
Start by adding the peppers, salt and water to the food processor – pulse until it’s a thick salsa. Transfer to a clean jar and cover with a cheesecloth or a piece of cotton fabric. Allow it to sit, undisturbed, for 24-48 hours.
Then stir in the apple cider vinegar and allow it to ferment for 7-21 days, still covered with cheesecloth or a piece of cotton fabric.
(Feel free to go longer if you’d like – I have gone up to 3 weeks with mine.)
After that time, you should see the bubbles (ferment activity) start to slow down considerably. Transfer to a blender and blend until smooth. Push the blended chile through a cheesecloth or a fine mesh strainer (make sure you wear gloves!) to remove the seeds and remaining pulp.
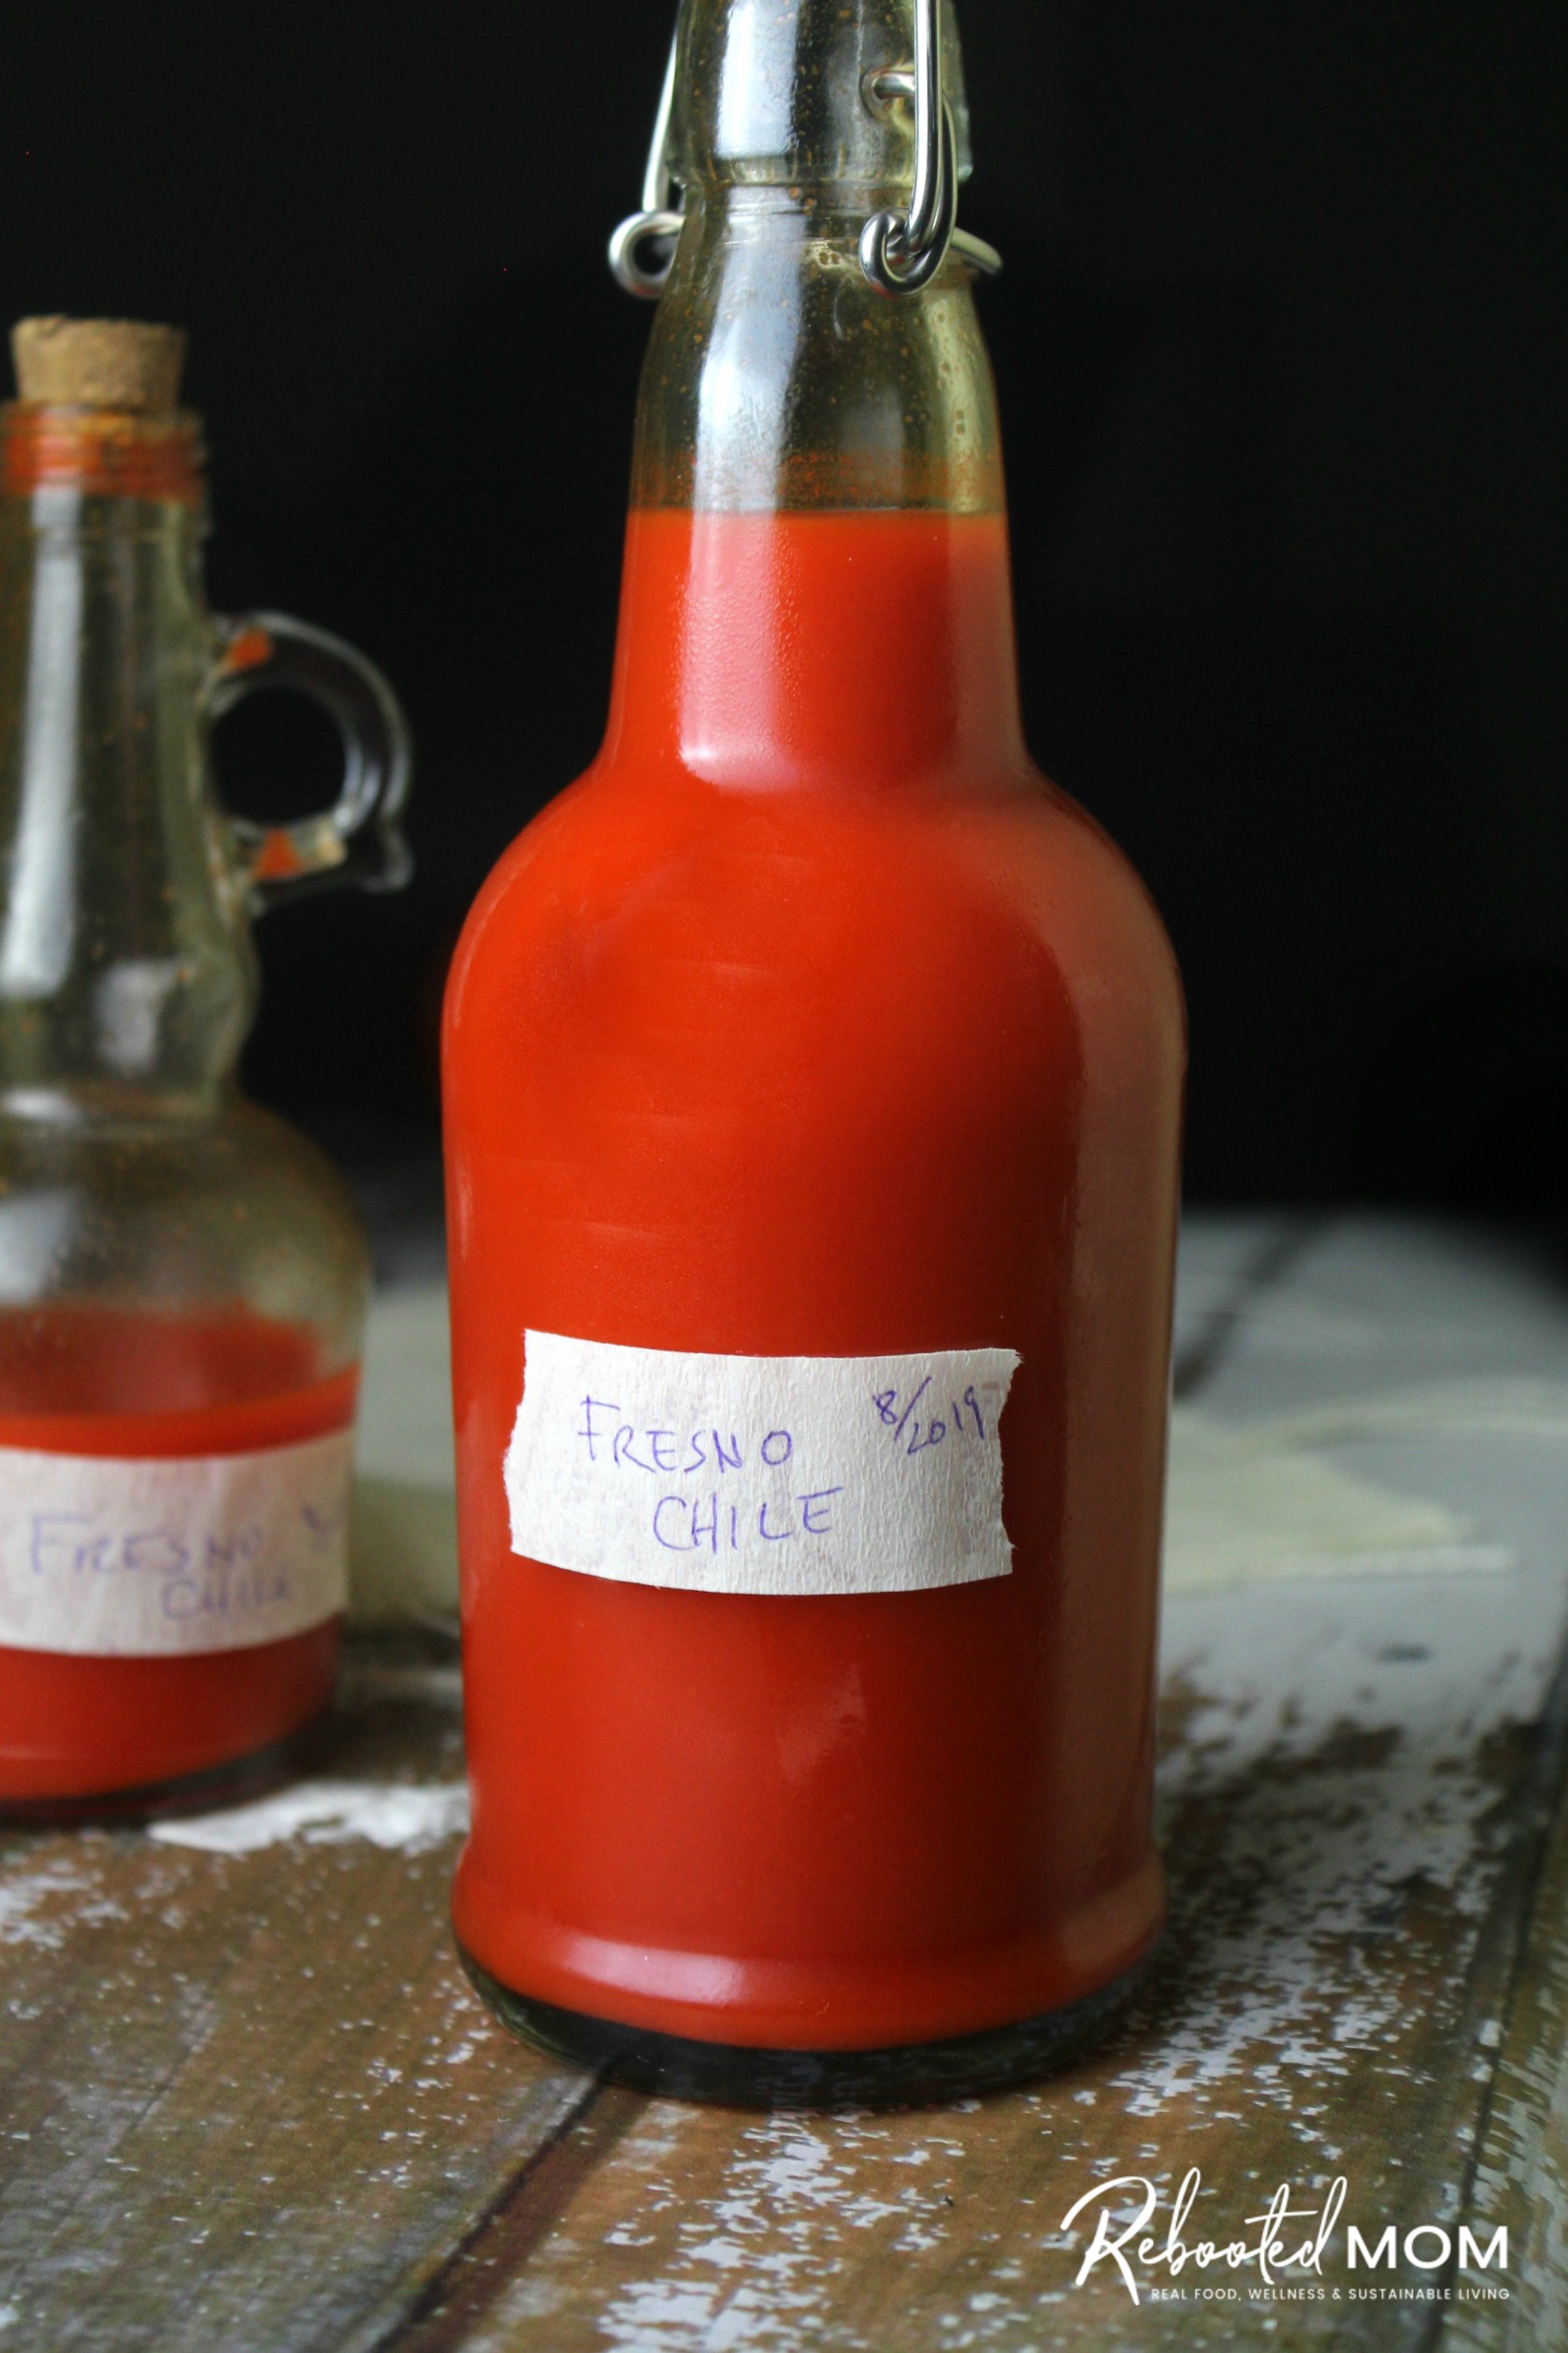
Transfer to a glass jar, swing top bottle or these hot sauce bottles if you are giving as gifts.
Fermented Fresno Pepper Hot Sauce
Ingredients
- 1.5 lbs Fresno peppers stems removed
- 6 garlic cloves
- 1.5 Tbsp Kosher salt
- 1/2 C water
- 1/2 C apple cider vinegar with the mother
Instructions
- Combine the chile peppers, garlic cloves, salt and water in the food processor. Process until you reach the texture of chunky salsa.
- Transfer to a clean glass jar. Cover with a canning lid & ring, or a ferment lid, or a cheesecloth with a rubberband. Leave on the counter at room temperature for 48 hours.
- Add the apple cider vinegar & stir to combine. Leave on the counter, covered with cheesecloth for 7-21 days.
- After that time, transfer to the blender & puree until smooth. Pour through a cheesecloth and strain to separate the seeds. Push the liquid out into a clean bowl.
- Pour the liquid into a swing top bottle or clean glass jar & refrigerate. It'll last for several months.
- Separation of the sauce will happen - it's normal. Just give it a good shake before you use it.
Notes
Nutrition
Recipe Notes:
The flavor of this homemade fermented hot sauce is so fresh and vibrant. The biggest challenge in making this hot sauce comes from the waiting period. For a mere 10 minutes of total hands-on time, you can have a lovely hot sauce that will last you several months..
If it doesn’t last that long, don’t panic! Grab some more chiles and make some more.

There are so many different kinds of chiles that you can use – for something hotter, use Scotch Bonnet peppers. If you can’t find Fresno peppers in your area, then use something like serrano or jalapeño peppers.
So if you find yourself with an abundance of peppers this summer, make this hot sauce! It’s so good!

Great recipe! Going to make a “bunch”.for friends for Christmas.
Glad you love it, Edmund!
At what point do you add the salt?
Hi Xavier, the salt is added to the ferment. “Add the peppers, salt and water to the food processor – pulse until it’s a thick salsa. Transfer to a clean jar and cover with a cheesecloth or a piece of cotton fabric. Allow it to sit, undisturbed, for 24 hours.”
Hope that helps! This is one of my favorite ferments!
I haven’t noticed any bubbles really. It smells like something is happening tho. Its been 9 days.Is this to be expected?
Zack – I’m in Phoenix and our weather here is somewhat warm. My house is at 78 degrees typically all summer/into the winter. You should notice bubbles after 3-4 days… but then that can ultimately depend on your temps/environment, too.
If it smells like something is happening, allow a little extra time. I let mine ferment for 3 weeks – as it went on, the activity (bubbles) went down drastically.
i did not add the vinager and its been 22 days. can i add the vinager now?
Can i add the vinegar after its been over 20 days?
I haven’t tried adding it that late, but I don’t see why not. Give it a try. Let me know how it goes/turns out 🙂
It turned out really good. I added the vinegar after 20 days and let it sit for another 2 weeks. 🙂
Another batch is brewing but this time going to add vinegar today (48 hours per your recipe) and see if there is a difference.
Thanks,
Jodi
i forgot to add the vinager in 48 hours, can i add it after 24 days?
Hi there! Another phoenix resident I am looking forward to trying this. I want to mail to a friend out of state and I am wondering how soon after you make the finished product do you need to refrigerate? Do you think it would make it in the mail?
Oh gosh! First of all, NICE to meet you .. I’m in Mesa :).
I have never sent it via mail and I am not sure I even know where to begin with that. It may make it… depends on where they are. I mail things to ABQ all the time and it’s about a day and a half priority mail – and right now the temps here in Phx and ABQ are
on the cool side so it’s a better time to “try” than any other time. I would make sure you put it in a ziplock (gallon size perhaps) .. you could send it via dry ice through UPS (UPS store will pack). I have done that too but — it is NOT cost effective! I used that method for sending tamales… but it cost me a fortune. Good luck – let me know if you do and how it turns out!
I am really excited about making this recipe. Can I add white vinegar instead?
Absolutely you can!
Im just over a week in since adding the vinegar and I only see a few small bubbles (10 or less) spread around the middle depth and sides of the jar. What type of bubble activity is to be expected? My home stays about 74 deg and I do planning on going the full 3 weeks, it just seems like not a lot of fermentation activity and I want to make sure it wil be safe to use later. I suppose maybe some more patience is required. Thanks for the help!
Every home can vary so much – here in my home, my temp is 78-80 degrees (Arizona, sadly!) and fermentation happens SO quick in the summer. But… entirely diff story in winter. Then, my house is quite… odd, it’ll be anywhere from 68-74 and it can take a while to “get going”.
Patience… definitely – but if another week passes you may want to give it a try again and lessen the salt a bit. Sometimes a bit too much salt can stall a fermentation. I have had successful ferments that have bubbled within days, and then other times, ferments that have been super sluggish to get moving (but eventually they do, just not as fast as I want them to!) Let me know how it goes!