


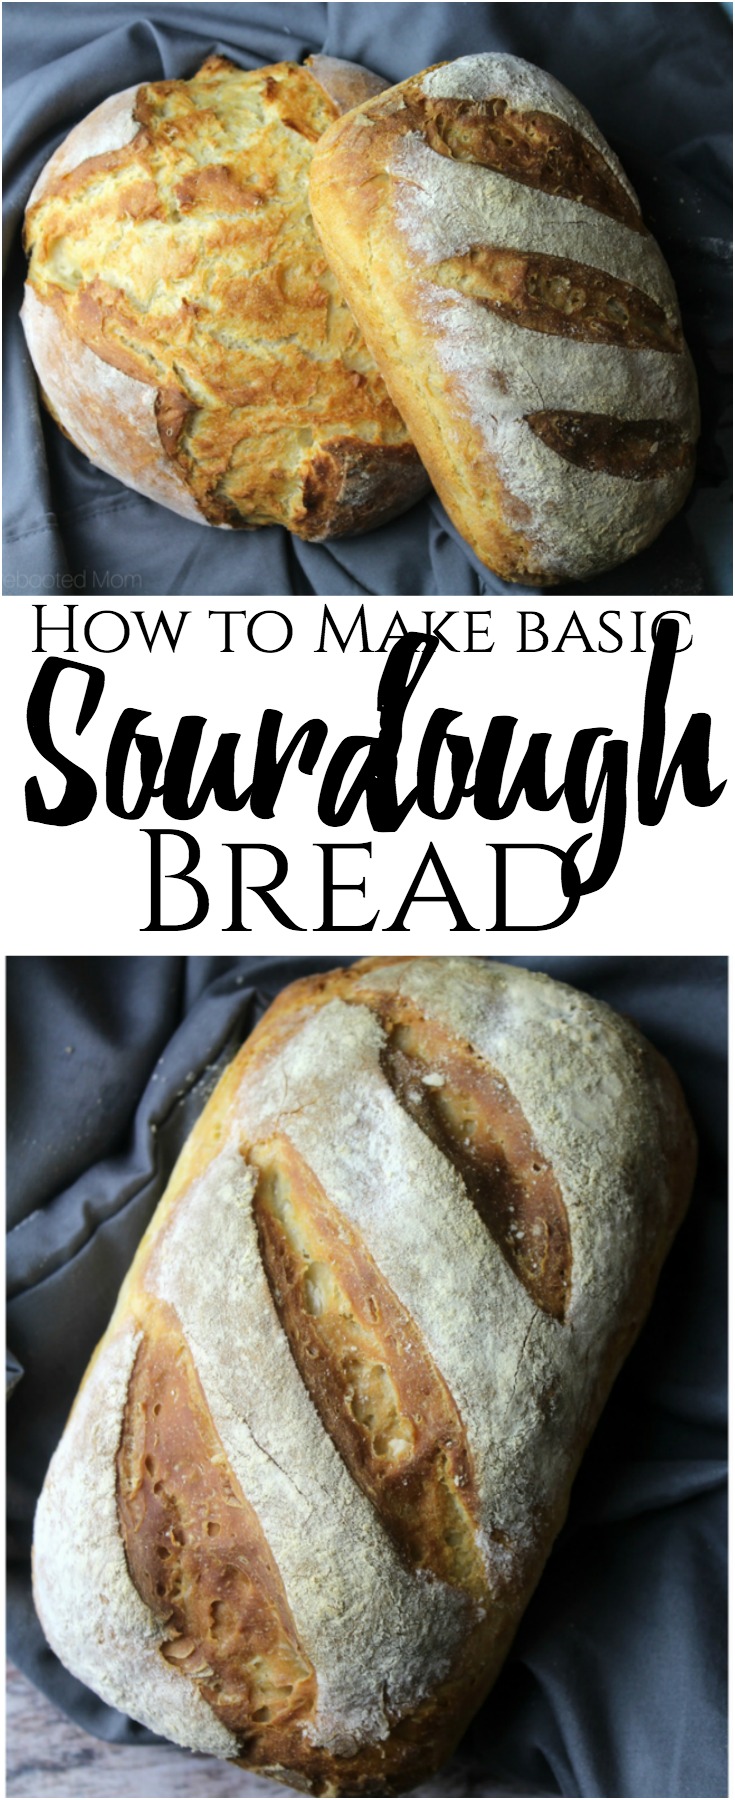
Sourdough is one of life’s greatest little pleasures. The smell of fresh, warm bread cooking in the oven is like no other, especially on a cold blustery day, or even a day where the rain is falling.
Sourdough is an incredibly easy bread to make – it requires minimal preparation and just simple ingredients. Making your own is always so much better than purchasing elsewhere, as the bread in store always has a ton of additional ingredients, preservatives and isn’t quite as fresh as homemade.
Unlike regular breads that are made in just an hour or two at home, sourdough requires quite a bit more time – advance prep to make the starter, wait for it to get active, feed it and stir it, and then use that active starter to make your dough. And while traditional bread is sometimes foolproof… sourdough is not. Your sourdough will not always turn out amazing, in fact, it may take several attempts to get your sourdough bread correct.
You might even give up and tell yourself that it’s better to buy it in the store. (Please .. don’t do that!)
It took me quite a long time until I succeeded – and I find that the best way to save money while attempting sourdough is to halve the recipe (below) so you aren’t blowing through too much flour.
Before you make the sourdough, you will want to make the starter. The starter can be made easily with a few simple ingredients (get the recipe here).
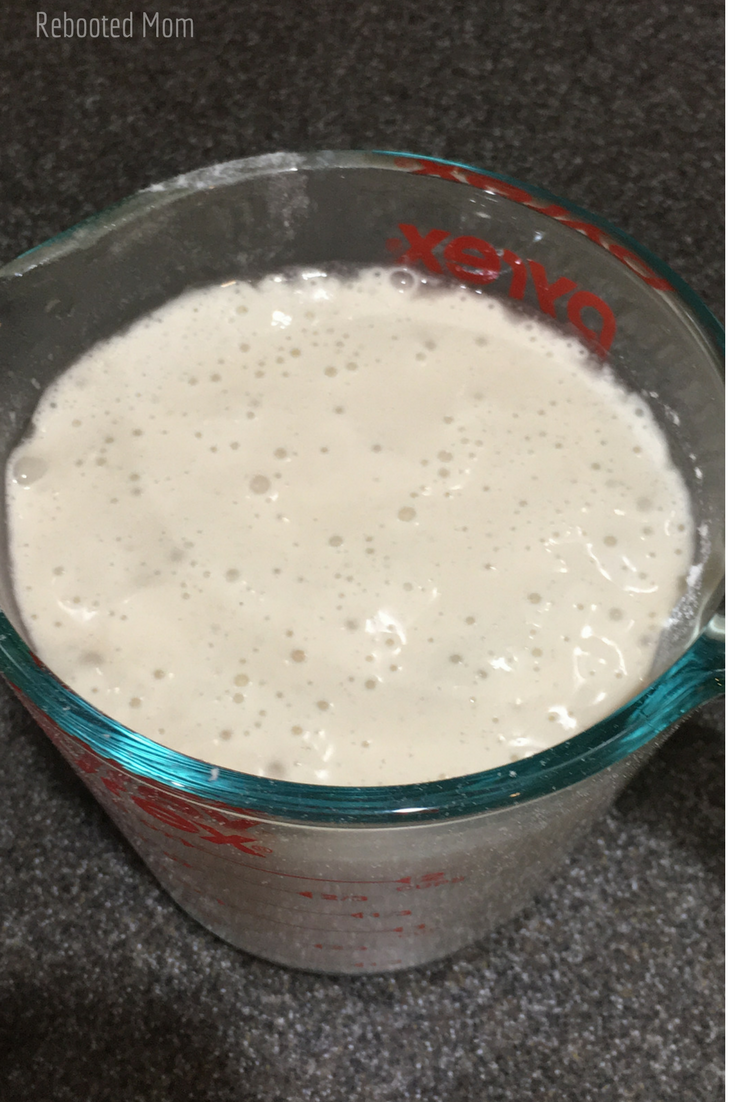
In order to produce a successful loaf of sourdough, your starter needs to be active and fresh – I have found that the best time to use my starter is approximately 4 hours after the last feeding. The top of the starter should be nice and bubbly. If it isn’t, you might want to feed that starter (1 C. flour, 2/3 C. water and 1 tsp sugar) and wait a few hours until you see activity.
If you allow it to go too long, the starter isn’t as active because it has begun to go dormant.
Sourdough bread recipes have a much wetter dough than traditional bread. When you add the water to the dough, avoid adding too much water at first – always go with the lower amount (1 C.) – if you add too much water the bread won’t have enough rise (lift) and will fall flat.
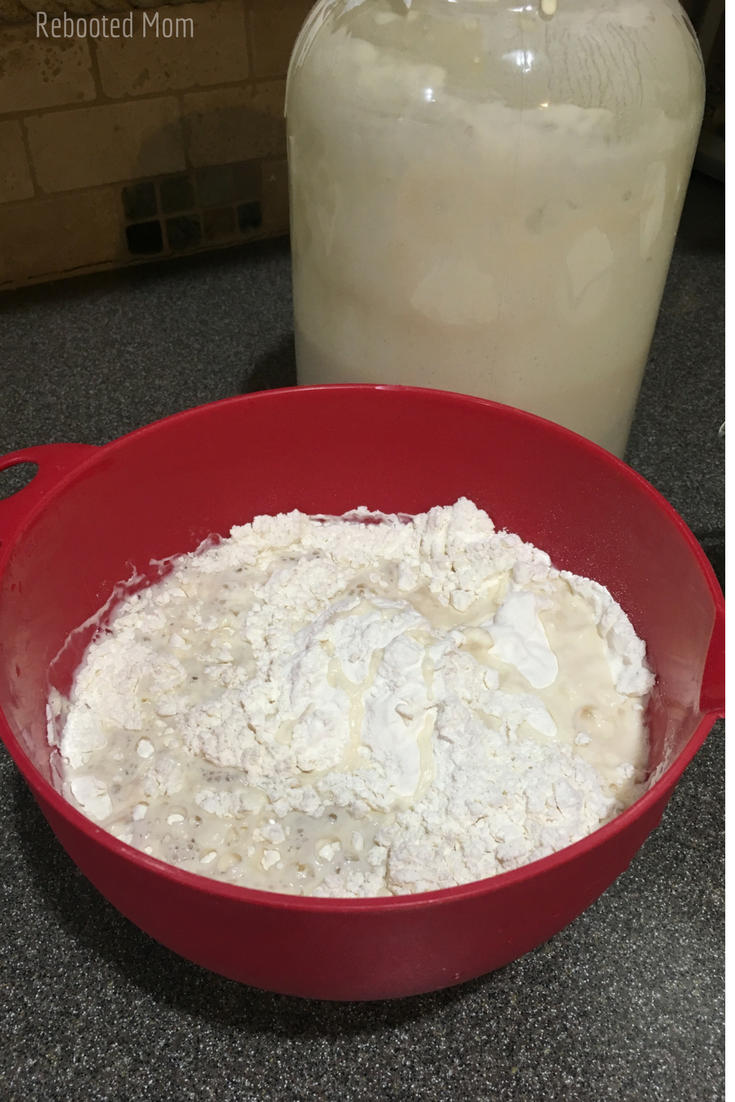
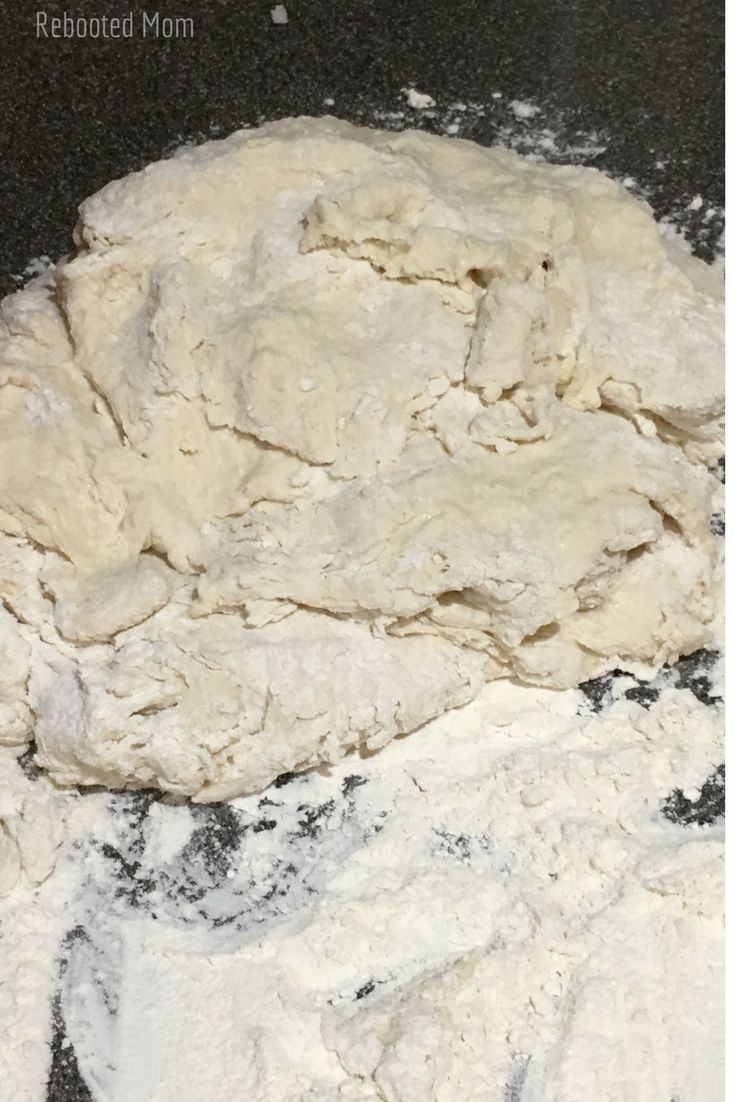
When you first mix the dough, it will be very moist.. then gradually a challenge to mix. Ditch the spoon and go with your hands until you can’t handle it any more. Then dump out onto a lightly floured surface as a shaggy mass and knead for 5 minutes. Allow equal time to rest. Then knead again.
The bread will come together over time, and kneading will help it do just that.
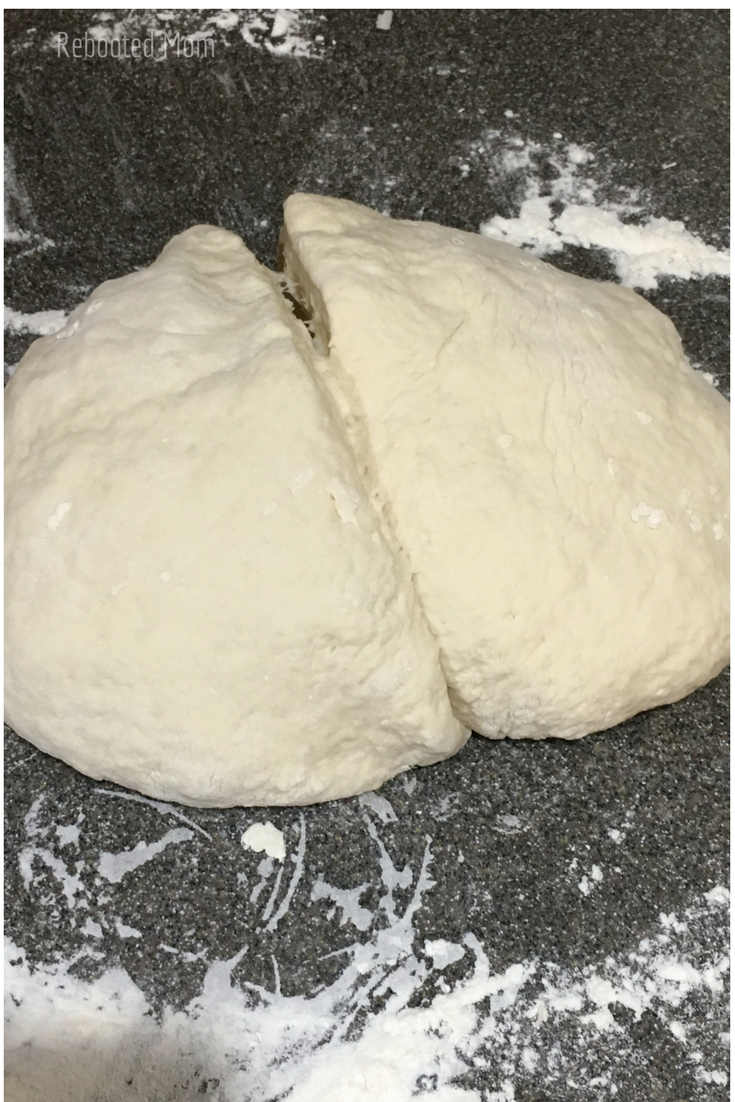
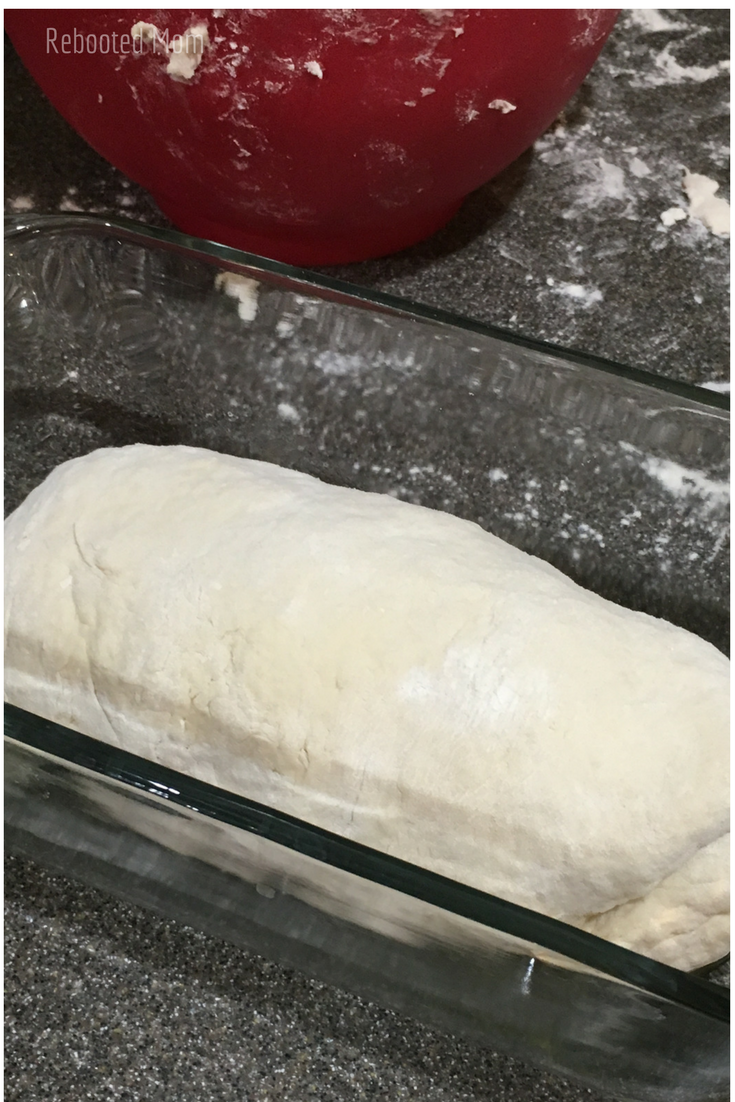
Divide the dough into two equal portions. Knead half until smooth, then place seam side down into a bread baking dish. Then, repeat with the other – except form into a round loaf. Generously flour the bottom of a cast-iron dutch oven and set the shaped dough within.
Loosely cover, then allow to rise.
Dough Rise
Dough rise can vary so greatly – they say sourdough can rise from 4-12 hours, but for us here in Arizona, warmer temps do have a profound effect.
- Sourdough bread may double in size, but not always.
- Generally speaking, dough can rise from 4 hours to 12.
- It is definitely possible that dough can over-rise — if you notice yours rising too fast, you can knead and allow it to do a second rise, in order to control the size.
- A quick rise will result in a bread that is less sour, while a slow rise will result in a very sour loaf.
- If your home is warmer, the dough will rise faster.
- If your dough isn’t rising up but is rising outward, that’s a sign that you used too much water in the dough. Don’t panic – it’s fixable. After the first rise, knead again for 1-2 minutes, using additional flour in the process), then re-shape. Allow that dough to rise a second time (usually half the time of the first rise).
- A double rise isn’t always necessary – if your dough is rising well the first time, then feel free to skip a second rise. However, if you notice that your bread dough is falling flat, you have likely used too much water in the dough and it’s best to knead the bread using additional flour (1/4 C. or possibly more) and re-form into another loaf for a second rise.
Hopefully the addition of a little more flour will help give your dough that structure it needs to truly “rise” and not spread flat. Always remember that a dough that spreads flat will indeed bake flat.
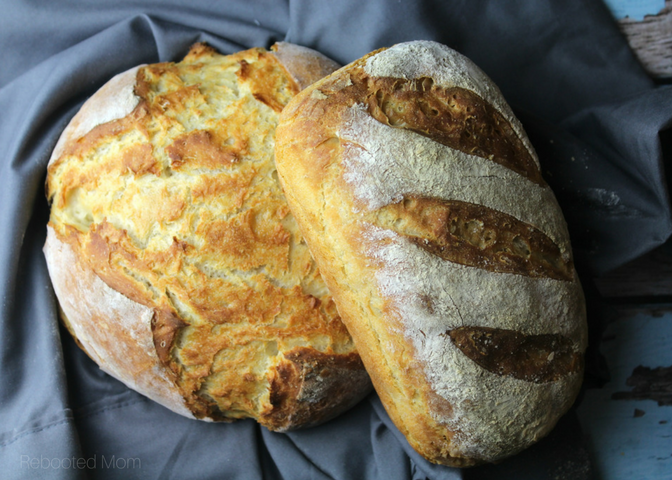
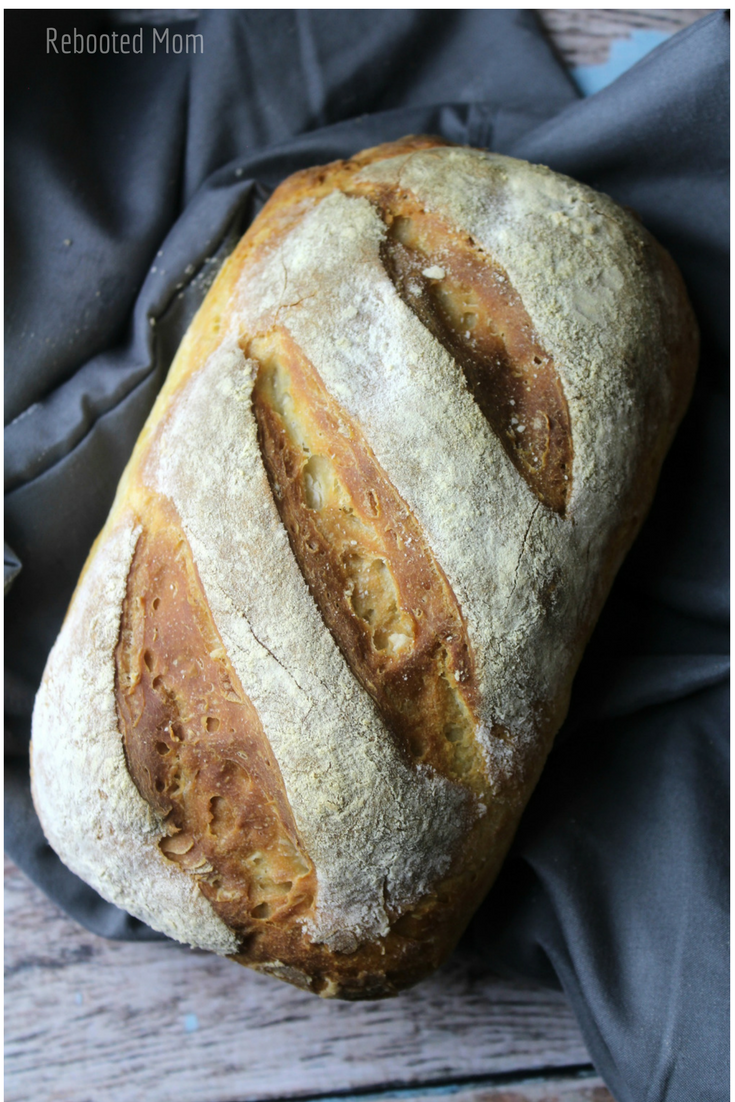
Once you have that rise, preheat your oven to 450 degrees F. You’ll want to move your oven racks to the lowest point in the oven. Then place the lid on your dutch oven (make sure it’s oven-proof!) and pop that in once the oven is fully heated. Bake that round one for 25 minutes at 450 degrees F. Then carefully open the oven, remove the lid using a potholder, and continue to bake, uncovered, for an additional 20 minutes.
During that 20 minutes, throw the glass loaf pan in there to bake – that will bake quicker. It will be done when it has browned on top and is hollow when tapped. Remove both and congratulate yourself for making sourdough!
Whew! It all sounds so complicated, but I assure you that it’s not as complicated as it may seem. If you are new to making sourdough, it helps to cut the recipe (below) in half so that you can experiment until you get it right. Then once you perfect your bread, take it on with the full recipe.
Just remember that it may take a few tries until you find out what works best for you — but at least you will have a better grasp of what to look for and a wonderful starting place to help you gain more knowledge over time.
A simple sourdough recipe using a fresh, active starter that results in a wonderfully soft sourdough bread!
Ingredients
- 2 1/3 C. fresh active sourdough starter
- 3 1/3 C. flour (+ more for kneading)
- 1 - 1/2 C. water (90-100 degrees F)
- 1 Tbsp salt
Instructions
- Mix the sourdough starter, flour and salt together - start with just a cup of water (too much water will prevent the dough from rising up, and will result in a flat bread).
- The dough will be hard to mix at first as it will be incredibly moist, then will move on to a shaggy mass. Mix as much as you can with a wooden spoon, then use your hands to continue.
- Lightly flour the countertop and dump the shaggy mass out - knead the dough until the mixture results in a nice, firm (yet moist) dough that can easily be shaped. Dough should be able to pass the window pane test -- a small piece of dough will stretch between four fingers without breaking.
- Cut the dough into two equal portions. Shape one into a loaf, and gently place in a lightly buttered or oiled glass bread baking pan. Shape the other into a round circle, and place in a generously floured dutch oven.
- Take a sharp knife and slash an "X" into the top of the round loaf, and 3-4 slashes on the bread loaf, and allow to rise - anywhere from 3-6 hours (no more than 12 hours).
- If the dough rises too fast and spreads, it's a sign that you have too much water in your dough -- in that case, do a second rise by dumping the dough on a floured surface and kneading in an additional 1/8 - 1/4 C. dough into each of the two pieces. Re-form, and place back in their proofing dishes (loaf pan or, dutch oven) and allow to rise a second time - usually half the time of the first rise.
- Preheat your oven to 450 degrees F. Ensure your oven racks are on the bottom portion of the oven. Place the lid on your dutch oven (*ensure that it is oven-proof!) and set that dutch oven in your preheated oven for 25 minutes. After 25 minutes, remove the lid and bake for an additional 20 minutes at 425 degrees F. Place the glass loaf pan in the oven at the temp of 425 and bake for 15-20 minutes until browned on top and hollow when tapped.
- Remove both and allow to sit on the counter top to cool before slicing. Tightly wrap to keep fresh.


Hi I love Sourdough bread this recipe looks amazing how do I make Gluten Free Sourdough? Thankyou so much
Susana – I’m so sorry, I haven’t ever made Gluten-Free sourdough!
Ugh!! I knew better…should have used parchment paper in the dutch oven, all the flour in the world didn’t work. The recipe forgot to restate that the dough needs to be lightly covered during the rise. I knew to do that though.