


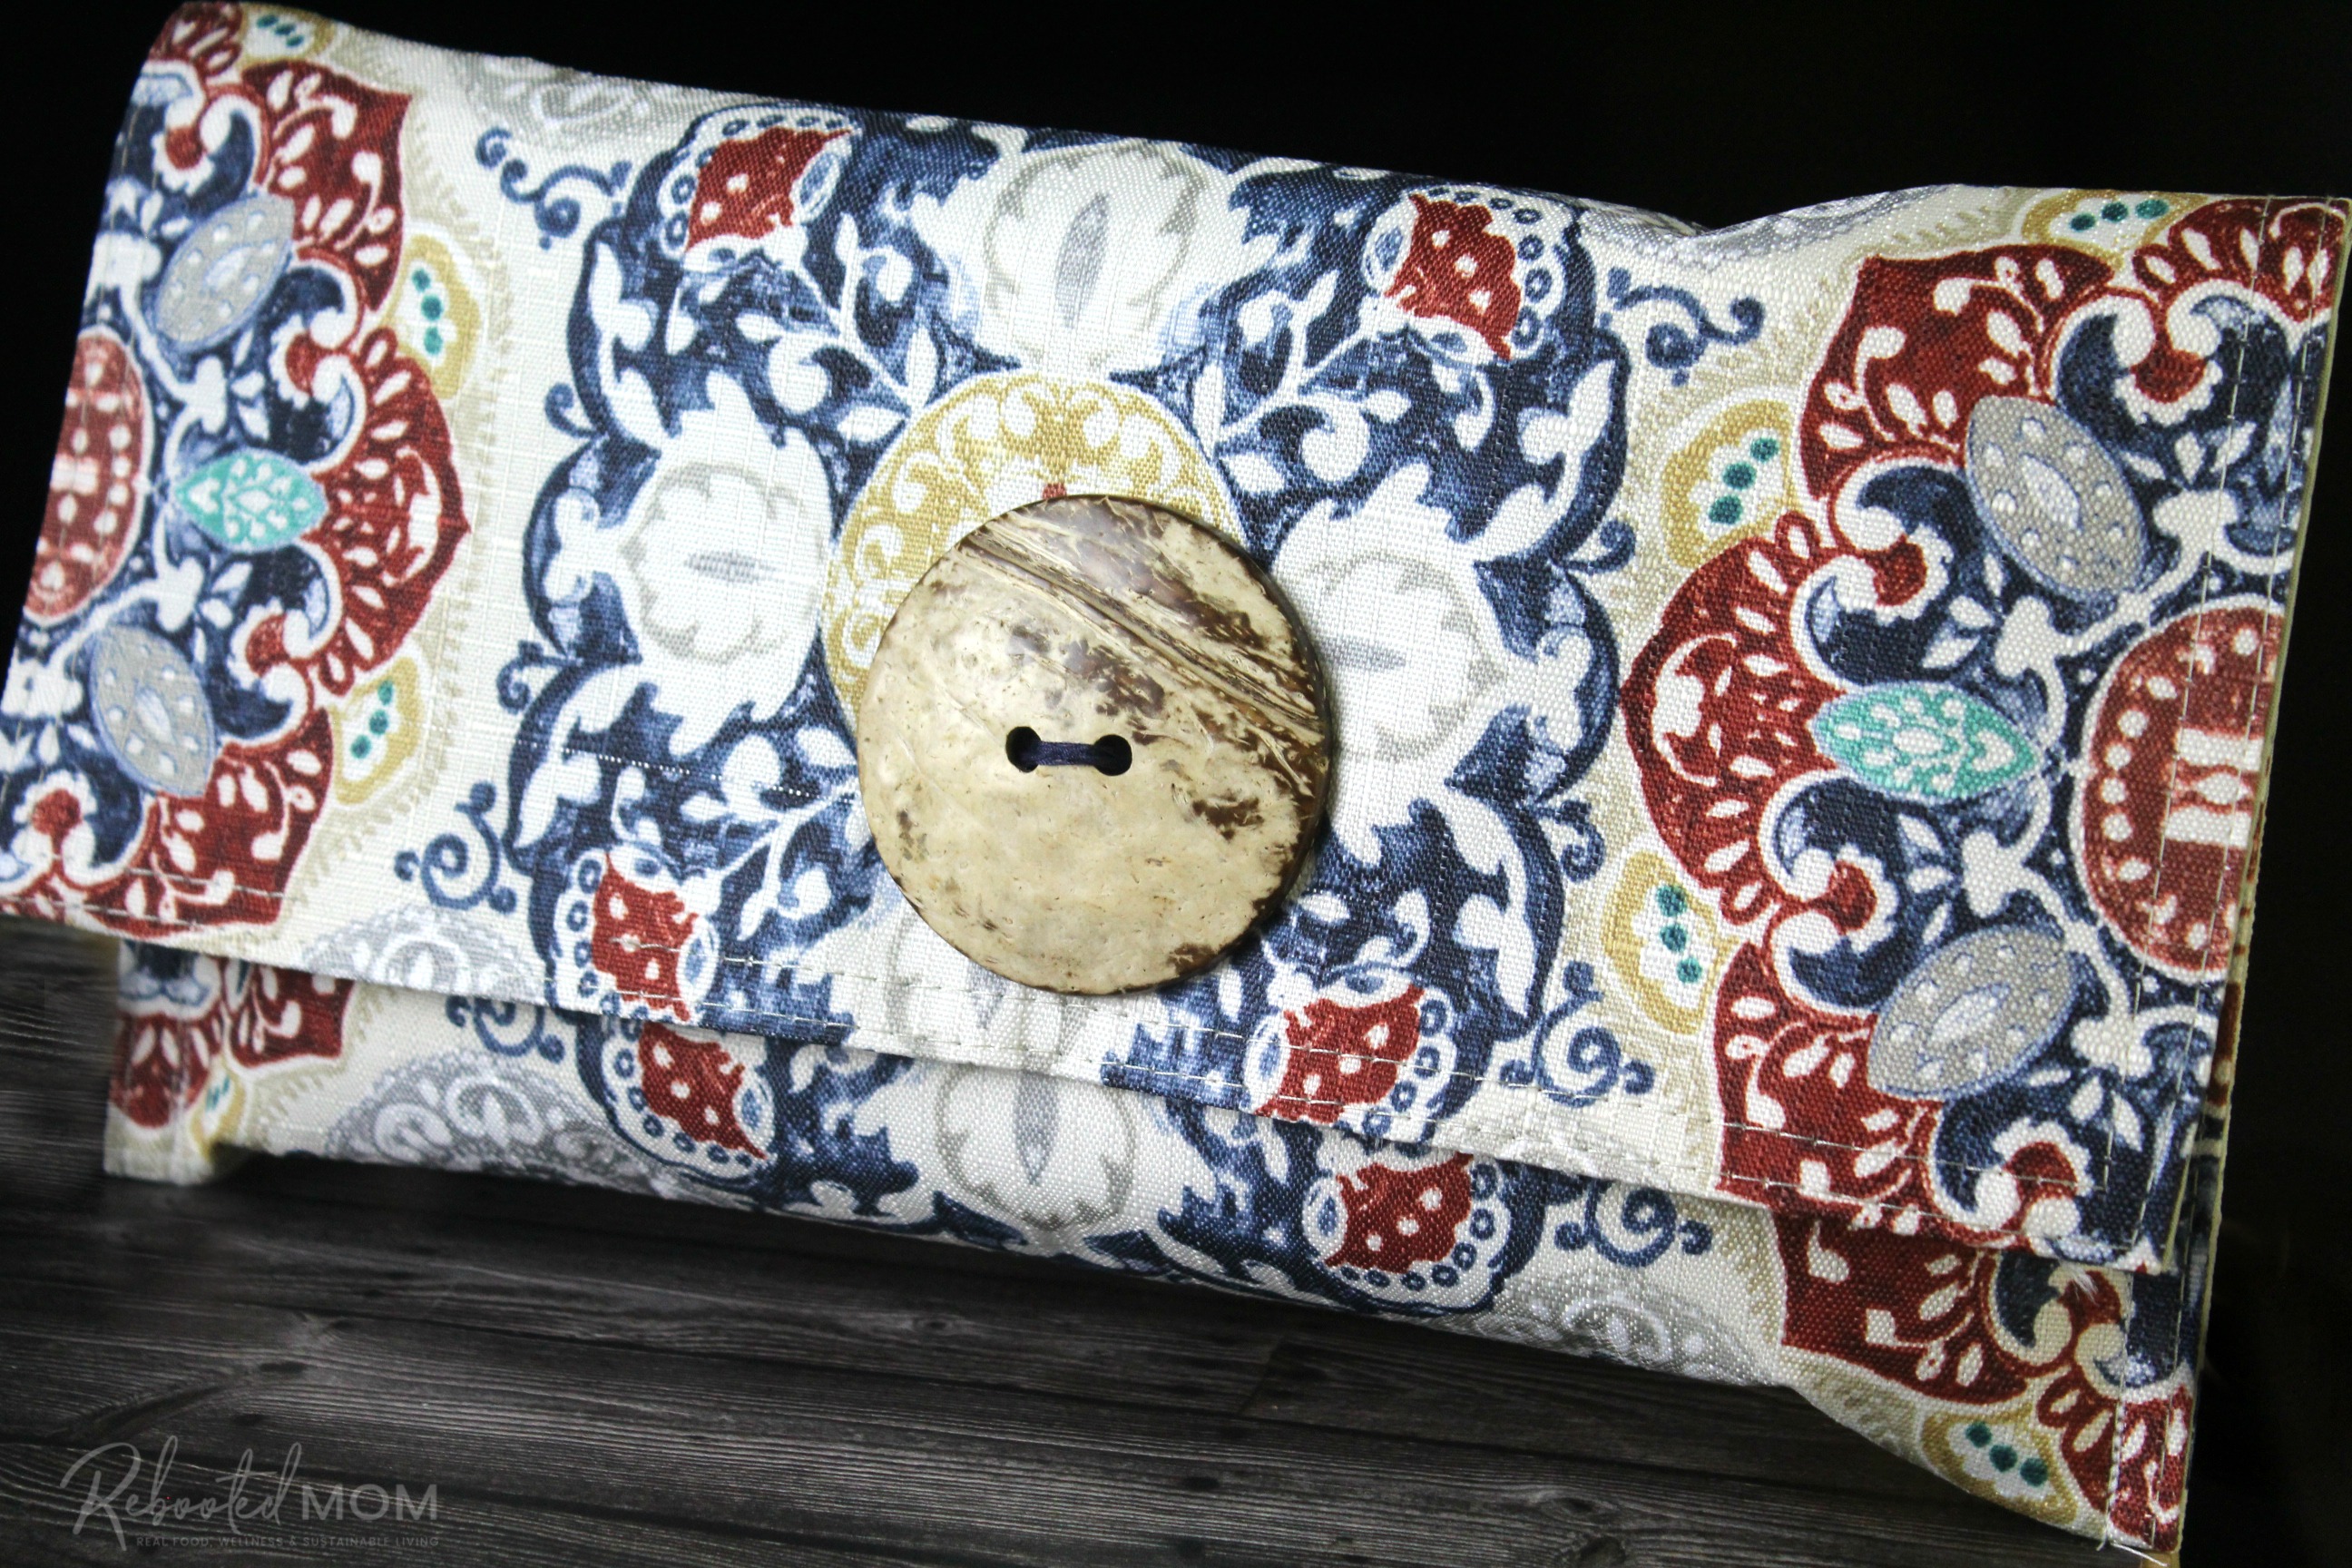
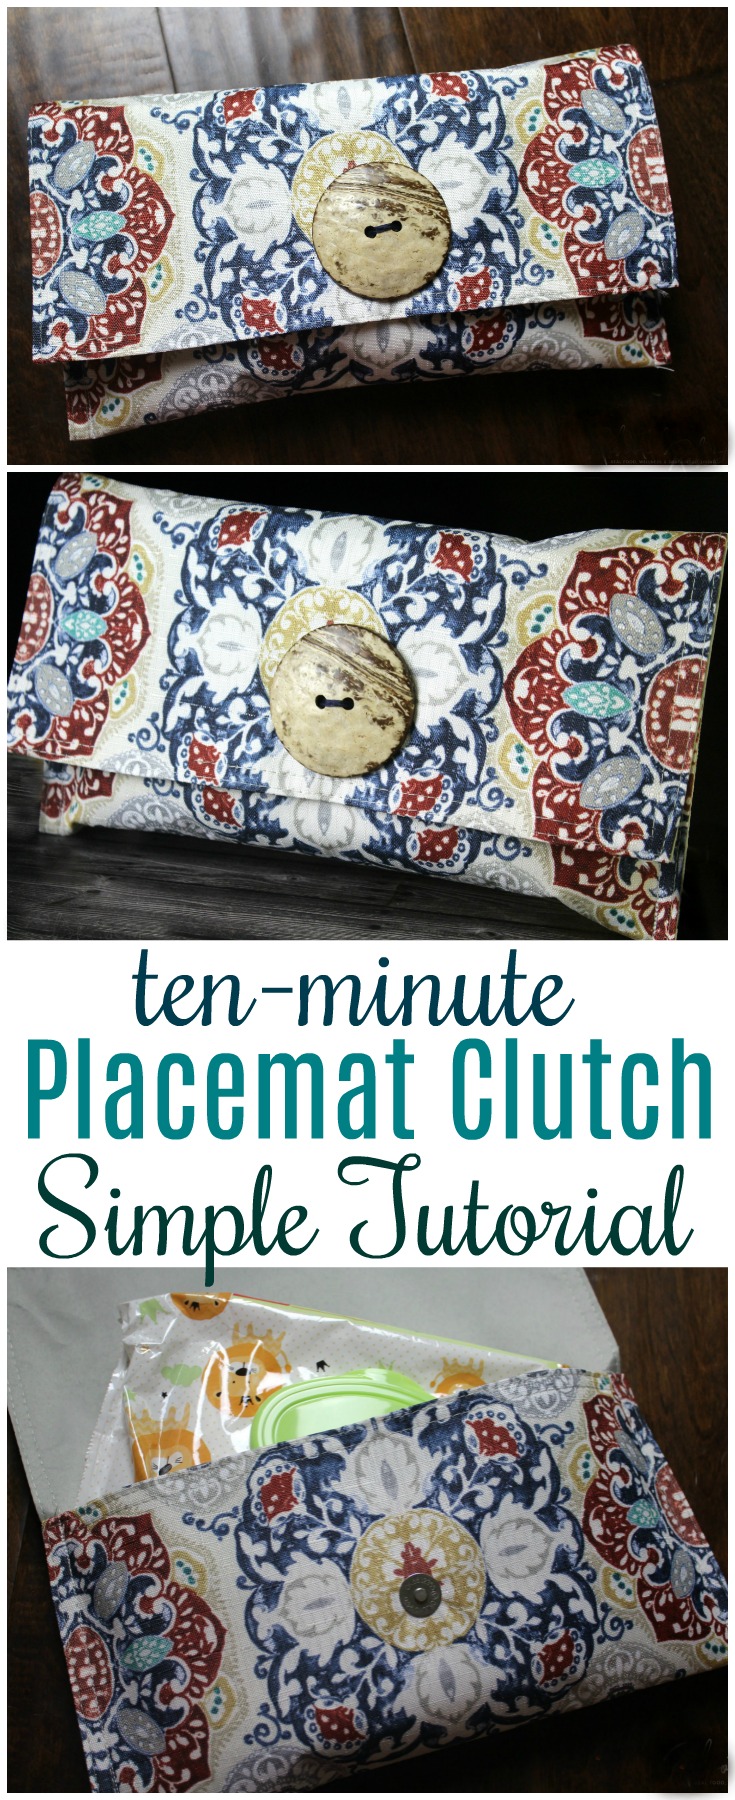
This placemat clutch purse comes together in under ten minutes for just a few dollars. It makes a stylish purse or case for baby wipes and a few diapers!
Just under a year ago I pulled out my sewing machine from our dusty garage with every intention to teach our oldest daughter how to sew. What a wild ride it has been!
We began with basic projects like lip balm holders and hair scrunchies. Once she got the hang of that, we quickly moved on to minky baby blankets and plain ol’ cuddle blankets for cousins. Sewing is quite an addiction, and before you know it, we had fabric scraps piled up in every corner of our sewing room, on tables and stuffed in bags.
So Much Fabric!
One thing led to another, and before you know it, my twelve year old had sewn 120+ zippered pouches, and was moving towards placemats.
Who ever knew that a $2 placemat could be turned into a cute and functional clutch? Even better, if you are a parent of littles, this clutch is the perfect way to carry a pack of wipes and a few diapers. Or simply use velcro in lieu of the magnetic button and make it effortless!
All in all, this clutch came together in less than 10 minutes with a few simple items you can pick up at Walmart. If you can sew a straight line, you can accomplish this easy clutch purse in just minutes!

Placemat Clutch Purse
Gather the following items to whip up this clutch in just minutes. You can find everything below at your local Walmart, Hobby Lobby or even JoAnn fabrics.
Items needed:
- 1 regular size placemat (this one was $1.97 at Walmart), tags removed
- 1 ruler
- pencil
- matching thread
- 1 magnetic button clasp (find these at Walmart in the sewing section, they come 2-3/pk)
- seam ripper ($1 at Walmart in the sewing section, on the end cap)
- sewing machine
- optional: 2-2.5 inch button
Making your placemat clutch:
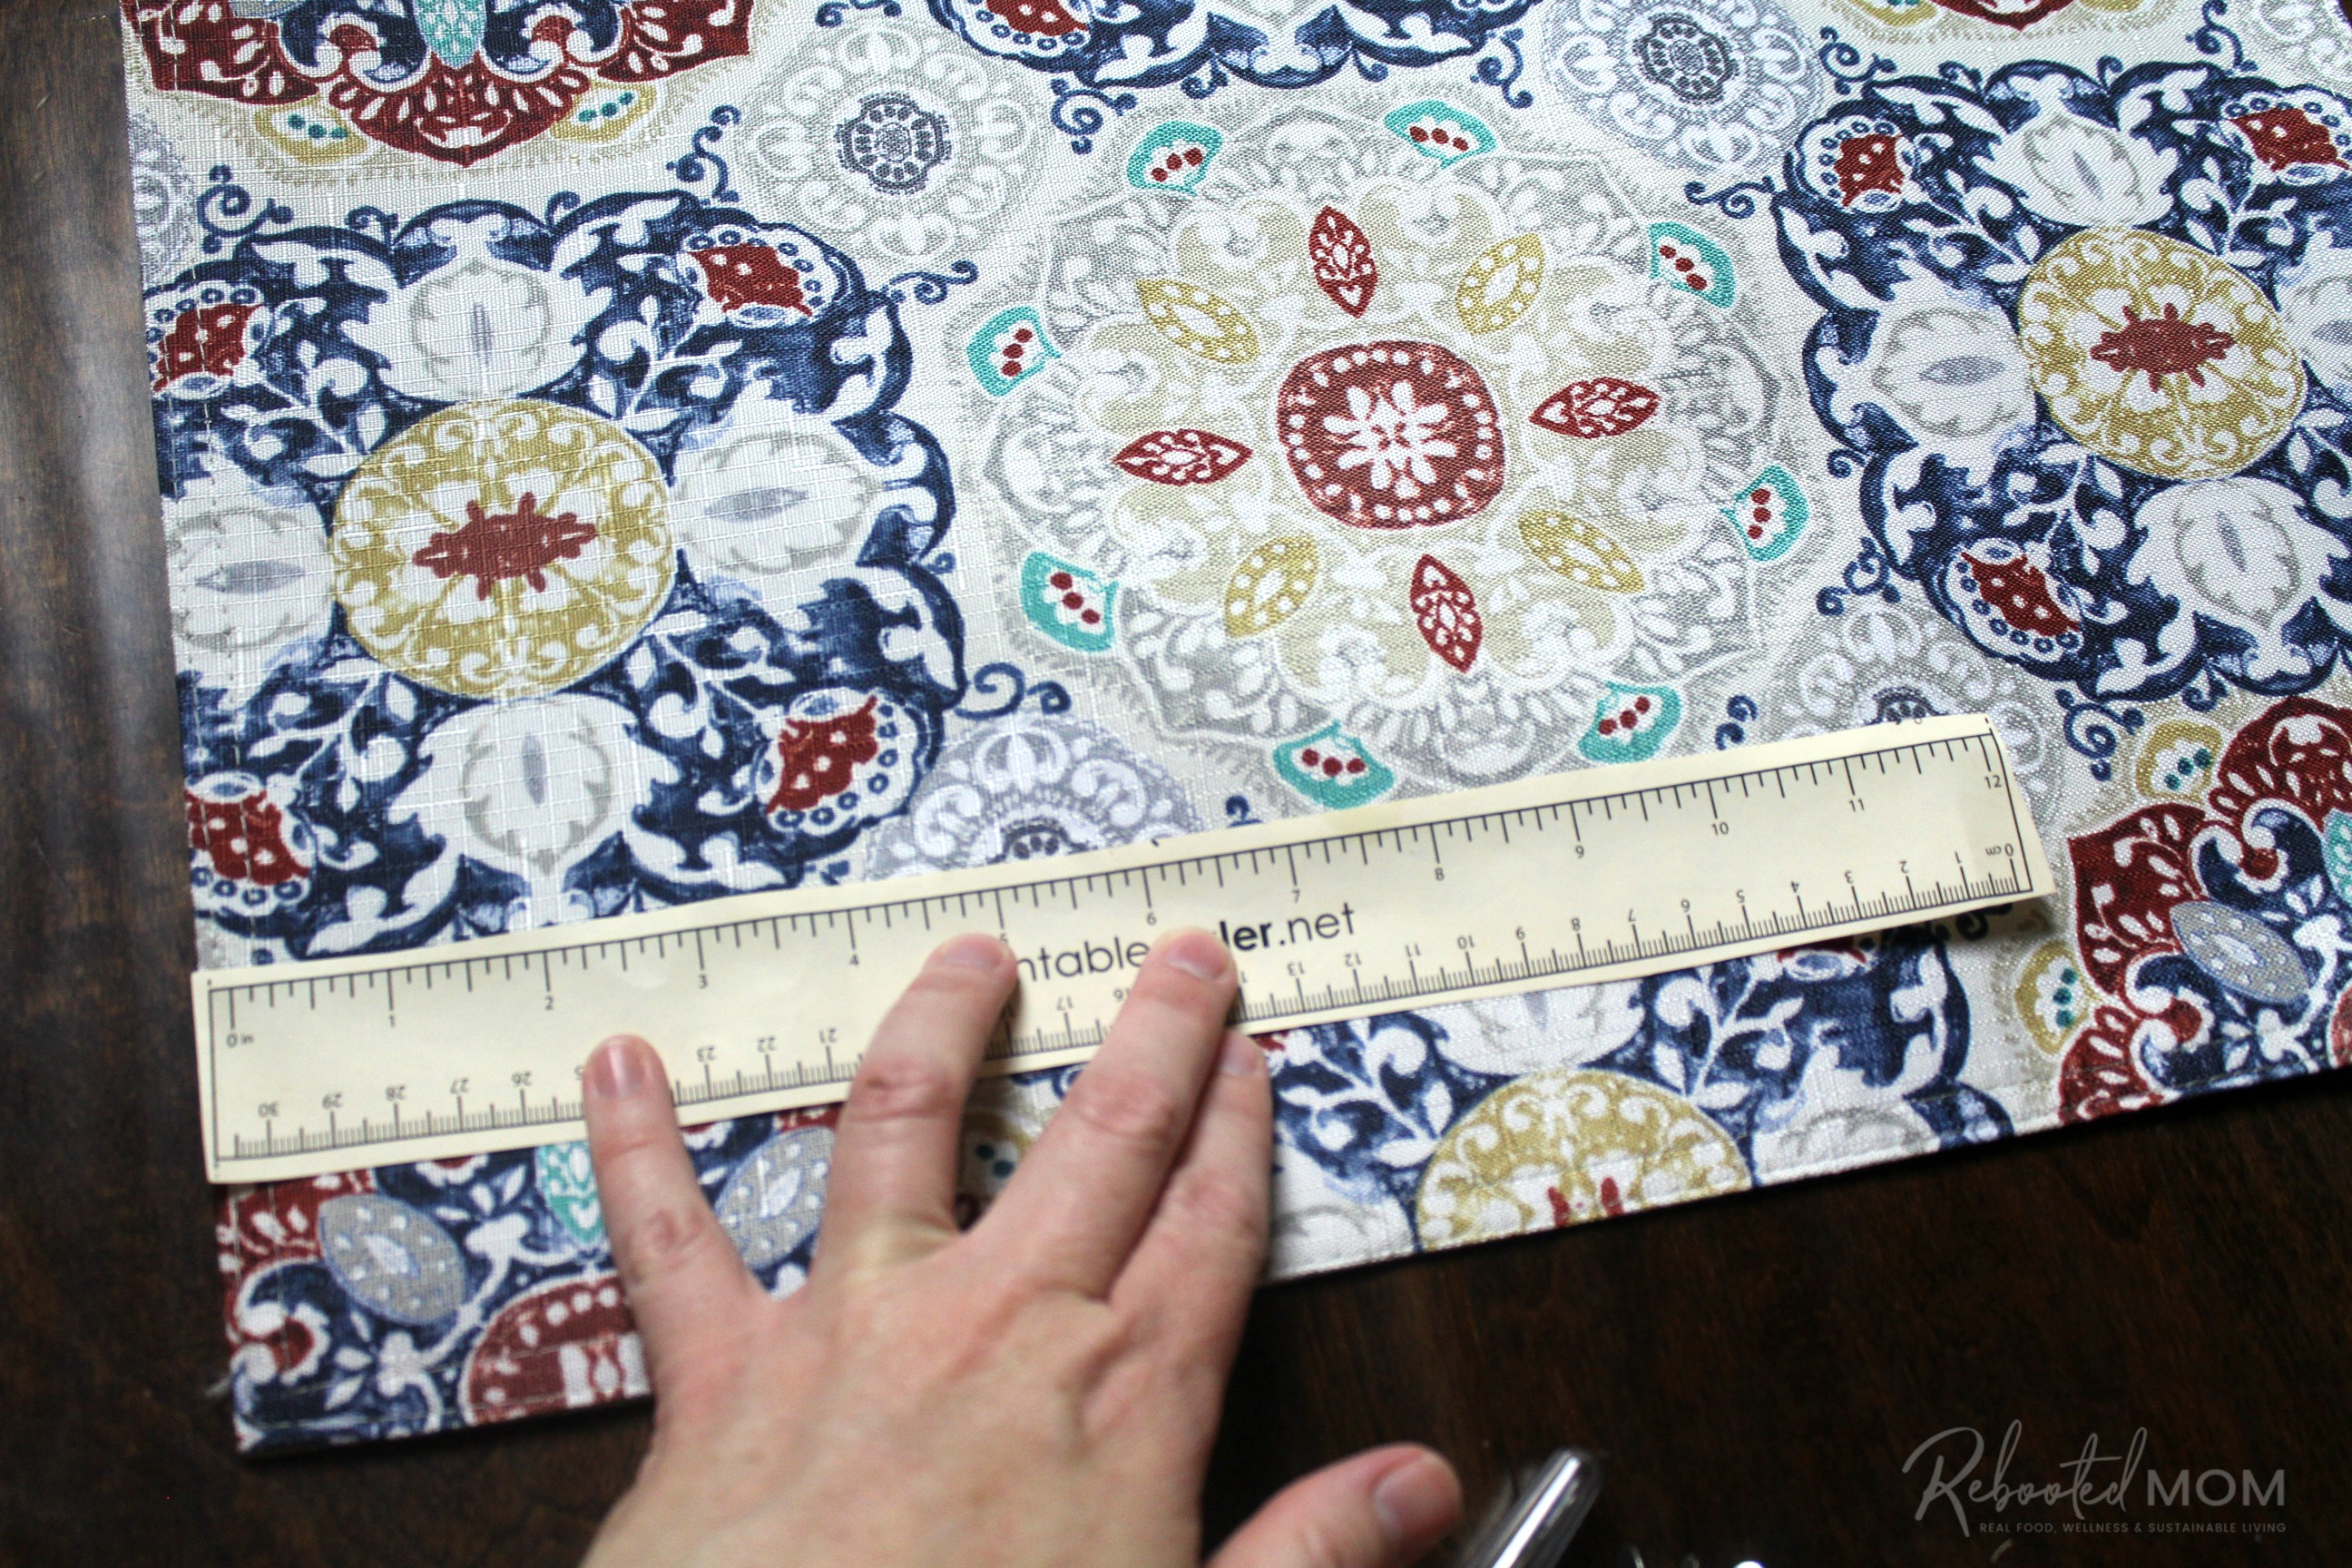
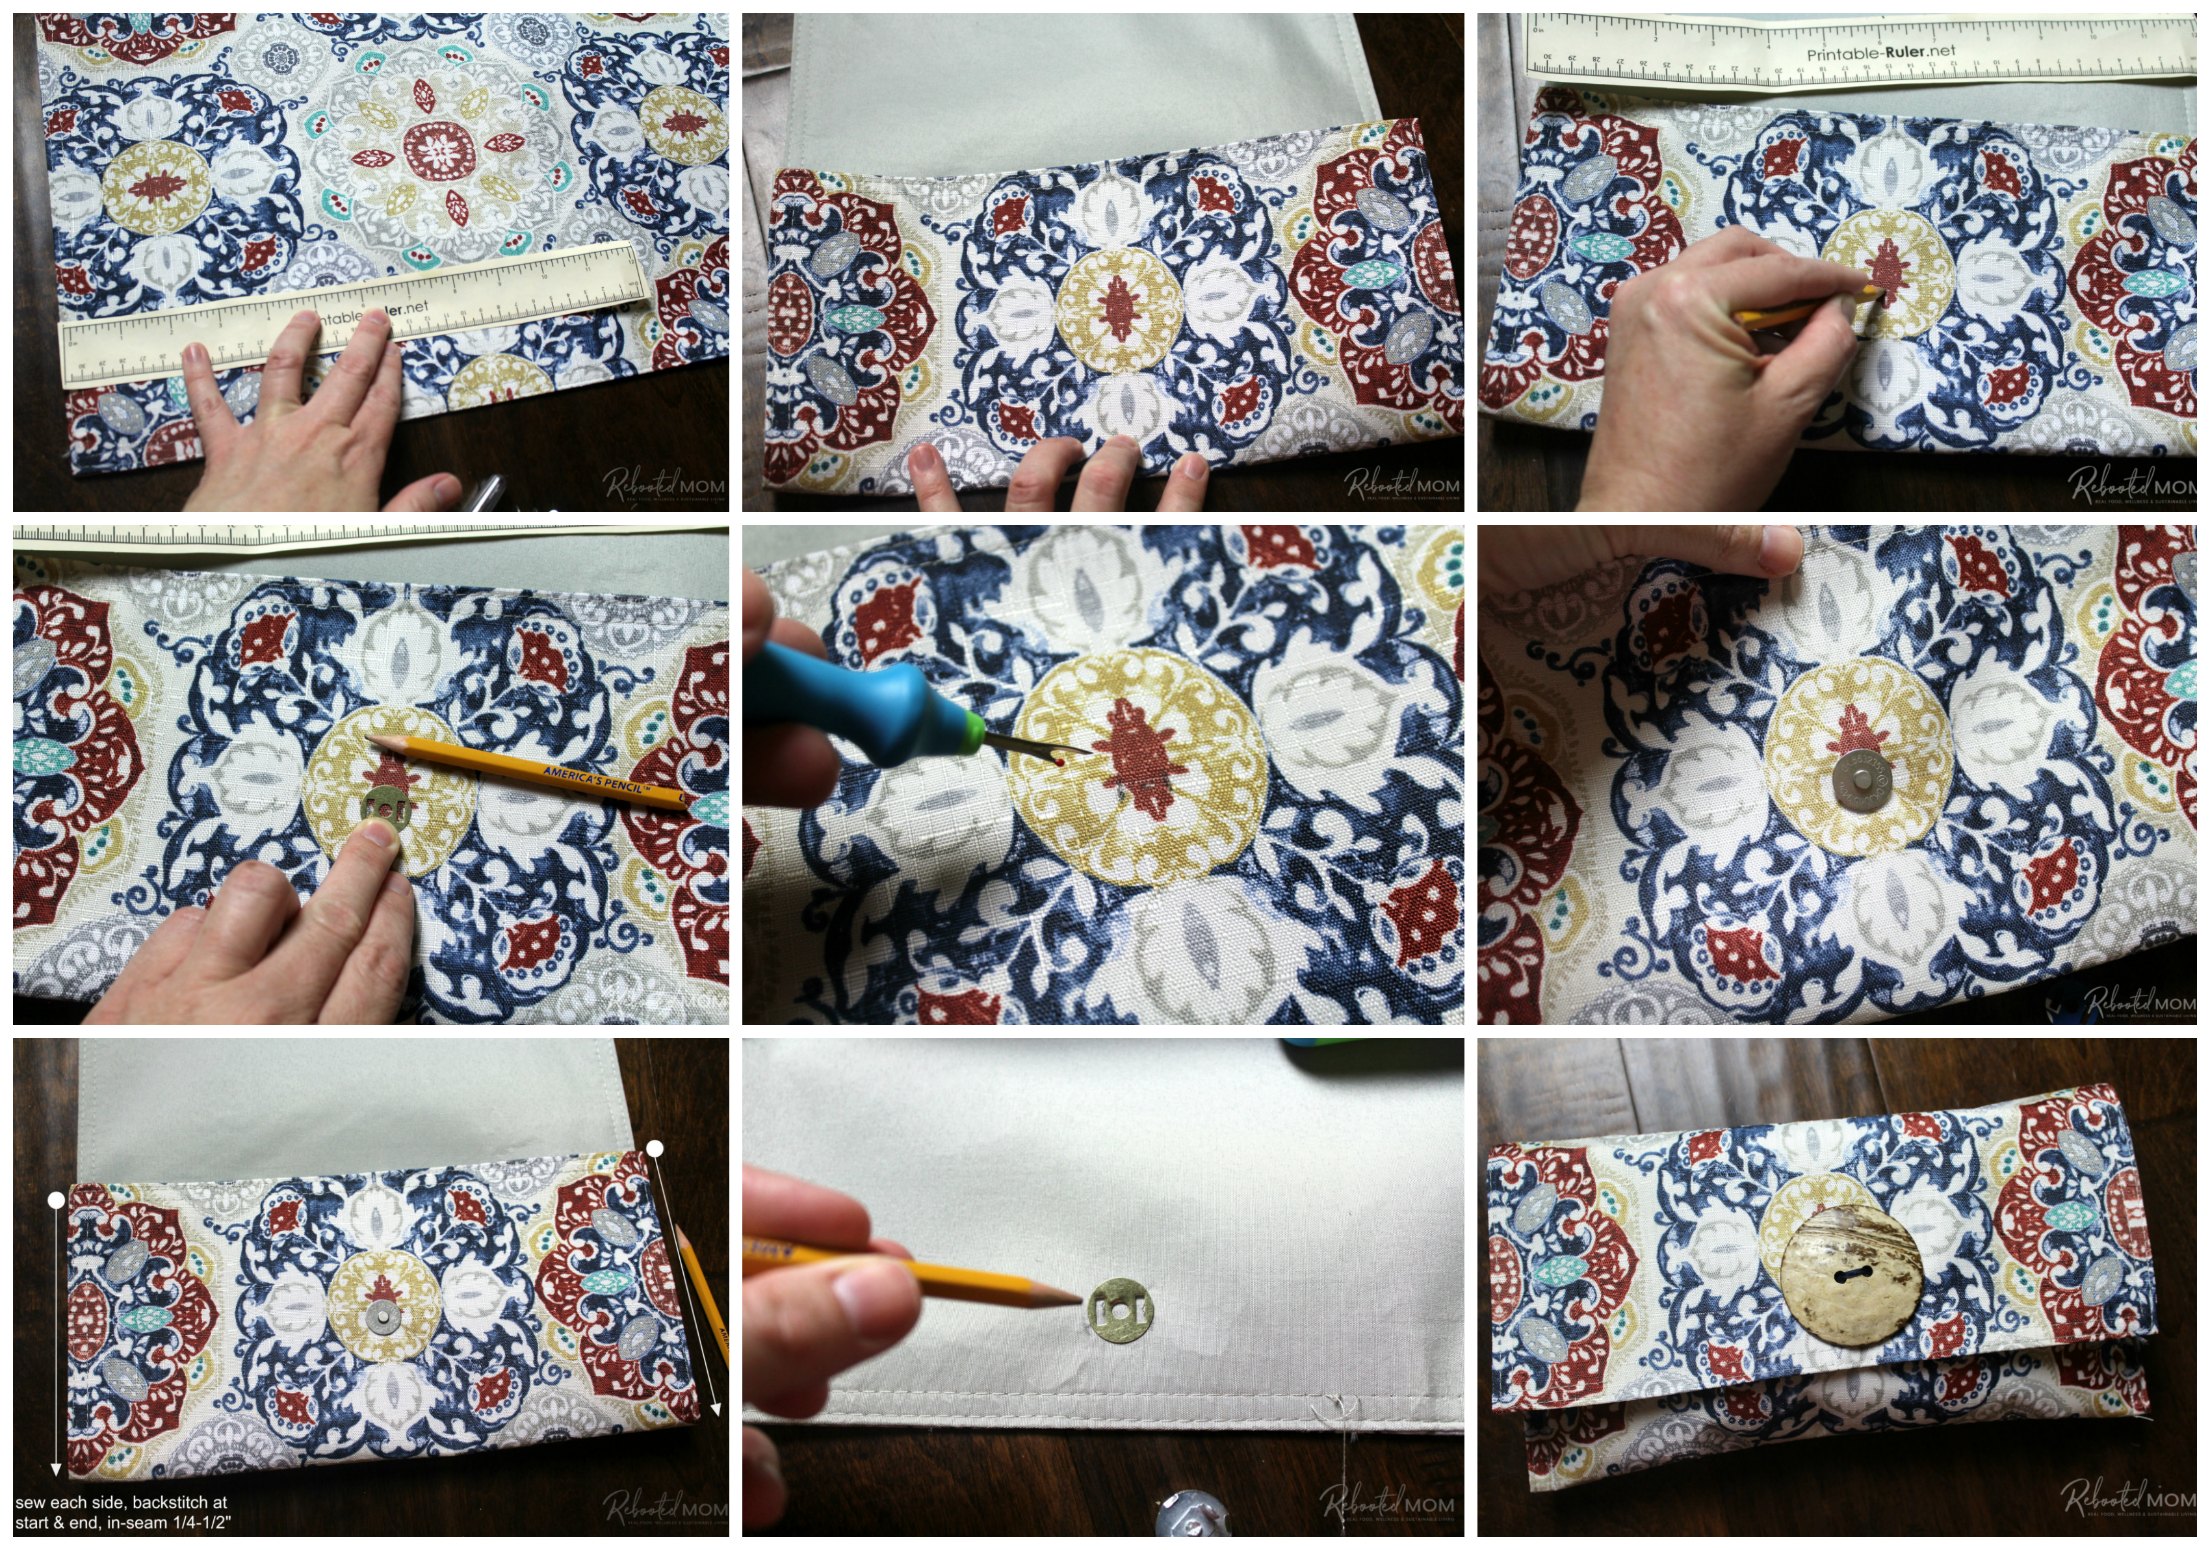
Lay your placemat horizontally with the print side facing upwards. Measure your placemat (horizontally) and then divide that measurement by 3.
With a pencil (or an erasable fabric pen) mark at those measurements – they will be your folds.
Once you have the placemat marked, fold once, pushing that crease down as best as you can with your hand.
Attach the First Button
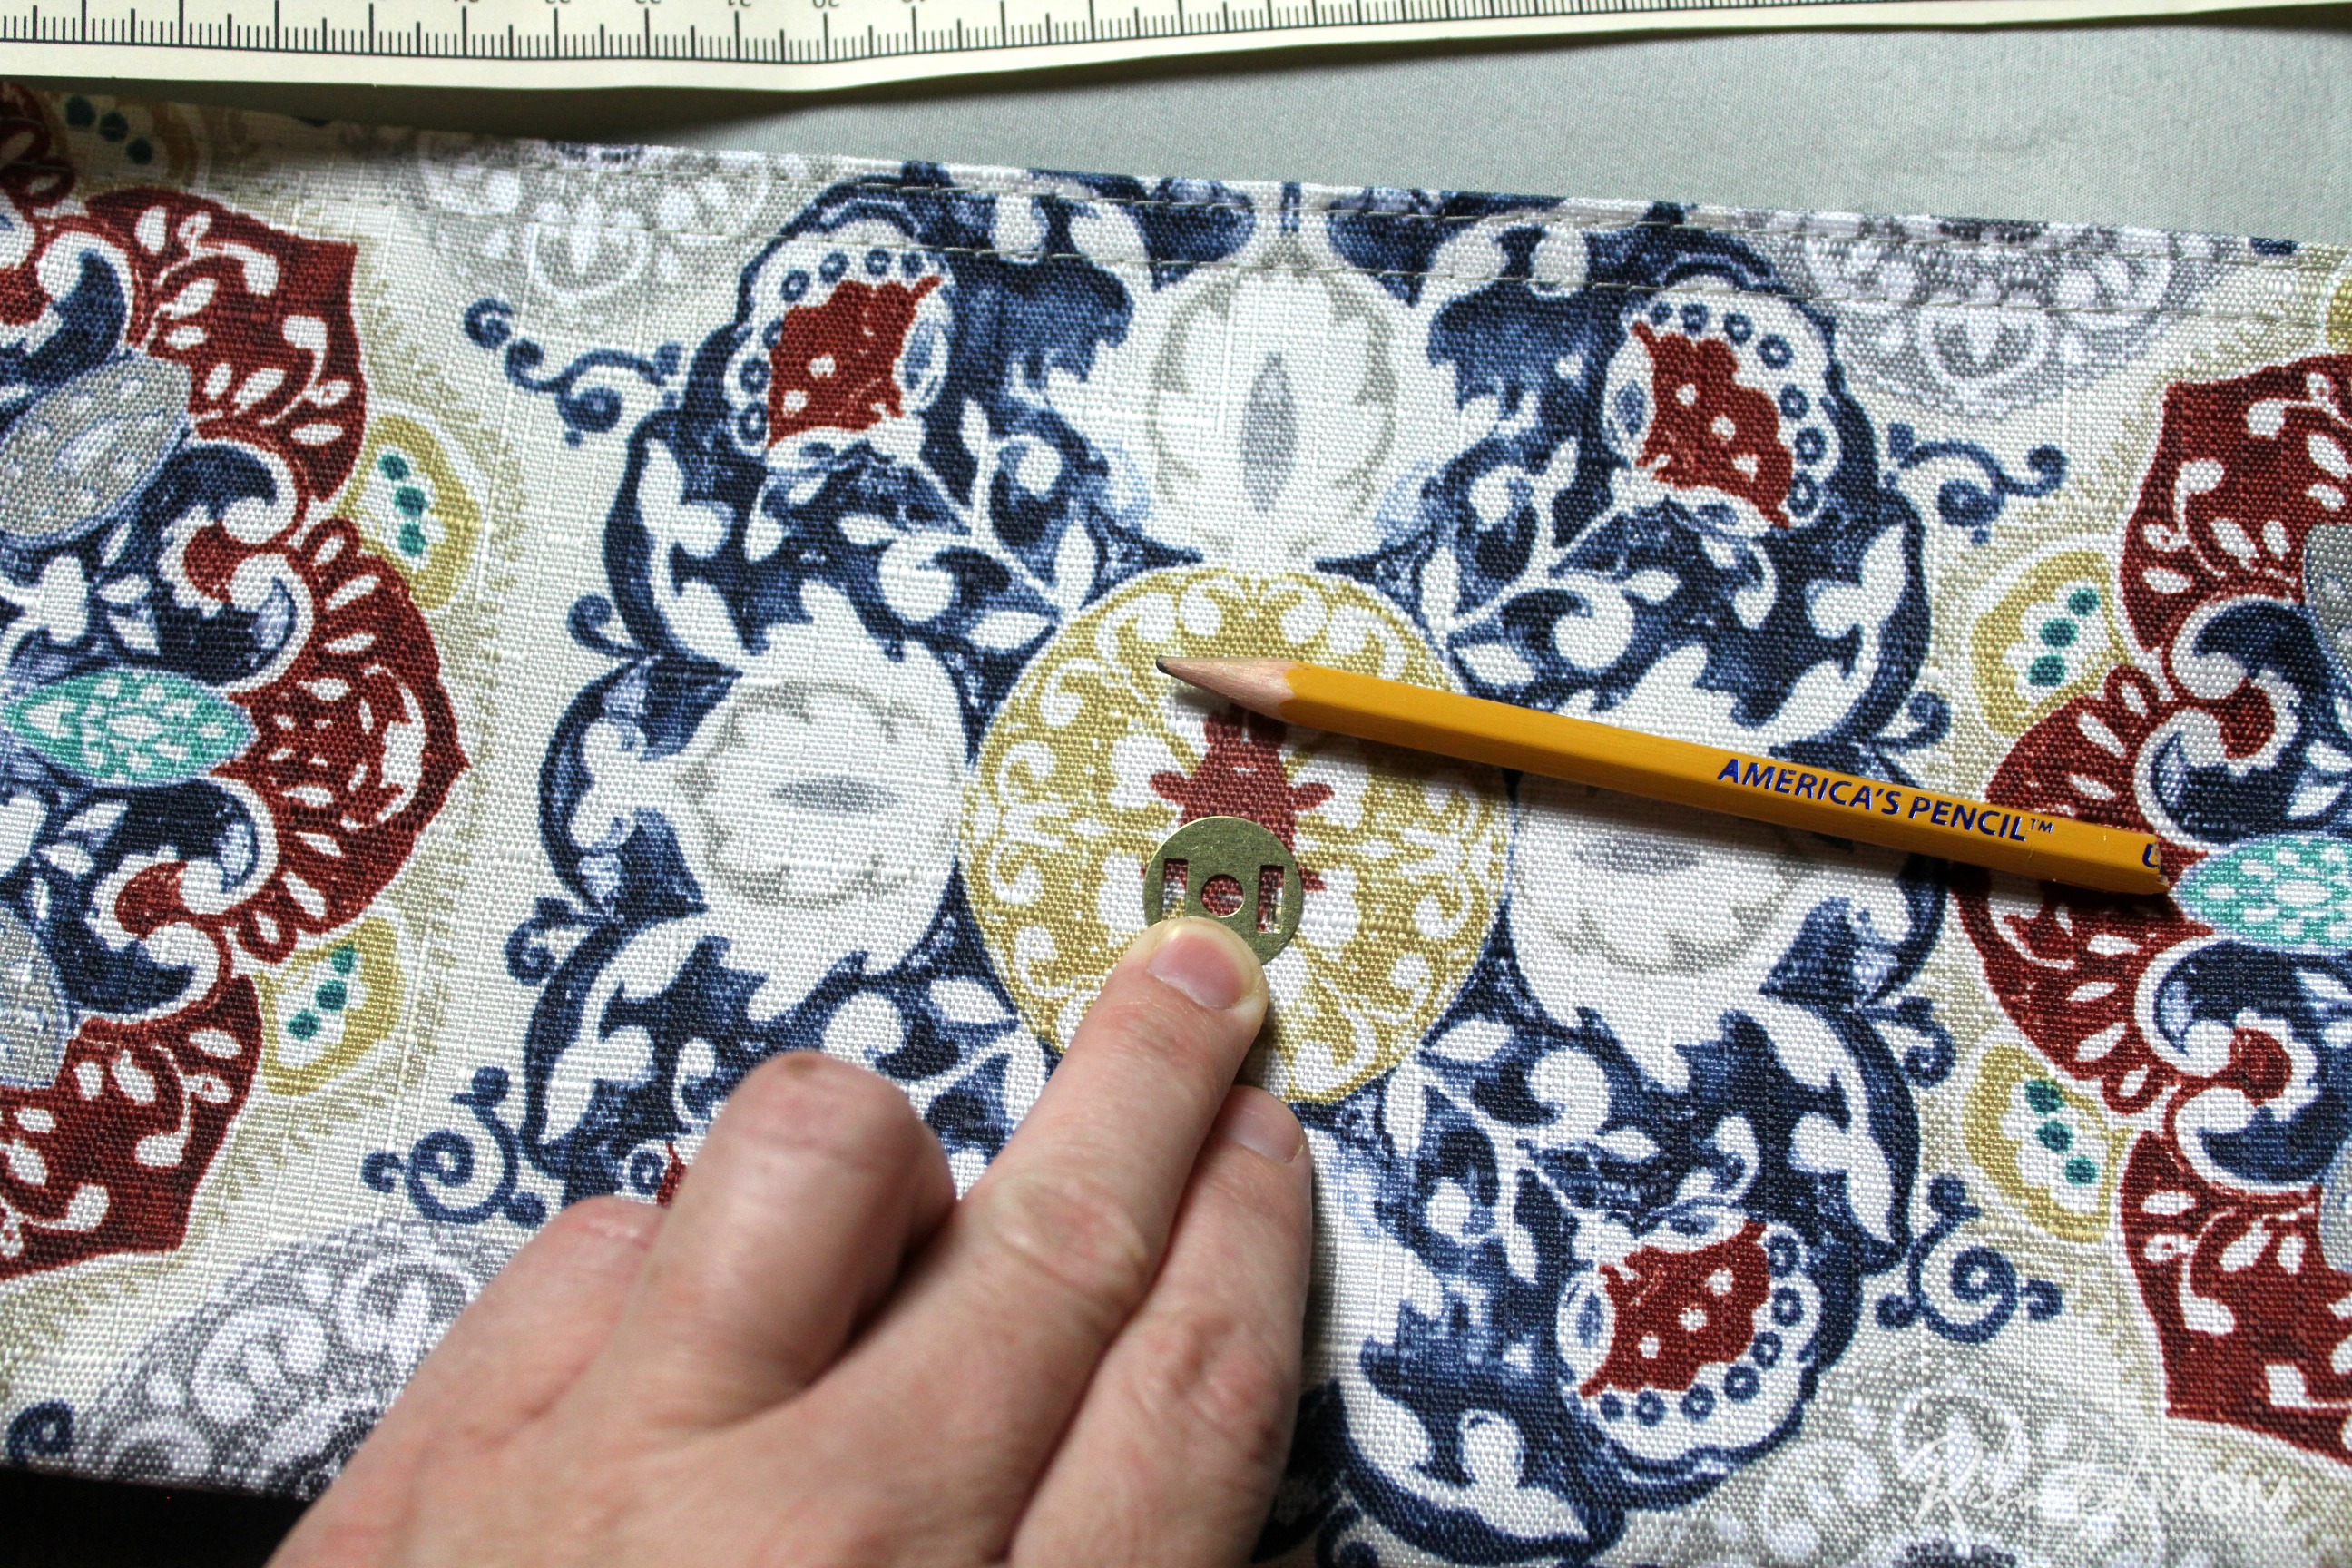
Now it’s time to measure for the magnetic button. Take your ruler and measure across — this particular placemat was just under 12″ wide. Mark at the mid-point. Then measure up from the crease 2 1/2 inches. Mark that with a pencil.
Lay your magnetic closure (as noted below) on top of your marking. Your pencil mark should be in the middle of the magnetic closure.
Then, use your pencil to mark inside the holes for the side prongs.
Push the metal piece aside – it’s time to pull out your seam ripper. Rip the two markings (that were made for the prongs).
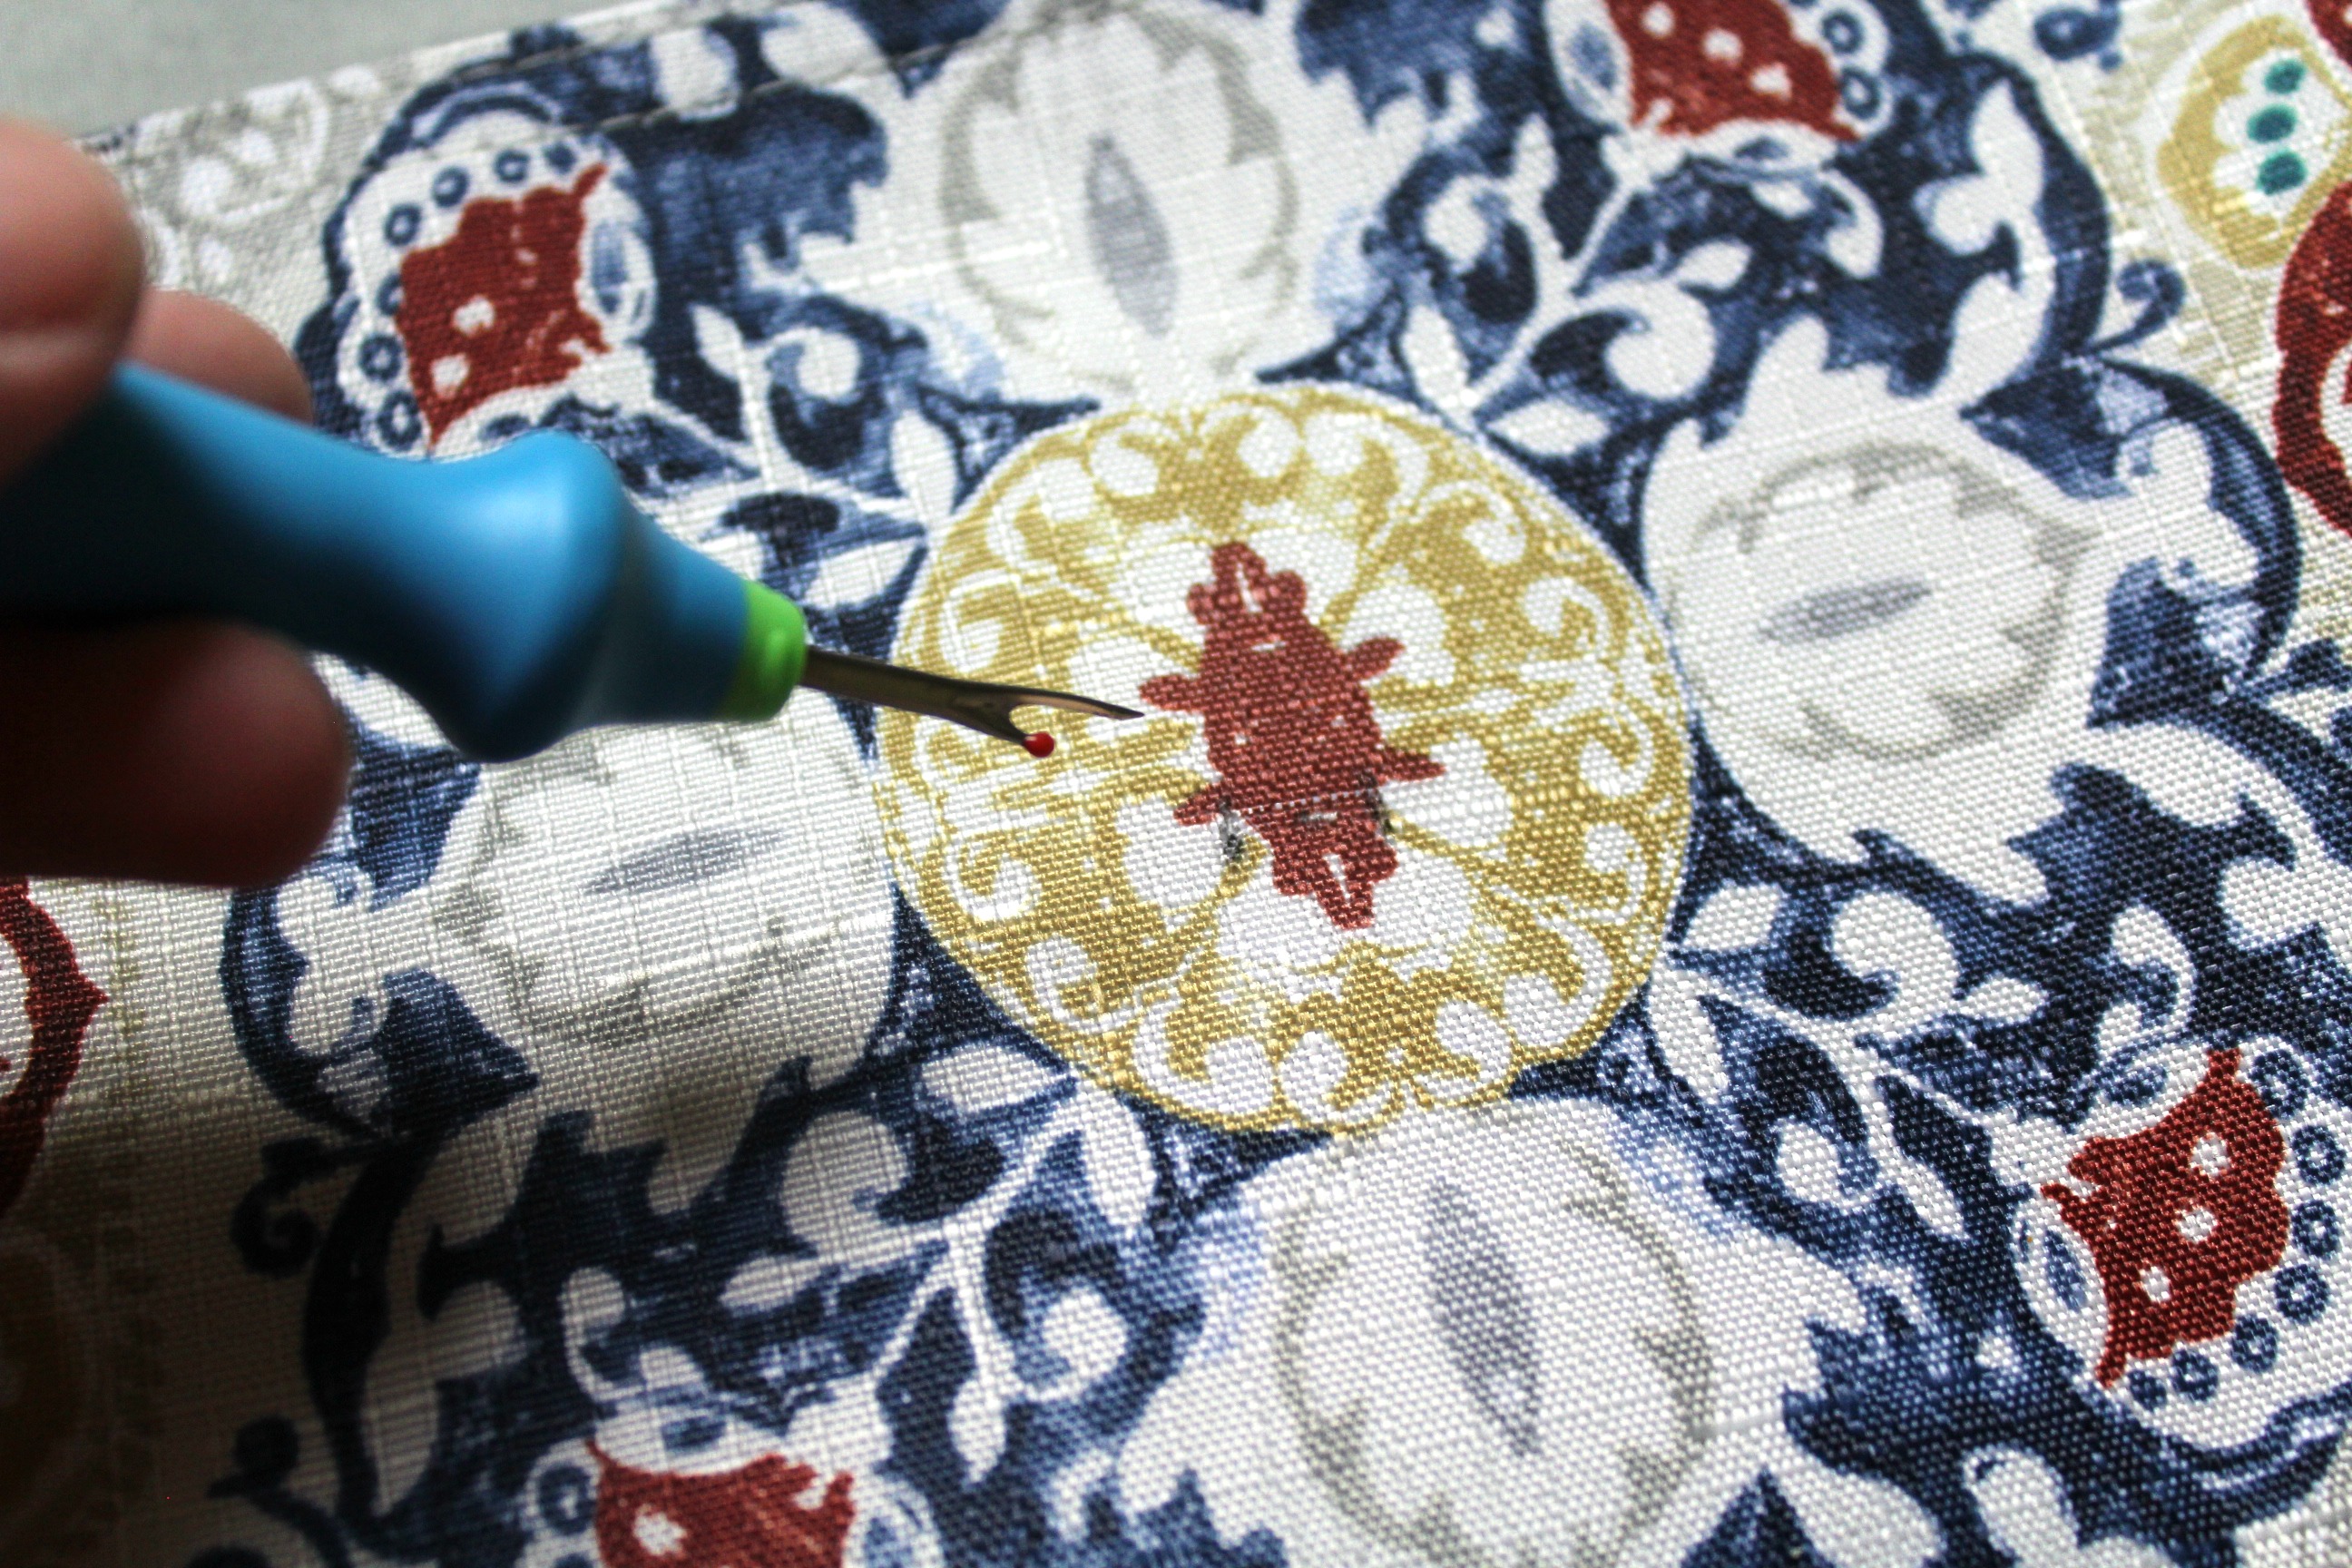
Once you have used the seam ripper to make two slits for the two prongs, then push the magnetic button closer in the holes. The prongs should stick out through the back (non-printed side) of the placemat.
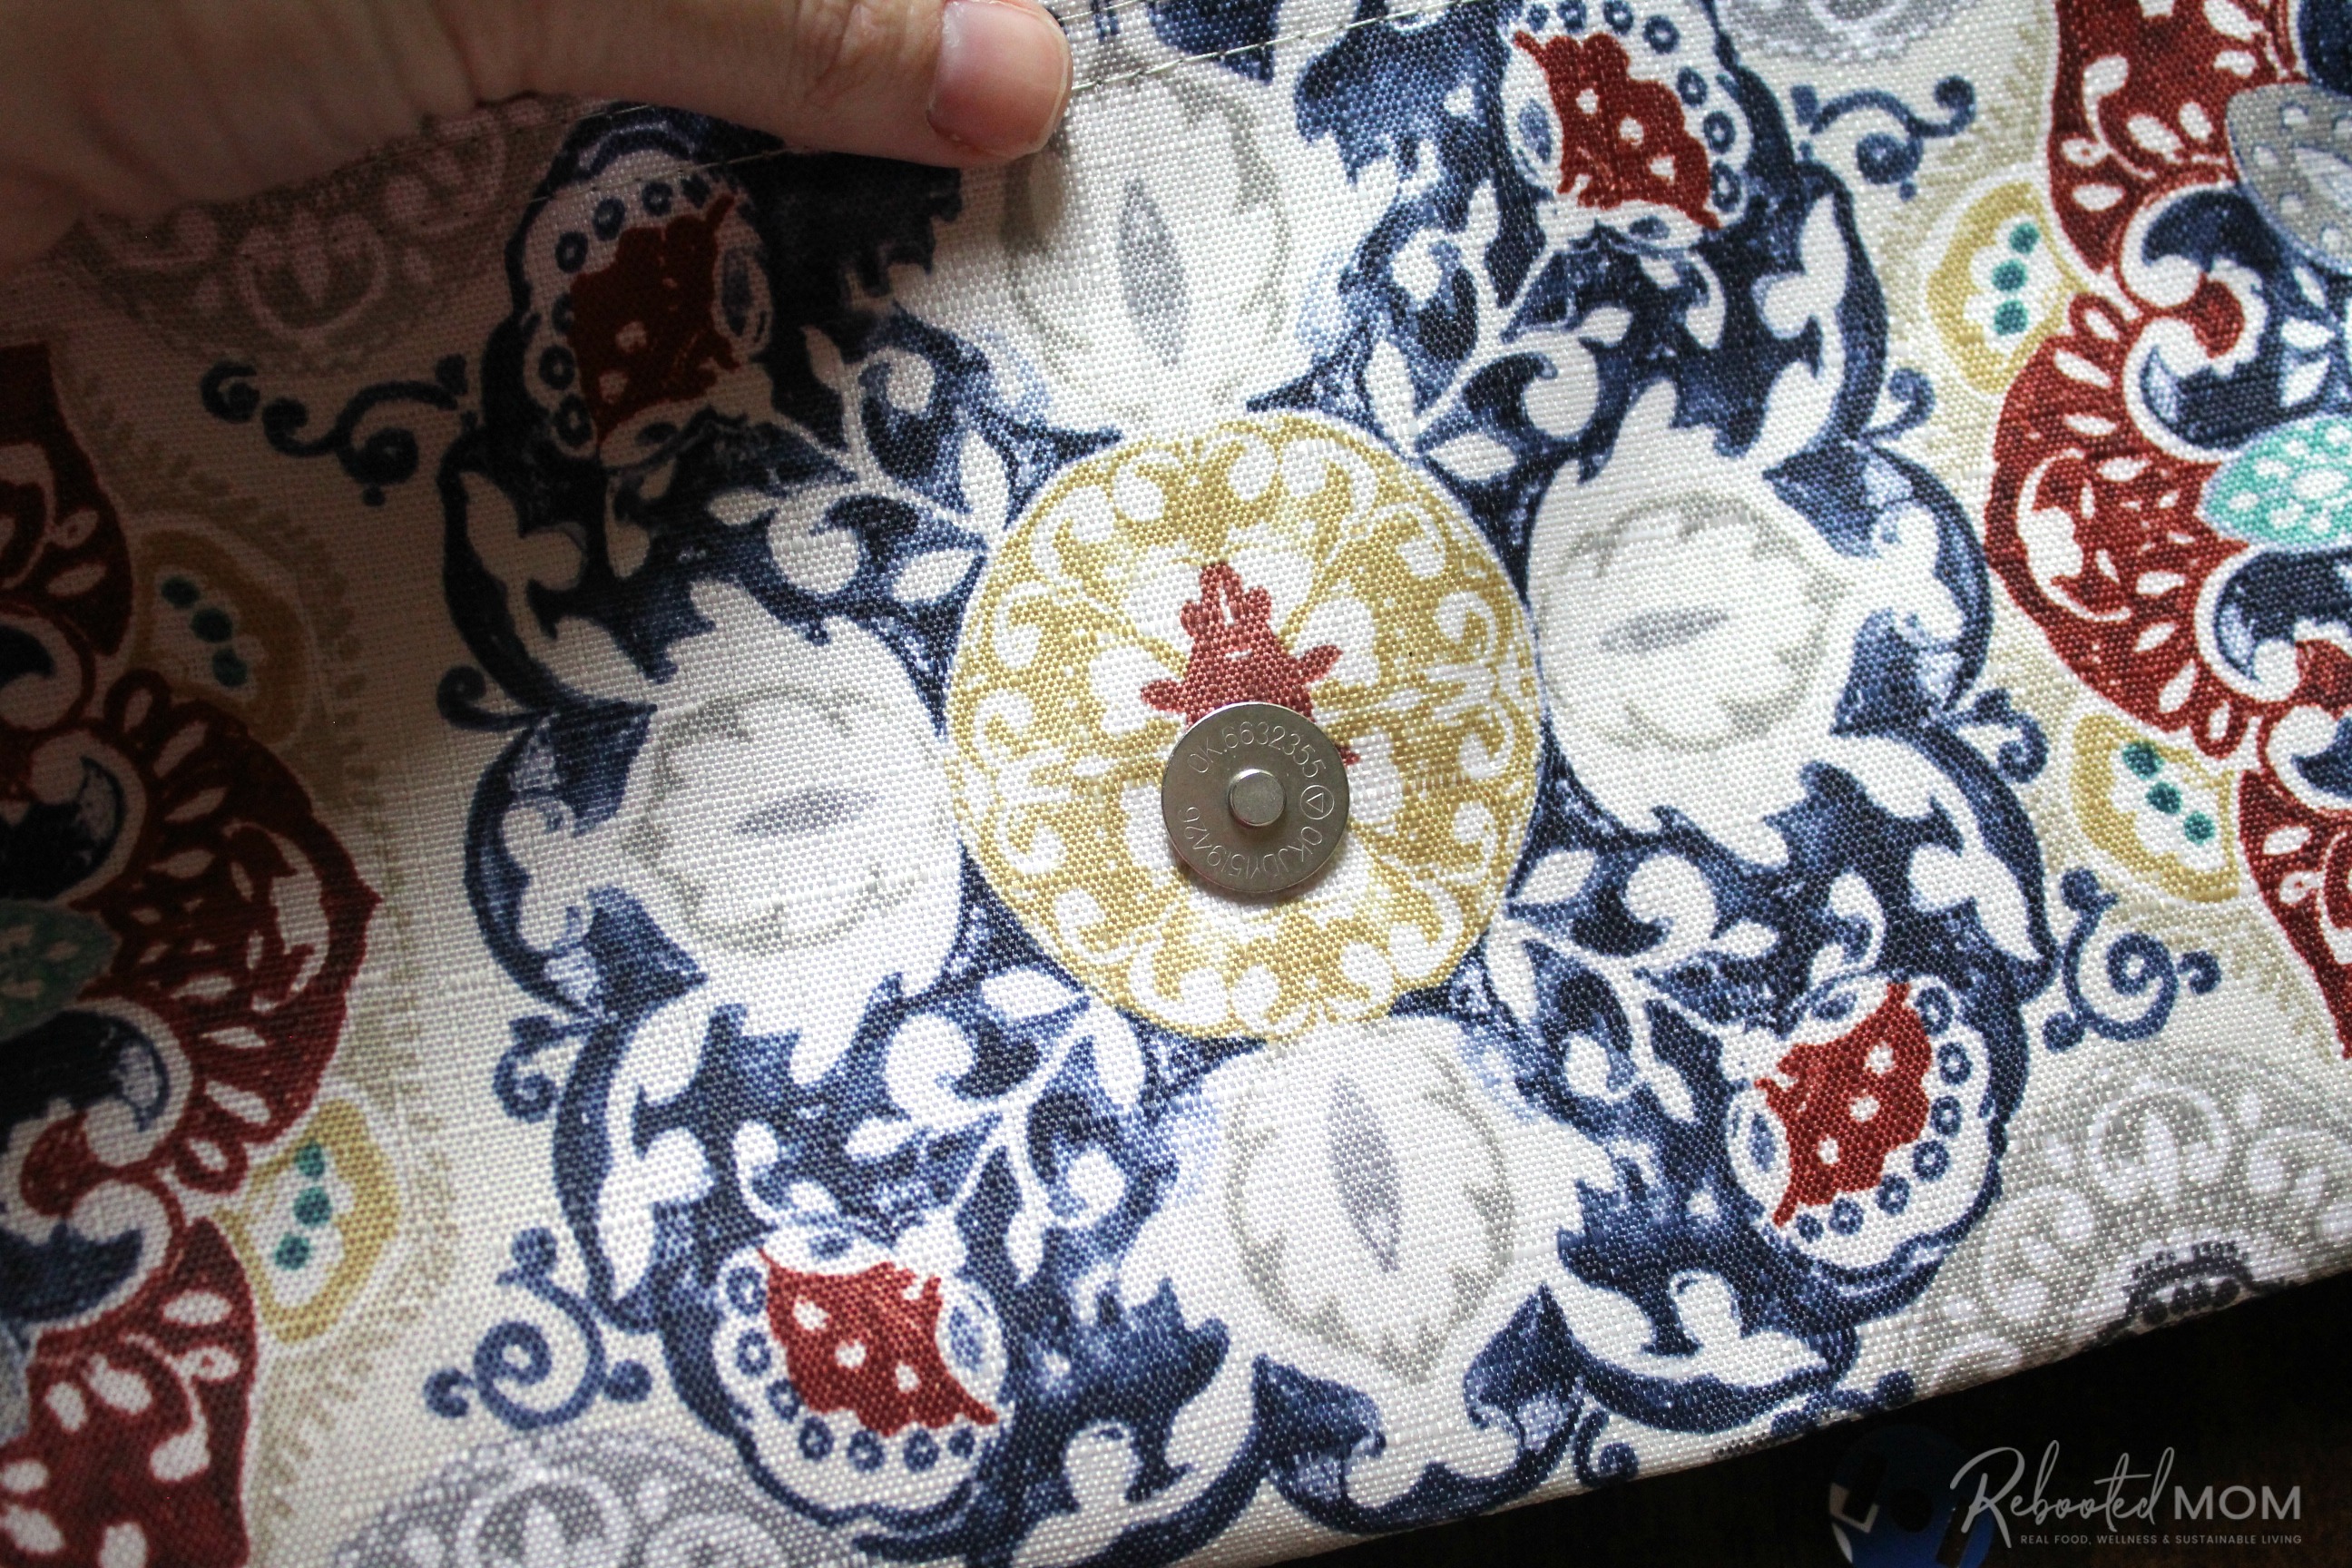
Flip the placemat over, place the metal grommet over the prongs and fold the prongs down to secure.
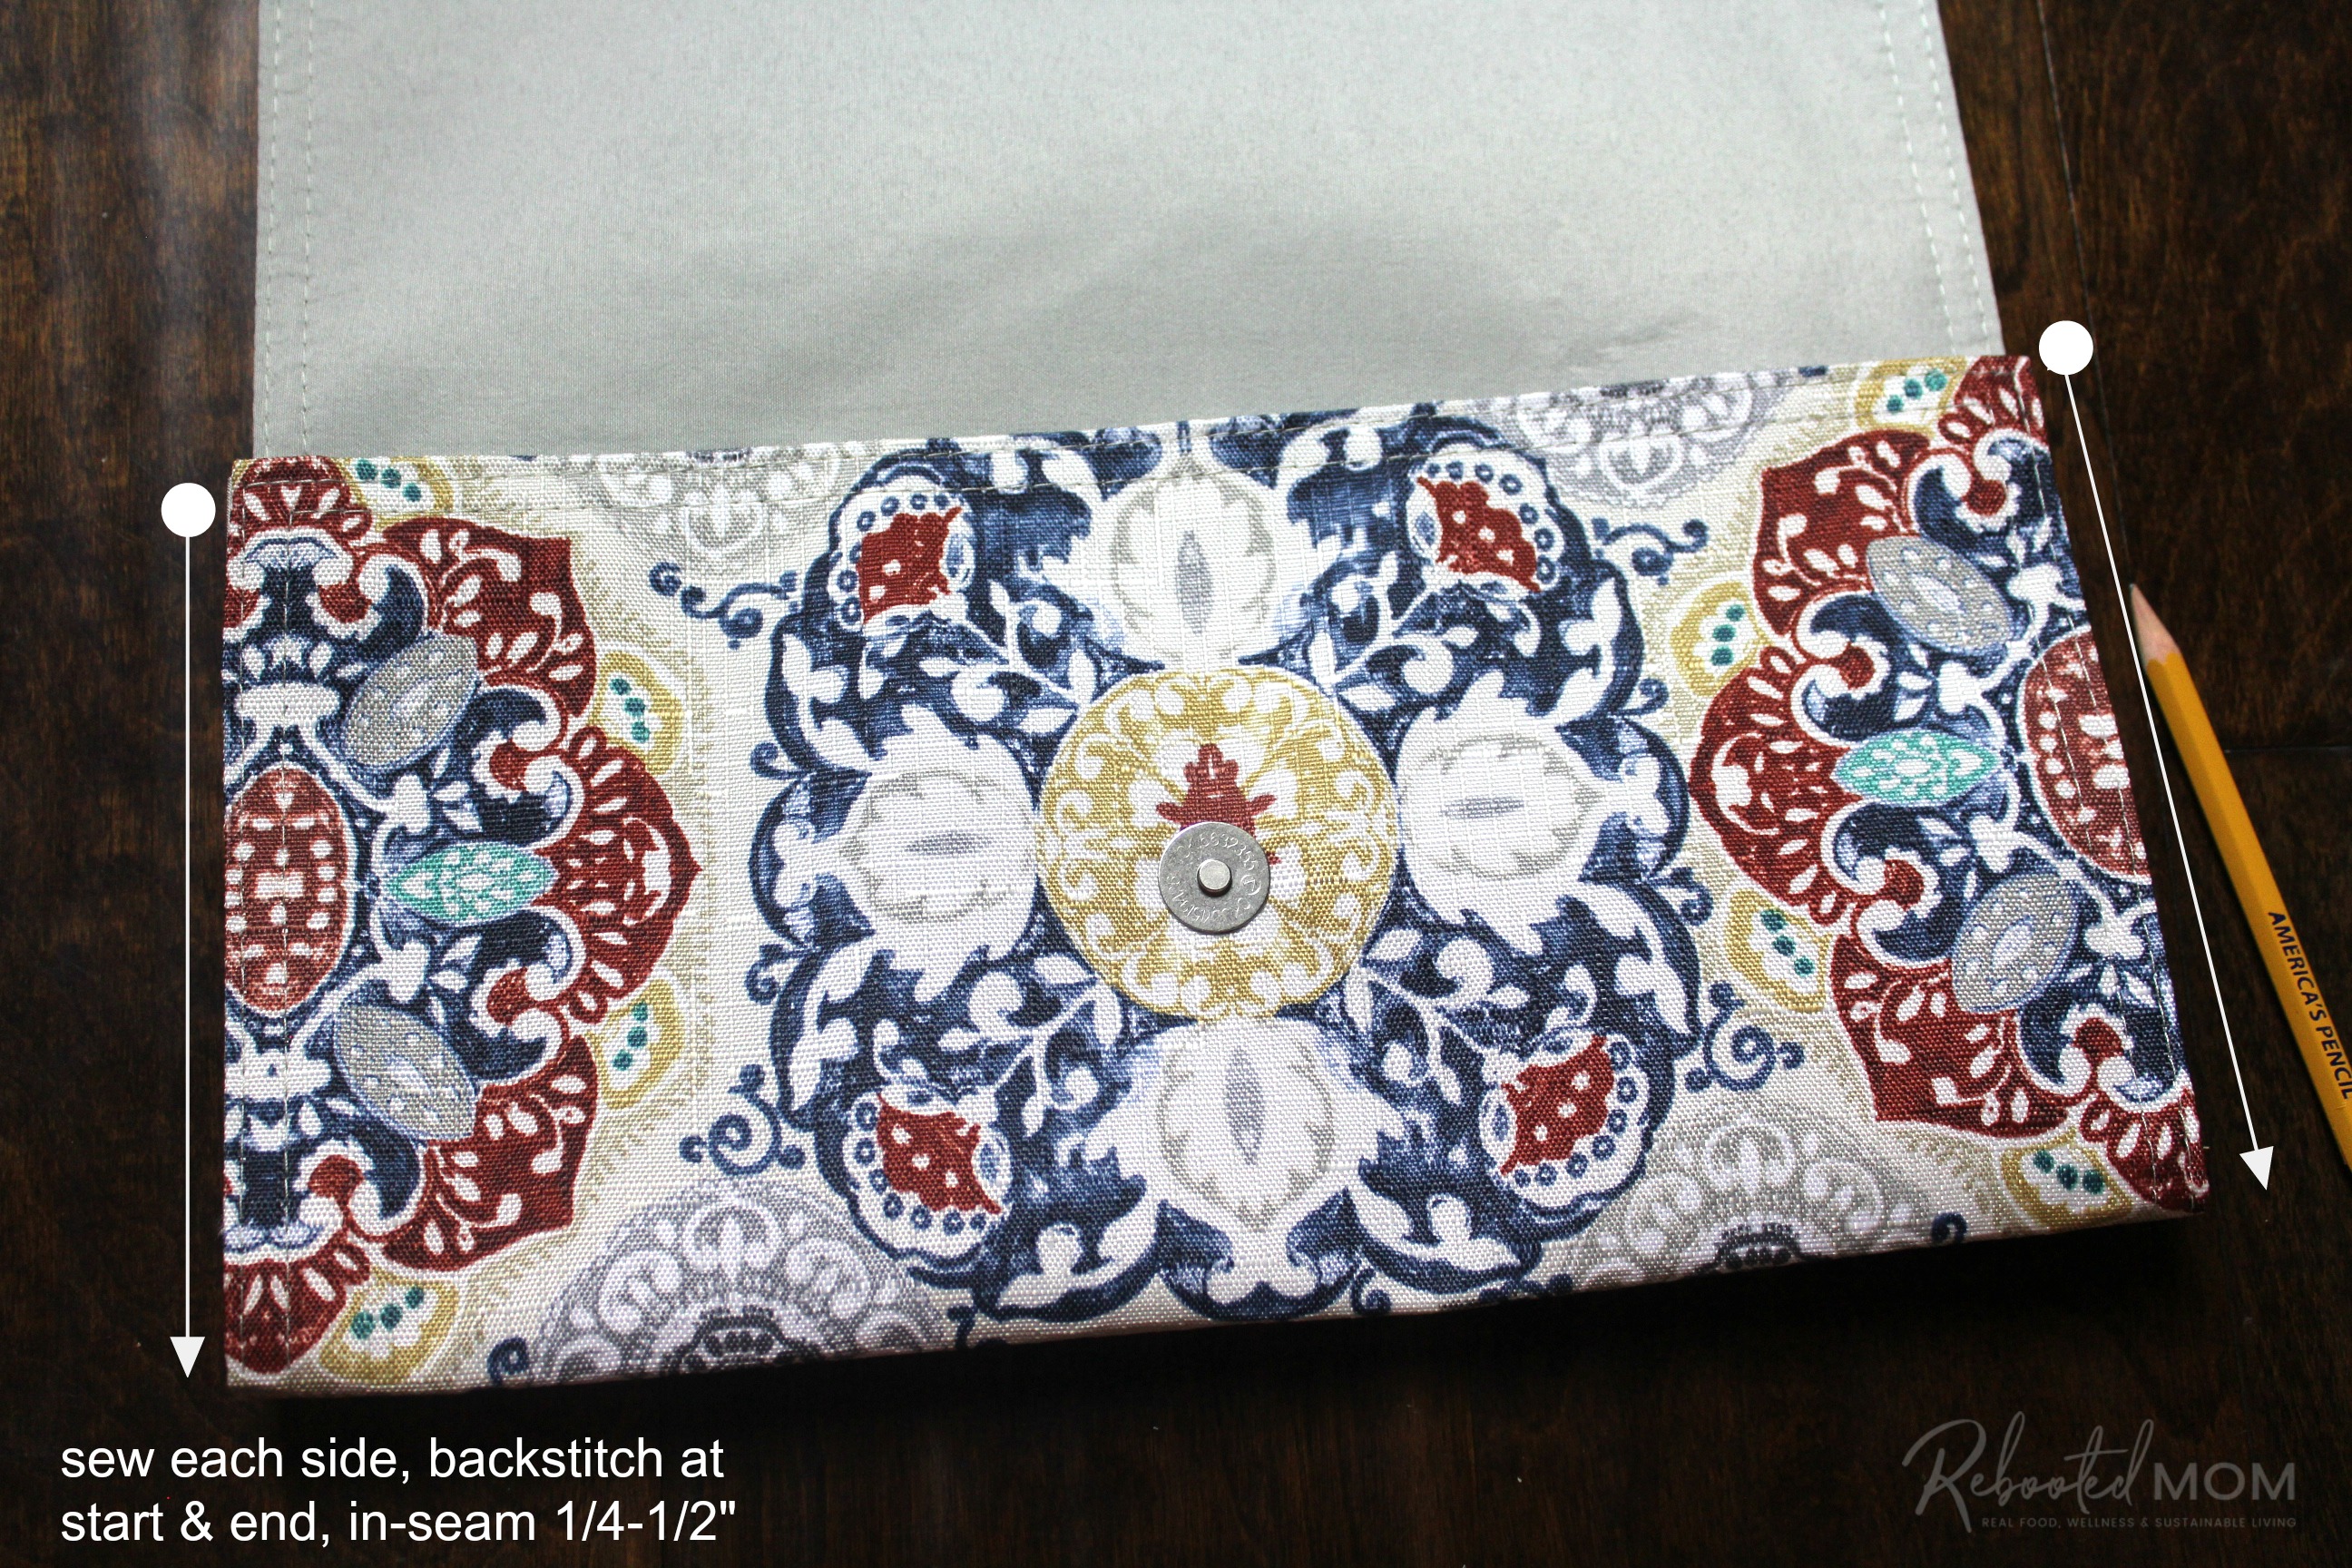
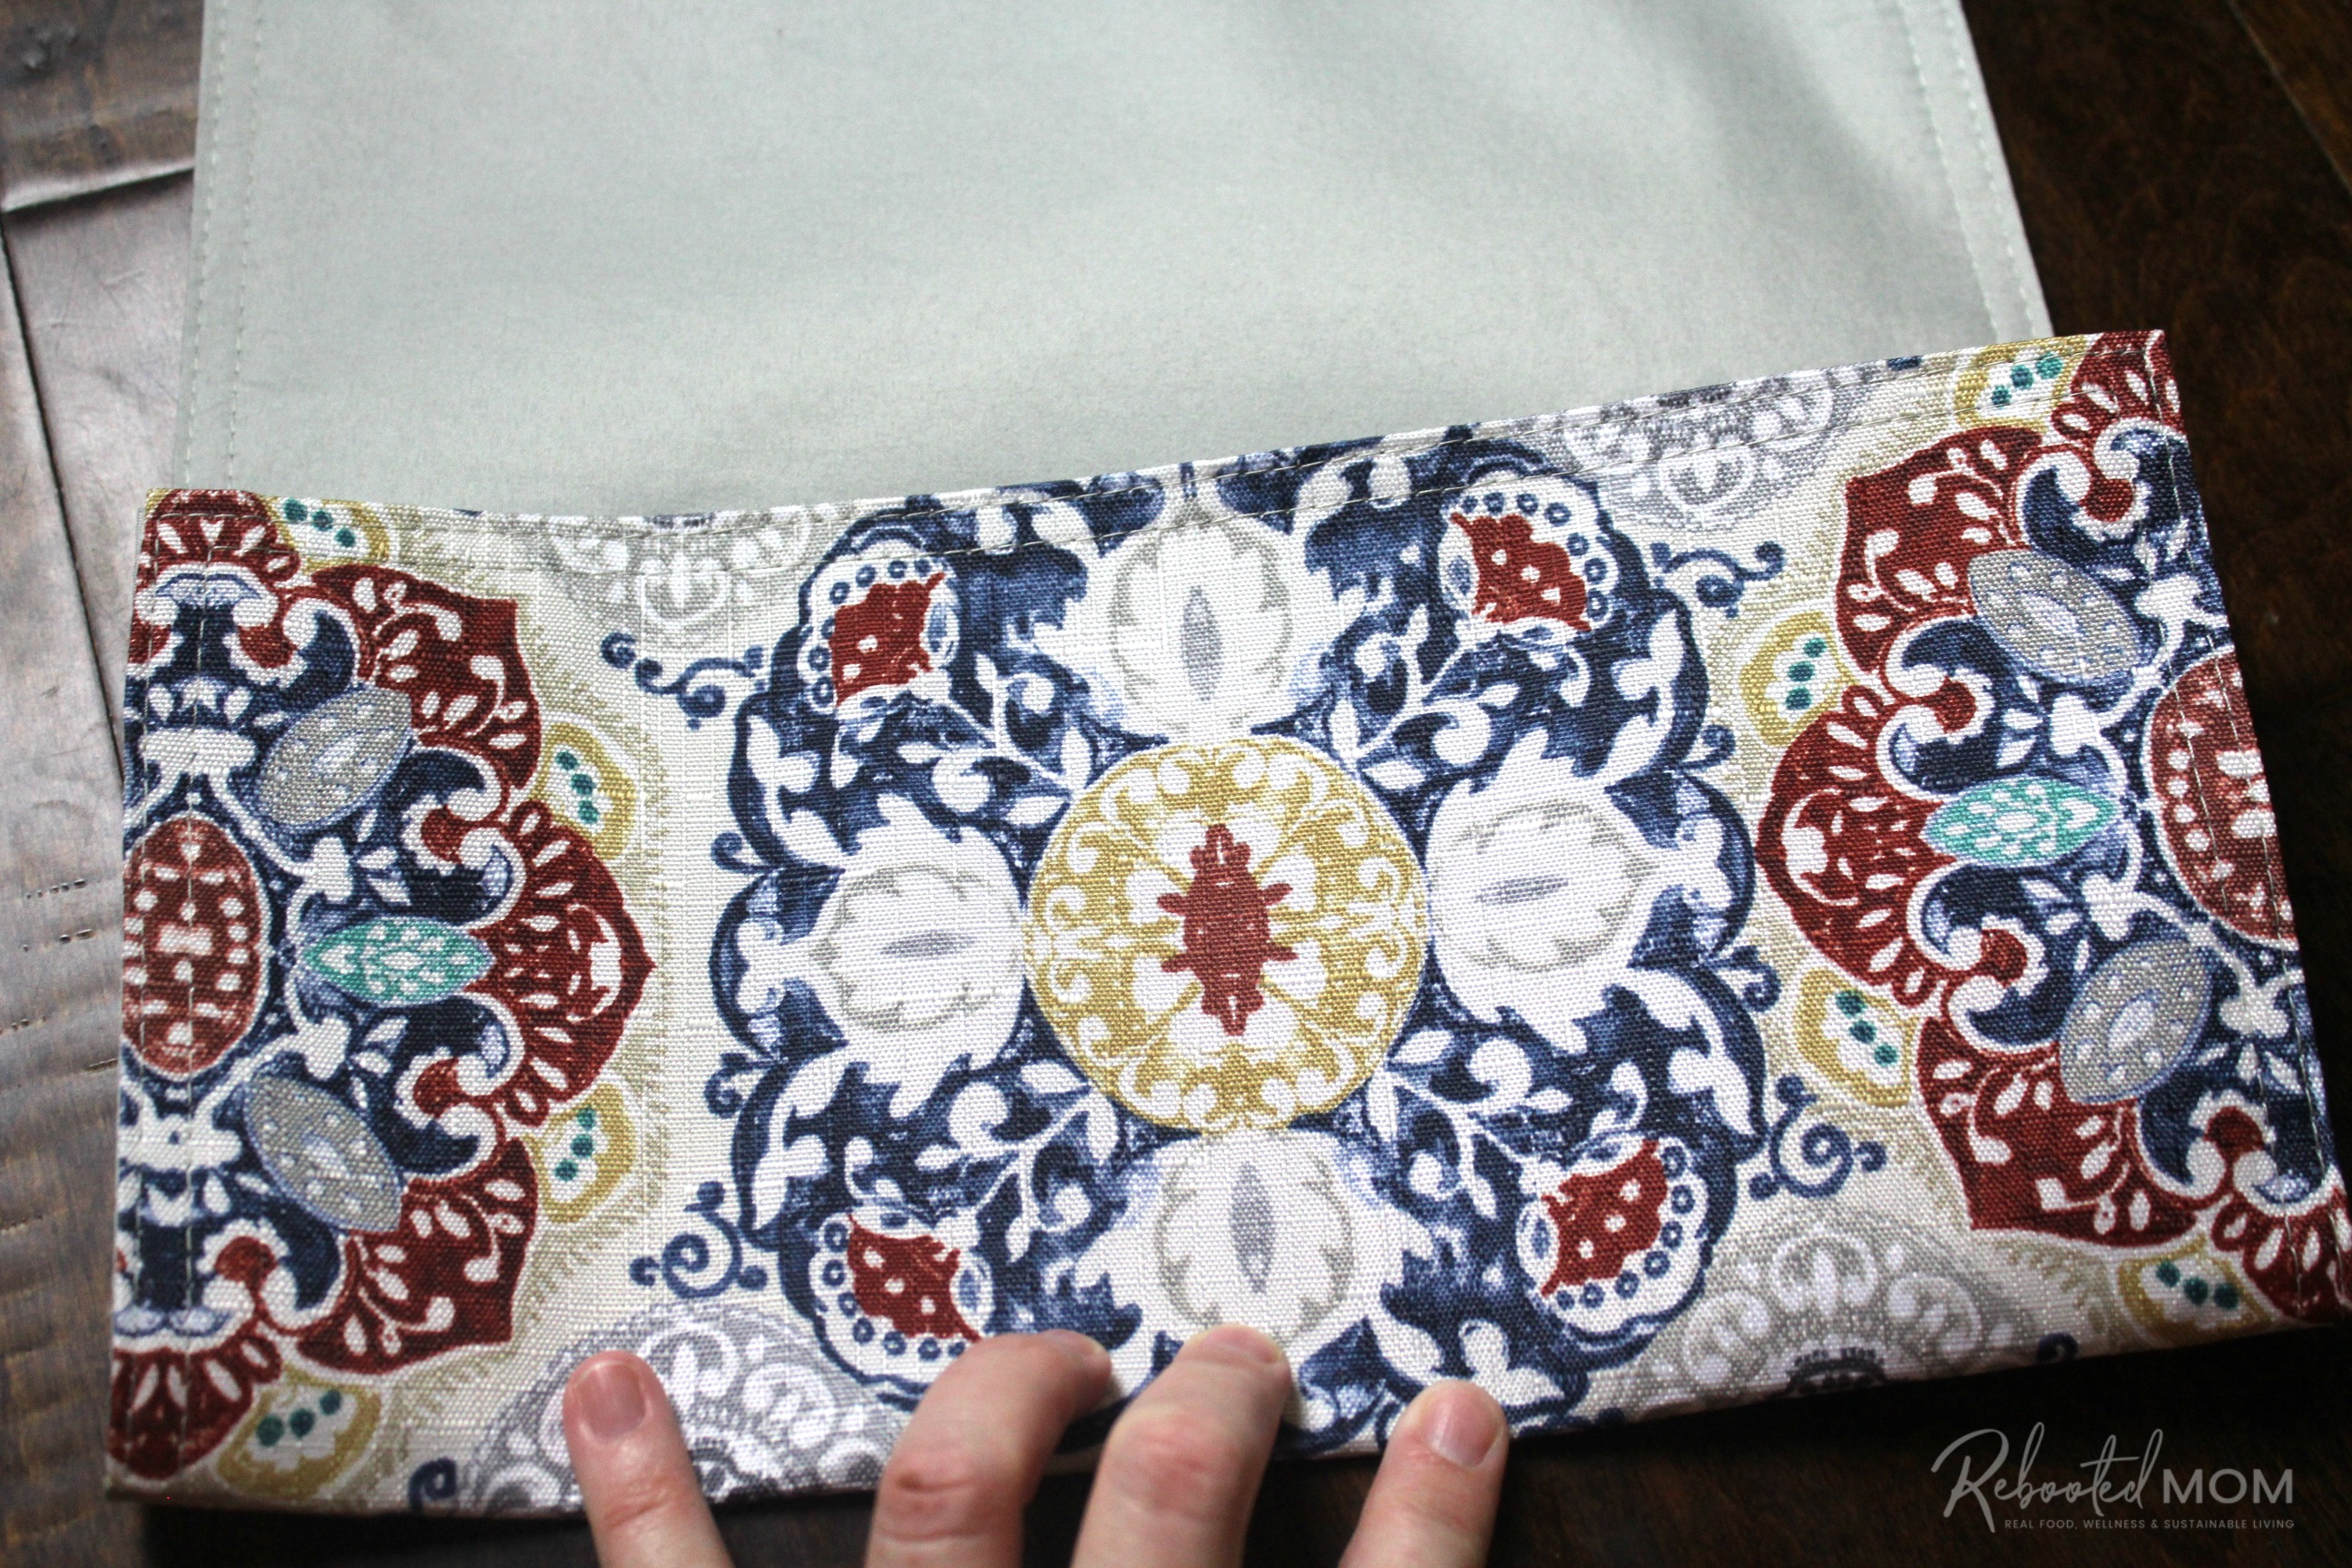
Sew each Side
Now you’ll want to set the placemat with the printed side facing you (up). Sew down each side, backstitch at the start and end. If you can, try to sew on top of the seam that’s already there.
Sewing on each side should take you less than a minute. It’s incredibly simple to sew a straight stitch.
Attach the Button
Now it’s time to attach the fastener to the other side.
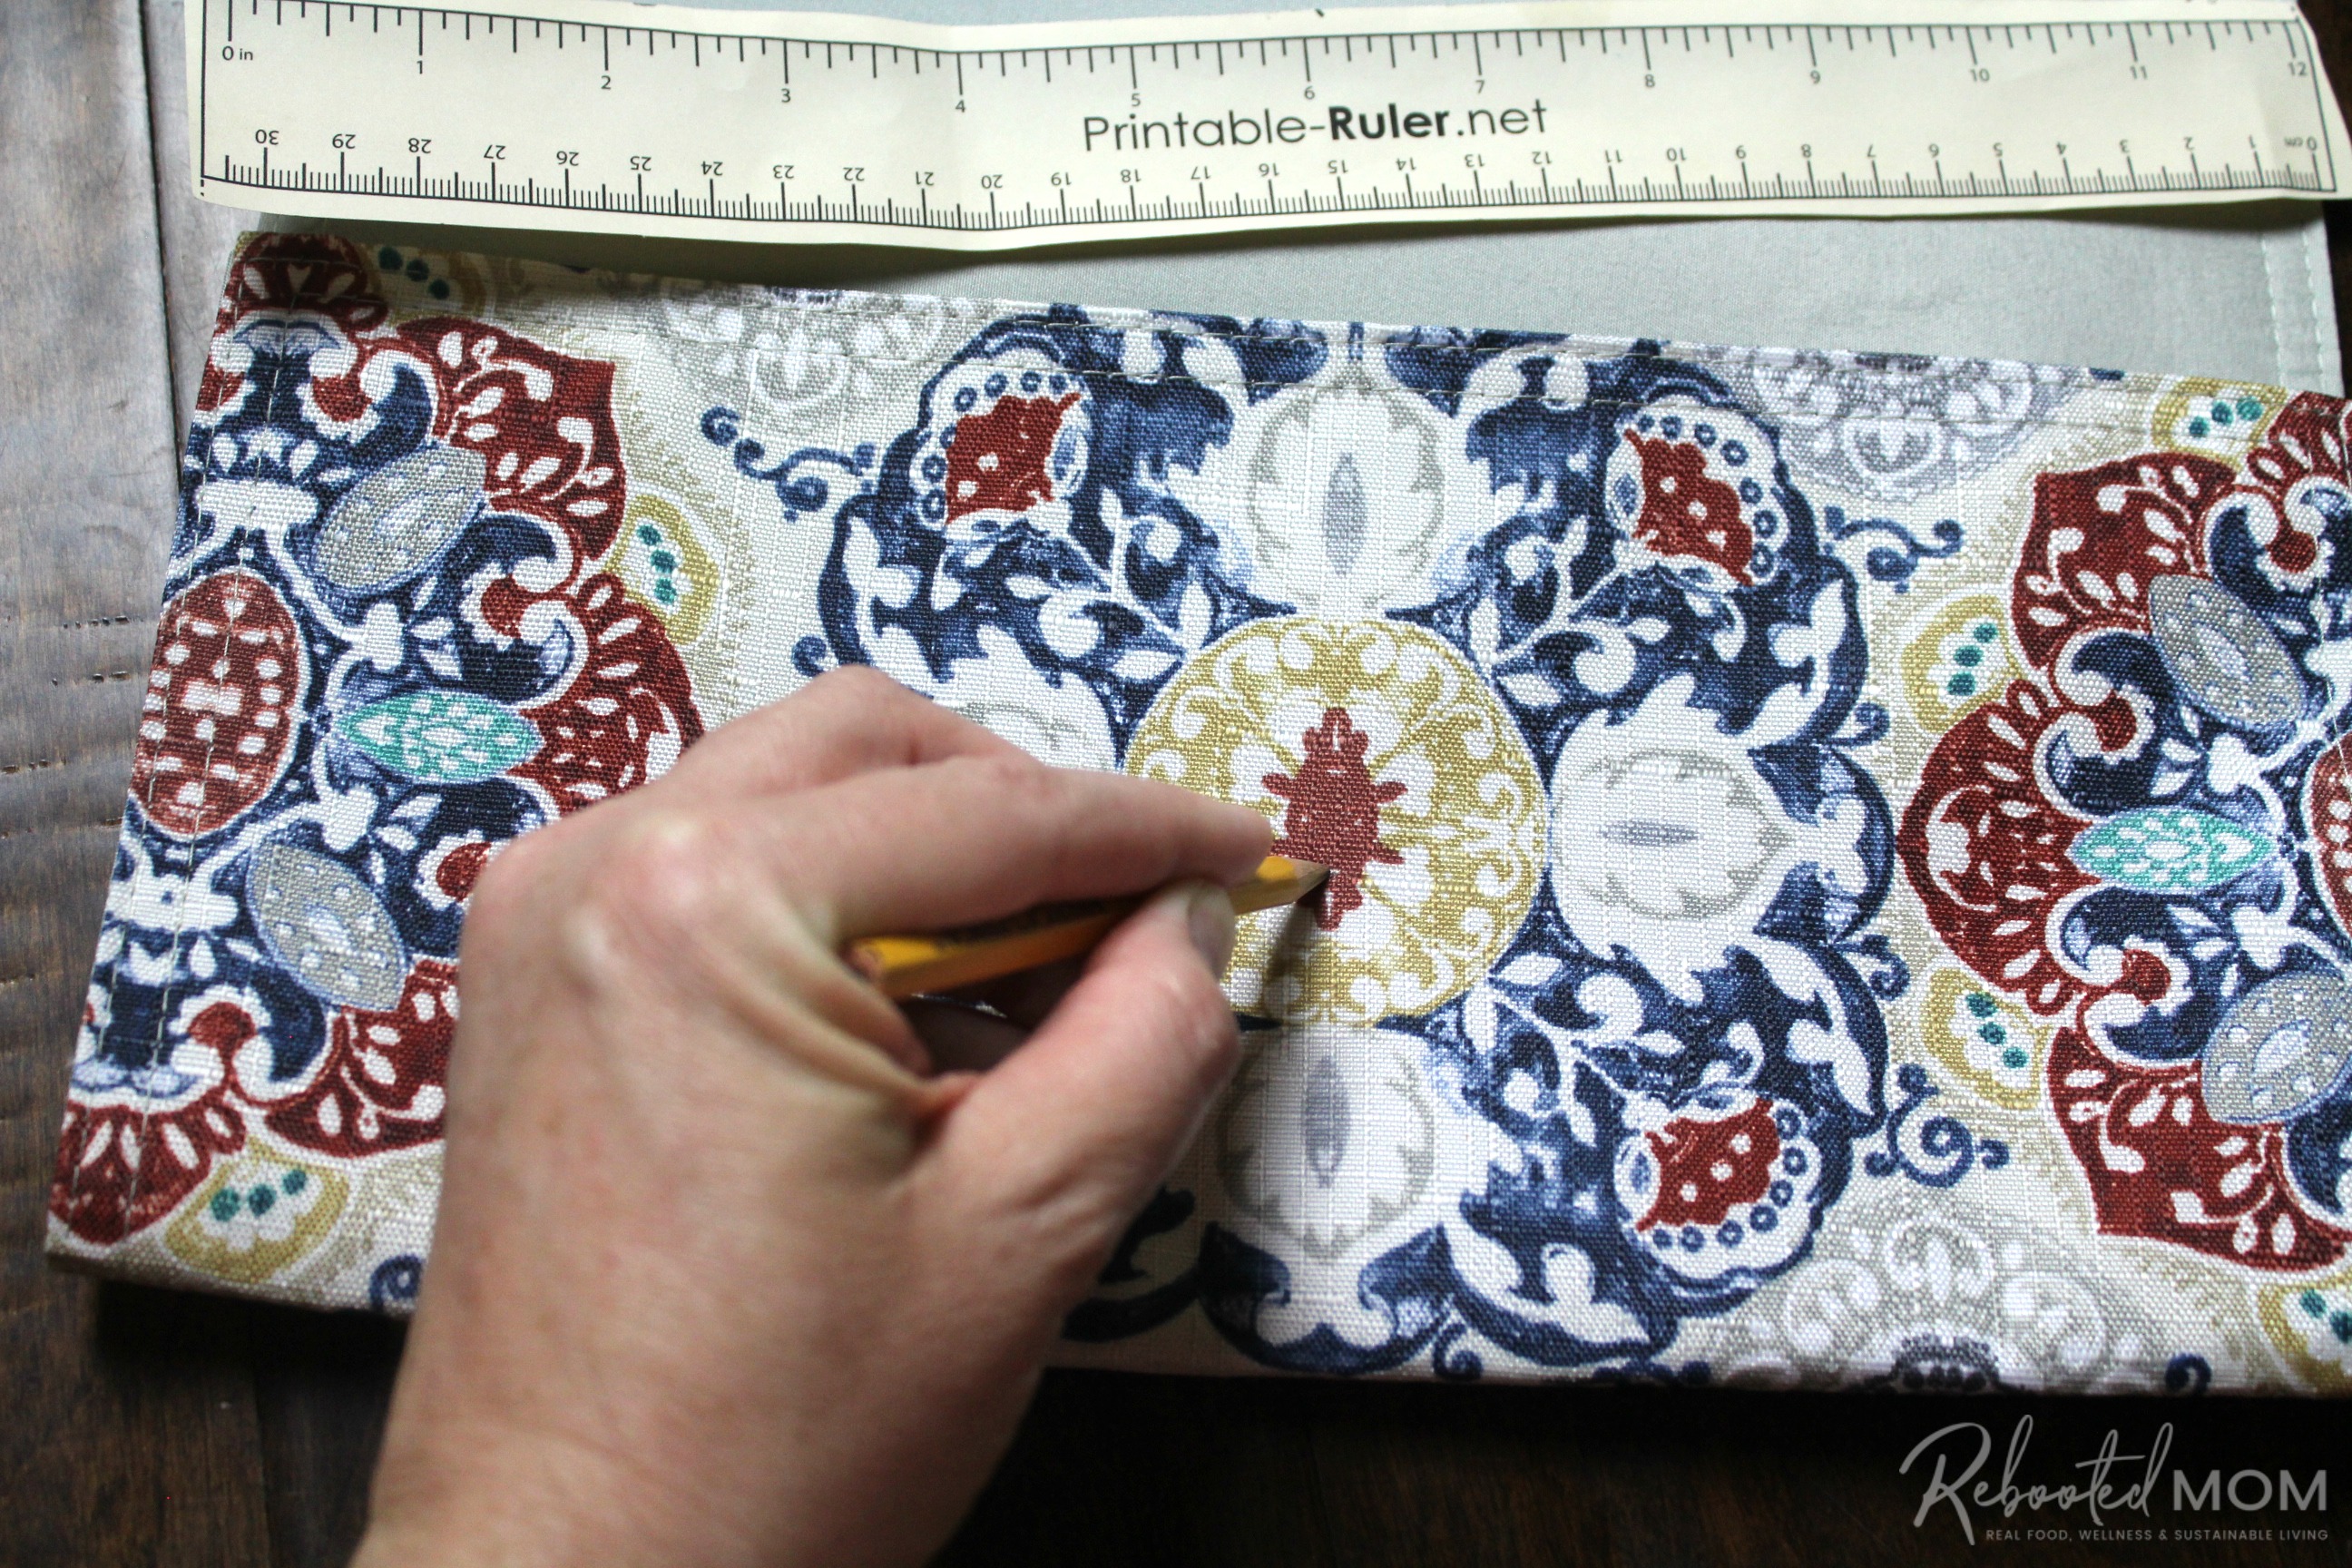
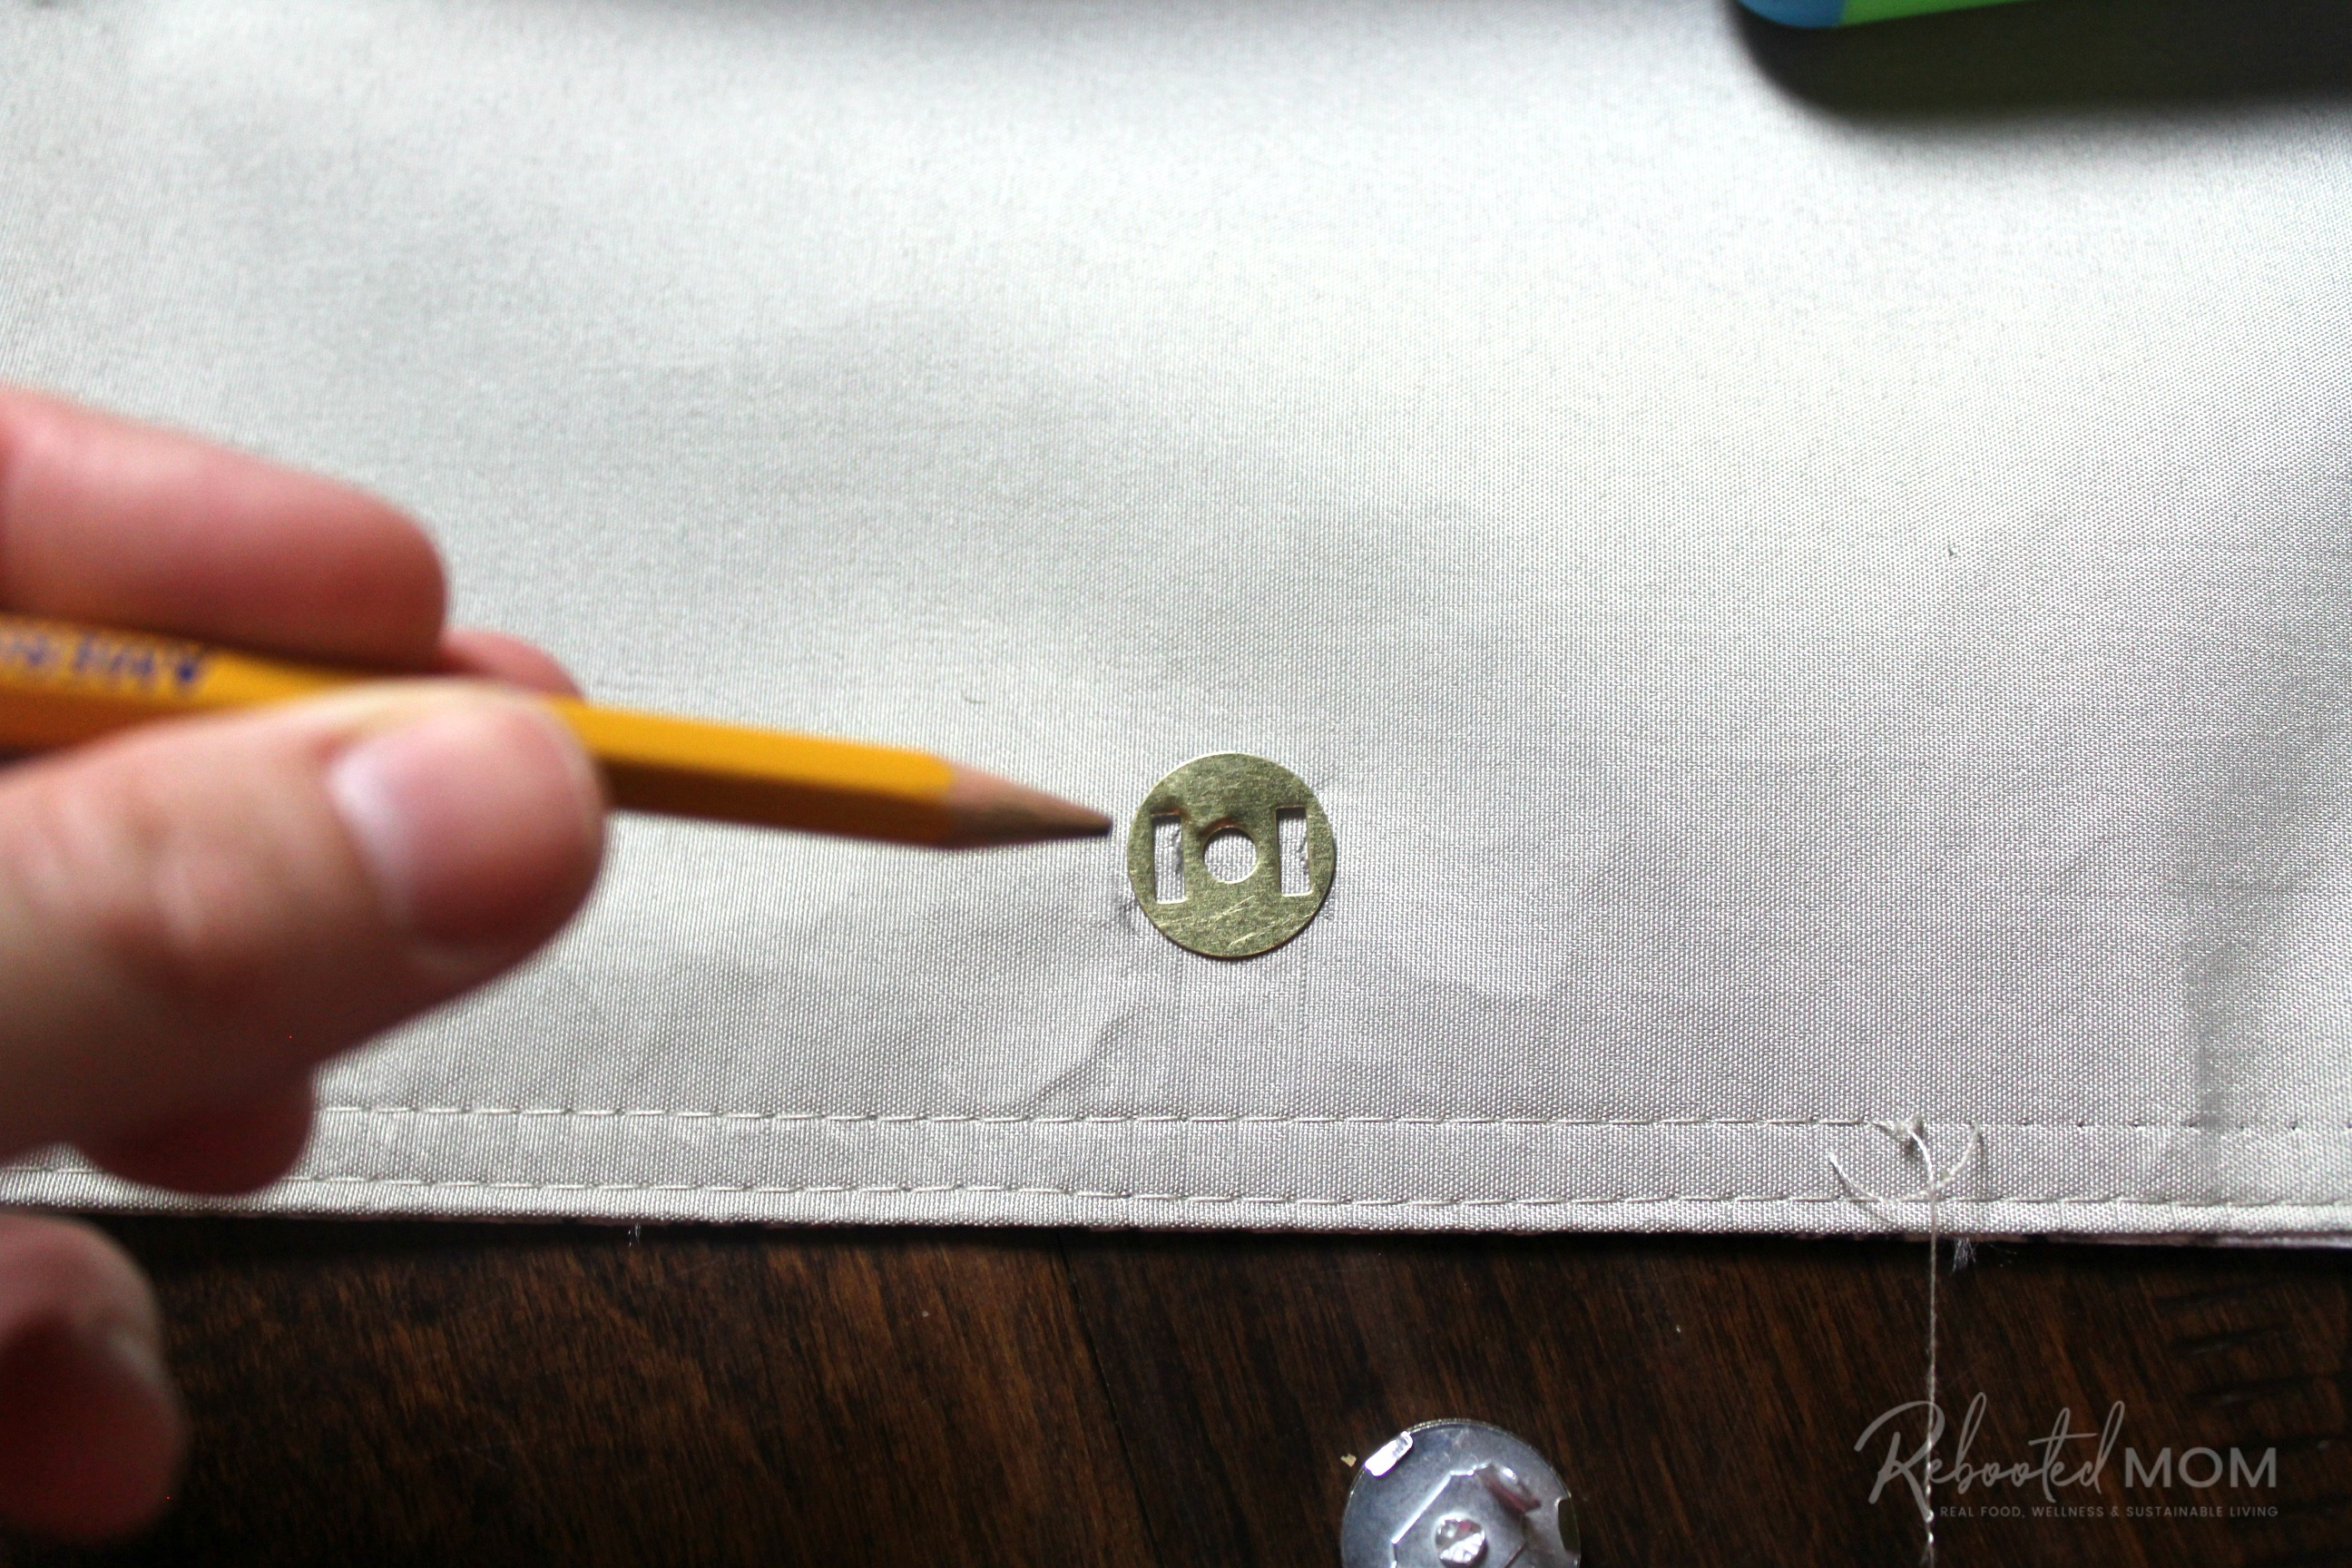
Turn the placemat to the opposite end, and then flip it over so that the plain side is facing you. Use the other metal grommet to mark this next button.
You’ll want to make sure the placement is similar to the button on the opposite side (that you already did). Measure the width of the placemat, and mark at the mid-point. Then, measure 2.5 inches from the edge. Mark that with a “dot” – then place the grommet over the top with the center hole over your dot.
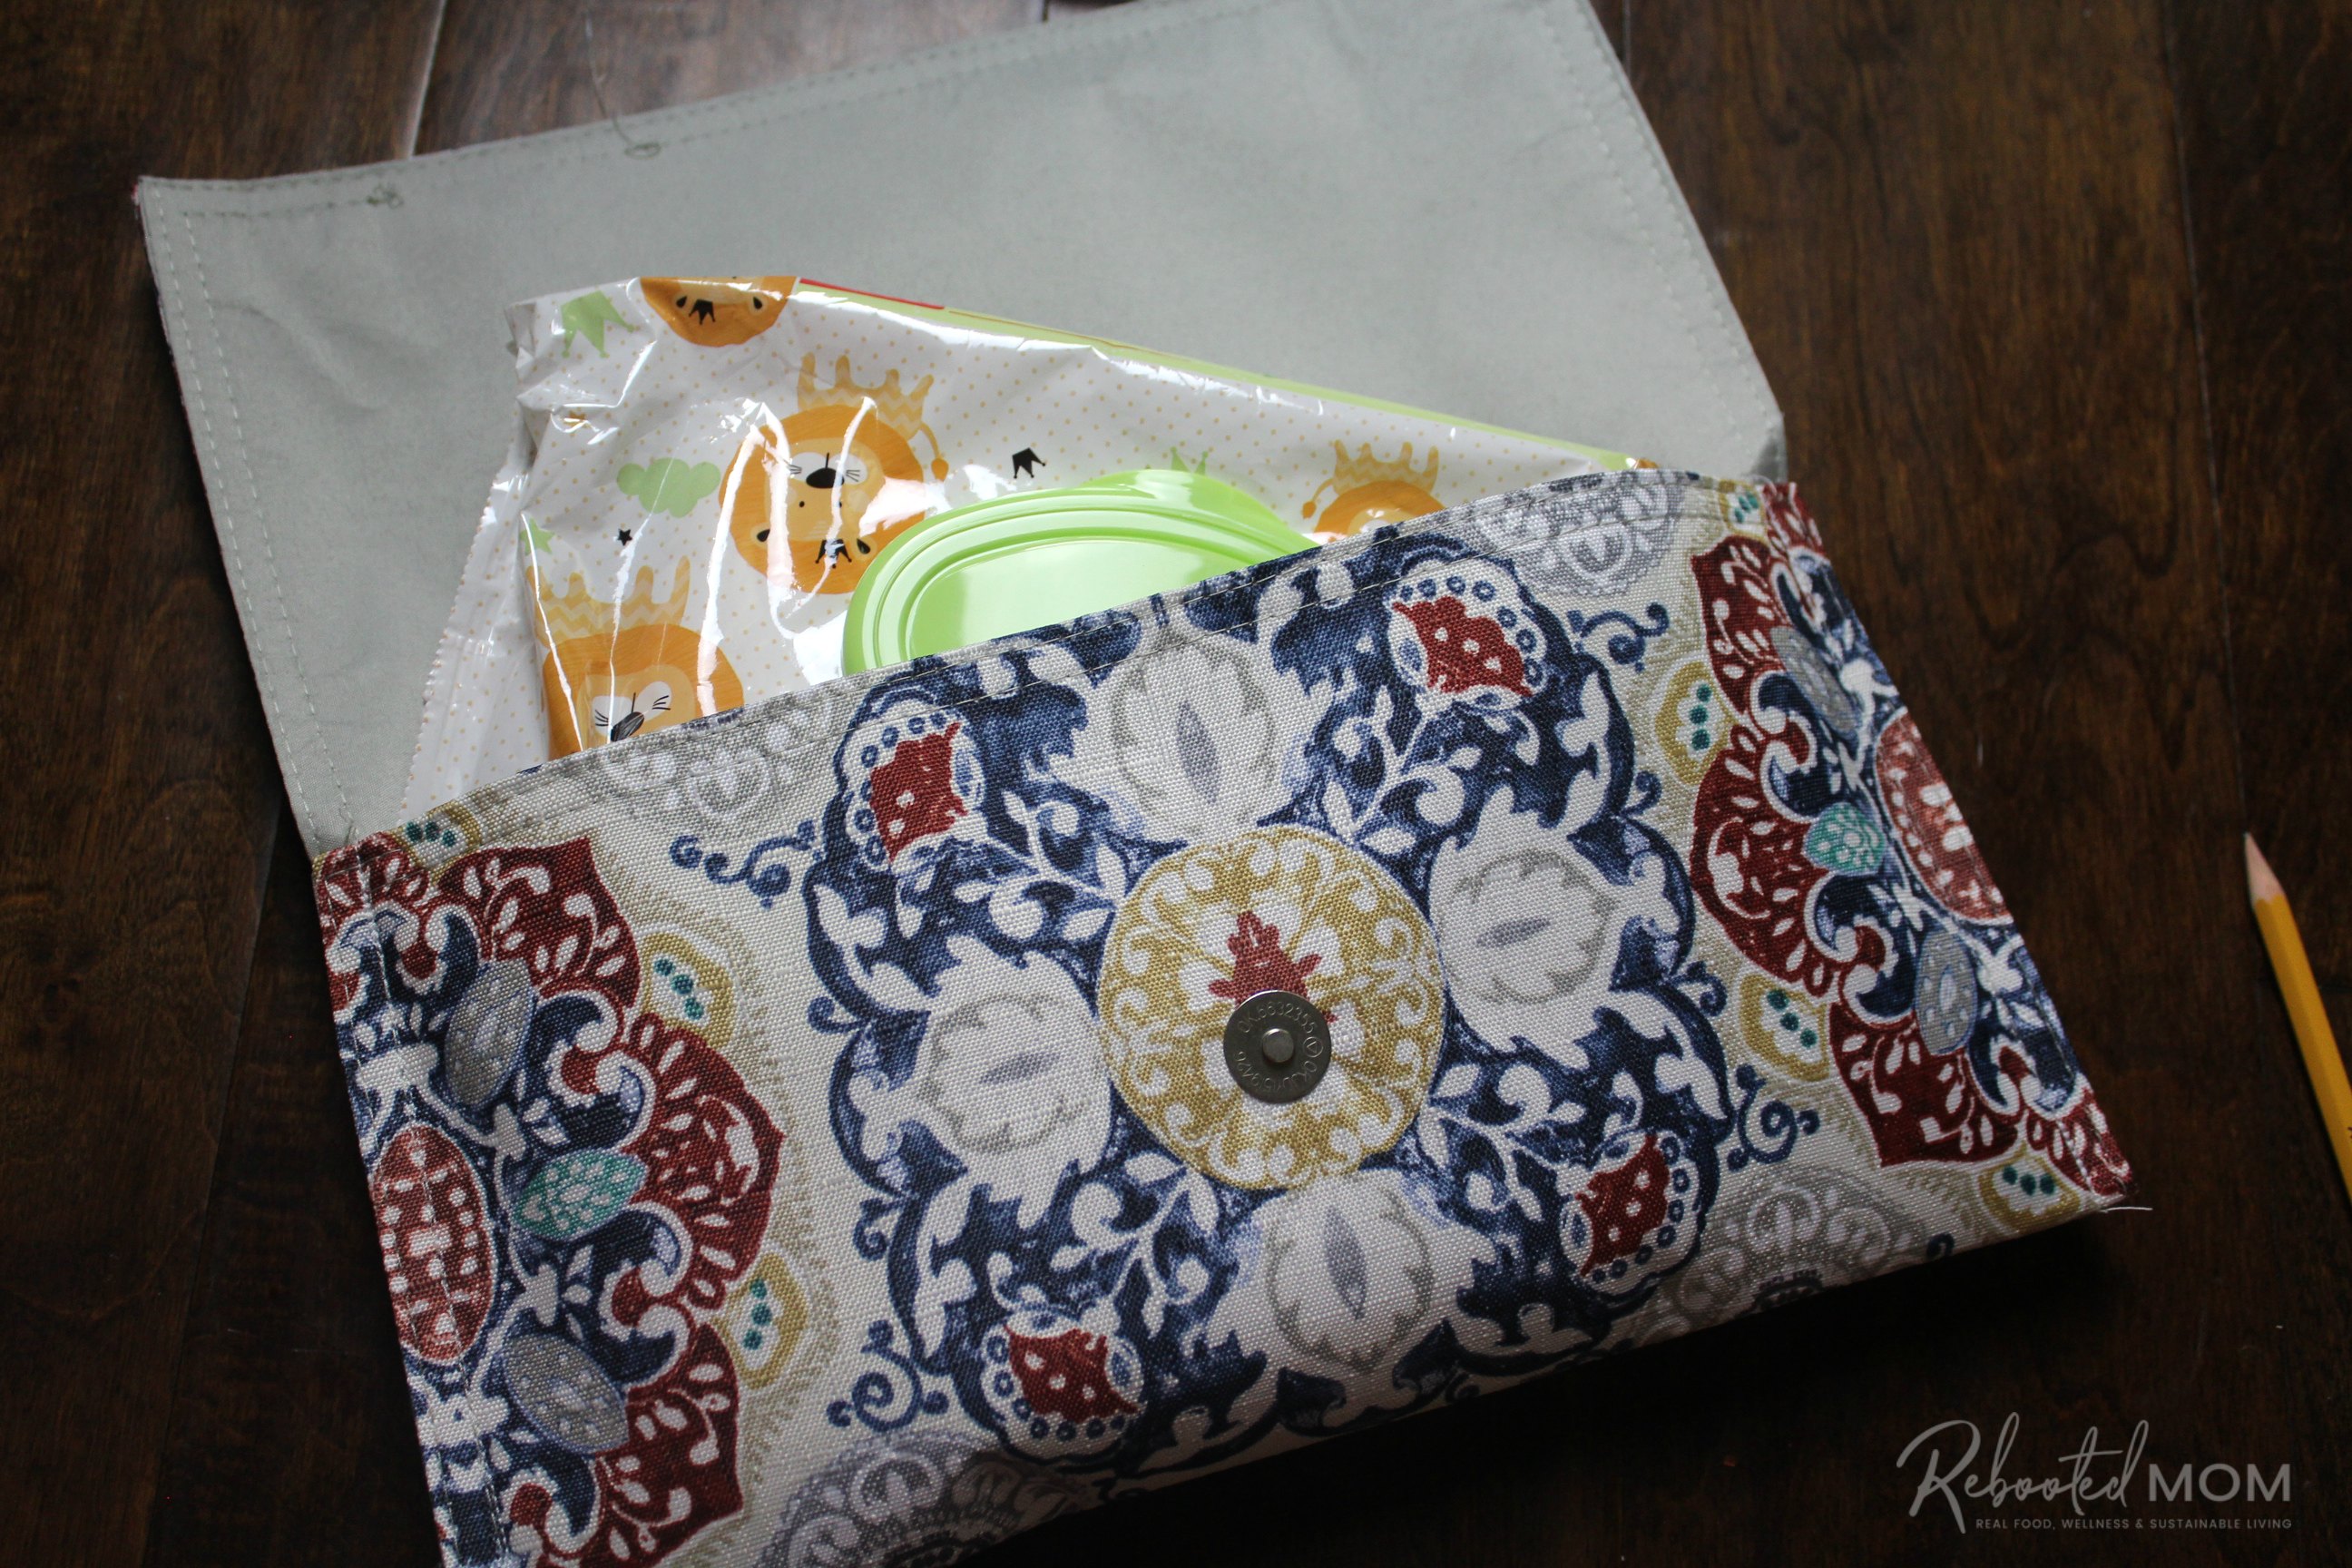
(***If you plan on using your clutch for diapers & wipes, you’ll want to make adjustments. Place the wipes and diaper(s) in the clutch and then close the flap. The bulge from the wipes may require you to place the button 1 – 1.5 inches from the edge to allow the clutch to close over that bulk).
Use your pencil to place marks in the empty prong spaces. Use your seam ripper to rip the placemat where you marked for those two prongs. Place the other side of the button in the spaces, pushing the prongs through. Flip the placemat over, and place the grommet over the prongs, then push the prongs down.
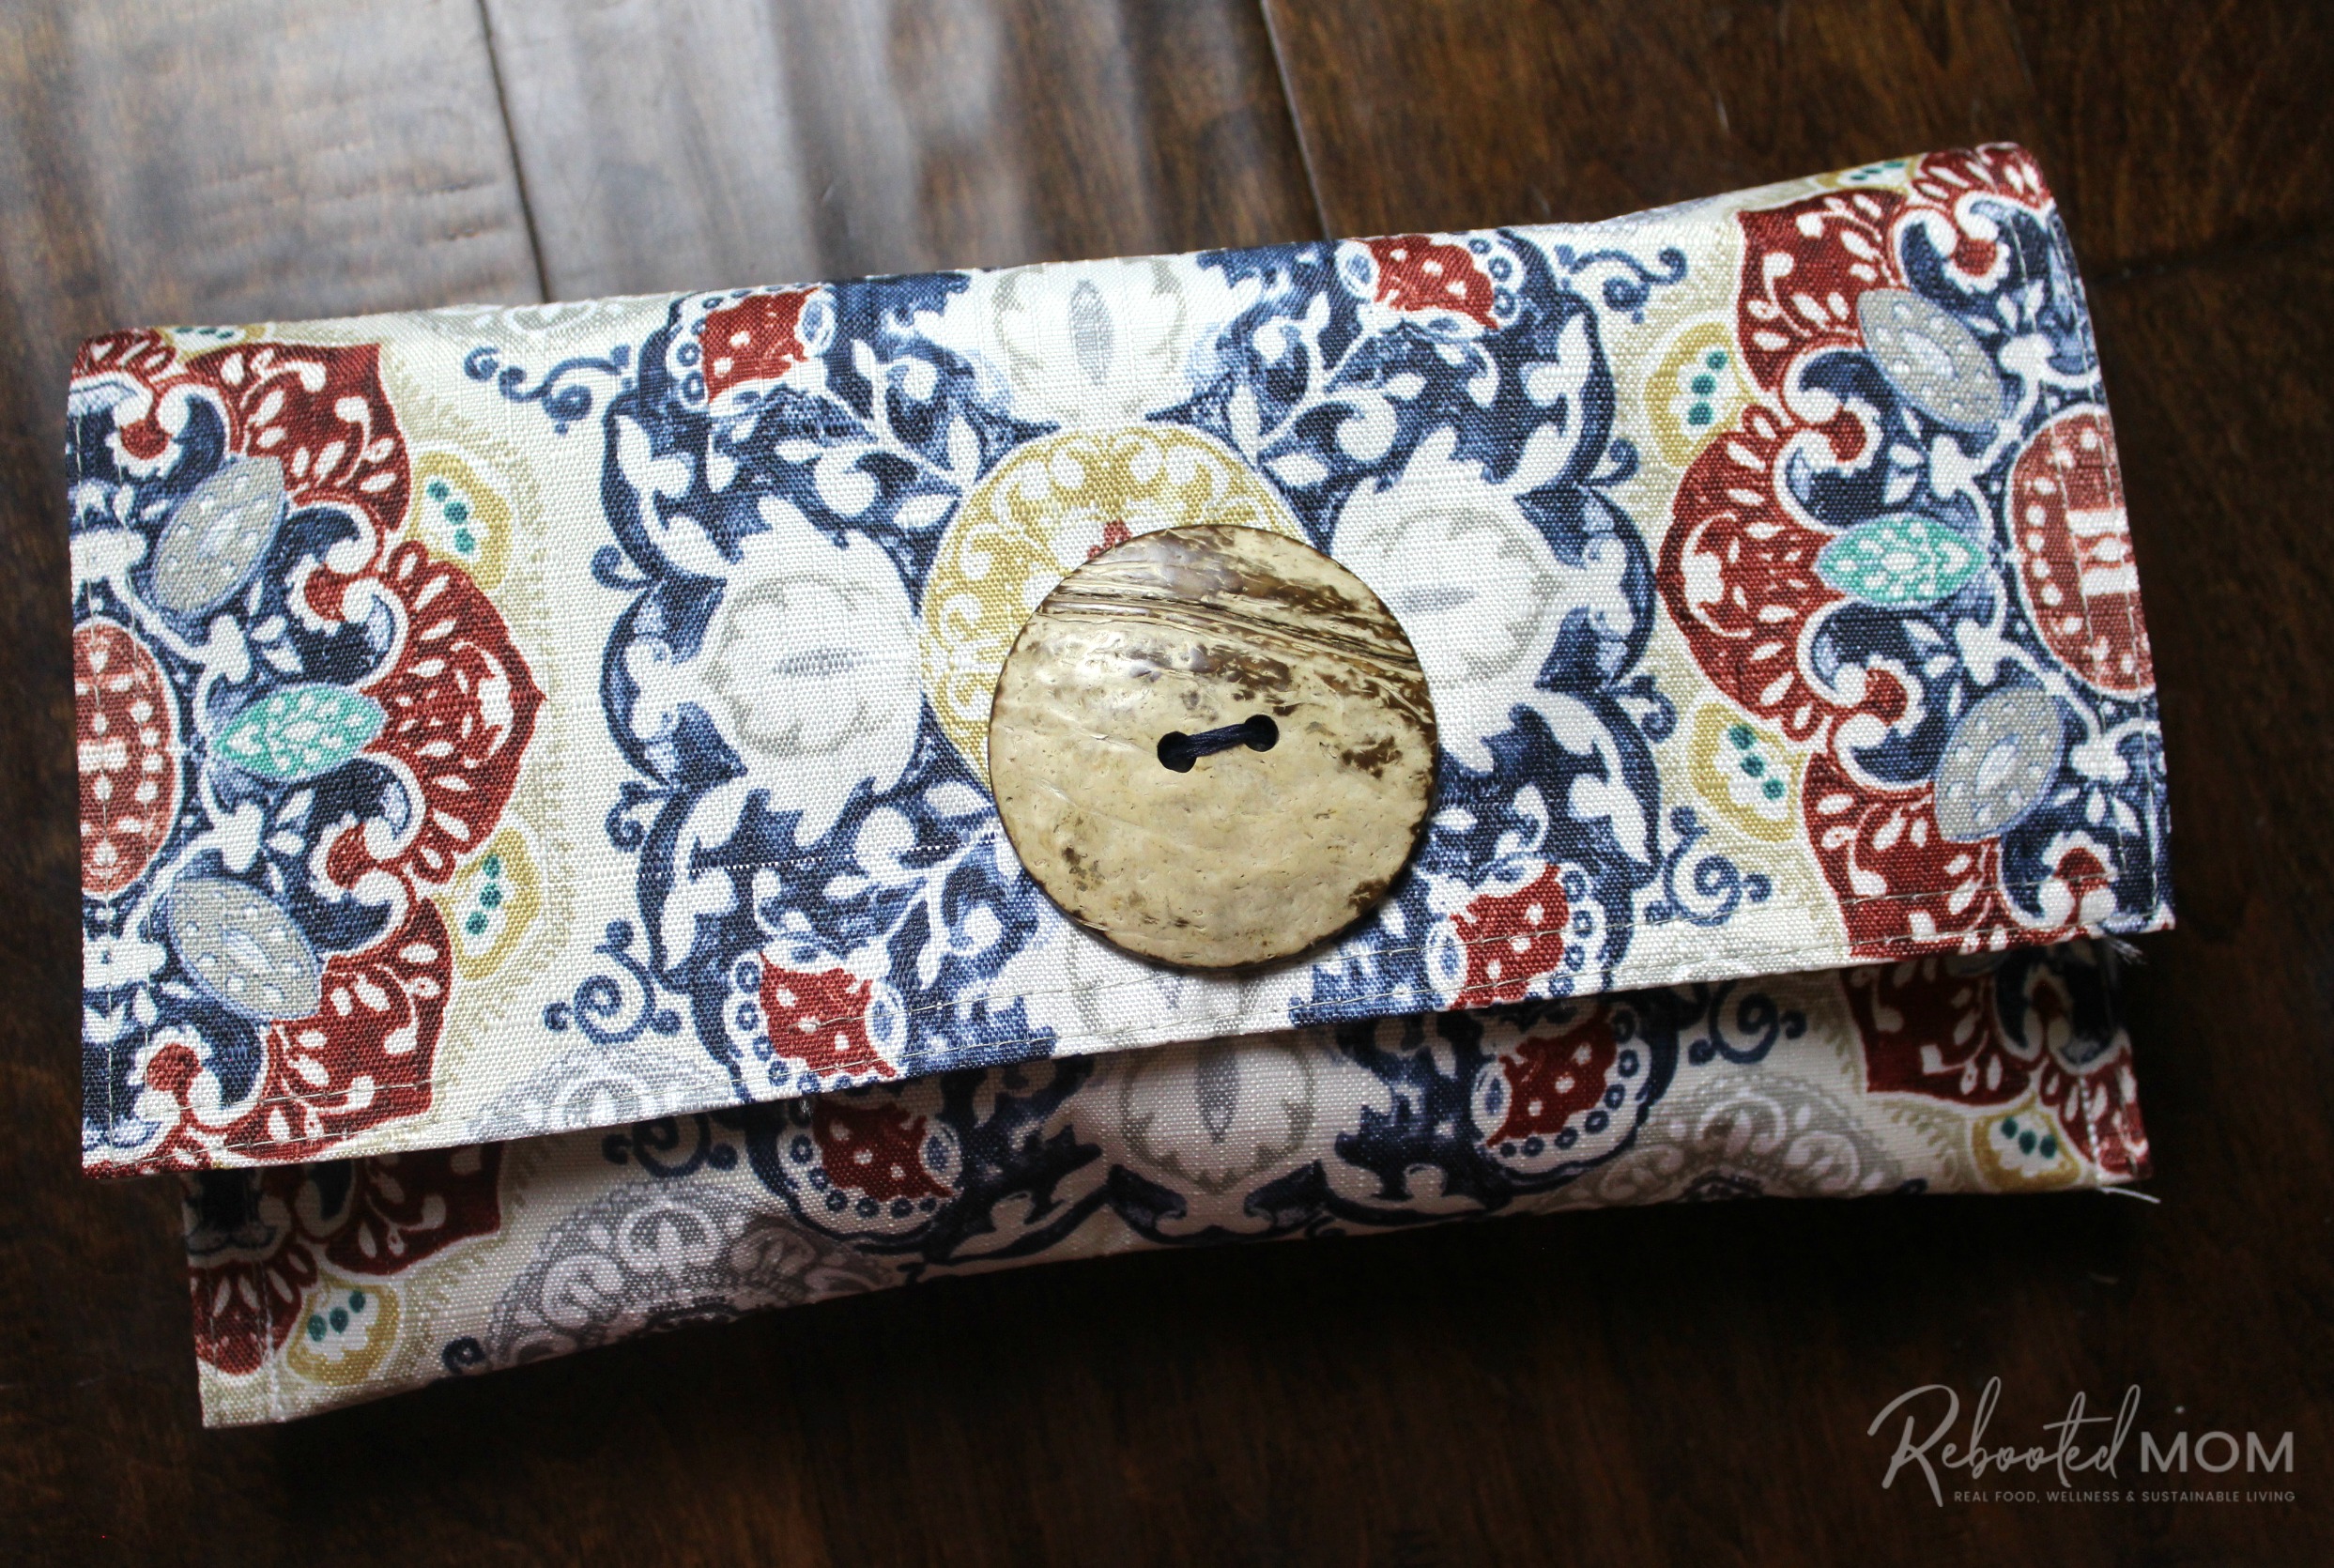
Voila – you have your placemat clutch!
Finish the Clutch
You can take one last step: We used a button to cover up the prong that shows from the outside of the clutch. Our button is a 2.5 inch button (from Walmart) in deep red. Instead of showing the red, we flipped it over because I liked the way it sat better.
Sew on with a needle and thread quite easily (and yes, the thread will be visible when you open the clutch). If you don’t like the thought of visible thread, you have a few options:
- Instead of the button, hot glue an embellishment on the outside of the bag.
- Use a thread that matches that color of the placemat (non-printed side)
- Make your own “Made with Love” tag and hot glue it in the inside of the clutch.
Perfect Gift or Summer Purse
This clutch is a simple way to make a cute summer purse or a fashionable baby wipe holder. It would also be a cute way to gift to a new mama – along side a soft baby minky blanket for a new baby.
Have you ever considered using a placemat to make a cute and functional clutch or wipes holder?
Looking for more simple sewing projects?
Try this easy pillow bed cushion sewing project that uses a plain twin sheet!

Leave a Reply