


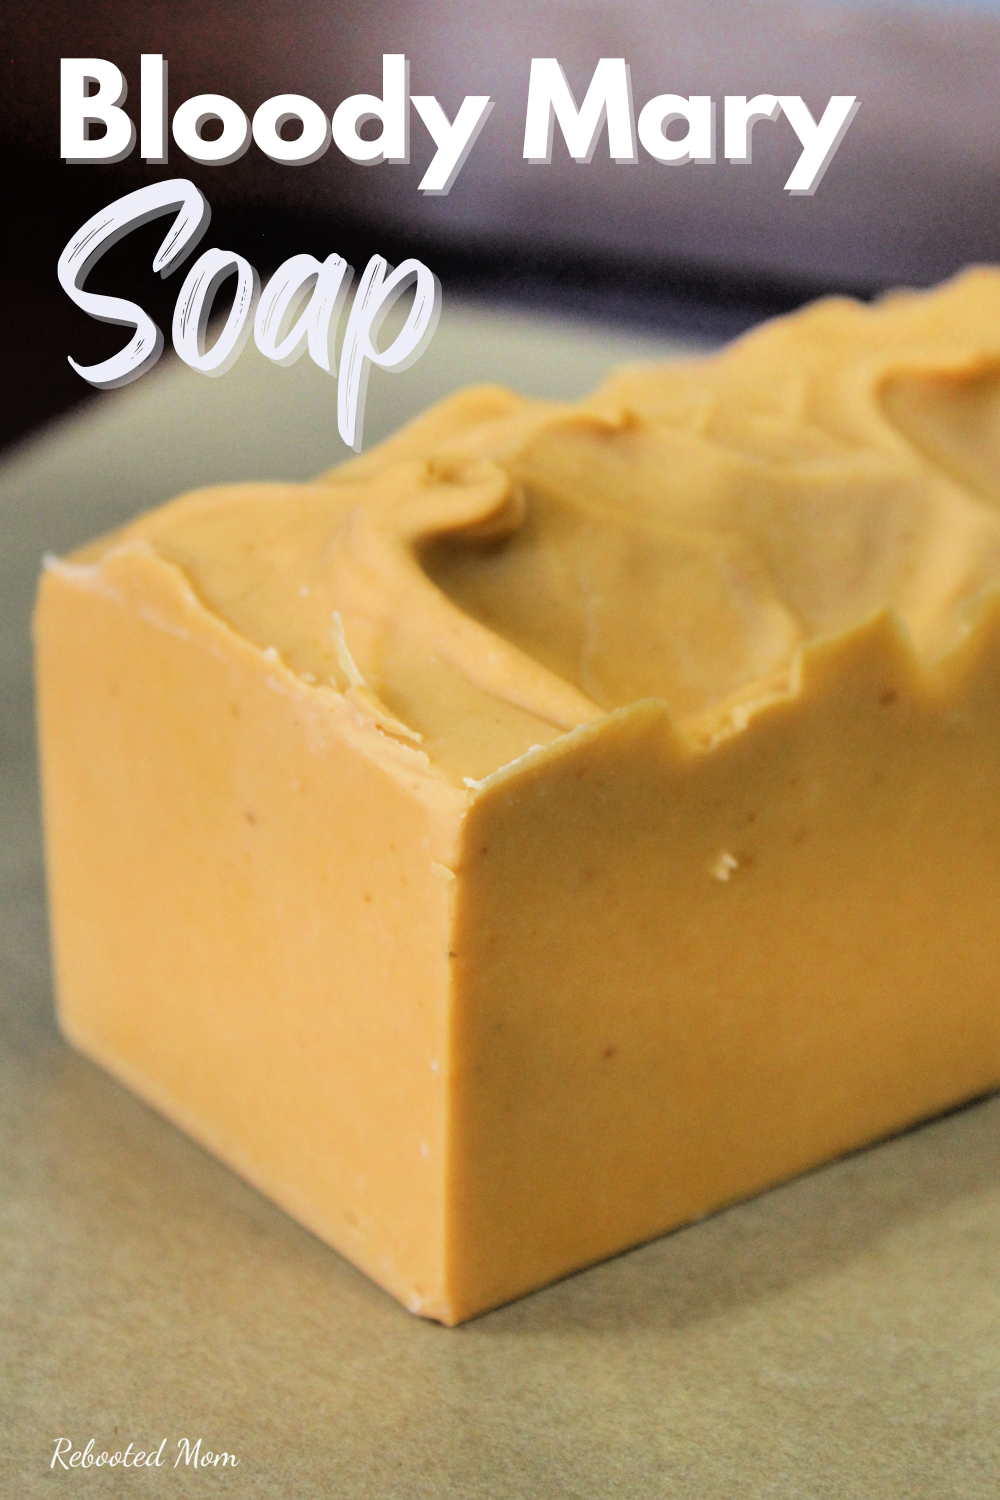
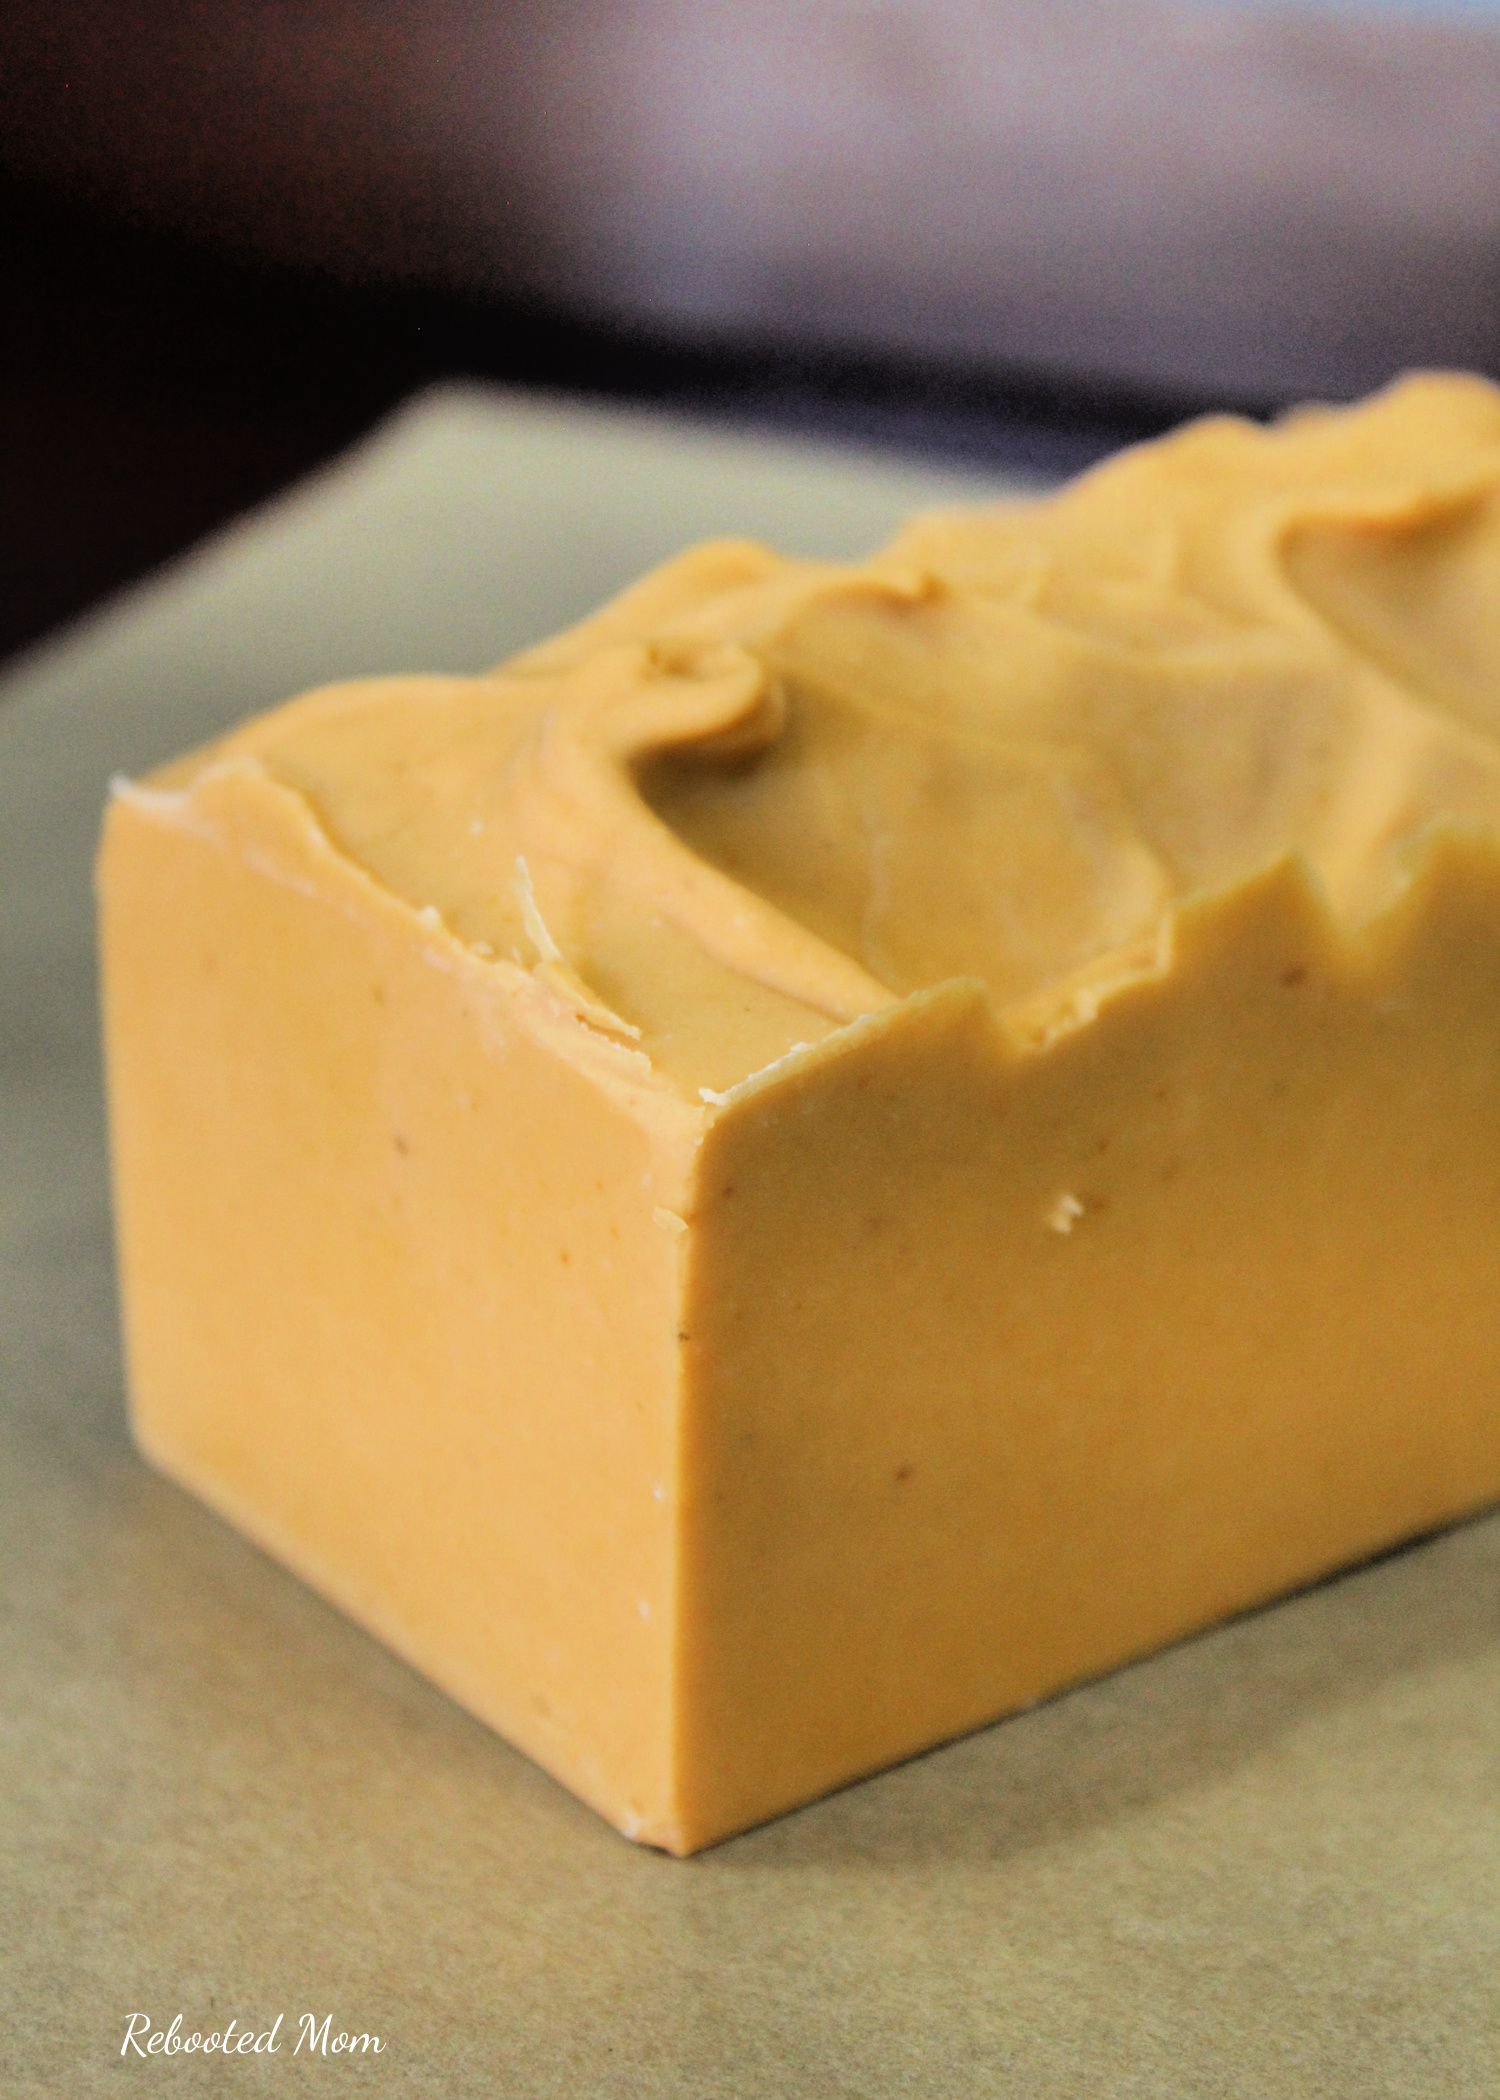
Bloody Mary Cold Process Soap – an unscented cold processed soap that comes together easily with Bloody Mary mix for a naturally colored soap that’s gentle on skin!
Cold process soaps can take so many different forms — fragrance oils, colorants, clays, and even essential oils. You can use raw cow milk, goat milk or even your favorite wine. When it all comes down to it though, I love unscented bars more than anything – because they are so gentle.
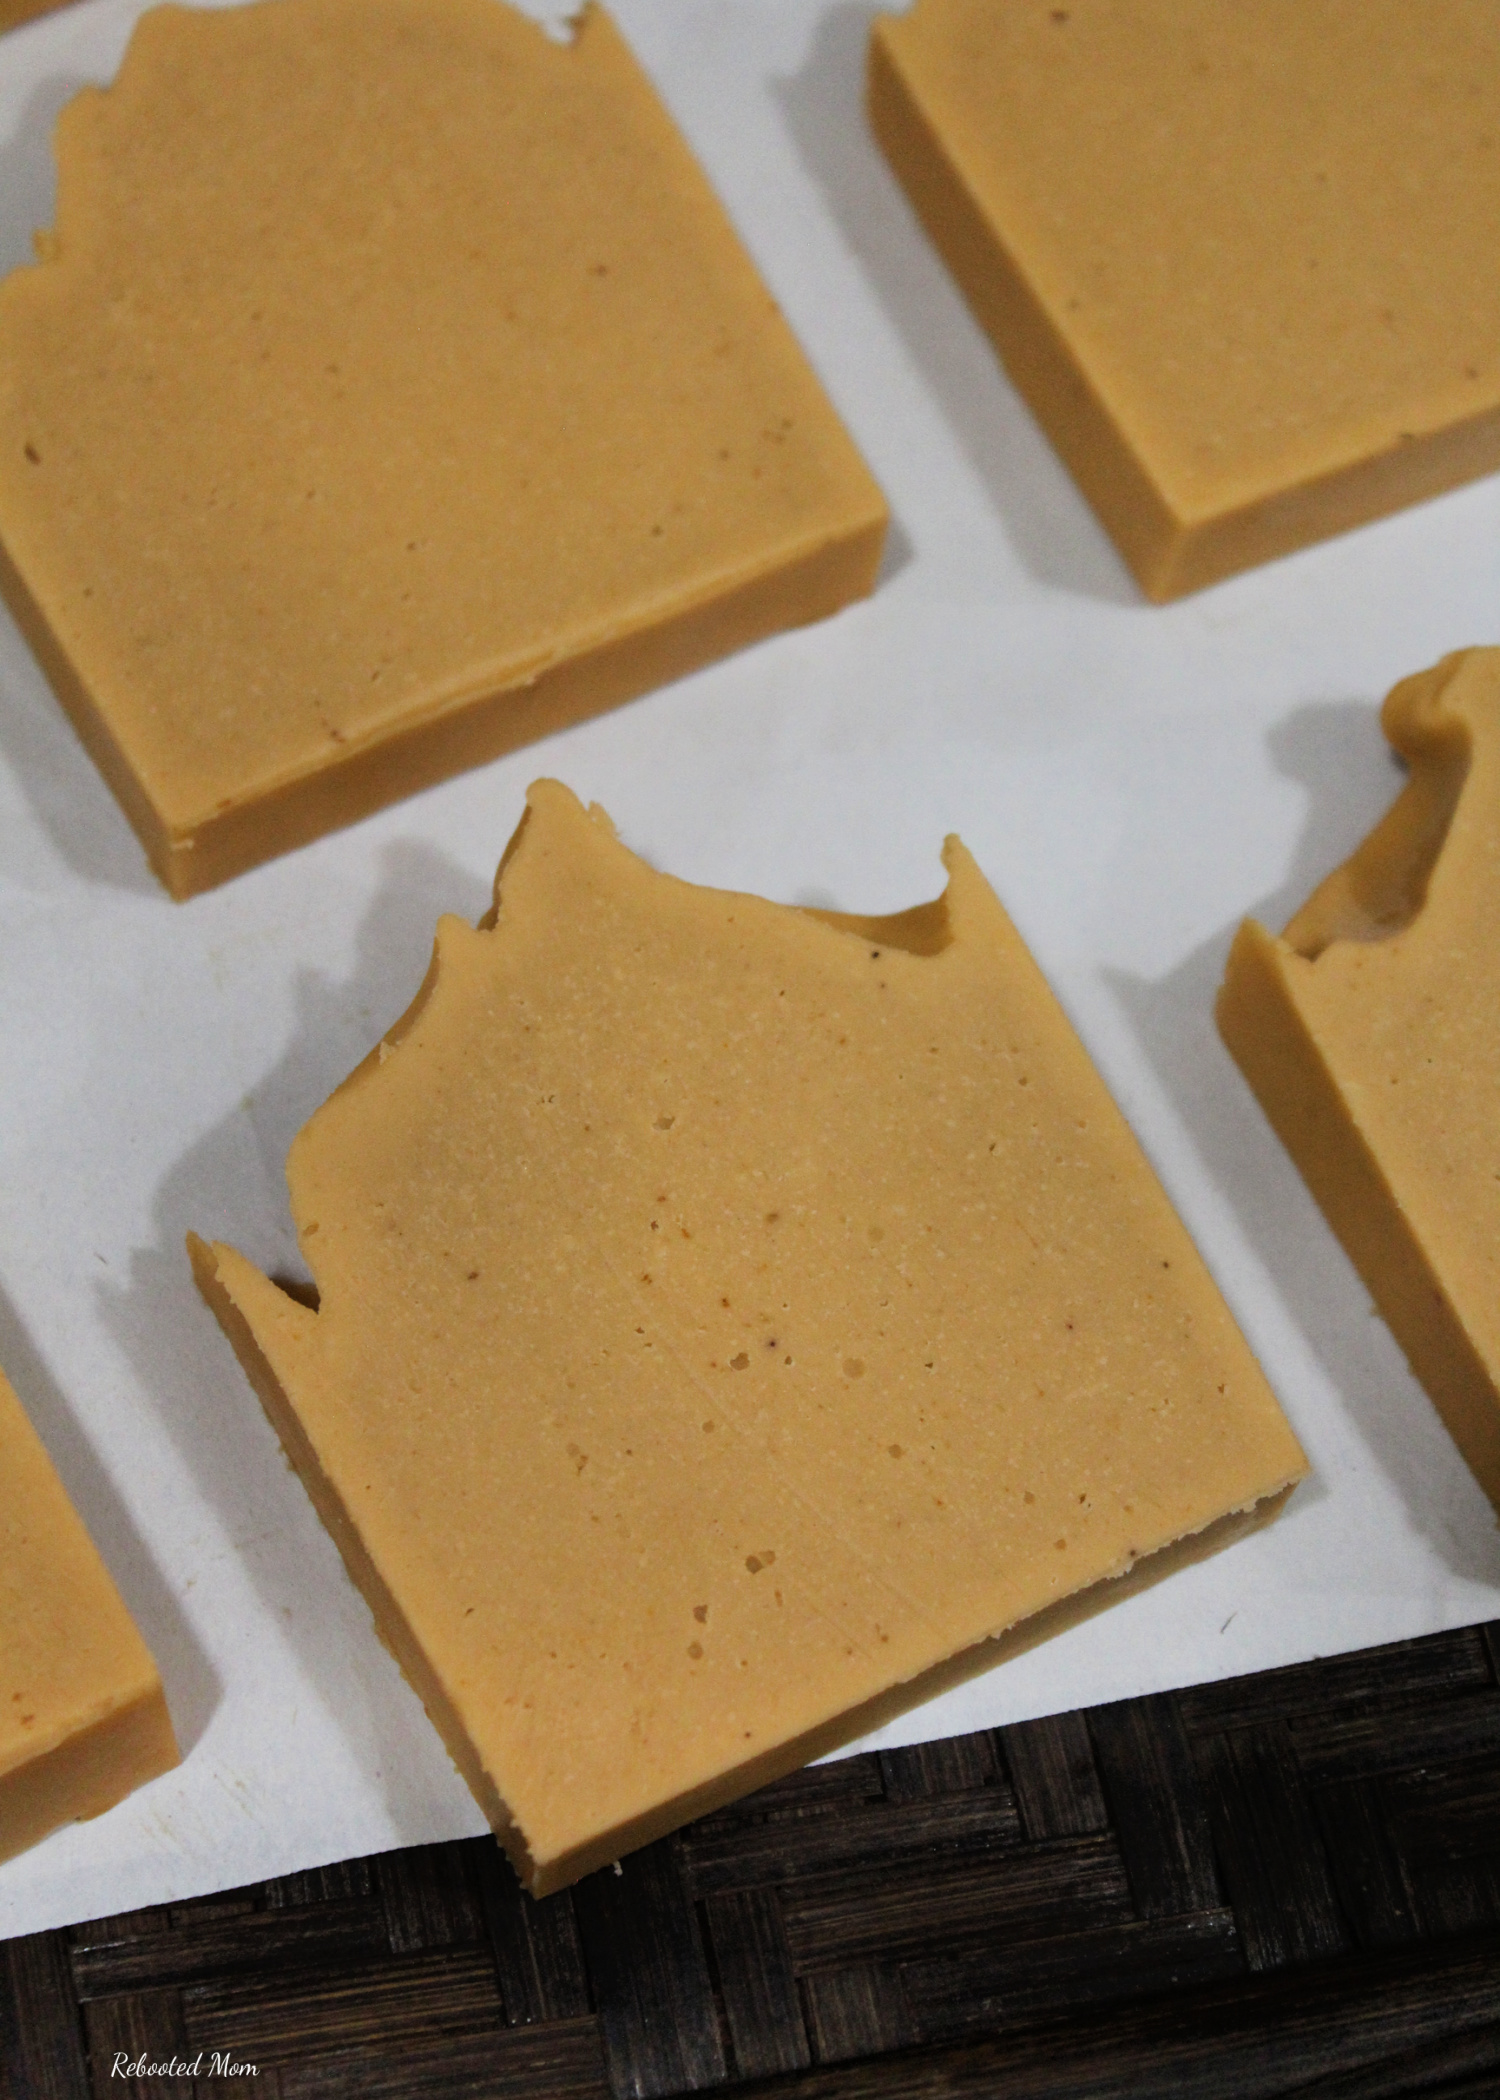
This soap was made with refrigerated Bloody Mary mix – but let me explain something: I did not set out to make a “Bloody Mary” Soap. It just kind of … happened. 😜
I picked up Bloody Mary mix a week ago from the local food bank – while I’m not a drinker by any means, I tucked it away in my refrigerator looking to give it a second life. As my 11 year old son opened the fridge one day recently, he shouted “Hey! Mom! You should use this Bloody Mary mix to make soap one day.”
Ahh… he is definitely my child!
So a second life is exactly what I gave it – a second life in SOAP.
What kind of Bloody Mary mix do you use?
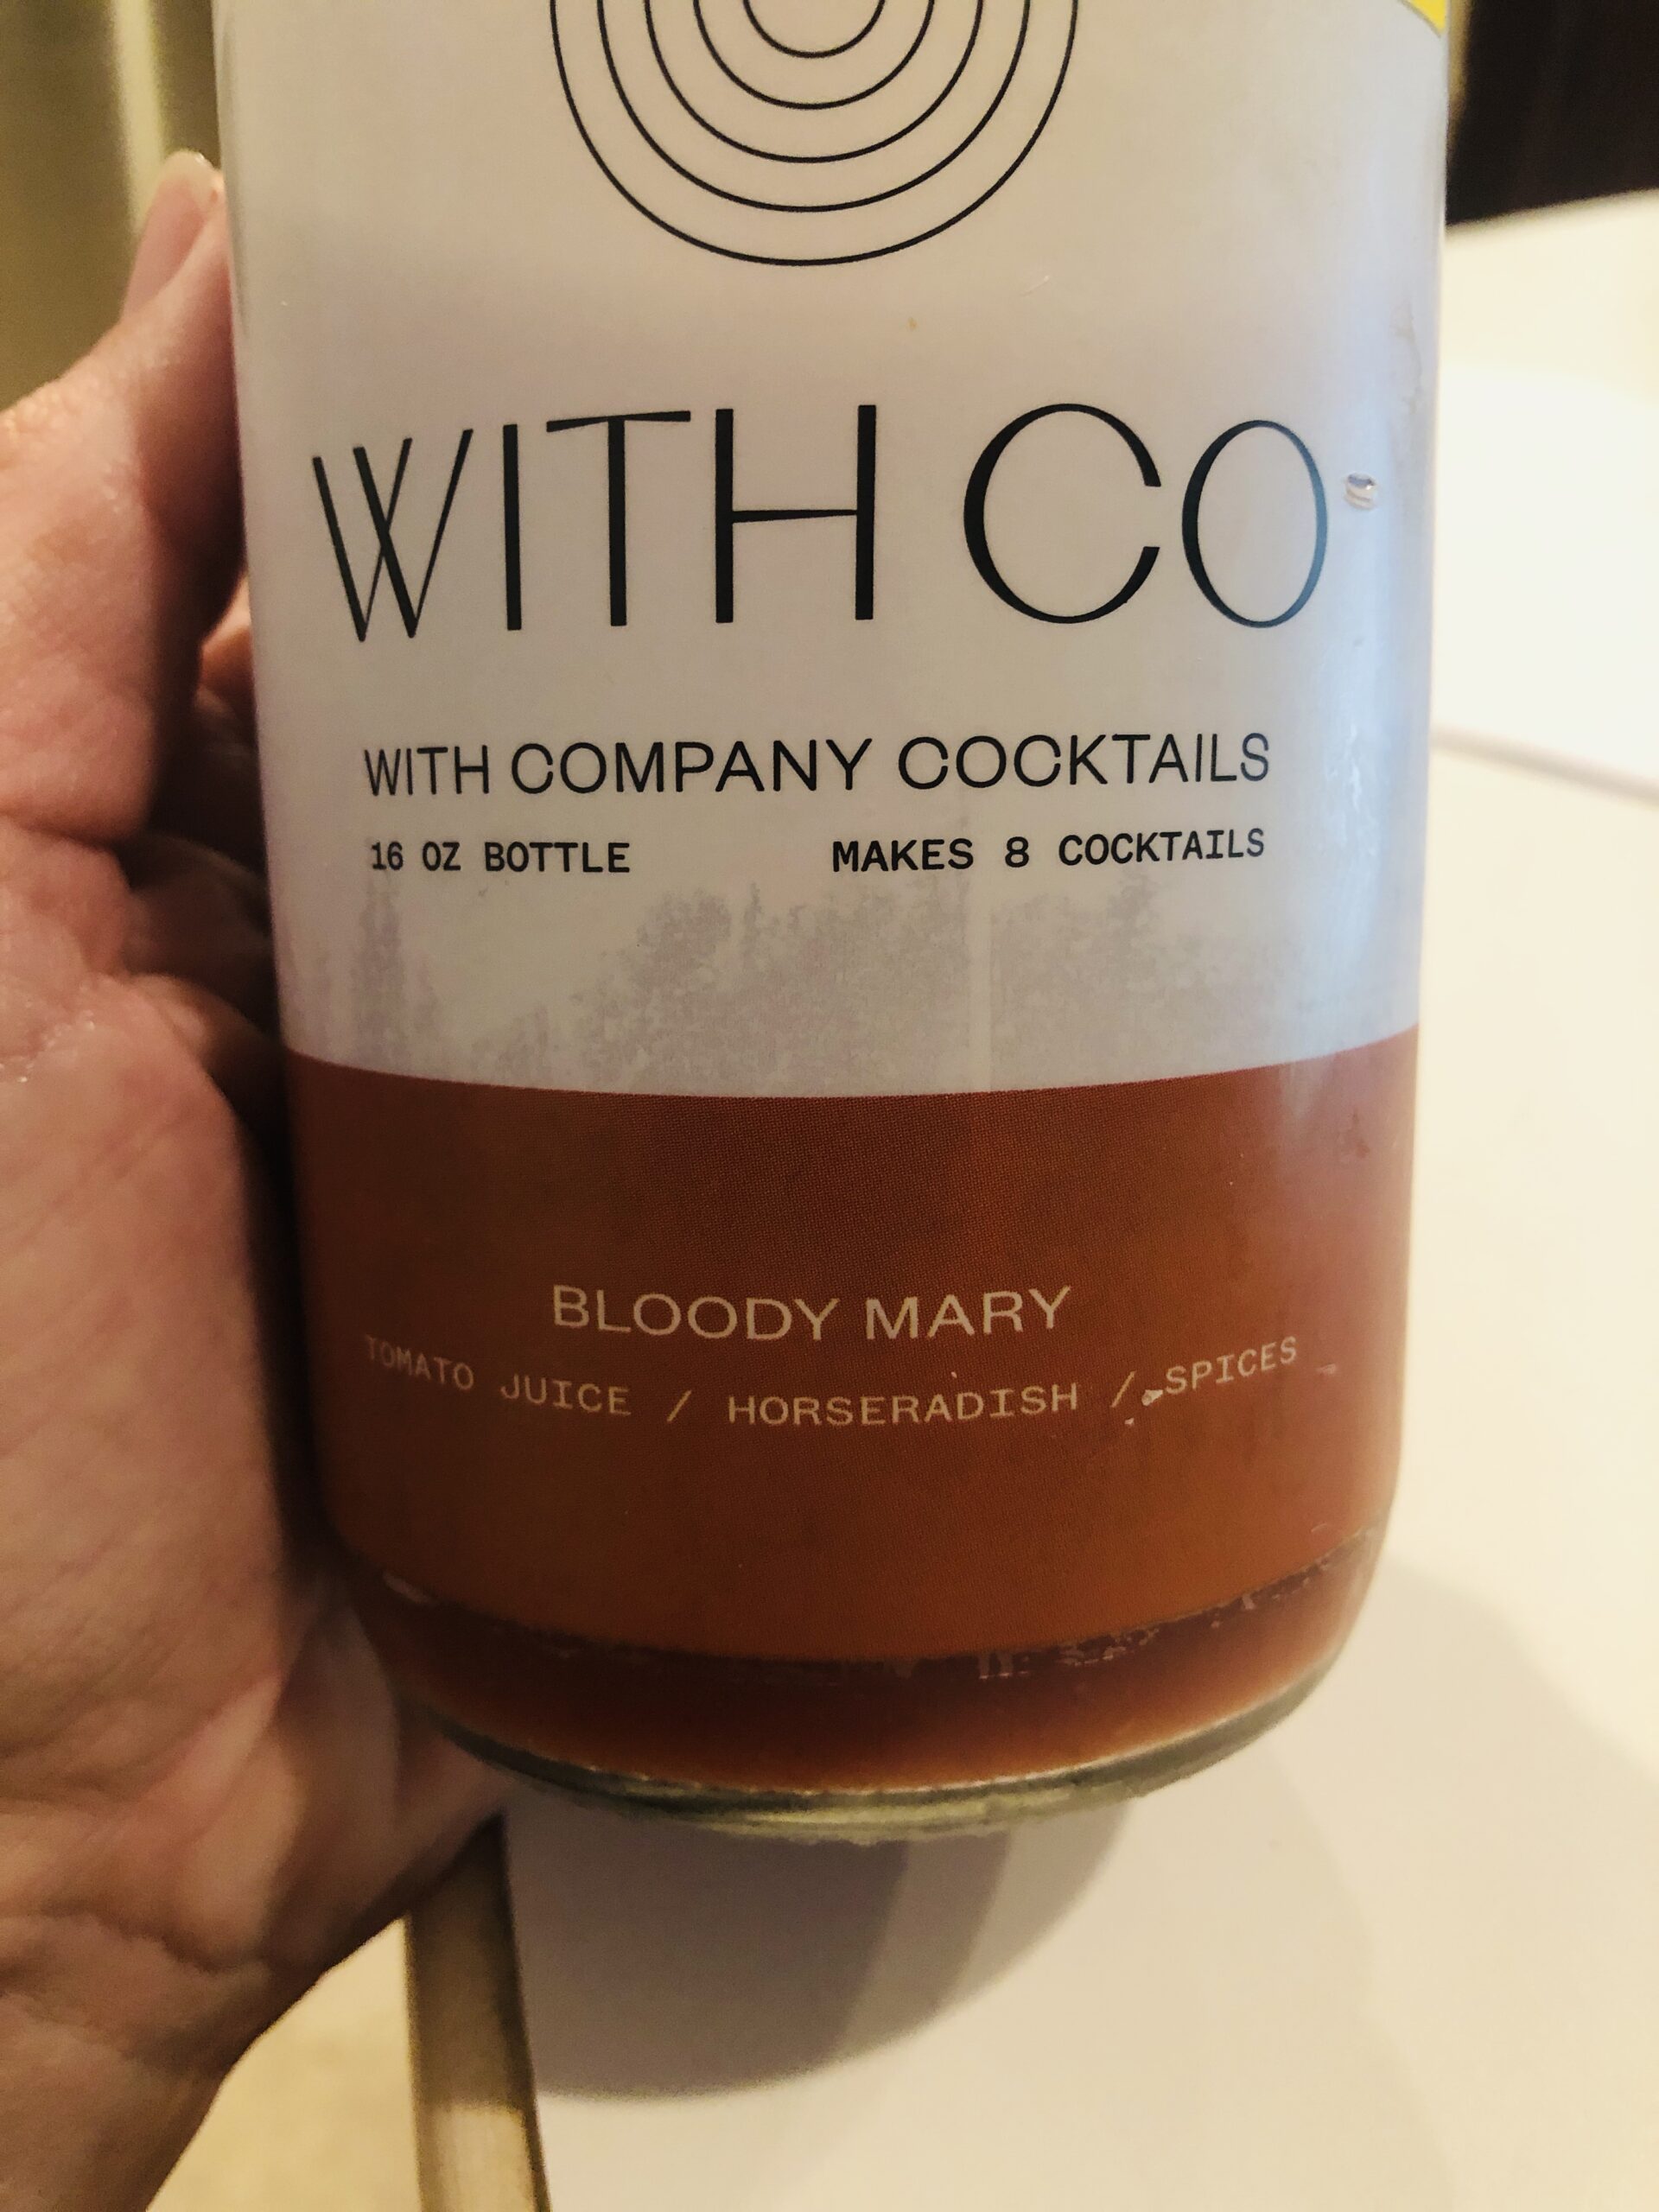
I’m not all too familiar with Bloody Mary mix in general, but the one I used was “With Co” (which stands for “with company cocktails”. It is a 16 oz bottle that makes 8 cocktails – and the ingredients include:
- tomato juice
- celery salt
- horseradish root
- apple cider vinegar
- light brown sugar
- lemon juice
- paprika
- chili powder
- red pepper flakes
- ginger root
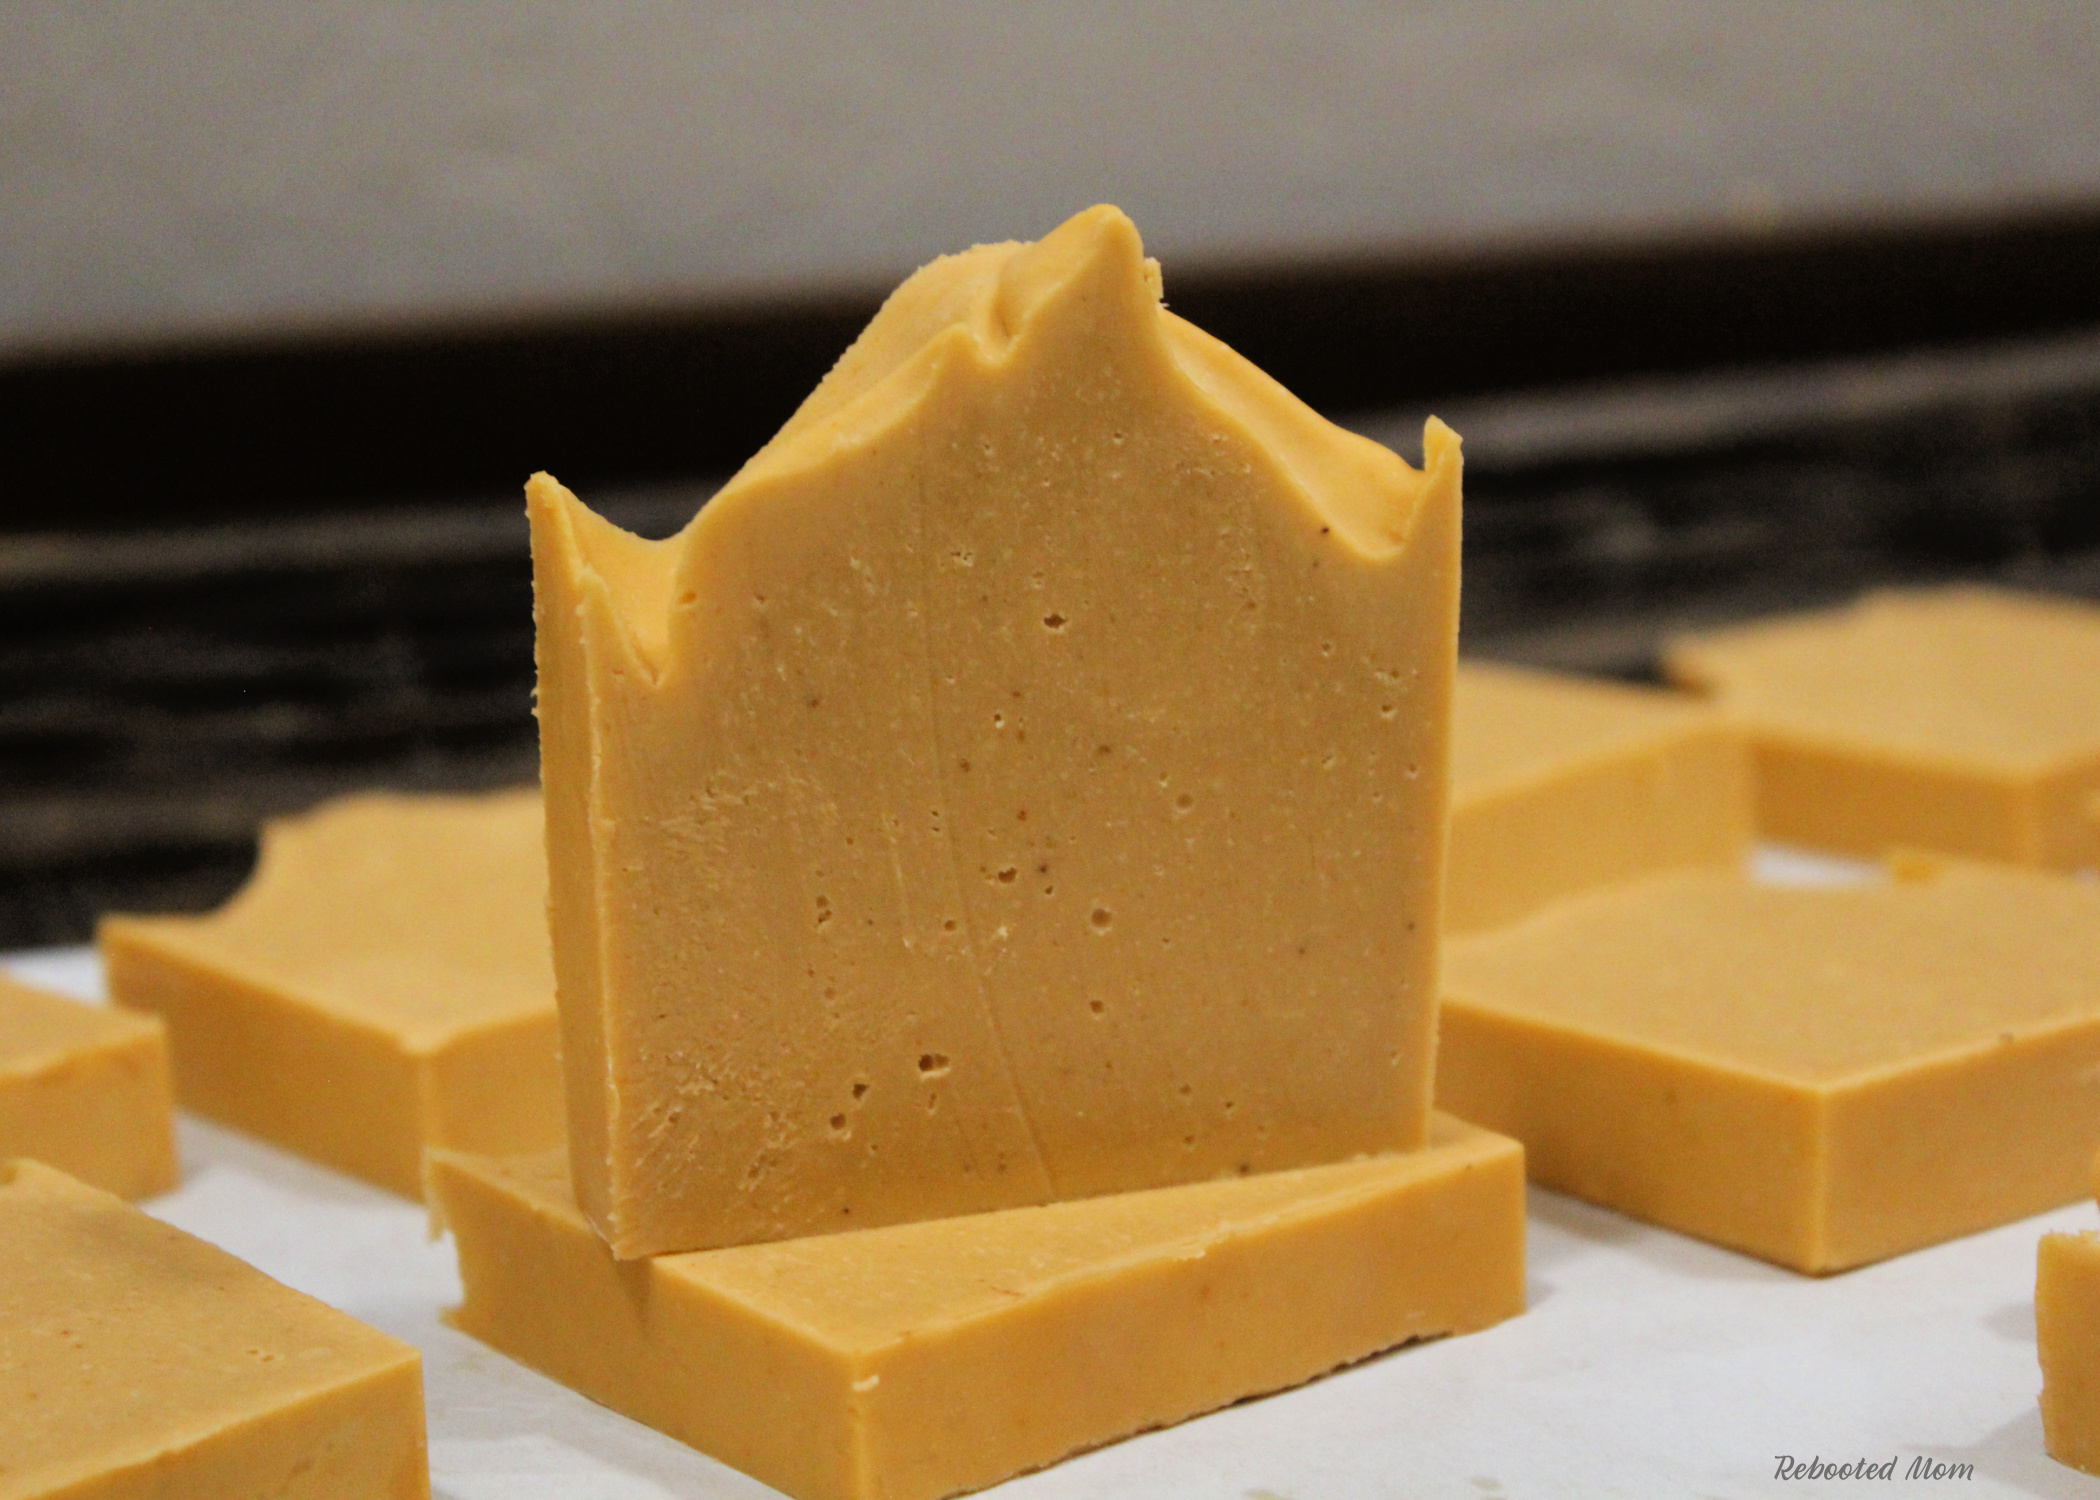
After combining with the lye, I let it cool in the fridge – surprisingly enough, the beautiful orange hue remained through the soap. Eeek! SO exciting!!!

UNSCENTED BLOODY MARY SOAP (6% SUPER FAT)
Please use a scale to weigh the ingredients and ensure they are accurate.
LIQUID/LYE:
- 2.23 oz lye (sodium hydroxide)
- 9.89 oz Bloody Mary mix (as the liquid)
OILS AND FATS:
- 16 oz pork lard
- 1 oz Castor Oil
This recipe yields 25 oz of soap – slightly smaller bar than this mold I used here. I cut the bars in 2 oz slices for trial size travel bars.
Prepare all of your ingredients – and have everything set aside to start:
- Thermometer (one that you don’t use for food)
- Vertical Soap Mold (holds 42 oz) – we are filling only to 25 oz.
- Pyrex 8 cup measuring device – not required, but so handy to have!
- Immersion Blender – you don’t have to spend oodles but you will want something reliable with a metal stick, not plastic.
- Lye – this is the brand I use
- Digital Scale to measure your ingredients
STEP BY STEP:
Step 1: Slowly add the lye to the liquid portion over a sink. Open up the windows behind the sink or place a fan behind you to dissipate the fumes. Make sure you are wearing safety goggles or gear, long sleeves and gloves. The mixture will get hot very quickly and the fumes will be strong until the mixture cools.
Slowly add the lye (little by little), and stir continually until the lye is dissolved (3-4 minutes).
Step 2: Set aside your lye + liquid mixture and allow to cool to 100-105 degrees F. In the meantime, prepare your oils by measuring them on the scale. Melt the lard and castor oil just until melted. Combine the oils in a large bowl and set them aside until you are ready to mix with the lye mixture. They should be at room temperature.
Step 3: Once you are ready to make your soap, add your lye + liquid to the oils/fats, and blend with a stick blender. Avoid running the stick blender for long periods. 10-15 second bursts with short breaks will be sufficient.
Step 4: Pour the thickened soap batter into your soap mold and level off (for flat top soap) or, use a spoon to “peak” the top of the soap. Push to the rear of the counter top or place in a closet for 24-48 hours.
Step 5: After 24-48 hours, remove from the mold. If your soap is still too soft, set it in the freezer for 30 minutes and then try to remove from the mold. Bring to room temperature before using a soap cutter to cut into bars. Allow the soap to cure for 4-6 weeks before using.
I had a beautiful soap cutter for years – but it recently broke. So until I pick up a new one, I simply use a large kitchen knife to cut my slices. It works just fine – and gives the bars a more rustic look, too!
Looking to change out the oils? Make sure you use a lye calculator to re-run the recipe and ensure you have the correct amount of lye.
DON’T WANT TO MAKE THIS YOURSELF?
Shop my soap store for handmade soaps just like this!
If you make this Bloody Mary soap, please consider leaving a comment. I’d love to see your results!

I haven’t made this soap but curious how yours turned out because I have some Bloody Mary mix lingering in the fridge and thought I might give it a try. BTW, I enjoy your site.
Actually turned out beautiful. The color kept even when it hit the lye – surprisingly. The soap cured well too, it’s now a gentle rose color, didn’t even use any clays. It lathers well. I cut them into mini bars and made labels for it .. called it Bloody Mary soap.