


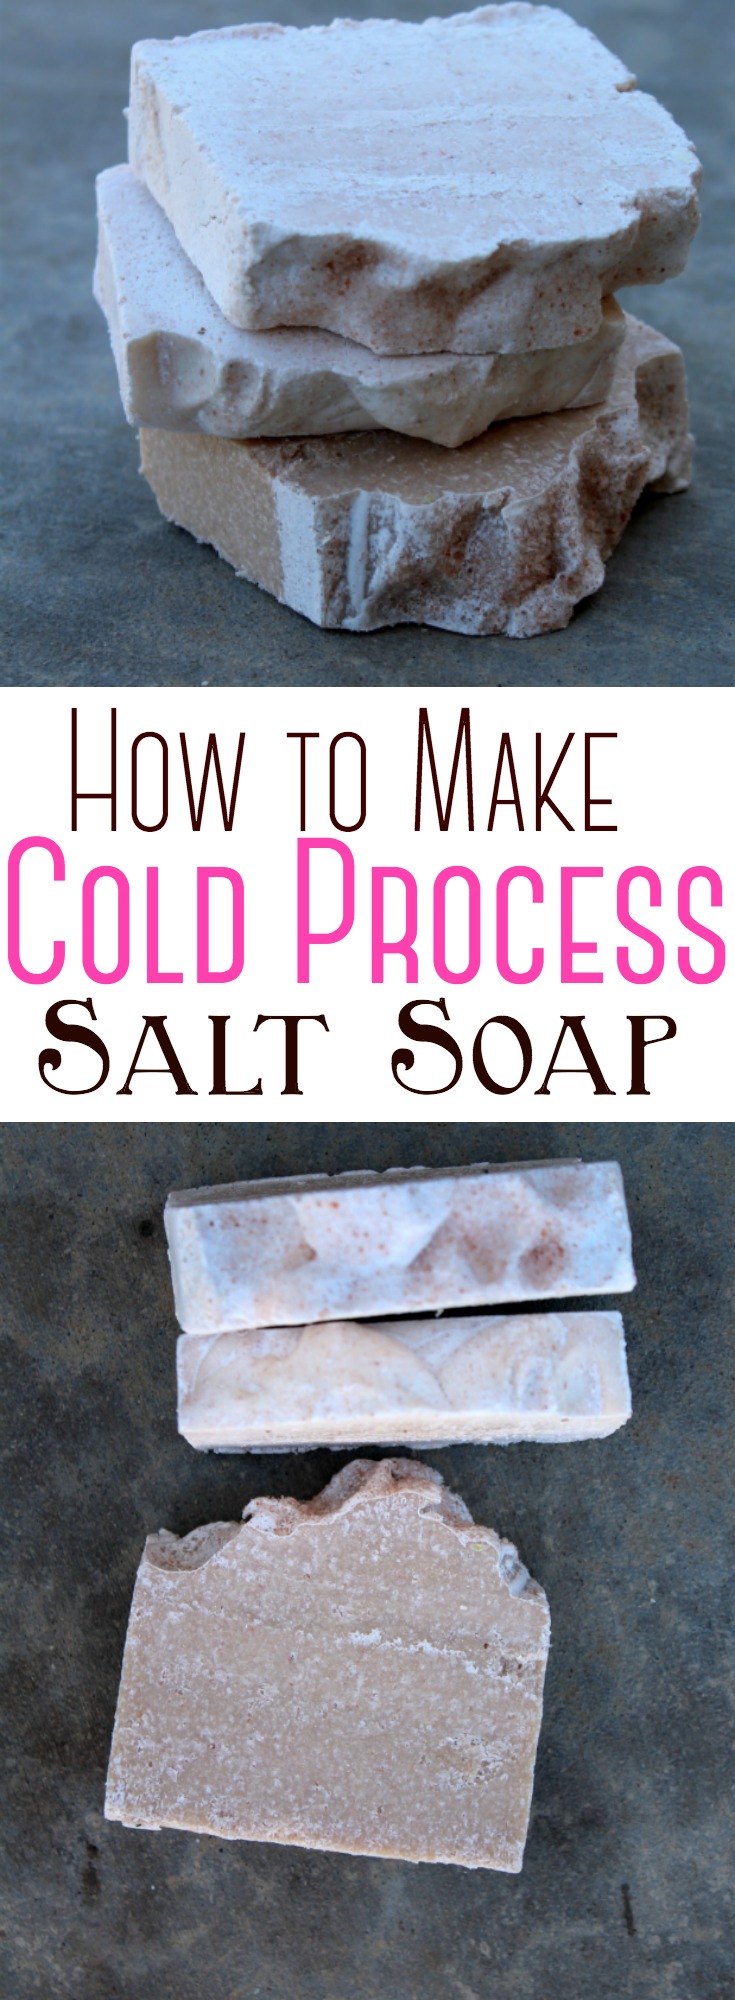
Learn how to make your own Sea Salt Soap Bars – a fun and gratifying DIY project for intermediate to experienced soap makers!
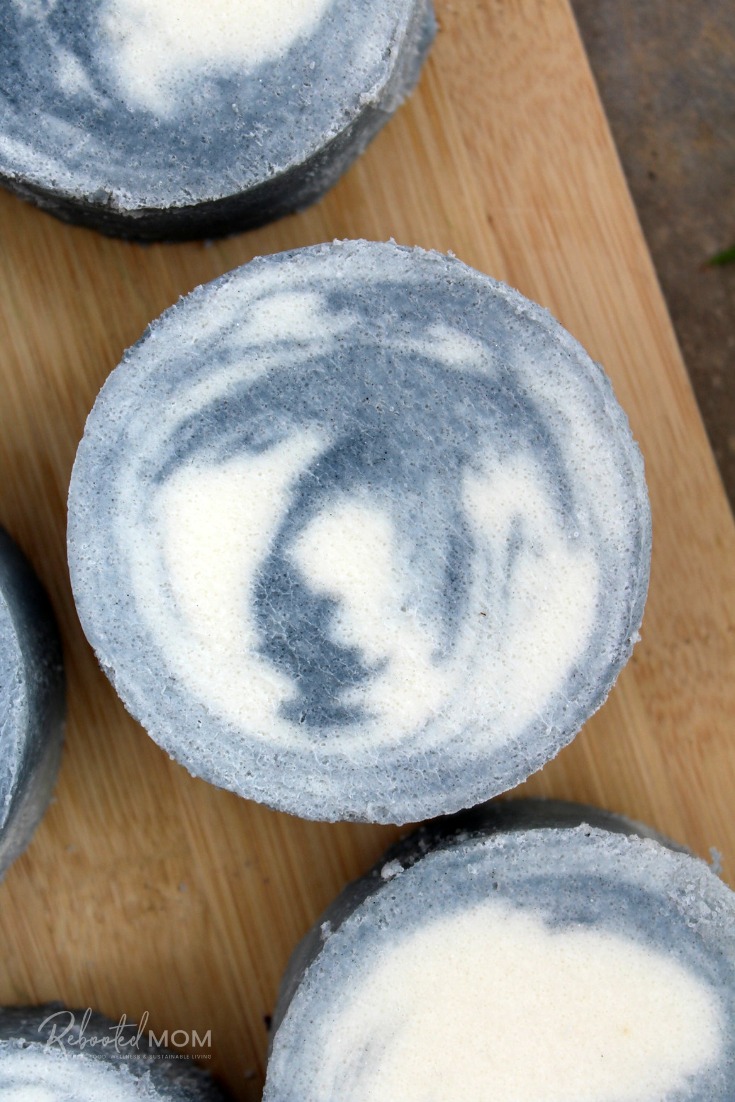
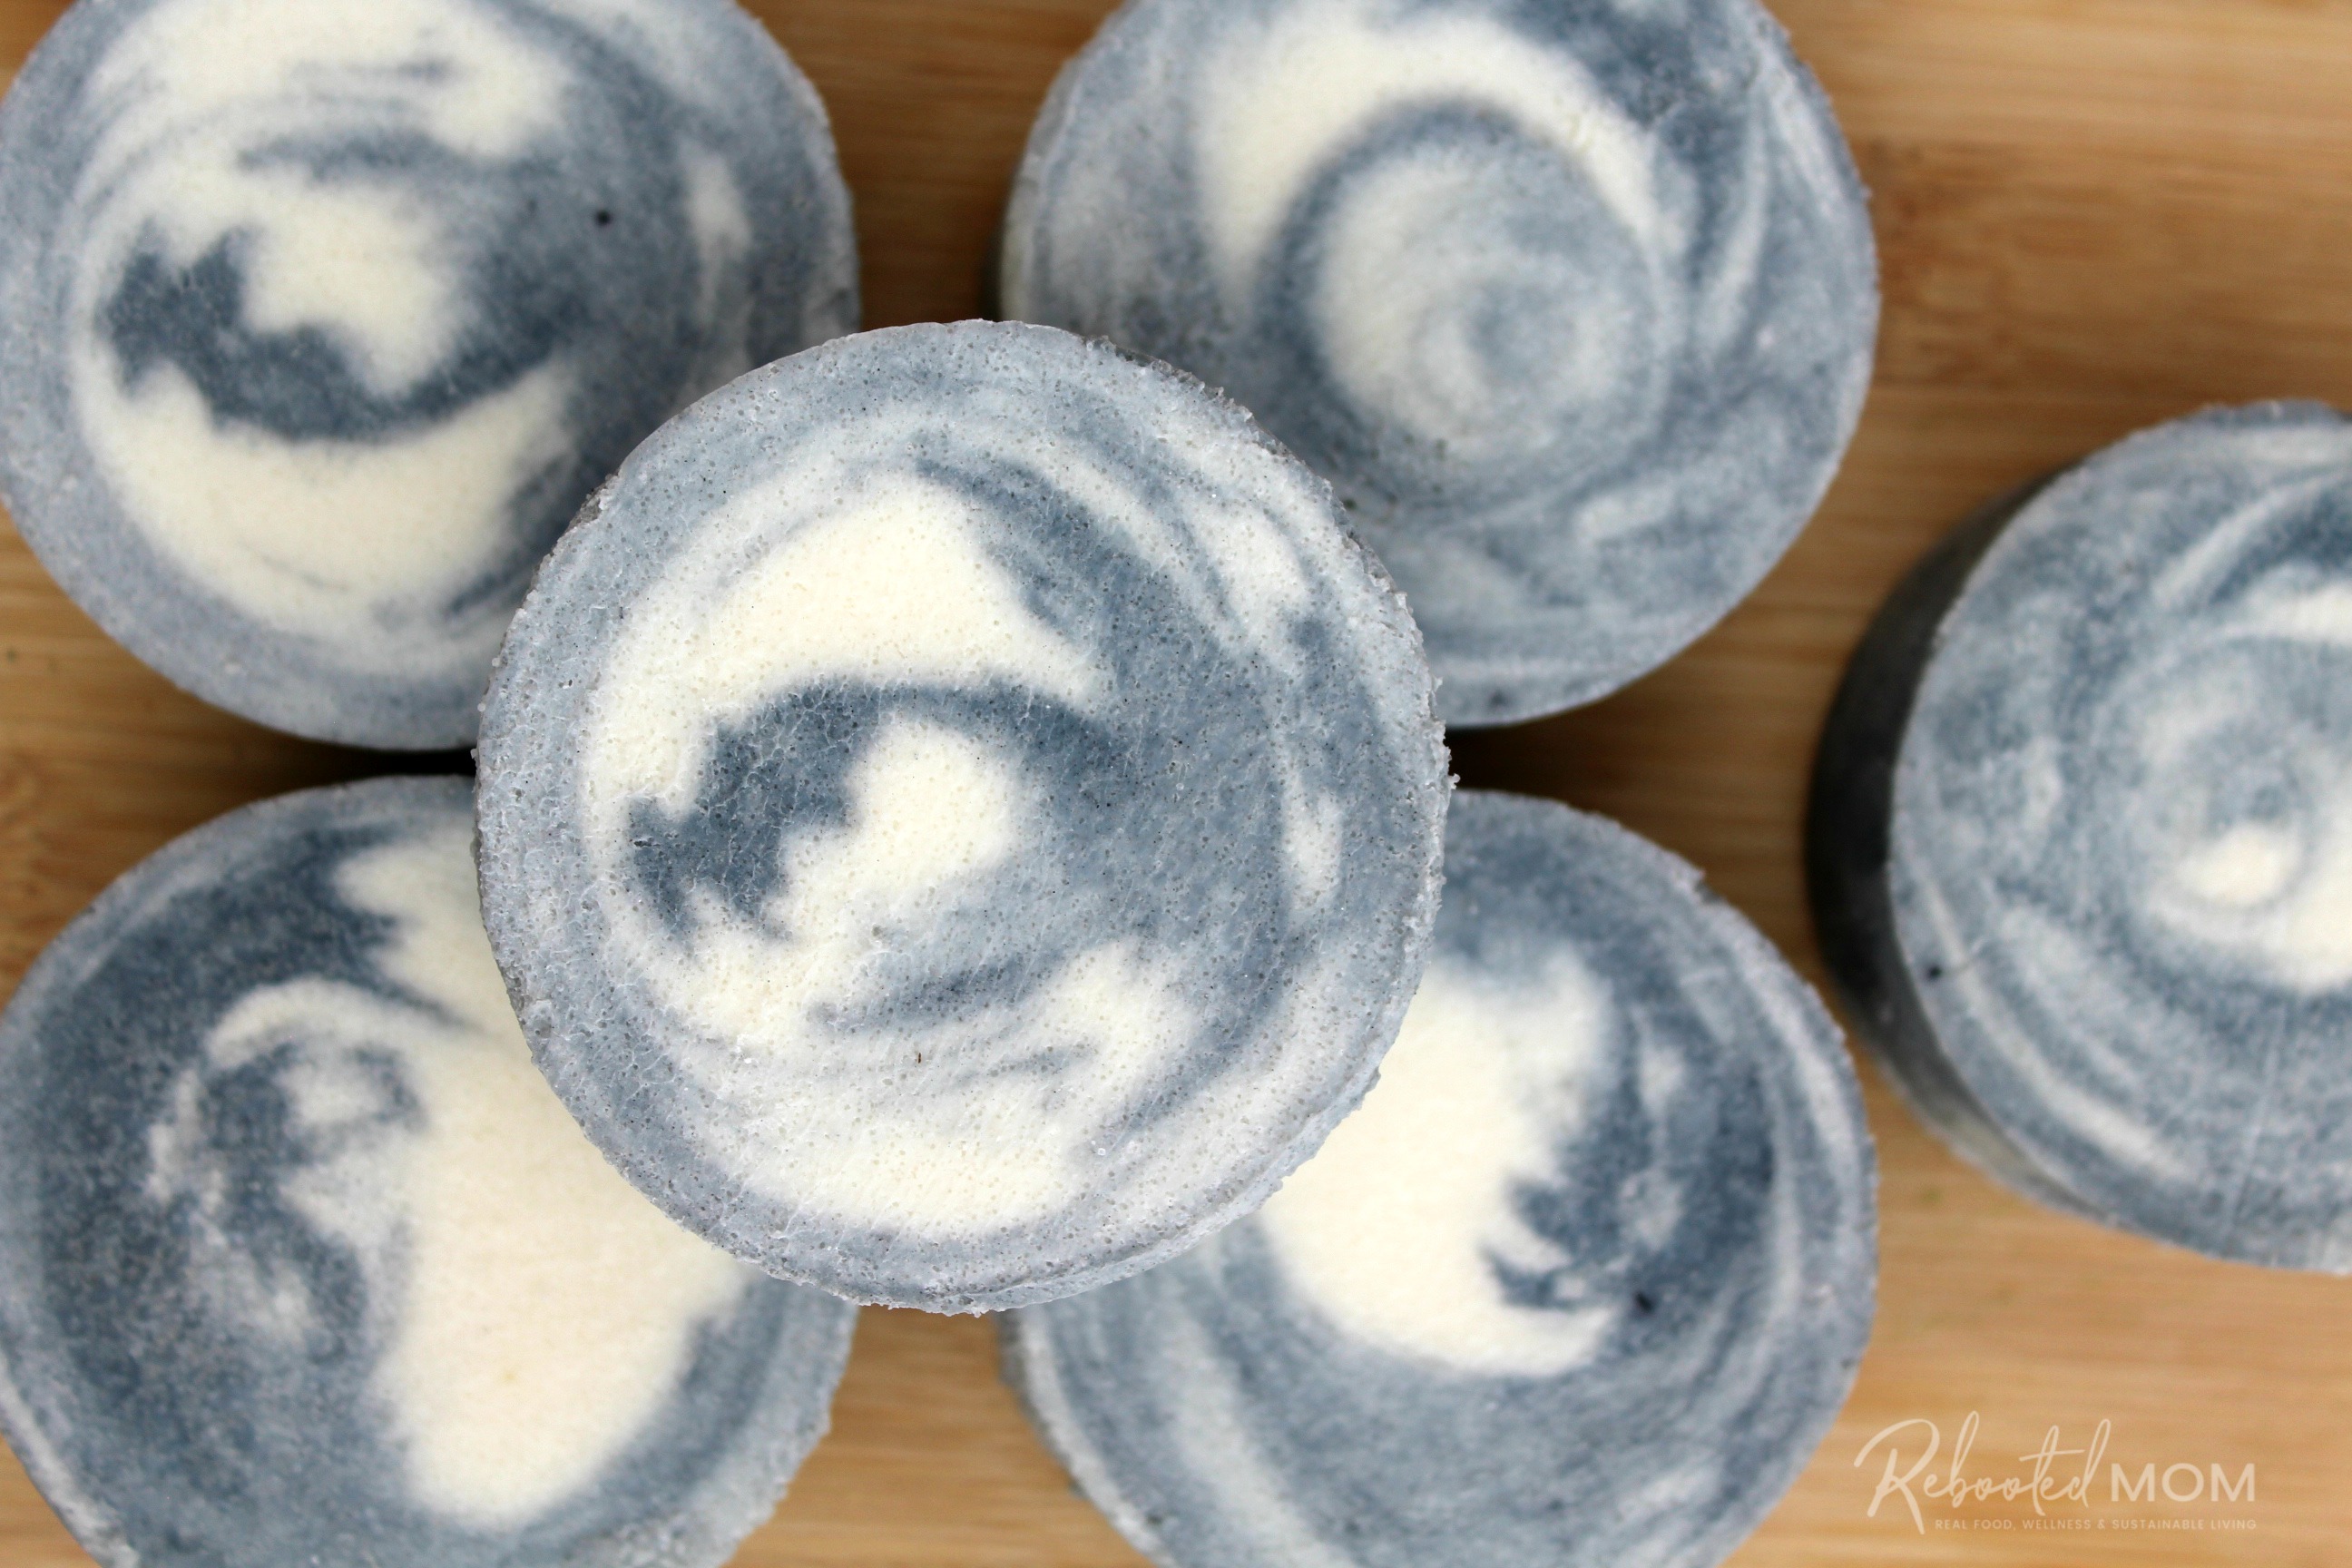
Cold Process Sea Salt Bars made with Raw Milk and colored with Indigo Powder
You might be asking “why in the world would you put sea salt in a soap bar?”
The truth is, sea salt gives soap a natural means of cleansing, detoxifying and exfoliating all wrapped into one.Sea salt soap is a wonderful way to combine a sea salt bath with a natural soap. Believe it or not, the final result is a hard bar of soap with a creamy, lotion-like lather.
I love the way it makes my skin feel!
Sea salt soap is made similar to other cold process soap recipes, but with a few exceptions:
#1: Himalayan pink salt will suppress the lather in the cold process soap recipe. As a result, you will need to adjust the oils in your cold process soap recipe to be at least 70% coconut oil. That high coconut oil will produce a rich, creamy lather, without drying up your skin.
#2: You will add the Himalayan pink salt at trace – – any of three different amounts:
50-70% of the total oils in salt
100% of the oils in salt (which means that if your recipe has 30 oz of oils, then use 30 oz of salt)
100% of the soap amount (which means that if your recipe is for 3 lbs of soap, then add 24 oz of salt.
#3: Himalayan pink salt cold process soap will be very thick once you add it at trace – it will seem like a lot of salt. You will need to pour in the mold quickly, and insulate as soon as possible.
Unlike regular cold process soap recipes, Himalayan pink salt soap bars will set up very very fast. They will need to be removed from the mold just a few hours after you pour otherwise the soap will crack and the soap will be difficult to slice.
Cold Process Sea Salt Soap Bars
Before you get started, you will want to create the recipe that you will use for the soap. No matter what recipe, you will need at least 70% coconut oil.
How to Make Sea Salt Soap
This base recipe (below) works wonderfully for me. You might find that a silicone mold like this works better simply for the fact that you don’t have to worry about unmolding, and you can let the soap cure 24 hours.
My first few batches of salt soap in a log mold were quite a challenge as I tried to determine when I could remove the soap. I found that 2-3 hours after pouring the batter was the perfect time to unmold and slice.
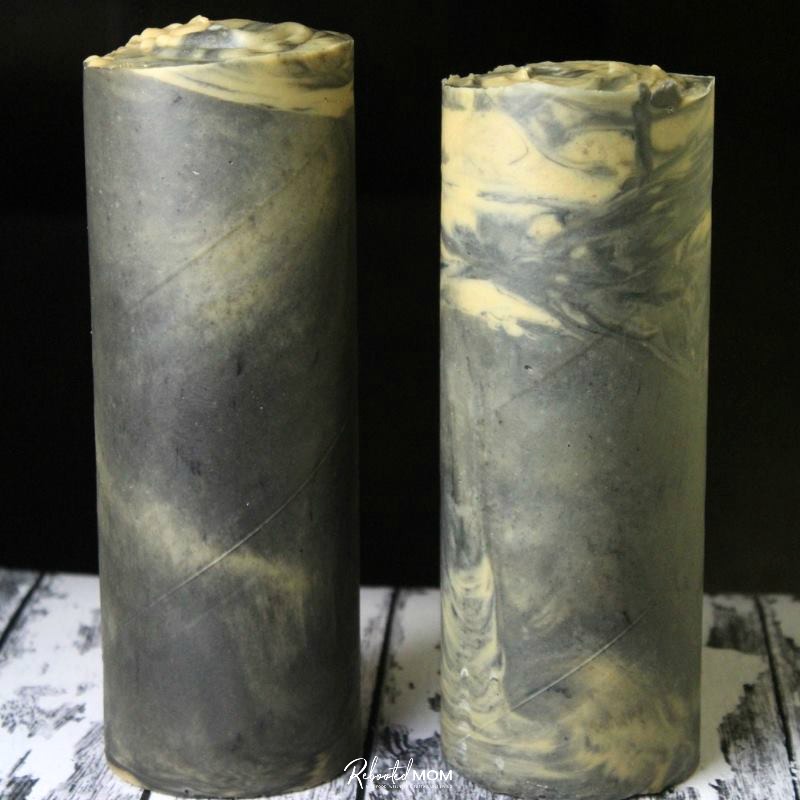
However, after making hundreds and hundreds of salt soap bars, I find that using a Pringles can is my favorite method. As a result, I tend to hoard Pringles cans from neighbors and friends to use for soap making as they make beautiful round soaps without having to buy a silicone mold.
Pringles cans are easy to unmold. Just take a knife to cut a small bit from the top lip of the can, then unwrap it carefully until you can unmold the soap as one.
This recipe makes enough to fill 2 regular size Pringles cans (just under 50 oz of soap batter), with a 15% superfat.
- 5.26 oz lye
- 11.22 oz water
- 1.5 oz castor oil (4.4%)
- 25.5 oz coconut oil (75%)
- 3.5 oz olive oil (10.3%)
- 3.5 oz shea butter, unrefined is what I find to work the best (10.3%)
- 2 C. fine grain Himalayan Pink Salt (more or less depending on preference)
- 1-2 tsp rose clay (if desired)* added before the salt, at trace
Soapmaking Steps:
#1: Suit up for safety. Put on goggles, wear gloves and don clothes that have long sleeves. Go a step further and make sure all distractions are out of the room/house. Use a well-ventilated area. I like to use my kitchen sink because I have a few windows behind it that provide ventilation.
#2: Prepare all of your ingredients – and have everything set aside to start:
- Thermometer (one that you don’t use for food)
- Silicone Column Mold, 31 oz or a circular mold (for easier removal) or 2 washed out Pringles cans
- Pyrex 8 cup measuring device – not required, but so handy to have!
- Immersion Blender – you don’t have to spend oodles but you will want something reliable with a metal stick, not plastic.
- Lye – this is the brand we use
- Digital Scale to measure your ingredients
#3: Measure out your water and set aside. Make sure the water is at room temperature or colder.
#4: Sprinkle the lye into your water. Stir slowly as you continue to add little bits of lye until the lye is fully dissolved. Never pour the water into the lye because that can create quite a reaction. The lye will heat up the liquid quite fast, so allow it time to cool (15-20+ minutes).
#6: Combine your oils that you have weighed out. I try to soap between 120-130 degrees F if I am using water. If I am using milk in my recipe, you’ll want to follow a different procedure by freezing the milk beforehand (see our post here). If your oils are not in liquid form, you can combine them in a pot on the stove and heat slowly.
#7: Pour the lye mixture into the oils. Use your immersion blender to stir mixture together, making sure to pulse the immersion and take 15-20 second breaks. Don’t overheat your stick blender. Blend with your stick blender until the mixture reaches a medium trace. It may take anywhere from 3-7 minutes if not more. If you are using scent (fragrance or essential oils) add during this time, too.
#8: Add the Himalayan pink salt when the mixture is at medium trace. Stick blend as best as you can, the mixture will thicken up very quickly.
#8: Quickly pour the batter into the mold evenly distributing from one side to another. Use a paddle or long spoon to spoon out as much of the batter as you can. If using a round mold like a Pringles can, tap on a hard surface to remove air pockets. Insulate away from kids or others to allow it to gel for several hours.
Remove Sea Salt Soap from the Mold
After 2 – 3 hours, your soap should be able to come out of the mold. Make sure you are wearing gloves, as the soap is still caustic.
Rub on the bottom of the mold very gently and pull out the sides of the mold to loosen the log. If it seems too wet, you may have to give it additional time. (If you are using a cavity mold, you don’t necessarily have to unmold until after 24 hours).
**There is no “set time” – you will need to use your judgement! Typically 2-3 hours after pouring allows the soap enough time to set – but that also depends on the mold you use.
Once you manage to release it from the mold, immediately cut the log into slices and allow to finish curing.
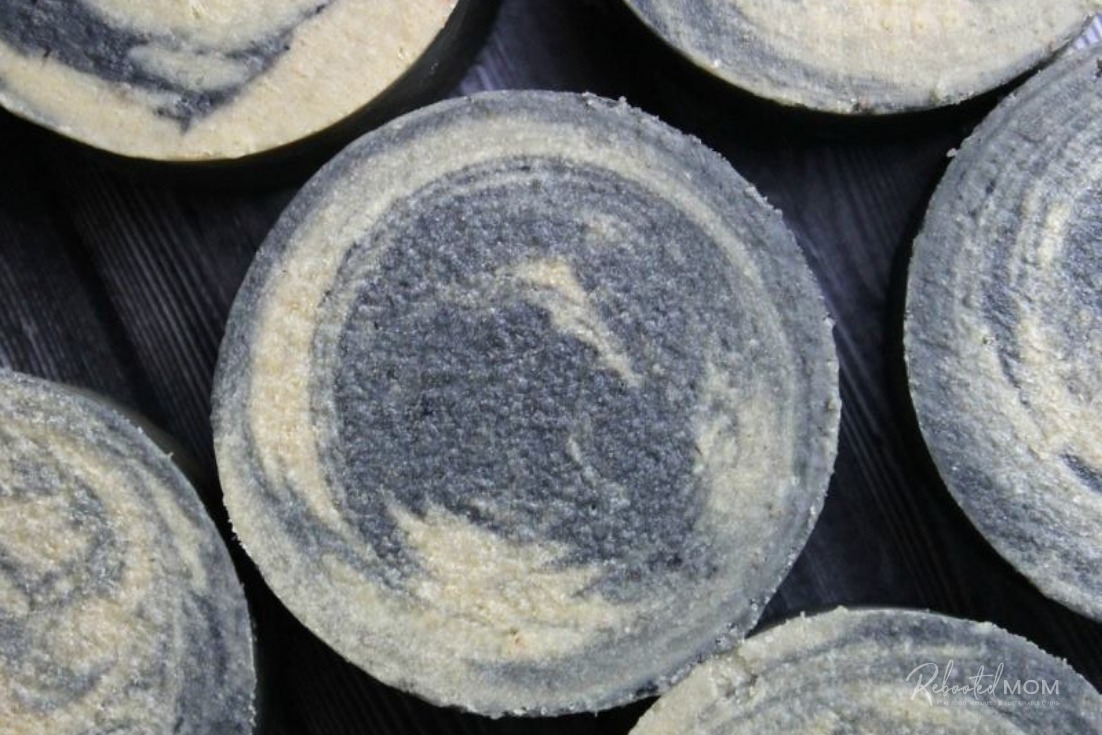
Guinness Beer Salt Soap made with activated charcoal
Tips for making Sea Salt Soap:
- Stick with fine grain sea salt for within the soap. If you wish to dress up the top of the soap after you pour, then a coarse soap will work wonderfully, too.
- Avoid using epsom salt in cold process soap – it won’t work out too well for you and you might have a very big mess.
- You can definitely use colorants (clays, mica, and scents/oils) in your soap – just remember that once you add the salt, the batter will get thick very quickly so you may want to add those items before you add the salt to give yourself time to work.
- Certain scents play better in salt soap bars – I found citrus to tend to dissipate, but scents like Palmarosa worked incredibly well. A great ratio is .7 oz of oils for each pound of oils in your recipe.
In most cases, cold process soap is ready to use within 4-6 weeks cure time, but with salt bars, the longer the cure time, the more luxurious the bar.
It’s not uncommon to allow salt bars to cure for 4-6 months if not more – if you are selling salt soap bars to friends and family, I would recommend allowing them to cure for 6 months, as the lather will get much better over time.

Hi! I tried making a salt bar and it keeps sweating. How do you cure your salt bars to prevent this ?
Hi Kadine. I have never had a problem with mine sweating – but then again, I live in Arizona and our weather is very very dry. In a humid environment, I can only imagine they would, because salt tends is hygroscopic & draws moisture.
If you have a problem with them sweating, then try to find a drier place in the house to allow them to cure. Or, you might want to try running a dehumidifier in that particular area. You don’t have to buy an expensive dehumidifier, try a cheaper one as that will/should work just as well.
Thank you so much! I moved it to a smaller room with a dehumidifier i got from amazon and it helped a great deal
Have you ever used dead sea salt in your soap?
Laurie ~ I haven’t used Dead Sea Salt in salt soap bars. Dead Sea salt has a different mineral makeup than other salts and because of that they do not work well. The high mineral content will make the bars weep and they won’t set up properly. I use Himalayan Pink Salt in salt soap bars and it works beautifully!
What’s 2C for the salt? 2cup ?
2C is 2 Cups. Thank you 🙂
Do these bars tend to have ash after piping them out of the mold??
I haven’t had an issue with ash (here in Arizona) on my salt bars.
Hello!
Do you line your pringles can before pouring soap? And how do you insulate them?
Thanks!
Melanie
Nope, neither! No need to. The only soap that hasn’t worked for me in Pringles cans is a beer soap from the request of a wholesale customer, she wanted me to use cinnamon essential oil. That EO (as you know) is so “hot”… and even though the skin usage is so VERY small, it heated up the soap in the can something fierce and it volcanoes out the top. I will never do that again.. I did two batches and even though I stuck the second batch in the freezer to eliminate the chance of it spilling out, it still didn’t work. I have made so many soaps in Pringles cans and it always comes out effortlessly – even sea salt soap. I pour the soap and put the cap on the cans, then push to the rear of my countertops. I also soap at a very cool temperature, which helps.
Hi instead of cylinder moles can I use this recipe in a box mold new to soap making
You sure can.
How do you remove the soap from the pringles can once it is ready?
After about 24 hours (that’s how long I wait), I use a serrated bread knife and cut a little bit down off the top of the can… just enough to start to “peel” it. Once you start to peel the can, it’ll peel/unwrap all the way down to the bottom aluminum ring. Then just lift the soap out in one mass upright log and lay it on its side to cut on your soap cutter. It’s super easy!