


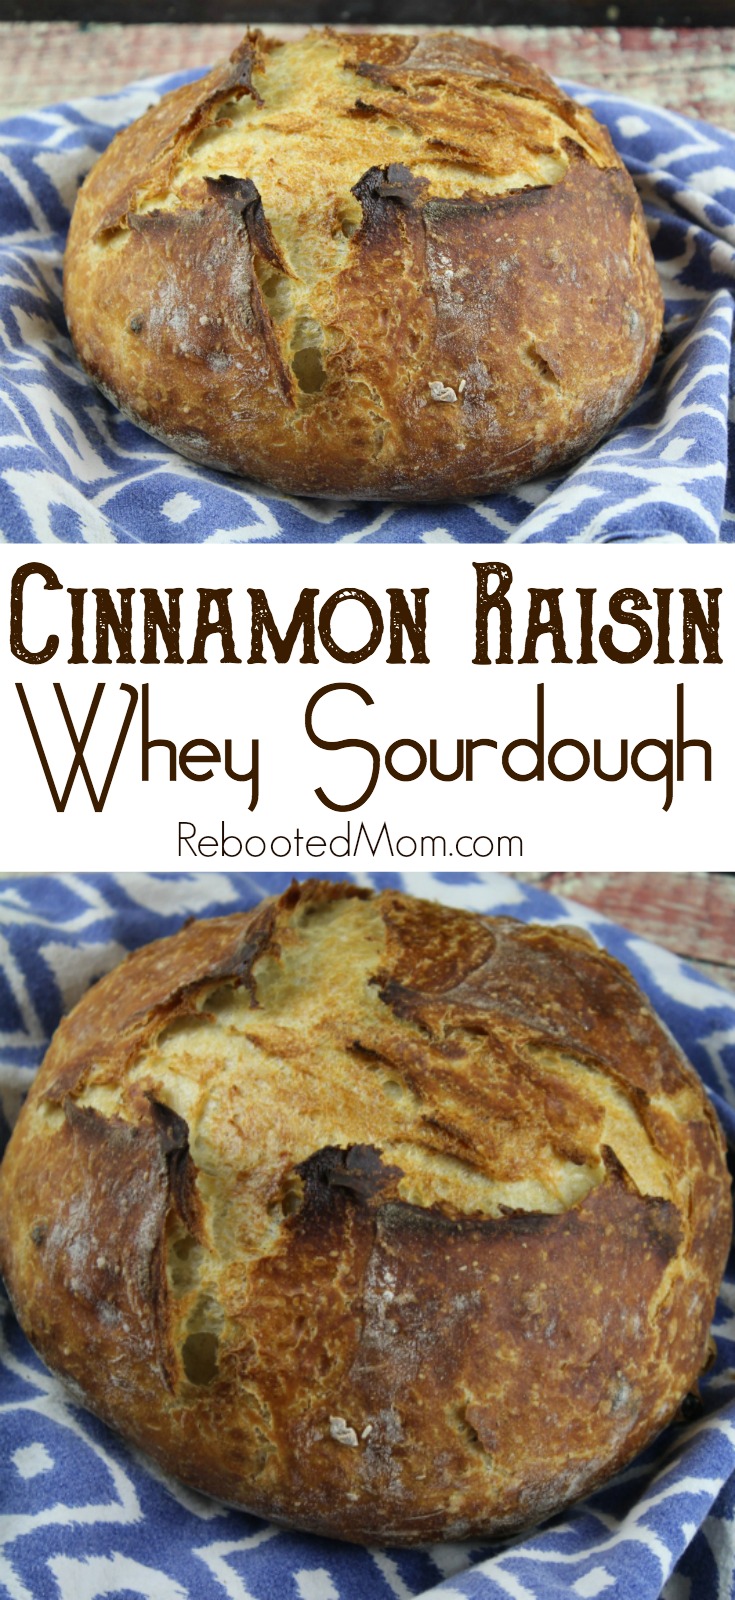
Make a beautiful loaf of cinnamon raisin sourdough bread from whey leftover from cheesemaking or, homemade yogurt.

I can’t honestly tell you anything that is more enjoying than cutting into a beautiful, new loaf of homemade bread when the weather is a little cold outside. The smell that fills the house cannot quite be explained!
This sourdough bread is incredibly easy to make – it’s something I would probably even consider a lazy man’s or woman’s bread, because it requires almost no effort at all. This bread is so easy and yummy you will wonder why you haven’t made it before.
This bread uses whey
While some sourdough bread varieties traditionally use a starter that you feed for several days before beginning your sourdough recipe, this one does not ~ instead of using a sourdough starter, this bread uses whey.
I use my fresh whey from making yogurt at home, but you can also use whey from cheesemaking too – it all works wonderfully.
Cinnamon Raisin Whey Sourdough Bread
To get started, you’ll combine the whey with the flour, yeast, sugar or maple syrup, cinnamon, raisins, melted butter, and salt. Using a wooden spoon, mix until combined.
It won’t be as moist as you might like it to be and that is O.K. — grease a large, deep bowl with a little oil or butter and plop that mixture right on in there.
The wet dough before we turn out on a lightly floured surface.
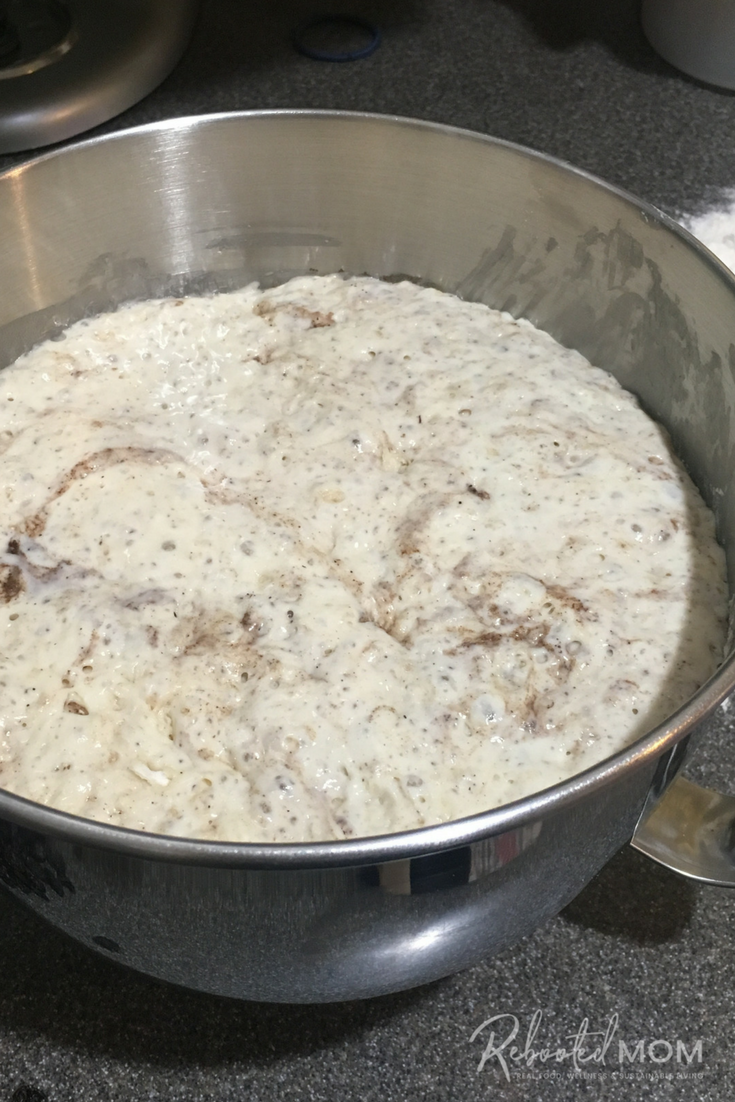
Cover that bowl with a little [greased] plastic wrap (it’ll rise quite a bit and that lightly oiled wrap will make sure it stays moist under there). Allow the mixture to do its magic for at least 9-10 hours.
I like to allow mine to rise overnight because it makes it easier for me to avoid peeking.
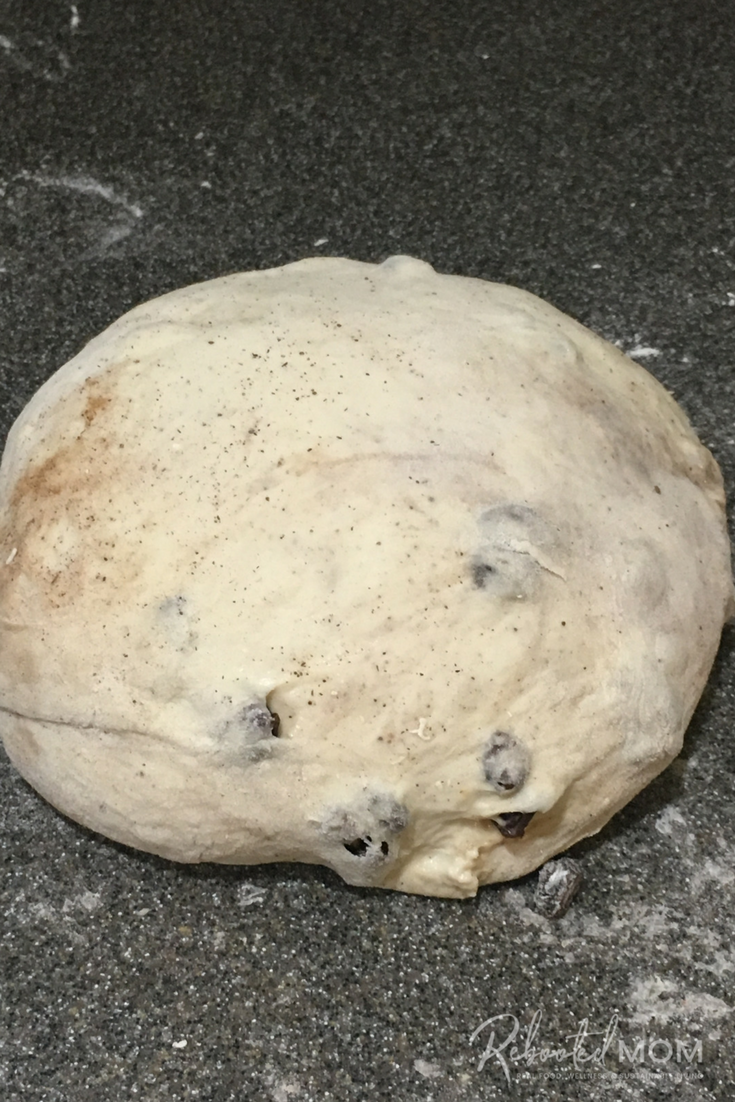
Gently shape into a round loaf – being careful not to destroy the air bubbles within the bread.
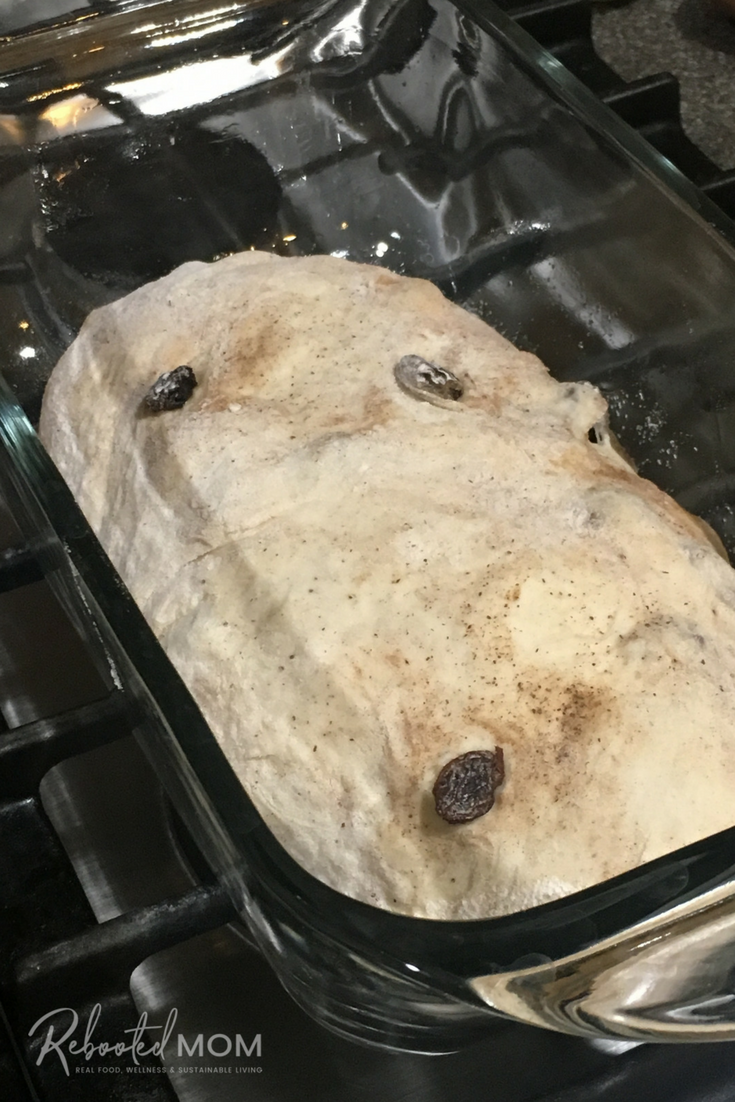
Throw the other half of the divided dough into a lightly greased loaf dish.
Once that 9 hours has passed, the dough will be substantially larger. Dump (literally) it out on a lightly floured surface, use a sharp knife to divide the dough into two. Don’t knead it, and be careful not to be too rough with the dough – it’ll be very loose and that’s ok.
Preheat your oven to 450 degrees F while you are preparing the dough.
Once you have two blobs of dough, shape one into a loaf and throw in a greased bread dish. Tuck the ends under on the second one to form a sourdough loaf and shape into a ball.
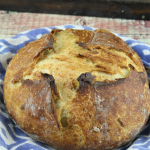
Lightly flour a dutch oven and place that round sourdough loaf ball in there making sure to keep the shape. Use a sharp knife to slash an “X” into the top of the loaf.
Place the lid on the dutch oven and set in the oven (you may have to lower the rack to the bottom for it to fit). Bake the dutch oven covered loaf for 25 minutes; remove the lid and reduce the heat to 425 degrees F, then bake an additional 15 minutes. Remove and let cool before slicing.
The other loaf in the bread can be baked at 425 (during the latter half of the round bake) for 15-20 minutes until lightly browned.
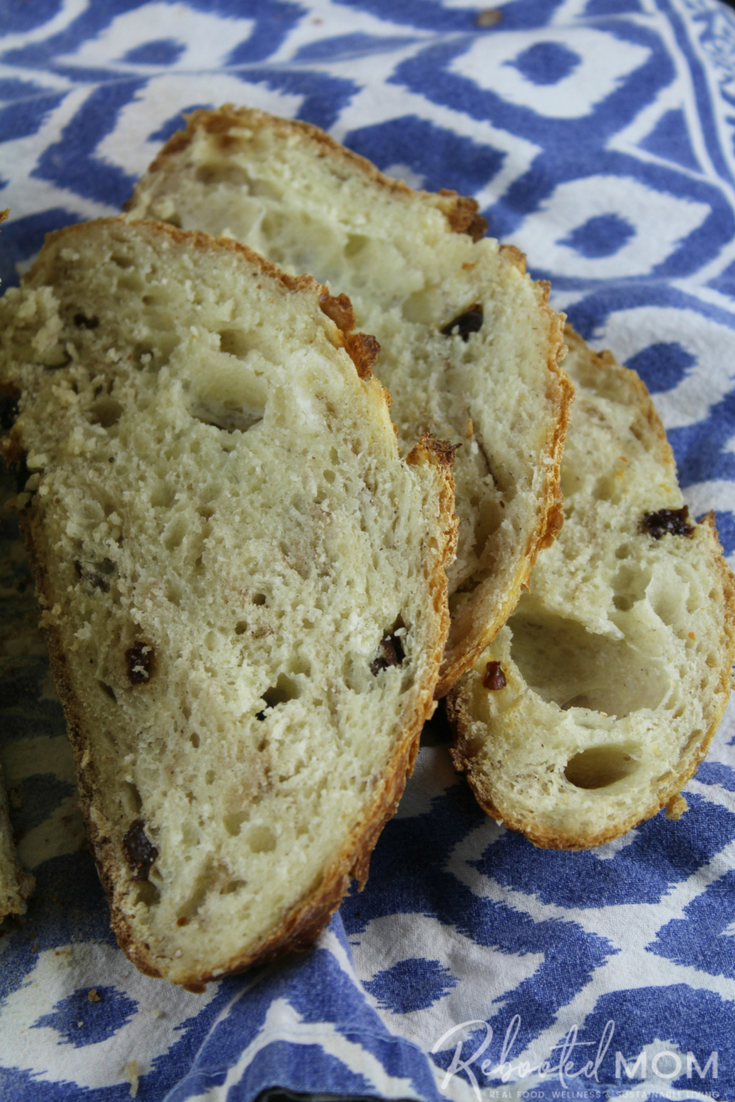
This bread is incredible when toasted and smeared with butter. Yum and YUM!
If you aren’t enjoying the bread, it’s wise to keep it tightly wrapped at room temperate to avoid it drying out.
Other sourdough recipes
Did you make this recipe?
If you did, please take a second to rate the recipe and leave a comment. I want to know how it turned out for you!
Cinnamon Raisin Whey Sourdough Bread
Equipment
- Dutch Oven with lid
Ingredients
- 2 Tbsp melted butter preferably unsalted
- 1 tsp sea salt
- 2 Tbsp maple syrup
- 1 tsp active dry yeast
- 2 tsp ground cinnamon
- 2 C. whey
- 5 C. all purpose flour or bread flour
- 1/2 C. raisins
Instructions
- Mix the ingredients in a large bowl. Dough will be sticky and challenging to mix. Knead for 2-3 minutes and then place in a lightly oiled bowl.
- Cover with plastic wrap that has been lightly oiled (so as not to stick to the rise). Allow to sit, undisturbed, for 9-10 hours in a relatively warm area. The dough should at least double if not triple in size.
- Preheat your oven to 450 degrees F.
- After that 9 hours, dump the dough onto a lightly floured work surface. Do not knead the dough and don't be tempted to "punch down" the dough. Be gentle with the dough as you don't want to destroy the air pockets that have worked so hard to develop.
- Once you "dump" it on the floured surface, cut into two with a sharp knife. Carefully fold the ends under of one of the halves and shape into a loaf - place into a lightly greased glass loaf dish. Fold the ends under on the other and shape into a round sourdough loaf. Lightly flour your dutch oven and lift that round sourdough loaf into the dutch oven, being careful to keep that round shape.
- (Bread does not need a second rise; the oven will produce a rather large loaf regardless of the rise on the dough).
- Take a sharp knife and cut an "X" about 1/4-1/2 inch deep into the top of the round sourdough loaf.
- Place the lid on your dutch oven and set in the fully preheated oven (you may have to lower the oven rack). Bake for 25 minutes. Carefully remove the lid and lower the oven temp to 425 degrees F. Bake an additional 15 minutes. Remove from the oven and allow to cool before slicing.
- Your separate bread loaf can be baked for 15-20 minutes at 425 degrees F (during the latter half of the round loaf bake). Remove and allow to cool before slicing.
- Keep tightly wrapped when not enjoying. Bread is best served toasted and smeared with butter.
Nutrition

Can you just bake into one round loaf in the dutch oven?
You sure can!
Are the calories and carbs for the whole loaf?
I have made this bread twice. I don’t have a Dutch oven so I bake one loaf in a glass casserole(8 & 1/2” in diameter and 2” deep) with a lid as directed for the Dutch oven and the other in a metal bread pan. They both turned out Great.
I used this recipe after I made cottage cheese. It’s a good way to use the liquid whey and we love the bread. (I toast mine and slather it with butter then dunk it in my coffee)
Thank you for sharing the recipe.
I love it too… I slather it in butter, and I also love mine toasted. Thanks for letting me know you love it Martina.. have a great week!
This was delish! The little sour tang from the whey makes this bread so much more interesting than its overly-sweet commercial cousins. I took the advice to let the dough sit overnight, then bake in the morning, and the house smelled amazing. When I make it again (not *if* definitely *when*), I might try adding a tablespoon of vital wheat gluten to provide a little more openness in the crumb. Thanks for a perfect “whey” to handle my yogurt-making byproduct!
I’m so glad you loved it!