


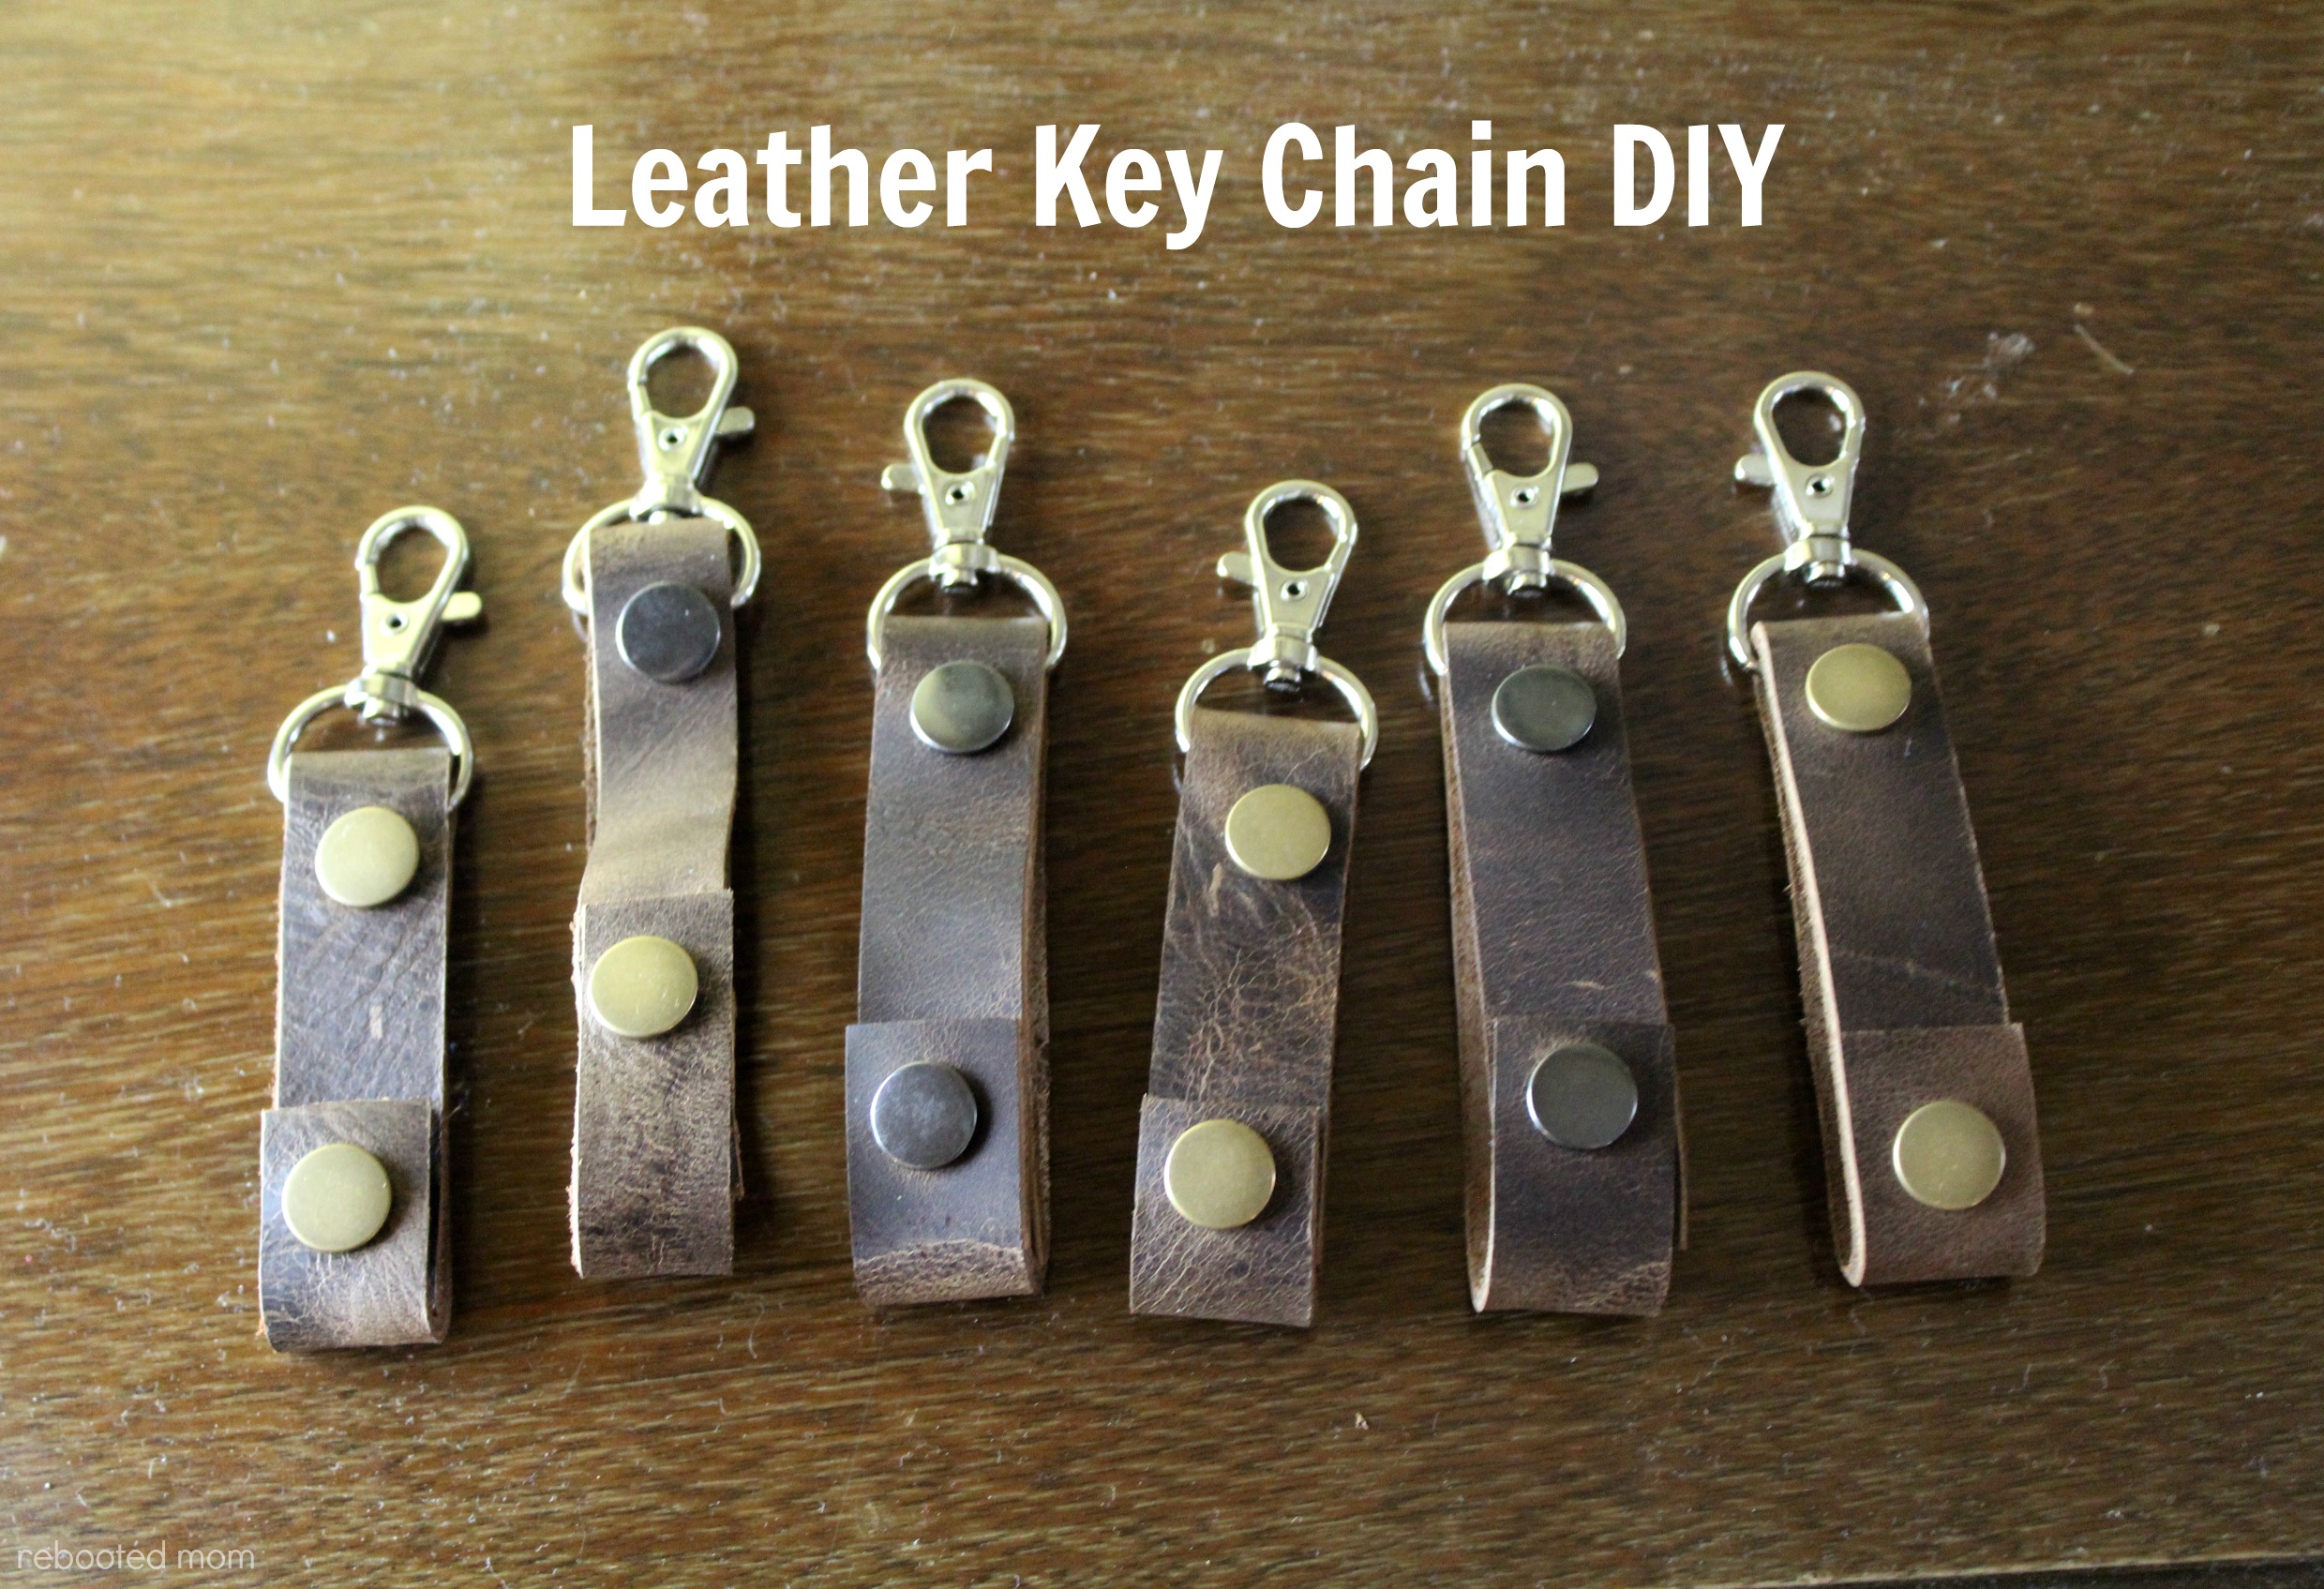
Follow this Leather Key Chain DIY to transform leather scraps into a gorgeous Leather Key Chain that you can gift to family and friends!
Over the last few years, I’ve been a big fan of working with my hands to make gifts – from homemade soap to body wash, and now leather work.
Key chains are one of those items that everyone needs and can use. Who doesn’t have their keys on a key ring? Everyone I know (well, with the exception of kids!)
These leather key chains are super easy to make. In less than an hour, you can crank out dozens of leather key chains to gift to family and friends.
Leather Key Chain DIY
Materials needed:
- Leather scraps
- Rotary cutter & mat
- Leather punch (I got mine at Harbor Freight for $6)
- Leather snaps
- Swivel clasps
- Hammer
Directions:
Lay the scraps out on a flat surface on top of a rotary mat. Use the rotary cutter to cut strips that are 6/8 in width and 7-8″ in length.
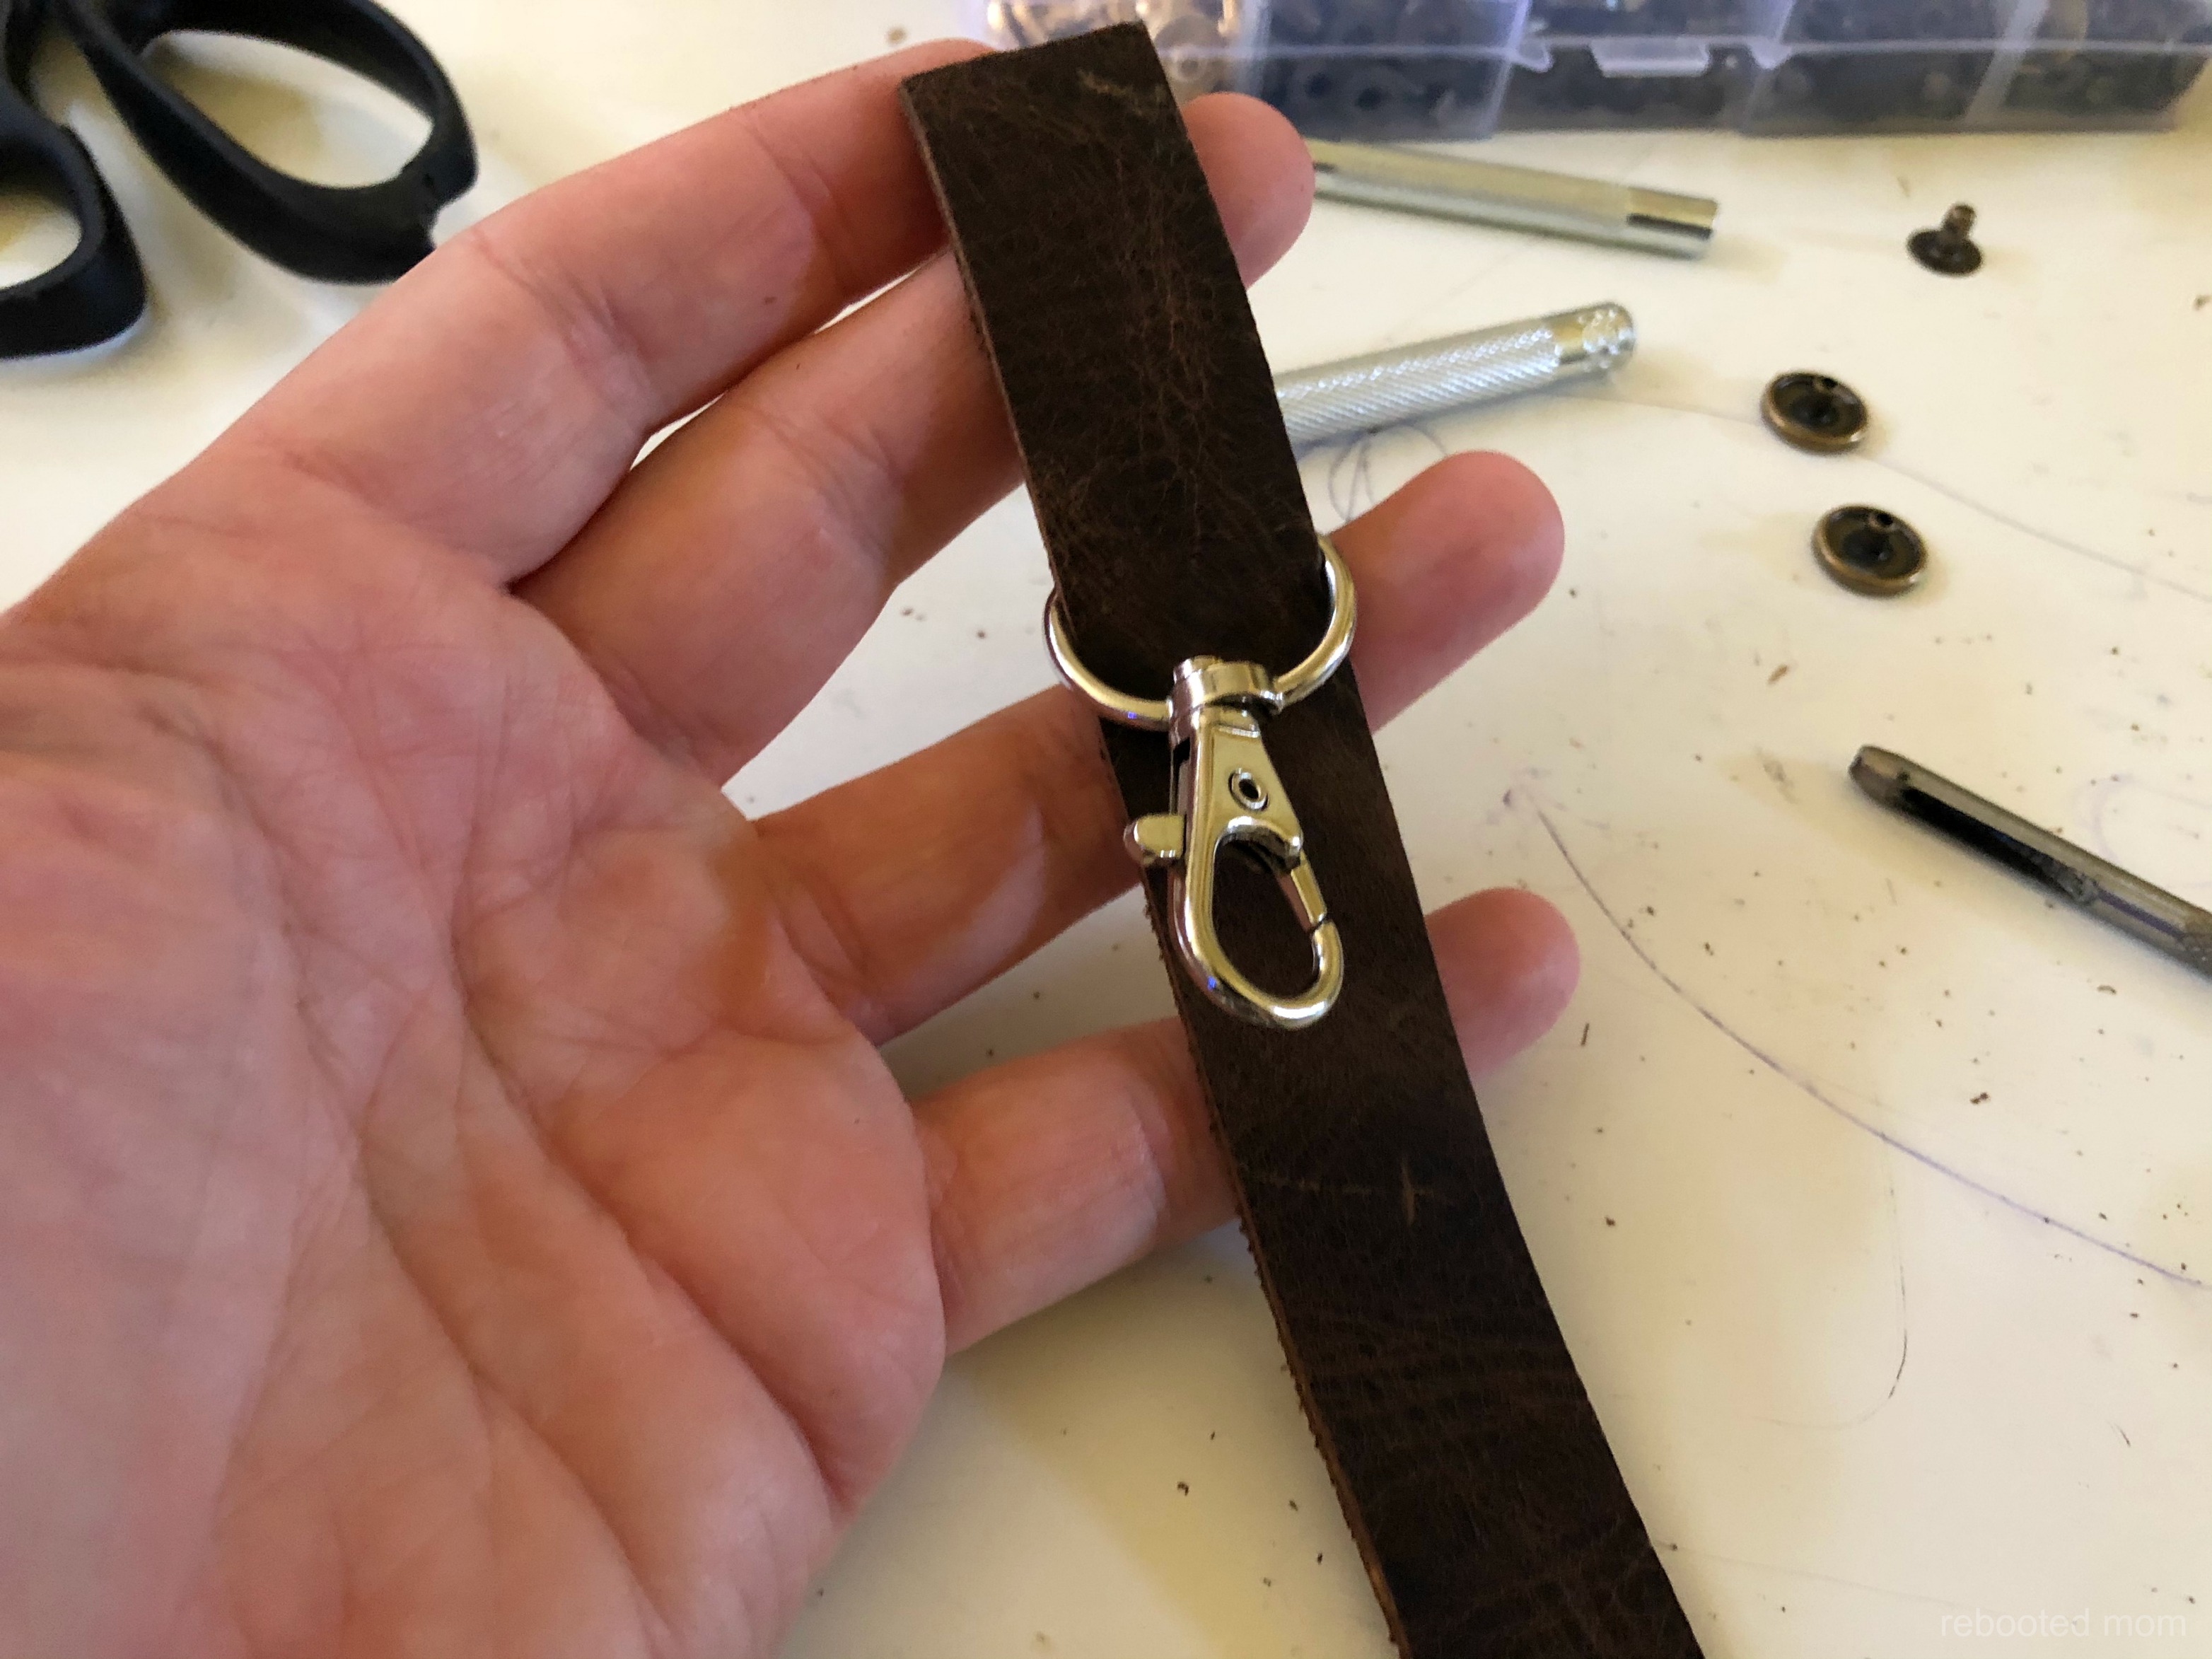
Feed the leather through the swivel clasp and loop it back around as shown above. Make sure the ends are not even (as you want to fold up that one side to add a clasp).
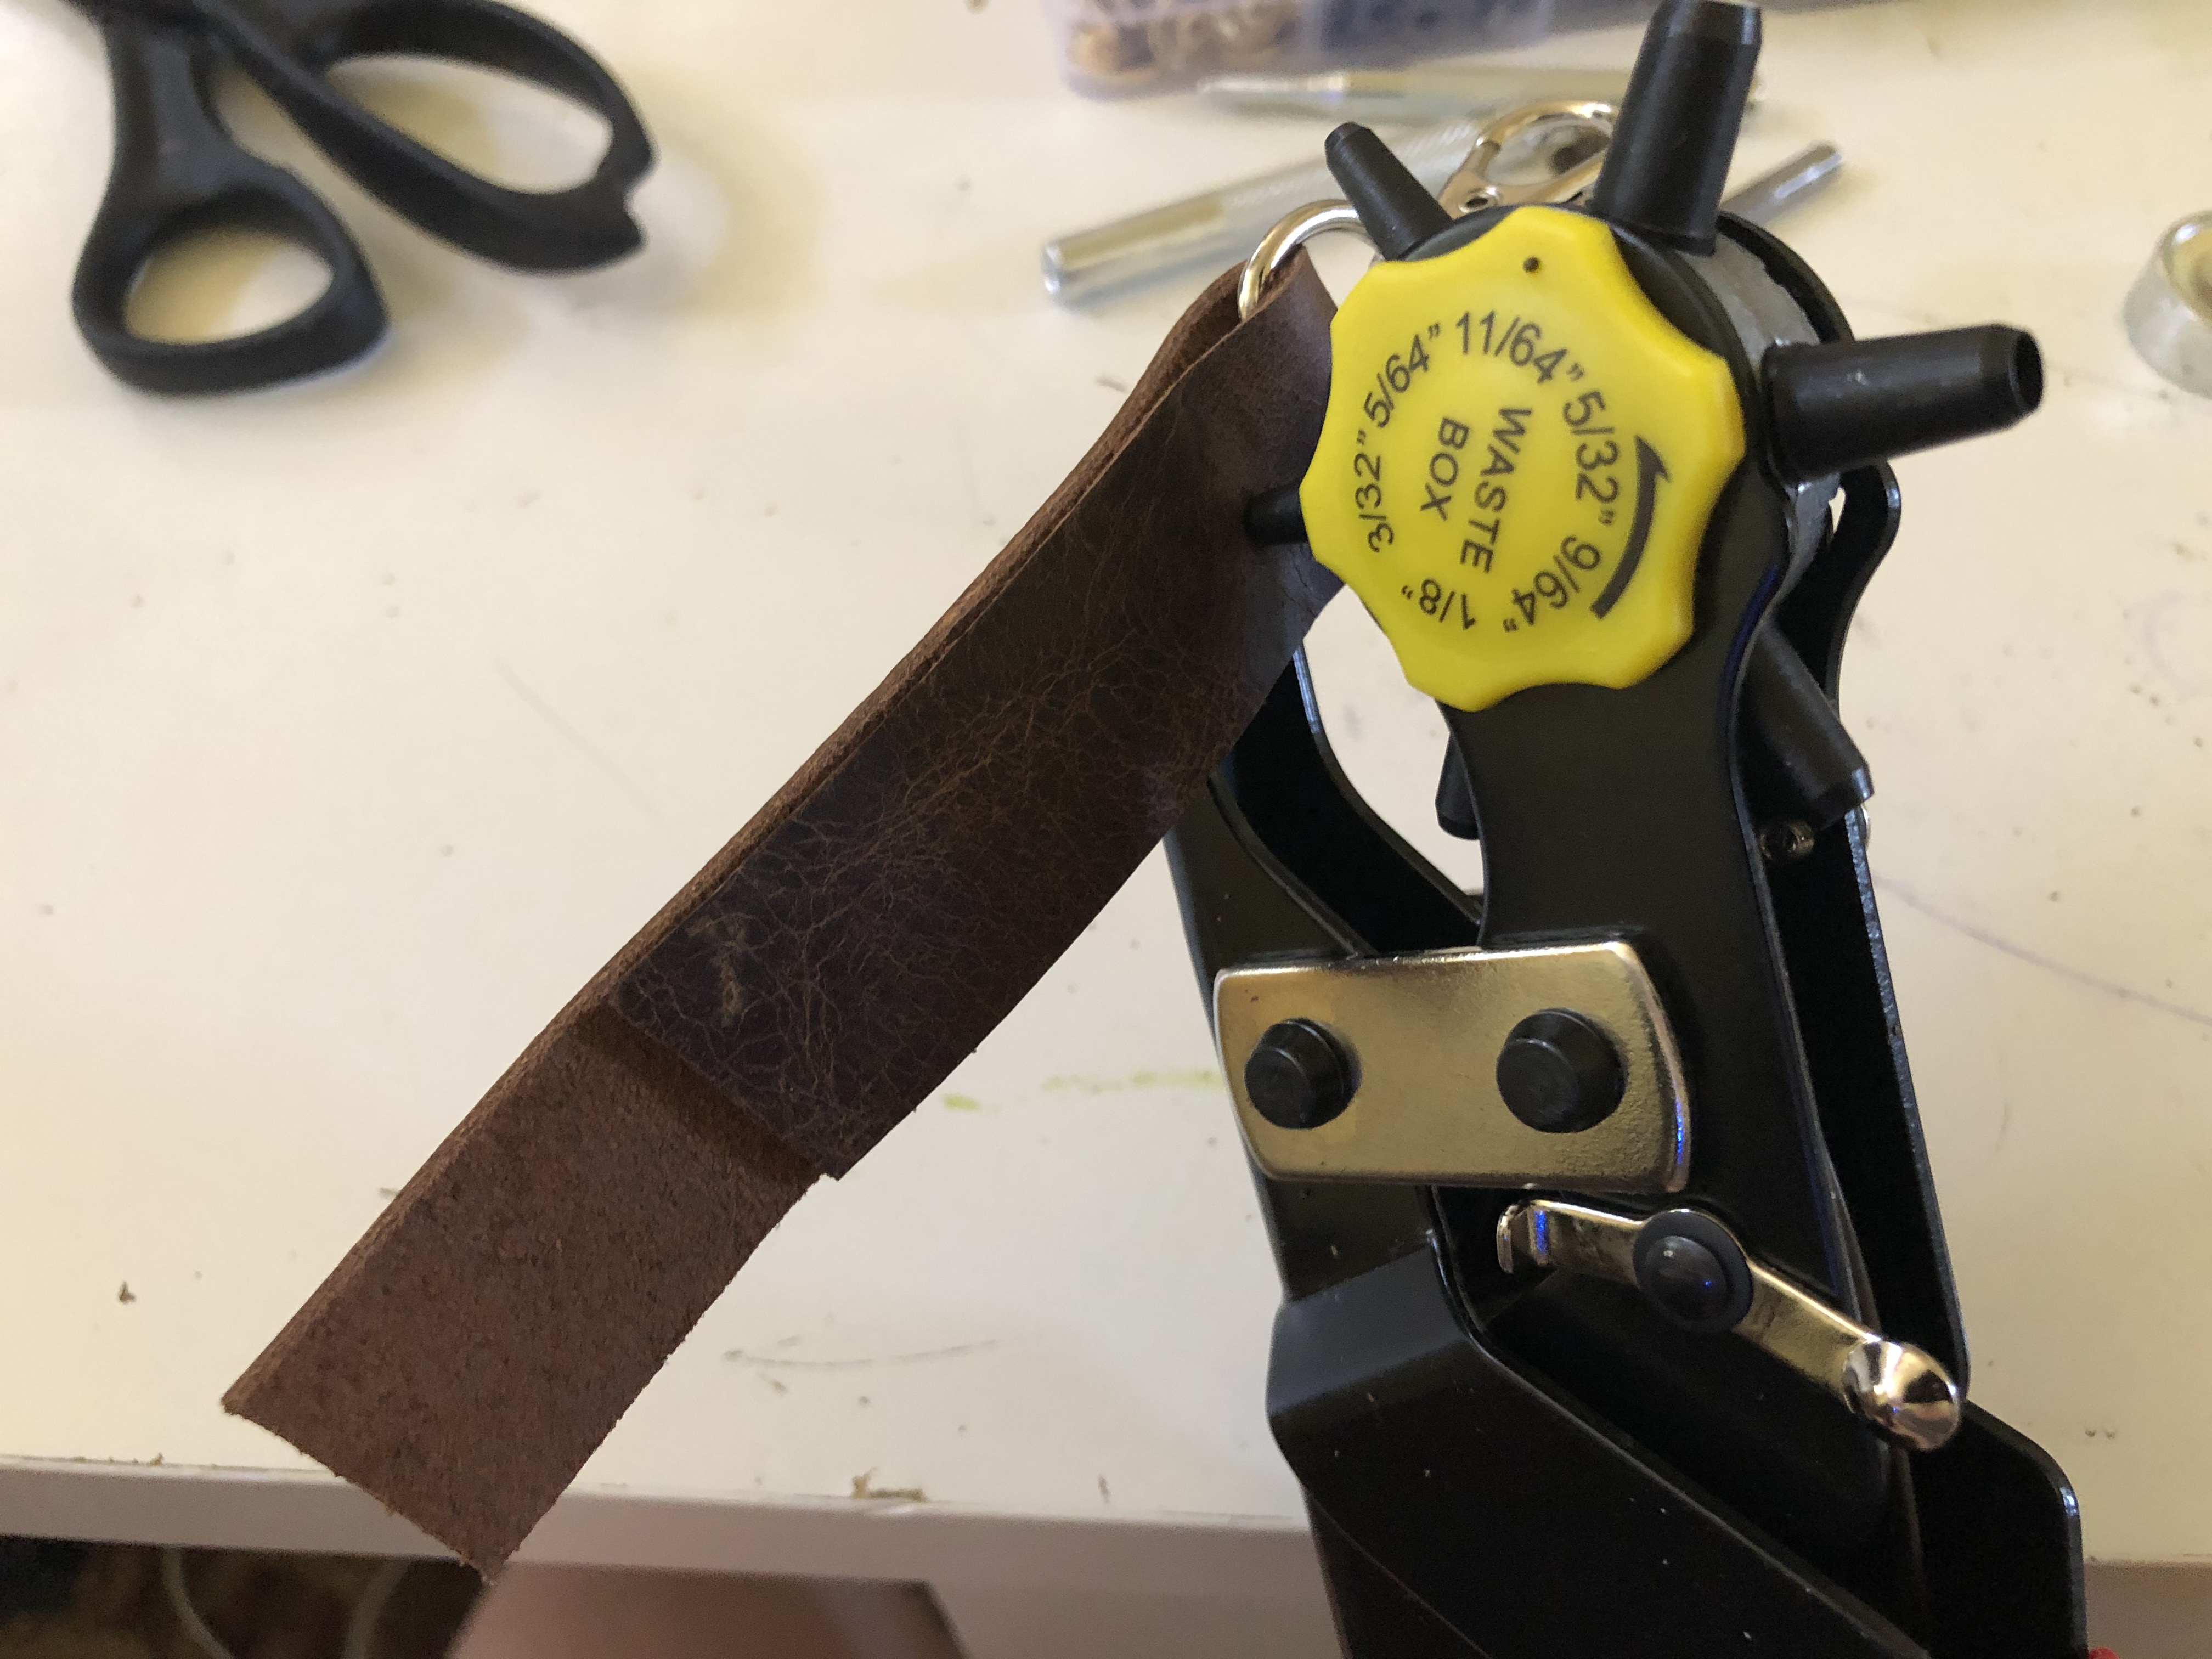
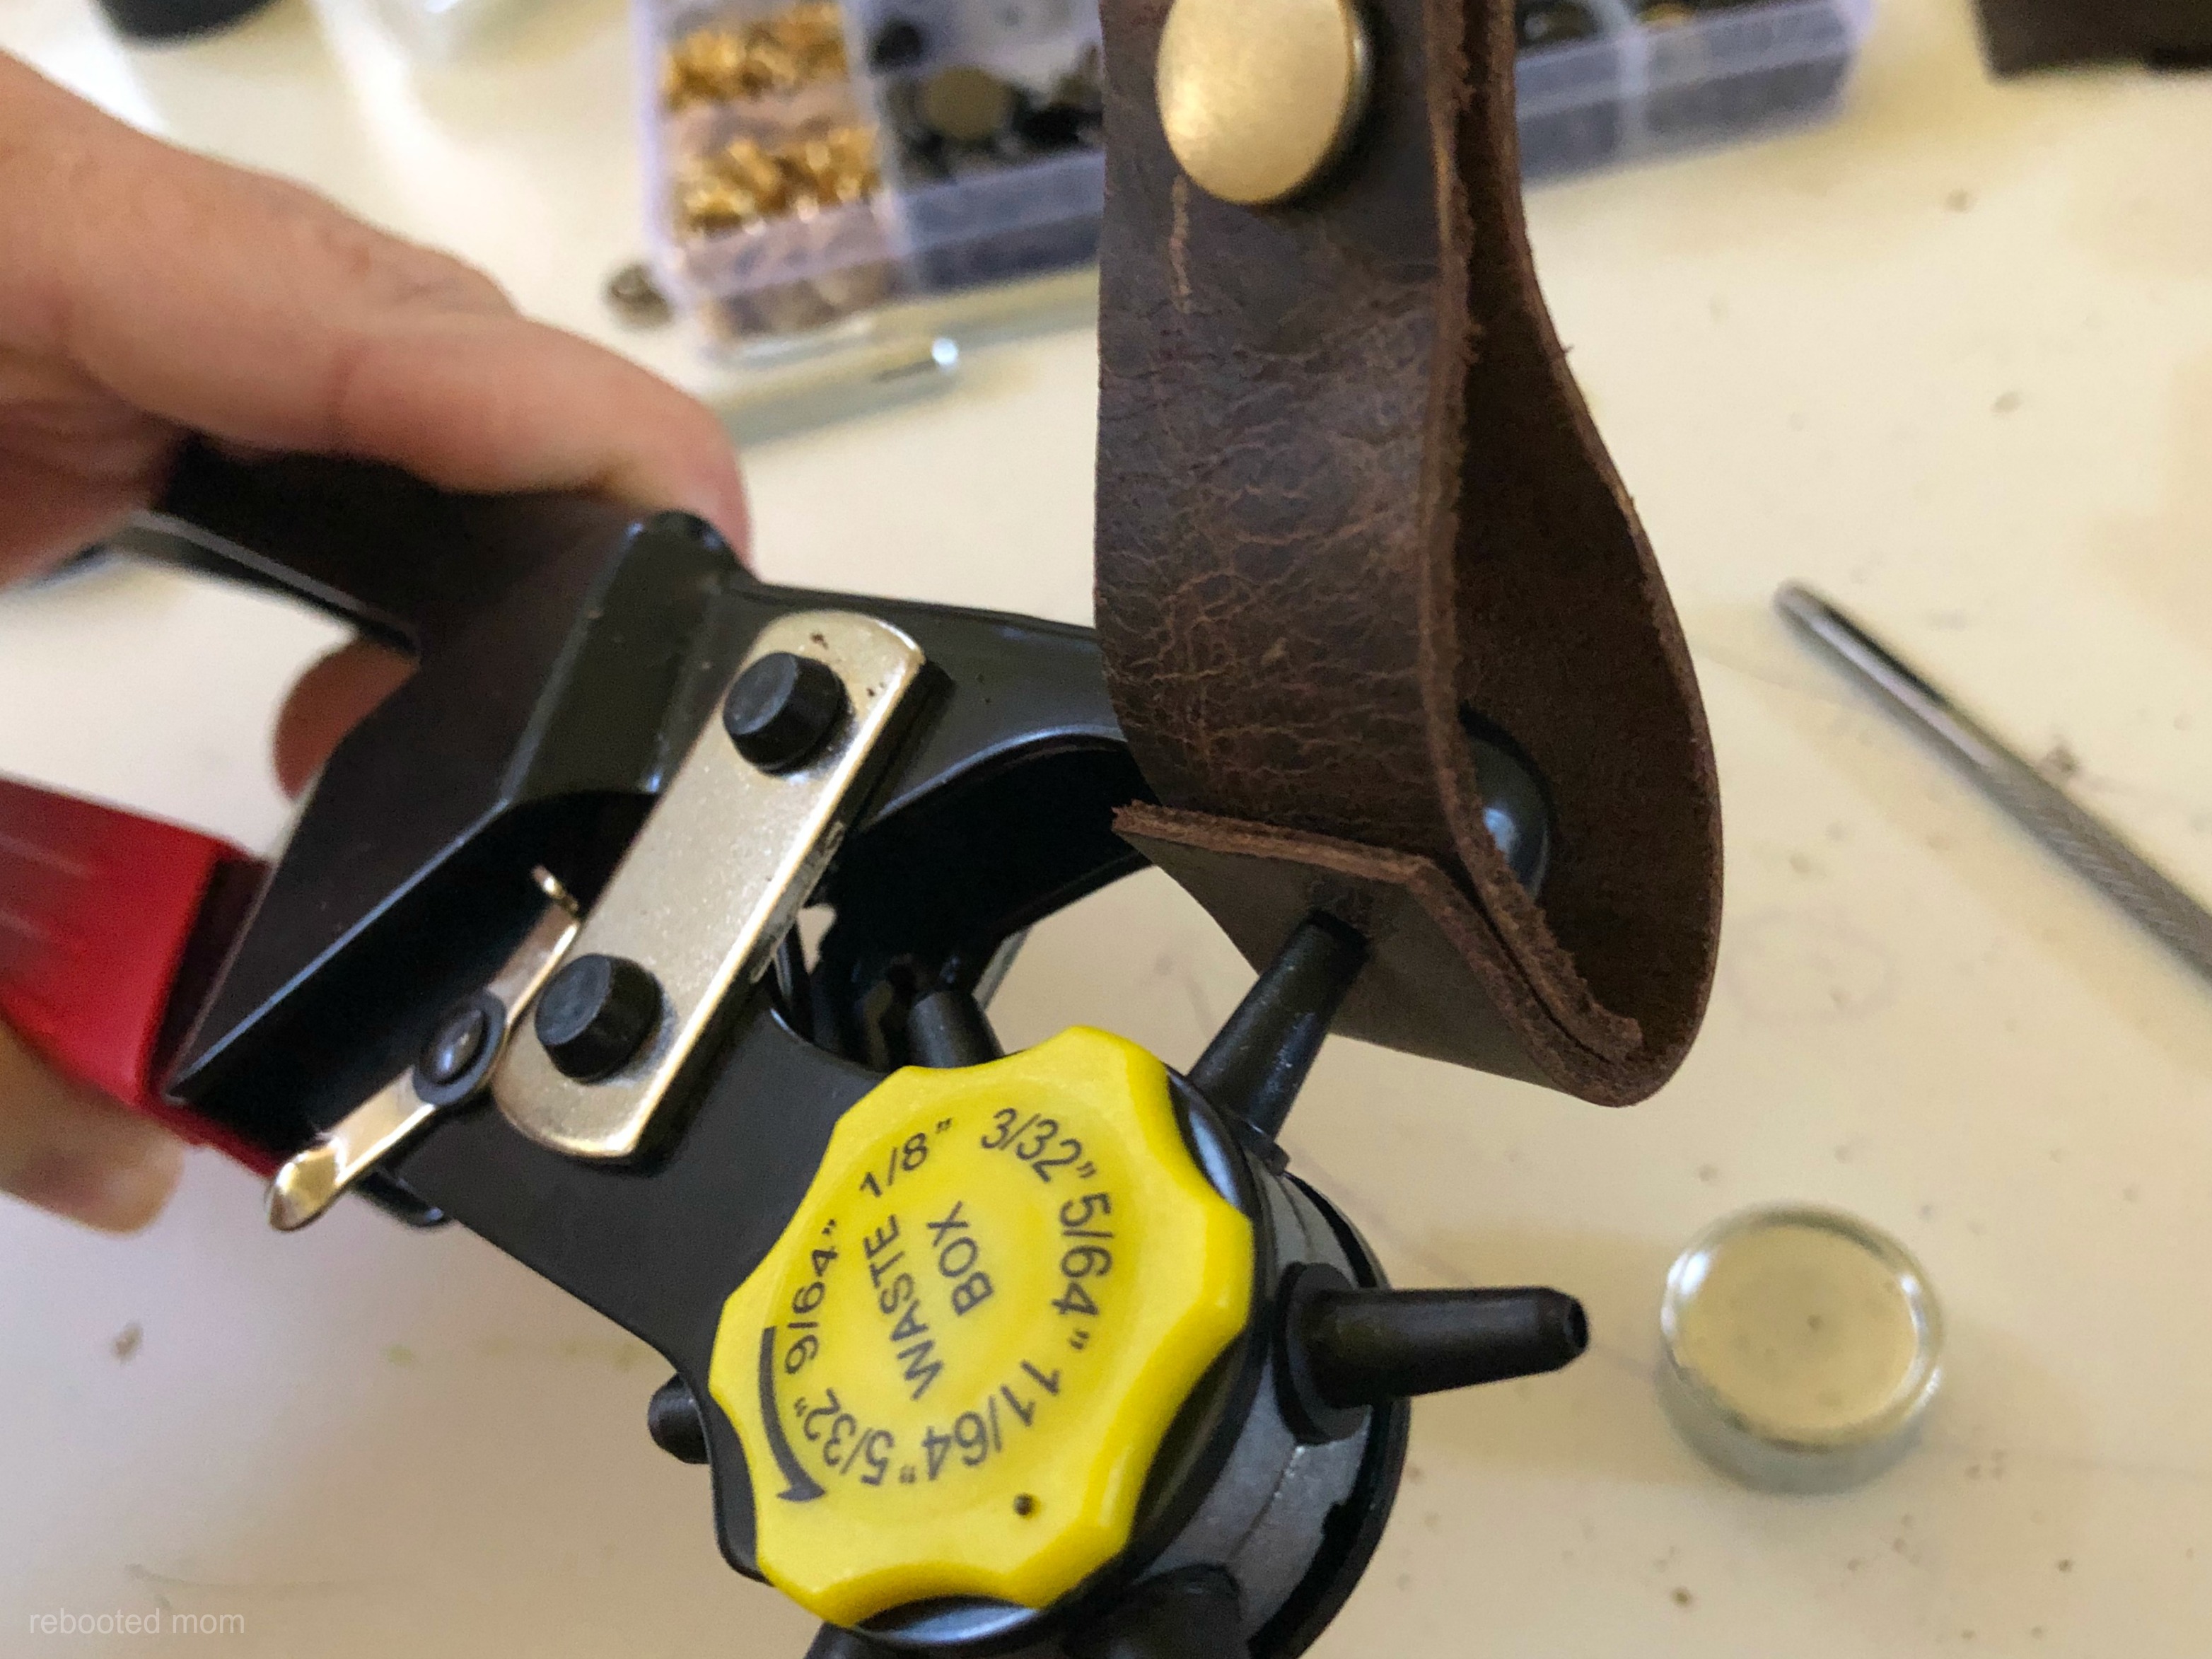
Use your leather punch to punch a hole that goes through both layers.
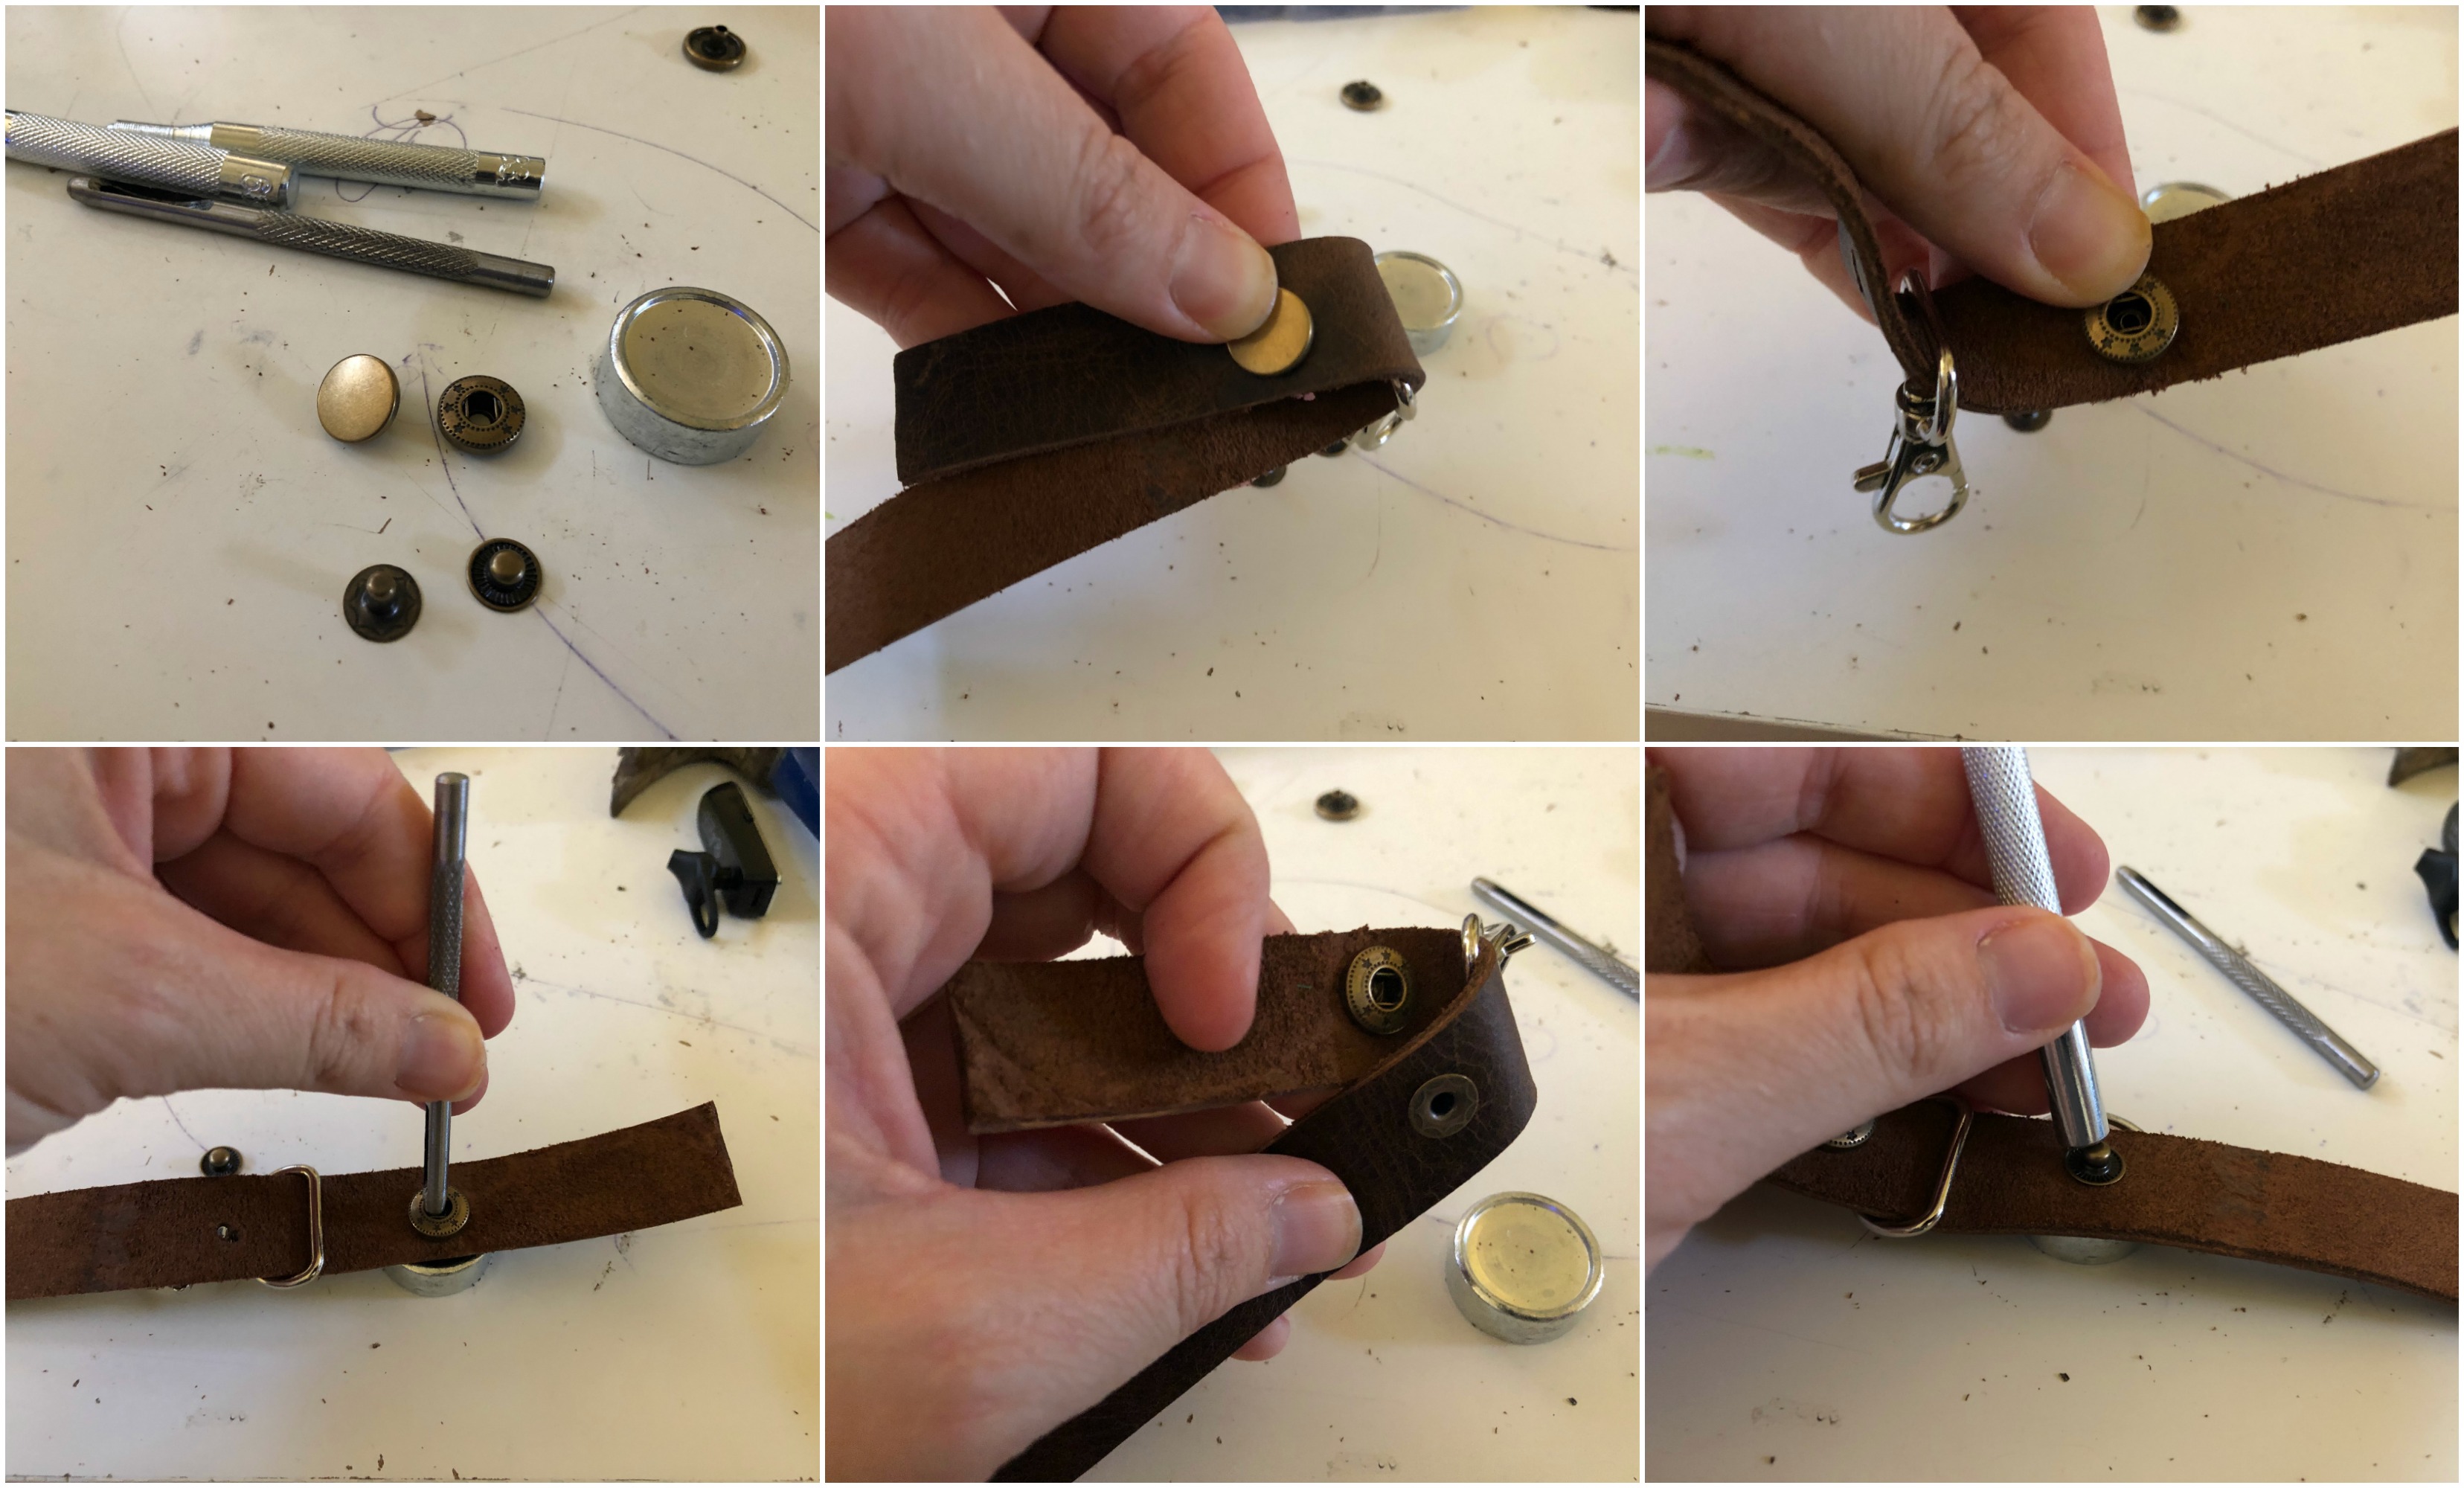
Take a few minutes to watch this video on using the snap fasteners – it’s super helpful, especially if it’s your first time.
You’ll want to use your snap kit to attach fasteners in the holes you just punched. The swivel clasp will be between those holes – after you attach your snaps, snap the buttons shut.
Finish the key ring off by punching holes on the opposite end, and attaching snaps there, too. Take care to punch only the two layers shown, and not all 3 layers.
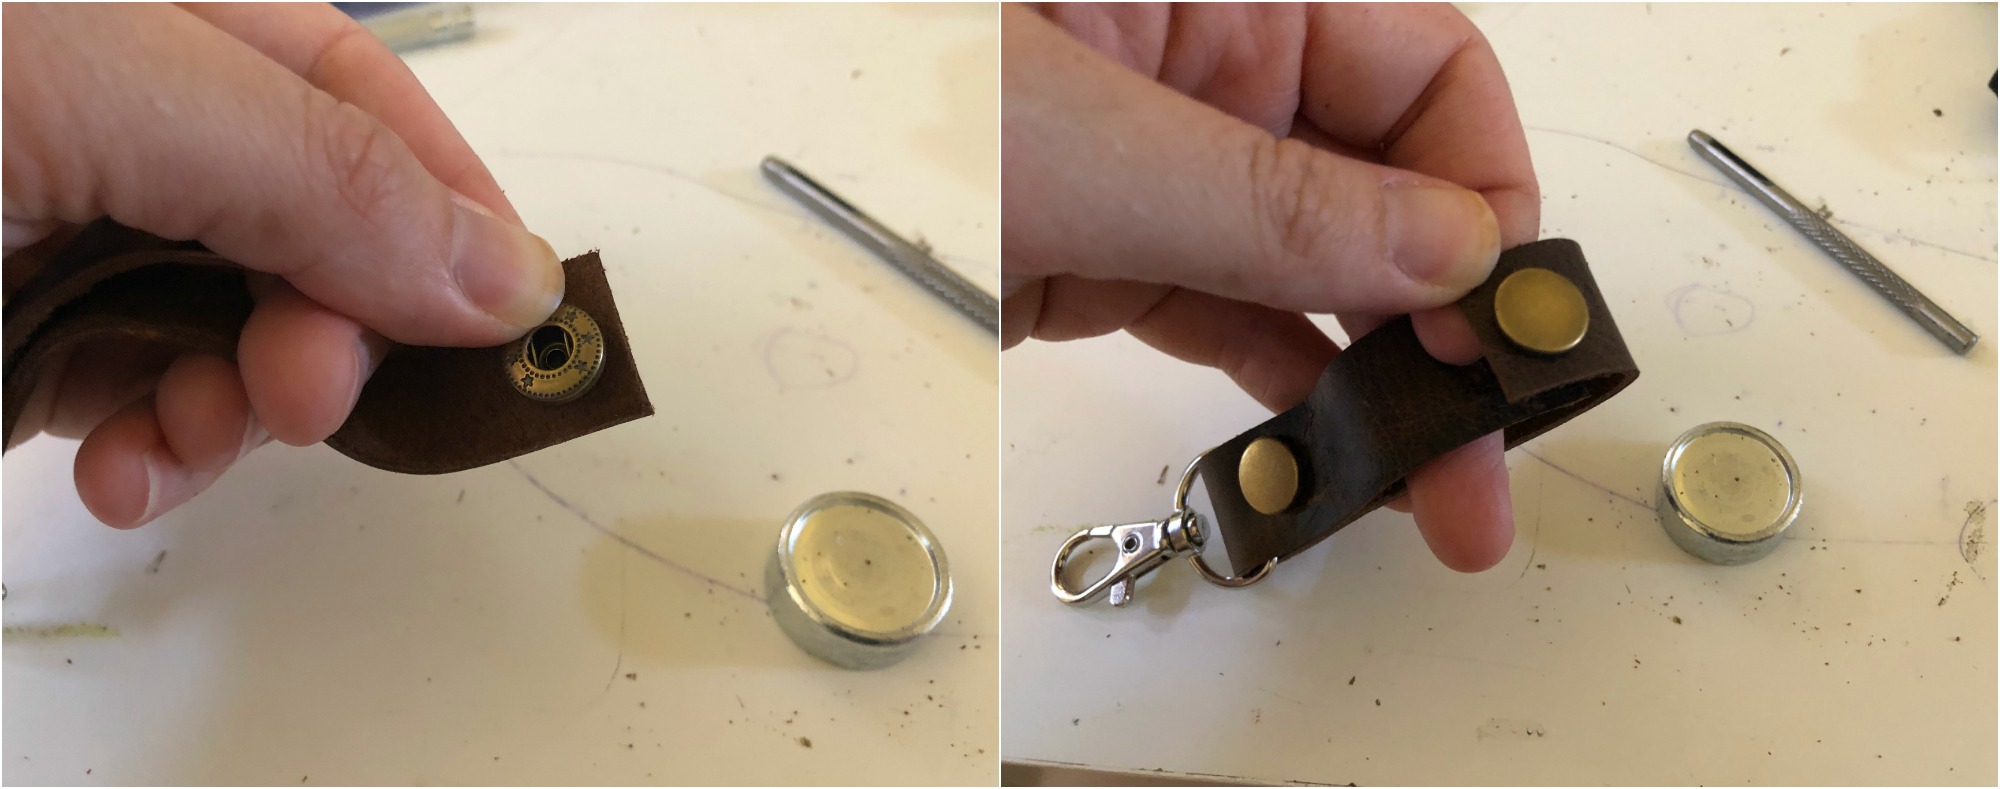
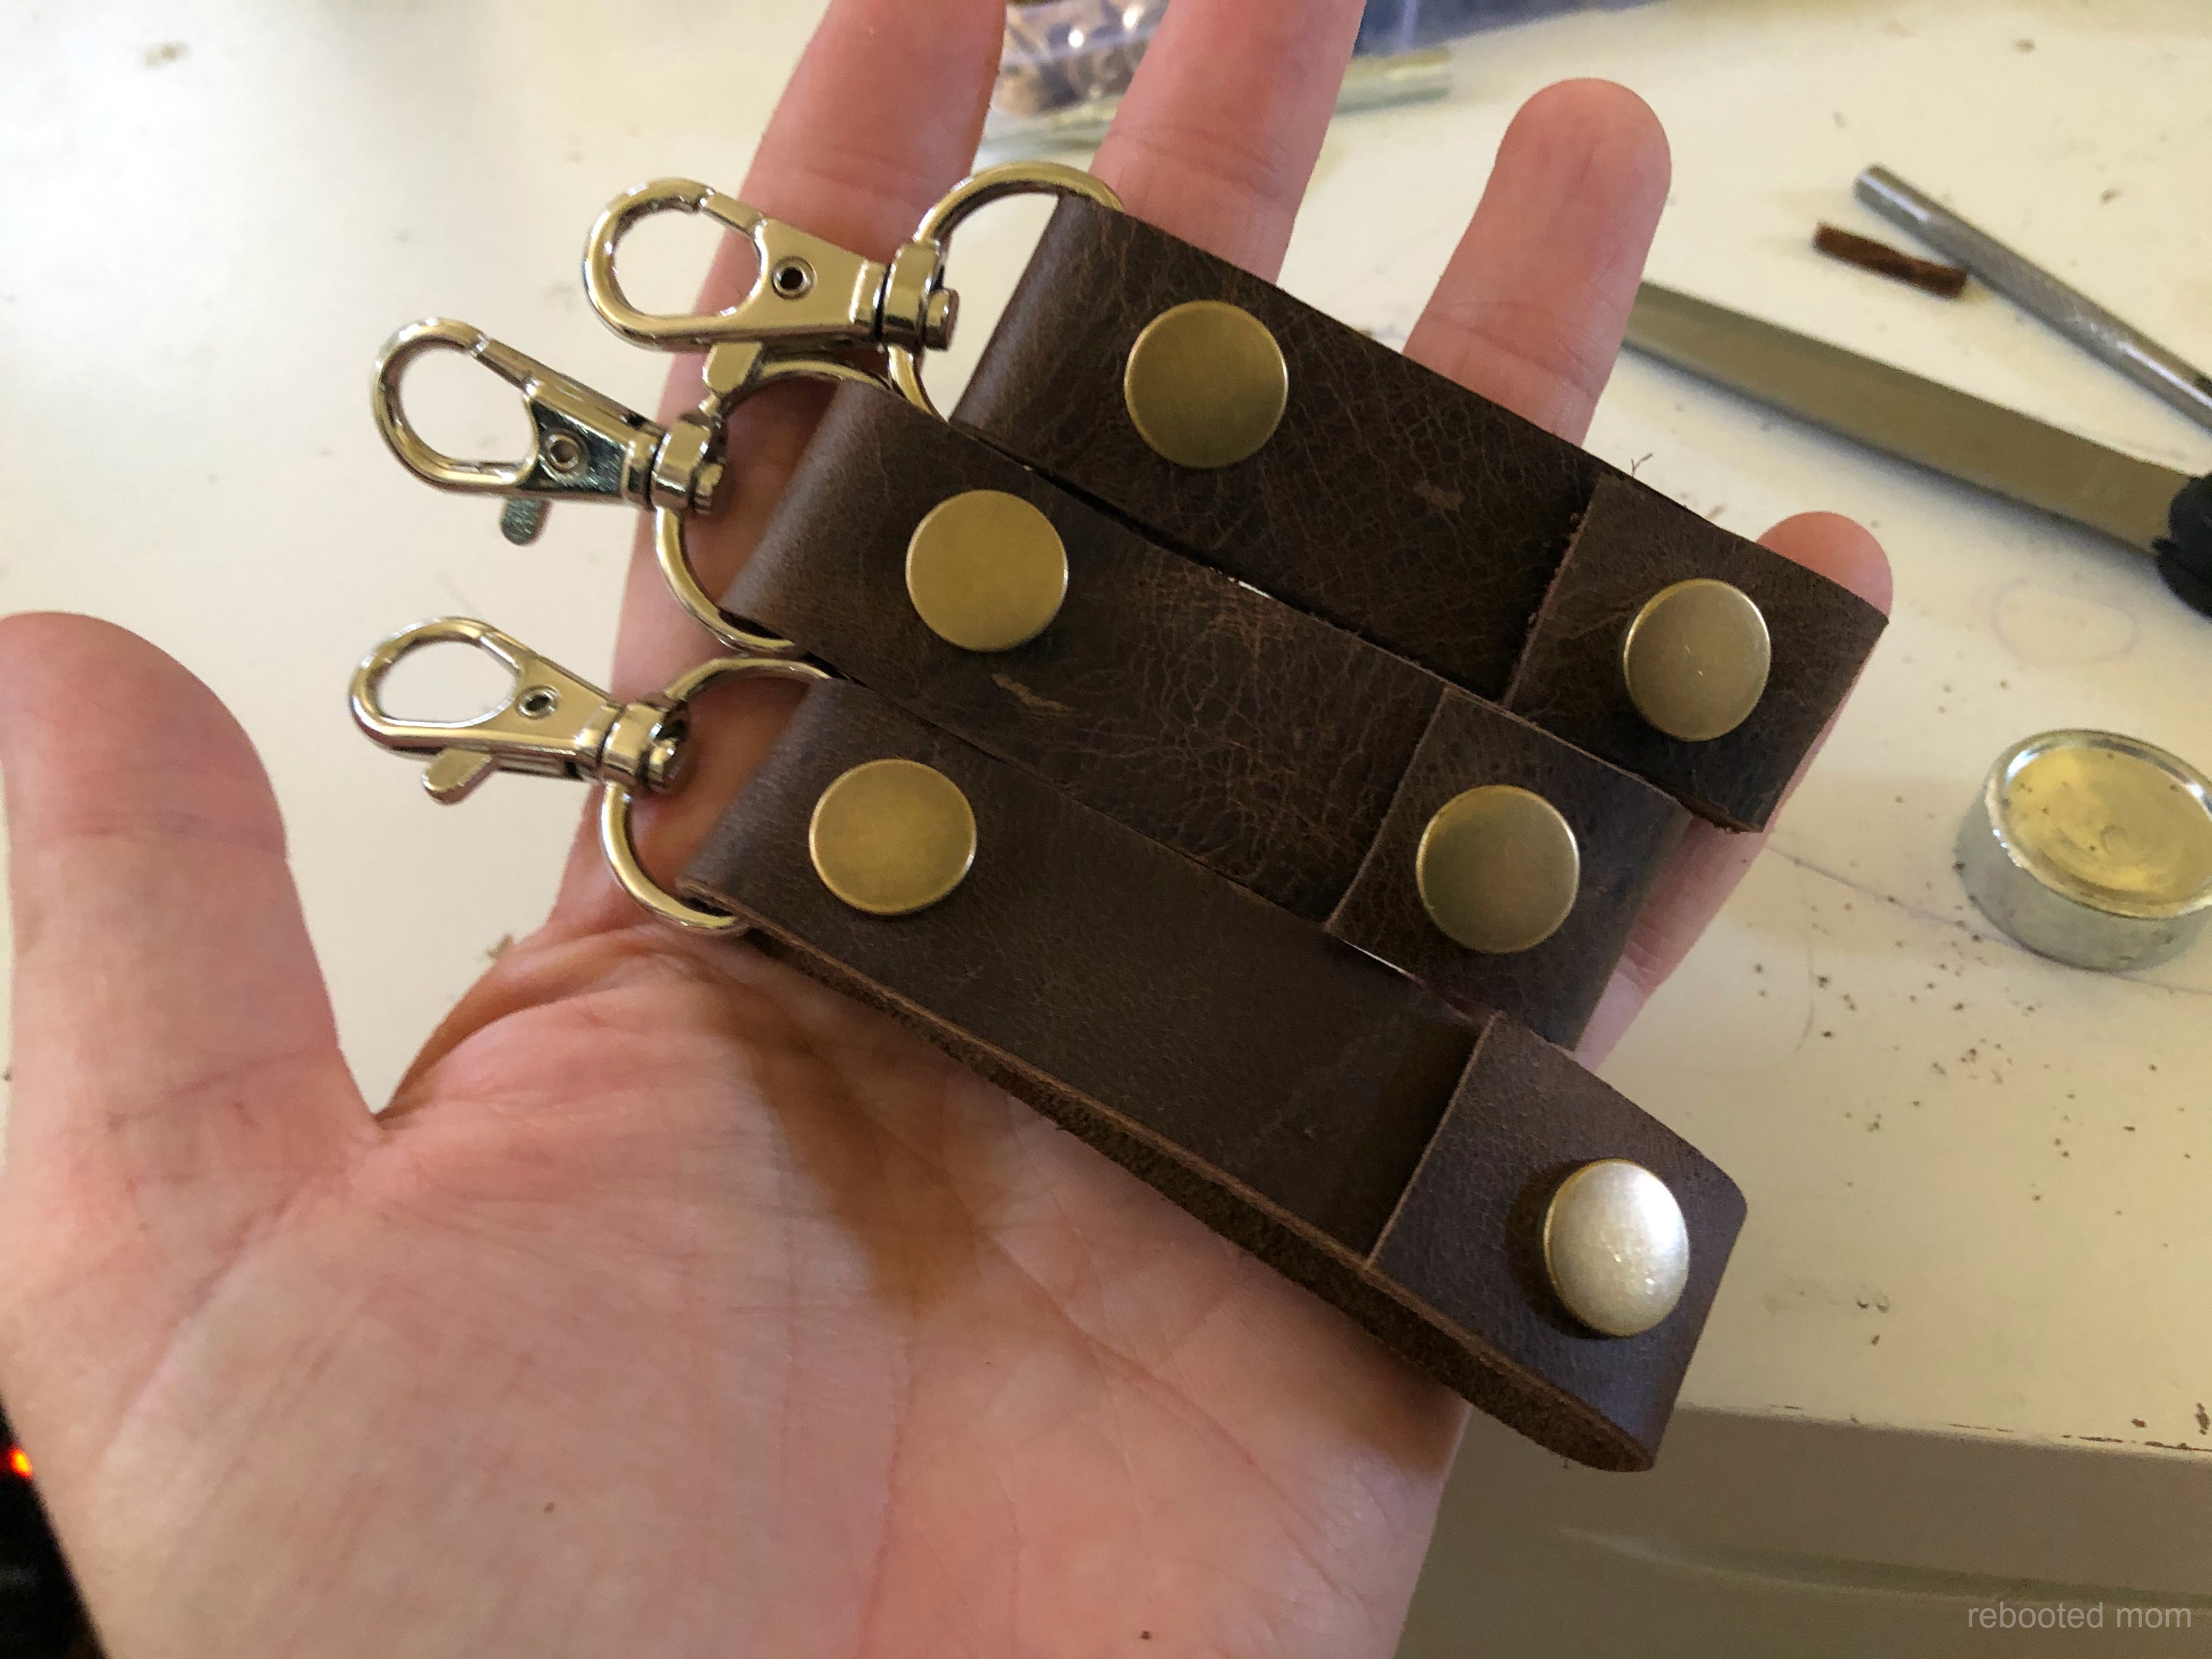
Snap the bottom of the key chain and now you have your own DIY Leather Key Chain that you can gift to family or friends!
Looking for more gifts to make?

Leave a Reply